
Related Manuals for Sony Giga Juke NAS-SC55PKE


Summary of Contents for Sony Giga Juke NAS-SC55PKE
- Page 1 3-300-262-13(1) Read this first Quick Connection and Setup Guide — Quick start guide to main features HDD Network Audio System NAS-SC55PKE © 2008 Sony Corporation Printed in Malaysia...
-
Page 2: Table Of Contents
Wireless Station Operating Instructions for a description of the Wireless Station. DIGITAL MEDIA PORT Adapter Operating Instructions for details on operations and troubleshooting for the DIGITAL MEDIA PORT Adapter. Customer support site of Sony Europe at http://support.sony-europe.com/ (for customers in Europe only). -
Page 3: Checking The Required Items (Package Contents)
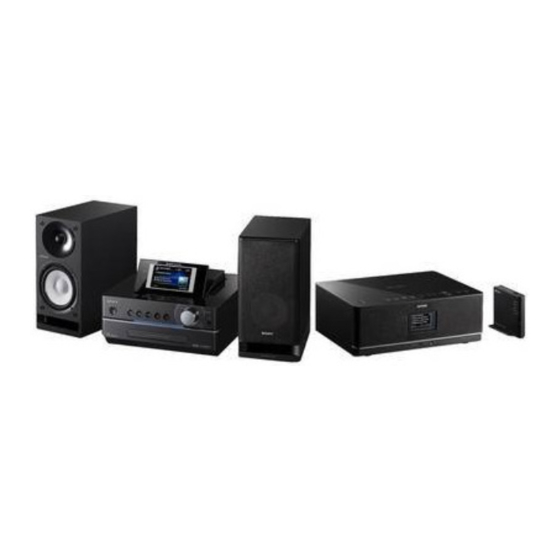
Checking the required items (Package contents) If you find any items missing or damaged, please contact your nearest Sony dealer. “GIGA JUKE” Music Server and its supplied accessories “GIGA JUKE” Music Server NAS-S55HDE (1) Wireless ... -
Page 4: Connecting The Speakers And Antennas Of The "Giga Juke" Music Server
Connecting the speakers and antennas of the “GIGA JUKE” Music Server This operation is performed on the “GIGA JUKE” Music Server. Note DO NOT plug the power cord into a wall outlet until instructed to do so. Follow the steps below to connect the supplied speakers and antennas to the “GIGA JUKE” Music Server. - Page 5 Connect the speakers to the unit. Make sure the speaker cords are correctly matched with the projections on the SPEAKER terminals, and then insert the cords firmly into the SPEAKER terminals. Make sure to keep the speaker away from the antennas as they may produce noise in the radio reception.
- Page 6 Connect the DAB wire antenna (UK model only). With a DAB external antenna, you can enjoy a more robust DAB reception (optional). It is recommended that you use the supplied DAB wire antenna for strong reception areas only. coaxial cable with F male type connector will be needed to install the DAB external antenna ...
-
Page 7: Setting Up The Instant (S-Iws) Connection
“GIGA JUKE” Wireless Player placed in a different room. * S-IWS (Sony Instant Wireless Audio Setup) is a function that can connect and set up a wireless network automatically by turning on the power of the devices. - Page 8 Connect the power cord of the “GIGA JUKE” Music Server to a wall outlet. The “GIGA JUKE” Music Server automatically turns on, makes the initial settings (the display shows “Checking System Please Wait”), and then turns off. The initial settings may take a few minutes depending on the condition of the “GIGA JUKE”...
-
Page 9: Connecting To The Internet
Connecting to the Internet Choose either the Instant (S-IWS) connection or AOSS connection to connect the devices to the Internet, though the AOSS connection is recommended when connecting the devices to the Internet together with a computer. Connecting the devices to the Internet enables the “GIGA JUKE” Wireless Player to receive Internet radio (web radio). - Page 10 AOSS connection Wireless adaptor “GIGA JUKE” Music Server Set the operation mode switch on the wireless station to “MODE 2”, and then connect the wireless station to a broadband router. On the “GIGA JUKE” Music Server, perform the AOSS connection by pressing SETTINGS and selecting [Network setting] –...
-
Page 11: Selecting The Display Language
Selecting the display language English, French, German, Italian or Spanish may be selected for the display language. On the “GIGA JUKE” Music Server / / / / ENTER Press SETTINGS. The Settings menu appears. Press / to select [Screen setting] and press ENTER. -
Page 12: Recording A Cd To The Hdd Jukebox Of The "Giga Juke" Music Server
Recording a CD to the HDD Jukebox of the “GIGA JUKE” Music Server You can record audio data from a CD to the “GIGA JUKE” Music Server. This operation is performed on the “GIGA JUKE” Music Server. Press CD on the “GIGA JUKE” Music Server and place a disc into the disc tray. -
Page 13: Playing The Hdd Jukebox Of The "Giga Juke" Music Server
Playing the HDD Jukebox of the “GIGA JUKE” Music Server This operation is performed on the “GIGA JUKE” Music Server. HDD Press HDD on the “GIGA JUKE” Music Server. Playback starts from the track you last played or recorded. Track name Playback indication Album name, etc. -
Page 14: Playing Audio Data Stored On The "Giga Juke" Music Server Through The "Giga Juke" Wireless Player
Playing audio data stored on the “GIGA JUKE” Music Server through the “GIGA JUKE” Wireless Player You can use the “GIGA JUKE” Wireless Player to play audio data stored on your “GIGA JUKE” Music Server. Before you can do this, you must first connect the “GIGA JUKE”... -
Page 15: Other Operations
Other operations Do the following Pause playback Press during playback. Press again to resume playback. Stop playback Press to turn off the unit. The next time you turn on the unit, the unit starts playing the track from the point at which it stopped. -
Page 16: Listening To The Internet Radio On The "Giga Juke" Wireless Player
Listening to the Internet radio on the “GIGA JUKE” Wireless Player You can listen to Internet radio broadcasts offered on the Web by Live365 and SHOUTcast on the “GIGA JUKE” Wireless Player. To listen to the Internet radio, the wireless station or the wireless LAN access point has to be connected to the Internet. -
Page 17: Transferring Audio Data From The Hdd Jukebox Of The "Giga Juke" Music Server To A "Walkman
Transferring audio data from the HDD Jukebox of the “GIGA JUKE” Music Server to a “WALKMAN” You can transfer audio data to a “WALKMAN”. Refer to the customer support site of Sony Europe, http://support.sony-europe.com/ (for customers in Europe only) for the compatible models. - Page 18 Press repeatedly to select “Mode” directory. Press / / / to display the albums, playlists, groups, or tracks that you want to transfer. Press TRANSFER. Press / to select the albums, playlists, groups, or tracks that you want to transfer, and then press ENTER to put a check on.
-
Page 19: Troubleshooting
Troubleshooting If a problem occurs when connecting, follow the below procedures. For other problems see the operating instructions of each devices. The Instant (S-IWS) connection is not possible (“Wireless LAN Instant (S-IWS) Connected. ” does not appear in the network setting display of the “GIGA JUKE”... - Page 20 If a network cable is connected to the “GIGA JUKE” Music Server, disconnect it. Connect the wireless adaptor to the USB port of the “GIGA JUKE” Music Server. When performing the Instant (S-IWS) connection: On the “GIGA JUKE” Music Server, press SETTINGS, and then select [Network setting] –...