
Related Manuals for Blaupunkt ACAPULCO MP54 7 644 250 310


Summary of Contents for Blaupunkt ACAPULCO MP54 7 644 250 310
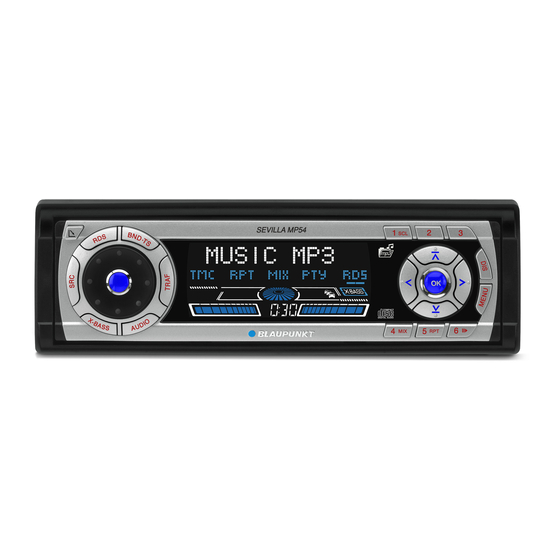
- Page 1 Radio / CD / MP3 Acapulco MP54 Casablanca MP54 Operating instructions 7 644 252 310 7 644 250 310 http://www.blaupunkt.com...
- Page 2 Open here...
- Page 4 Button to switch the device on/ off and operate the volume mute feature button to open the flip-release control panel RDS button to switch the RDS function on/off (Radio Data Sys- tem). BND button (band) to select ra- dio mode as the source, to se- lect the FM memory banks and the MW and LW wavebands TS to start the Travelstore func-...
-
Page 5: Table Of Contents
CONTENTS Notes and accessories ... 50 Road safety ... 50 Installation ... 50 Accessories ... 50 Activating / deactivating demo mode ... 51 Detachable control panel ... 51 Theft protection ... 51 Detaching the control panel ... 51 Attaching the control panel ... 52 Switching on/off ... - Page 6 Repeating individual tracks or whole directories – REPEAT (not in MP3 browse mode) ... 71 Pausing playback (PAUSE) ... 71 CD-changer mode ... 72 Switching to CD-changer mode ... 72 Selecting CDs ... 72 Selecting tracks ... 72 Fast searching (audible) ... 72 Changing the display ...
-
Page 7: Notes And Accessories
You cannot switch the device on/off us- ing the remote control. Amplifiers You can use all Blaupunkt and Velocity amplifiers. -
Page 8: Activating / Deactivating Demo Mode
NOTES AND ACCESSORIES CD changers You can connect the following Blaupunkt CD changers: CDC A 08, IDC A 09 and CDC A 03. Compact Drive MP3 You can connect the Compact Drive MP3 instead of a CD-changer in order to play MP3 music tracks. If you decide... -
Page 9: Attaching The Control Panel
CONTROL PANEL Note: All the current settings are saved. Any CD already inserted in the de- vice remains there. The device switches off automati- cally after approx. one minute. Attaching the control panel Hold the control panel at approxi- mately right angles to the device. Slide the control panel into the de- vice’s guides that are positioned on the left and right at the lower edge... -
Page 10: Adjusting The Volume
Adjusting the volume You can adjust the volume in steps from 0 (off) to 50 (maximum). To increase the volume, turn the volume control 5 clock- wise. To decrease the volume, turn the volume control 5 anti- clockwise. Setting the power-on volume You can set the default volume level at which the device plays when it is switched on. -
Page 11: Setting The Volume Of The Confirmation Beep
You will need a cable for this with the following Blaupunkt number: 7 607 001 503. You can find out from your Blaupunkt dealer which navigation systems can be used with your car sound system. If the sound system receives a traffic... -
Page 12: Automatic Sound
ADJUSTING THE VOLUME Automatic sound This feature automatically adjusts the volume of the car sound system to suit the speed at which the vehicle is travel- ling. In order for this to work, your car sound system must be connected as described in the installation instructions. -
Page 13: Selecting The Waveband / Memory Bank
RADIO MODE Note: REGIONAL must be activated/de- activated separately in the menu. Switching REGIONAL on/off Press the MENU button 9. “TUNER MENU” appears in the display. Press the OK button : to display the tuner menu. button 7 repeat- Press the edly until “REG”... -
Page 14: Setting The Sensitivity Of Station
Note: When using this feature, you will only be able to switch to stations that you have received once before already. To receive the stations, use the Scan or Travelstore func- tion. Setting the sensitivity of station seek tuning You can choose whether the radio should only tune into stations providing good reception or whether it can also tune into those with a weak reception. -
Page 15: Scanning Receivable Stations (Scan)
RADIO MODE Scanning receivable stations (SCAN) You can use the scan function to play all the receivable stations briefly. You can set the scanning time in the menu to between 5 and 30 seconds. Starting SCAN Press and hold down the OK but- ton : for longer than two sec- onds. -
Page 16: Optimising Radio Reception
tion or from CD/MP3 mode or CD- changer mode to the station whose programme type matches the one you selected. Switching PTY on/off Press the MENU button 9. “TUNER MENU” appears in the display. Press the OK button : to display the tuner menu. -
Page 17: Switching Bandwidth During Interference (Sharx)
RADIO MODE Switching bandwidth during interference (SHARX) The SHARX function allows you to largely avoid interference caused by neighbouring radio stations (FM only). Switch on the SHARX function if the density of radio stations in your area is very high. Switching SHARX on/off Press the MENU button 9. -
Page 18: Activating/Deactivating The Radio Text Display
RADIO MODE Activating/deactivating the radio text display Some stations use the RDS signal to broadcast scrolling texts known as ra- dio texts. You can allow radio texts to be displayed or you can block them. Press the MENU button 9. “TUNER MENU”... -
Page 19: Setting The Volume For Traffic Announcements
TRAFFIC INFORMATION If you hear the warning beep, you can either switch off traffic information pri- ority or tune into a station that broad- casts traffic information. Setting the volume for traffic announcements Press the MENU button 9. button 7 repeat- Press the edly until “VOLUME MENU”... -
Page 20: Selecting Tracks
Note: If the device was switched off be- fore you inserted the CD, you will first have to switch on the device by pressing button 1 in order to start playing the CD. If a CD is already inserted in the drive, press the SRC button @ repeated- ly until “CD”... -
Page 21: Repeating Tracks (Repeat)
CD MODE Repeating tracks (REPEAT) If you want to repeat a track, press the 5 RPT button ;. “RPT TRK ON” appears briefly in the display and the RPT symbol lights up. The track is repeated continuously until you deactivate RPT. Cancelling REPEAT If you want to cancel the repeat func- tion,... -
Page 22: Naming Cds
Switching CD text on/off Press the MENU button 9. button 7 repeat- Press the edly until “VARIOUS MENU” ap- pears in the display. Press the OK button :. button 7 repeat- Press the edly until “CD TEXT” or “CD NAME” appears in the display. buttons 7 to switch Use the between the “CD TEXT”... -
Page 23: Traffic Announcements In Cd Mode
CD MODE button 7 repeat- Press the edly until “CD NAME EDIT” ap- pears in the display. Press the OK button :. Press and hold down the MENU button 9. After four seconds you will hear a beep and “DELETE NAME”... -
Page 24: Mp3 Mode
MP3 mode You can also use this car sound sys- tem to play CD-Rs and CD-RWs that contain MP3 music files. MP3 is a process developed by the Fraunhofer Institute for compressing CD audio data. Compression allows data to be reduced to around 10% of their orig- inal size without a noticeable loss in quality (at a bit rate of 128 kbit/s). -
Page 25: Switching To Mp3 Mode
MP3 MODE Note: When naming directories and tracks/files you should avoid using accents and special characters. You can use a maximum of 32 characters (including the “.MP3” file extension) for track names and di- rectory names. If you like your files to be in the correct order, you should use burner software that places files in alphanumerical or- der. -
Page 26: Selecting A Directory
Note: You can use MP3 browse mode to find MP3 files on your CD quickly and conveniently. You cannot use the fast search, MIX, SCAN or REPEAT functions whilst in MP3 browse mode. 4. “TRACK AND DIR MODE”: First line: Track number and play- ing time. -
Page 27: Selecting Tracks
MP3 MODE Selecting tracks Selecting tracks/files using the arrow buttons (Normal, info, track and dir and clock mode) To move up or down to another track/ file in the current directory, button 7 once or press the several times. button 7 once, the If you press the current track will be played again from the beginning. -
Page 28: (Not In Mp3 Browse Mode)
section entitled “Setting the scan- ning time” in the “Radio mode” chapter. Cancelling SCAN and continuing listening to a track Briefly press the OK button :. The currently scanned track will then continue to be played normally. Repeating individual tracks or whole directories –... -
Page 29: Cd-Changer Mode
CD CHANGER MODE CD-changer mode Note: Information on handling CDs, in- serting CDs and operating the CD changer can be found in the oper- ating instructions supplied with your CD changer. Switching to CD-changer mode Press the SRC button @ repeat- edly until “CDC”... -
Page 30: Repeating Individual Tracks Or
Repeating individual tracks or whole CDs (REPEAT) To repeat the current track, briefly press the 5 RPT button ;. “REPEAT TRACK” appears briefly and RPT lights up in the display. To repeat the current CD, press the 5 RPT button ; again. “REPEAT CD”... -
Page 31: Naming Cds
CD CHANGER MODE Naming CDs The car sound system allows you to assign names for up to 30 CDs so that you can recognise them more easily. The names can be a maximum of sev- en characters long. “CD NAME FULL” will appear in the dis- play if you try assigning more than 30 names. -
Page 32: Clock Time
CD CHANGER MODE button 7 repeat- Press the edly until “CD NAME EDIT” ap- pears in the display. Press and hold down the MENU button 9. After four seconds you will hear a beep and “DELETE NAME” appears in the display. Continue holding the button pressed down until you hear a sec- ond beep and “DELETE ALL”... -
Page 33: Selecting 12/24-Hour Clock Mode
CLOCK TIME button 7 repeat- Press the edly until “CLOCK SET” appears in the display. Press the OK button :. The time appears in the display. The hours flash and can be adjusted. Set the hours using the tons 7. Once the hours are set, button 7. -
Page 34: Sound
Sound You can adjust the sound settings (bass and treble) separately for each source (radio, CD/MP3, CD changer, AUX, traf- fic announcement, telephone/naviga- tion). The volume distribution settings (balance and fader) apply to all the au- dio sources. Note: You can only adjust the audio set- tings for traffic announcements and the navigation system whilst a traf- fic announcement or navigation an-... -
Page 35: X-Bass
X-BASS X-BASS The X-BASS feature can be used to boost the bass at low volume levels. Adjusting the X-BASS boost The X-BASS boost can be set in steps ranging from 1 to 6 for one of the fol- lowing frequencies: 32 Hz, 40 Hz, 50 Hz, 63 Hz or 80 Hz. -
Page 36: Selecting Sound Presets
To deactivate the equalizer, button 7 repeat- press the edly until “EQ OFF” appears in the display. Press the OK : button and then the DEQ button ?. Selecting sound presets You can select sound presets for the following music types. ROCK TECHNO JAZZ... -
Page 37: Manually Adjusting The Equalizer
EQUALIZER The position of the calibration micro- phone for Situation 1 (e.g. for the driver alone) is at the height of the driver’s head, approx. 10 cm next to the right ear. For Situation 2, the calibration micro- phone should be positioned at head height between the driver and the front passenger. - Page 38 Now refer to the “Sound impres- sion” column in the table entitled “Help adjusting the equalizer”. Adjust the equalizer values as de- scribed in the “Measures” column. Making adjustments Press the DEQ button ?. button 7 repeat- Press the edly until “MANUAL EQ” appears in the display.
-
Page 39: Help Adjusting The Equalizer
EQUALIZER Help adjusting the equalizer Sound Impression / problem Bass sound is too weak Dirty bass Booming sound Unpleasant pressure Sound very much in the foreground, aggressive, no stereo effect. Dull sound Little clarity No brilliance to the instruments Measures Increase bass with Frequency: 32 to 160 Hz Gain: +4 to +6 dB... -
Page 40: Adjusting The Display Settings
Adjusting the display settings Switching the bar graph on/off You also have the option of switching off the bar graph in the bottom line of the display. Press the MENU button 9. button 7 repeat- Press the edly until “VARIOUS MENU” ap- pears in the display. -
Page 41: Adjusting The Viewing Angle
ADJUSTING THE DISPLAY SETTINGS Adjusting the viewing angle You can adjust the display’s viewing angle to suit the installation position of the device in your vehicle. Press the MENU button 9. button 7 repeat- Press the edly until “DISPLAY MENU” ap- pears in the display. - Page 42 button 7 repeat- Press the edly until the setting that you want is displayed. button 7 to Press the move the selection marker to the position after the other colours. Adjust the other colour compo- nents to suit your preferences. When you have finished making your changes, press the OK : button and then...
-
Page 43: External Audio Sources
If you want to connect an external au- dio source, you will need an adapter cable. You can obtain this cable (Blaupunkt no.: 7 607 897 093) from your author- ised Blaupunkt dealer. Switching the AUX input on/off Press the MENU button 9. -
Page 44: Tmc For Dynamic Navigation Systems
Your car sound system has a TMC output, which you can use for connecting Blaupunkt nav- igation systems. You can find out from your Blaupunkt dealer which navigation systems can be used with your car sound system. - Page 45 01-89583 8394 210 94 12 711 01-4598830 02-369 62464 40 2085 023-565 6331 66-817 157 01-2185 11111 916-467952 08-7501810 01-8471650 02-6130 0514 01-324 8756 022-8771260 0212-3460040 708-6817188 +55-19 3745 2773 +604-6413 640 Blaupunkt GmbH CM/PSS 8 622 403 885 WWW: http://www.blaupunkt.com...