
Related Manuals for Airlink101 SkyIPCam310


Summary of Contents for Airlink101 SkyIPCam310
- Page 1 SkyIPCam310 Power Over Ethernet Network Camera Model # AICP310 User’s Manual Ver 1A...
-
Page 2: Table Of Contents
2.2 C ONNECTING THE THERNET CABLE 2.3 A TTACHING THE OWER 2.4 S ETTING UP THE AMERA 3. SECURITY...17 4. APPLICATION OF THE SKYIPCAM310...18 5. USING THE CAMERA ...20 5.1 W ONFIGURATION 5.2 S YSTEM DMINISTRATION 5.3 V – A MAGE CTIVE 6. -
Page 3: About This Guide
About This Guide This manual provides instructions and illustrations on how to use your SkyIPCam310 PoE Network Camera, includes: Chapter 1, Introduction, provides the general information on the camera. Chapter 2, Installation, describes the hardware and software installation procedure for the SkyIPCam310. -
Page 4: Introduction
Internet Explorer users) and Java mode (for Internet Explorer and Netscape Navigator users). Therefore, all that is required is a web browser software such as Internet Explorer 5.0 or above or Netscape 6.0 or above. Just plug and view the picture from your SkyIPCam310 with a valid IP Address. -
Page 5: Unpacking The Package
SkyIPCam310 anywhere and any time in the world. Apply the SkyIPCam310 to monitor various objects and places such as homes, offices, banks, hospitals, child-care centers, amusement parks and other varieties of industrial and public monitoring. -
Page 6: System Requirements
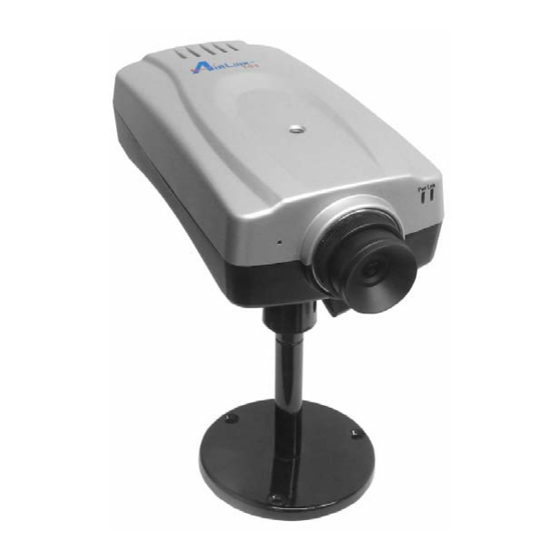
Memory Size: 128 MB or above Resolution: 800x600 or above 1.4 Physical Description This section describes the externally visible features of the SkyIPCam310. Front Panel 1. Link LED The Link LED is positioned on the right side of the camera’s lens while facing the camera. It is... -
Page 7: Amera
Factory Reset will be initiated when the reset button is pressed continuously for three seconds or when Power LED begins to light up. Release the reset button and the Power LED will begin to flash, indicating the SkyIPCam310 is changing to factory reset. The IP address will return to the default setting as 192.168.1.240. -
Page 8: A Ttaching The
Top/Bottom Panel Top Panel Screw Hole Bottom Panel Screw Hole Screw Hole Located on the top/bottom panel of the camera, the screw hole is used to connect the camera stand onto the camera by attaching the screw head on the camera stand into the screw hole of the camera. -
Page 9: Hardware Installation
Attach the camera stand to the camera and station it for your application. There are three holes located in the base of the camera stand allowing the SkyIPCam310 to be mounted on the ceiling or any wall securely. -
Page 10: Setting Up The Camera
2.4 Setting up the Camera Installing the Setup Wizard Step 1 Insert the provided CD and wait for the autorun screen to appear. Step 2 Click on Install Setup Wizard. Note: If the autorun screen does not appear automatically, go to Start, Run, type D:\Wizard\Setup.exe (where D is the letter of your CD drive) and click OK. - Page 11 Step 4 Click Yes to accept the License Agreement. Step 5 Click Next to accept the default Destination Folder. Step 6 Click Finish to complete the installation.
-
Page 12: Amera
Using the Setup Wizard Step 1 Go to Start > (All) Programs > AirLink101 IP Camera Setup Wizard > AirLink101 IP Camera Setup Wizard. Step 2 Select the IP Camera you want to configure from the list and click on the Wizard button. -
Page 13: Ddress
Step 3 If the Camera’s default IP address is on a different subnet, the following message will appear. Click Yes to continue. If you do not receive this message, skip to Step 4 Enter admin for both the Admin ID and Password and click OK. Step... -
Page 14: Amera
Step 5 The Wizard will automatically generate an IP address for the camera, if this address is not in use by any other device in your local network, click OK. Otherwise, enter an available IP address (ex. 192.168.x.240) and click OK. Step 6 Enter admin for both the Admin ID and Password field and click Next. -
Page 15: Amera
Step 8 Verify that all the fields are correct and click Restart to save the settings and reboot the camera. Viewing Images Step 1 At the Setup Wizard, select the desired camera from the list and click on the Web Config button. -
Page 16: Amera
Step 2 Enter the username and password for the network camera. The default username and password are both “admin”. Step 3 The web based viewing page will appear. You can view live video by selecting either the ActiveX Mode (Internet Explorer only) or the Java Mode (Internet Explorer and Netscape). - Page 17 Step 4 If you select ActiveX Mode, you may be prompt to install the ActiveX Control. Click on the yellow bar to on the top of the screen and click on Install ActiveX Control. Step 5 Click on Install.
-
Page 18: Security
The administrator can release a public user name and password so when remote users access the SkyIPCam310 they will have the right to view the image transmitted by the SkyIPCam310. NOTE: Since the default settings are Null String, it is highly recommended to set the "Admin ID"... -
Page 19: Application Of The Skyipcam310
"Admin Password" when you are the first time to use the SkyIPCam310. Once the ID and Password are defined, only the administrator has the access to management the SkyIPCam310. This procedure should be done as soon as possible since the security features with the SkyIPCam310 will not be enabled until the "Admin ID"... -
Page 20: Amera
Home Applications Diagram SOHO Wireless Internet Camera SOHO Applications Diagram SOHO SOHO Internet Camera... -
Page 21: Using The Camera
5. Using the Camera You can access and manage the SkyIPCam310 through: 1) a web browser, and 2) the enclosed software IPView Pro. This chapter describes the Web Configuration Utility, and provides the instructions on using the camera with a web browser. -
Page 22: System Administration
Click System Administration to prompt a login dialog window, and type the default username/ password (admin/admin) in the corresponding boxes. Then, click OK to enter the Configuration Utility. 5.2 System Administration The Configuration Utility contains eleven options in the top menu bar, including: System, Date/Time, Video/Audio, Network, Users, Trigger, Upload, RS485, Information, Tools, and Home. -
Page 23: Amera
Date & Time Server’s Time: Display the current date/time settings of the camera. TimeZone: Select the time zone for the region from the pull-down menu. (Please refer to the Appendix for the time zone selection table.) Synchronized with Time Server: Select this option and the time will be based on GMT setting. -
Page 24: Amera
Environment Select Outdoor or Indoor according to the installation location of the camera. Light Frequency Select 60HZ or 50HZ. Video Resolution Select the desired video resolution from three formats: 160x120, 320x240, and 640x480. The higher setting can obtain better quality; however, it will use more resource within your network. Compression Rate Select the desired compression rate from five levels: Lowest, Low, Medium, High, and Highest. -
Page 25: Amera
Brightness: Adjust the brightness level ranging from -64 to +64. Saturation: Adjust the colors level ranging from -64 to +64. Contrast: Adjust the contrast level ranging from -64 to +64. Sharpness: Adjust the sharpness level ranging from -6 to +6. Network The Network window contains commands that allow you to set up networking configuration of the camera. -
Page 26: Amera
IP Assignment Use Static IP Address: You can select this option and enter the IP address directly. The default settings are: • IP Address – 192.168.1.240 • Subnet Mask – 255.255.255.0 • Default Gateway – 192.168.1.1 Obtain IP address automatically via DHCP: If your network uses the DHCP server, select this option. -
Page 27: Amera
Administrator This field is used for entering the administrator password to access the settings. Enter the password in the Admin Password box, and then enter the same one again in the Confirm Password box to confirm the password. The default setting for Admin is blank space (Null String). For security purpose, you are strongly recommended to set the Admin Password (a maximum of 16 characters) as soon as possible to enable security function for the camera. -
Page 28: Amera
Trigger The Trigger window contains the control settings for external device through the I/O port, and the settings required for e-mail. Enable Trigger Email SMTP Server Address: To use the e-mail alert function, you must enter the mail server address in the field. Sender e-mail Address: Enter the e-mail Address of sender. -
Page 29: Ddress
Access Control Click the Access Control button to bring up a dialog window that contains list of users, allowing the administrator to assign legal users who are permitted to control the trigger output. Upload To upload the image to FTP server, you need to configure the related settings in the Upload window. - Page 30 Directory Path: Enter an existing folder name in this field, and the images will be uploaded to the given folder. Operation To enable the FTP upload function, check the Enable upload video to FTP server option, and then configure the following settings according to your necessary. Always: Allows you to upload the video to FTP server continuously.
-
Page 31: Amera
Check the Enable item to enable the function of your camera, and configure the related settings in the following fields. NOTE: When RS485 function is enabled, the system will provide the additional control buttons on the View Image screen (ActiveX mode and Java mode). See the illustrations on page 44and 47. Port setting Select the proper protocol setting from the two options: Popular protocol command setting or Custom protocol setting. -
Page 32: Amera
Information The Information window provides general information of the camera, including the Model name, Firmware Version, Mac Address, and IP Address. Model The camera’s model name will be display here. Firmware Version The field displays the firmware version of the camera. MAC Address This field displays the MAC Address of the camera. -
Page 33: View Image - Activex Mode
Reboot Do you really want to reboot this device? Click YES from this option, and you can restart the camera just like turning the device off and on and saved settings are retained. Factory Reset Do you really want to factory reset this device? Click YES from this option, and you can resume all factory default settings for the camera. -
Page 34: Amera
Camera Name/Location: The Camera name and location will be displayed when the Camera Name/Location fields are entered in the Web Configuration Utility. Video/Audio: You can enable/disable the video and audio function by clicking the desired selection. Trigger Out: you can turn on/off the output device manually by clicking the OFF button. Browse/Capture: Allow you to capture and save the video image. -
Page 35: Amera
When you select Popular protocol command setting in RS485 configuration window (see page37), you can use the Preset Position pull-down menu to select one position, then click Go To to move the camera’s lens to your desired position. If you select Custom protocol setting in RS485 configuration window (see page37), you can use the Custom Command pull-down menu to select one position, then click Go To to move the camera’s lens to your desired position. - Page 36 The function of these control buttons are the same as they are in ActiveX mode screen (see page 44).
-
Page 37: Ipview Pro
6. IPView Pro This chapter describes IPView Pro, which is a powerful software application designed with a user-friendly interface for ease of control and navigation requirements. 6.1 Installation Step 1 Insert the CD-ROM into the CD-ROM drive to initiate the auto-run program. The menu screen will appear as below: Step 2 Click the IPView Pro item to activate the InstallShield Wizard. - Page 38 Step 3 Read and accept the License Agreement; then, click Yes. Step 4 Choose the destination location. If no specific requirement, leave the default setting and click Next. Step 5 The InstallShield Wizard starts to install the software, and the progress bar indicates the installation is proceeding.
- Page 39 Step 6 Click Finish to complete the installation.
-
Page 40: Getting Started
6.2 Getting Started This section describes the User Interface of IPView Pro, with detailed procedures for using the application. To launch IPView Pro, click Start > Programs > IPView Pro > IPView Pro. The main screen will appear as below: NOTE: IPView Pro requires the system’s resolution setting up to 1024x768. -
Page 41: Amera
Rotate image Click to rotate the image shown in the View Window. angle Click to capture a still image from the View Window. Snapshot Audio ON/OFF Click to turn on/off the camera’s audio. Zoom Mode Click to zoom in/out the image in the View Window. View Mode Buttons Select the view mode from these buttons. -
Page 42: Using Ipview Pro
6.3 Using IPView Pro Adding a Camera To add a camera: 1. Click the System Configuration button to enter the System Configuration. If you are not sure of the camera’s IP address, you can click Search to search the available camera(s) within the network. -
Page 43: Amera
3. Click Save, and then click the System Configuration button to return to View Window. The selected camera’s video will be displayed now. You can click Save as to save the selected cameras into the desired path and the selected cameras can be reloaded by load button. Alternately, you can add a camera by entering the its IP address directly: 4. -
Page 44: Amera
Viewing a Camera From the View Modes of the panel, you can select one-camera mode or other modes to display your video. IPView Pro allows a maximum of 16 cameras for viewing. For example, if you use only one camera, select one-camera mode ( ), and the View Window will display the view as figure 1. -
Page 45: Configuring The System
Playing Recorded Video The recorded video clips are saved in your computer, and can be played using Windows Media Player. To start playback, simply click the Play button on the panel, and the following dialog screen will appear, allowing you to select the file to playback. Select one file to playback. -
Page 46: Amera
Camera Configuration In this field, you can add/delete the camera (as described in the previous section). Also, you can configure the following settings: Web Configuration In the left column, selecting the Web Configuration item will launch the Web Configuration Utility in View Window. You can configure these settings according to the description in Chapter 5, Using the Camera. -
Page 47: Amera
Select Custom region. Region 2. Detect Region: • Full picture – When you select this option, the camera will monitor the whole area. • Custom region – Click Add Region, and then use mouse to draw an area in the view screen;... -
Page 48: Amera
Invoke Alarm: Select this option to enable alarm when some motion detected by the system. Send e-mail: When this option is checked, click the Mailing Configuration in the left column to enter the required information (see the following section). Play music: You can use the music file to alert the event. Click Browse music file to select the desired music, and set the Interval time. -
Page 49: Amera
Factory Reset: Restore the factory default settings of the camera. Do you really want to factory reset this device? Click Yes in the pop-up dialog box to confirm. Update Firmware: When new firmware is available, you can upgrade it using this option. Click Browse to find the firmware file, and then click Update. - Page 50 Recording Configuration In this field, you can configure the storage settings. Log Storage: • Reserved HDD Space For MS-Windows OS – You can reserve 500 MB to 10000 MB hard disk space for the program. • Each Recording File Size – If the recorded video files reach the file size limit, video images will be recorded into another file automatically.
- Page 51 folder; click Delete to remove a selected path setting. Please note that you are not allowed to delete a path setting if there is only one setting in the list. Recycle: You can check this option to clear the files when the unreserved space of your hard disk is filled.
-
Page 52: Amera
Week Mode: First, select the camera desired from the pull-down menu. Then, setup the time in the Start/Stop fields, and select the weekday from the buttons. Click Add to add the recording schedule to the list. Click Save to save the settings. Others When multiple cameras connected, this option allows the system to display these views as the main view in circles according to your time settings. -
Page 53: Amera
Log List This filed displays the user(s) information, which include the Date, MAC address, and the brief description of events. Account This filed allows you to set the Admin ID and Admin Password. You can also check the Login password check option to secure your camera by checking the login password. - Page 54 About This filed provides information of the software application.
-
Page 55: Appendix
Q: What is the maximum number of users that can be allowed to access the SkyIPCam310 simultaneously? A: Maximum number of users that can log onto the SkyIPCam310 at the same time is 64. Please keep in mind the overall performance of the transmission speed will slow down when many users are logged on. -
Page 56: Ping Your Ip Address
Q: I cannot access the SkyIPCam310 from a web browser. A1: The possible cause might be the IP Address for the SkyIPCam310 is already being used by another device. To correct the possible problem, you need to first disconnect the SkyIPCam310 from the network. -
Page 57: Ddress
Q: Noisy images occur how can I solve the problem? A: The video images might be noisy if the SkyIPCam310 is used is a very low light environment. To solve this issue you need more lighting. Q: There is poor image quality, how can I improve the image? A1: A probable cause might be the incorrect display properties configuration for your desktop. -
Page 58: Adjust Skyipcam310 Focus
SkyIPCam310’s lens directly to sunlight. When operation is required in glaring light environment, it is recommended to use an iris lens. The SkyIPCam310 is designed for indoor usage and if your application requires prolong exposure to sunlight, a sun visor is recommended to protect the SkyIPCam310. -
Page 59: I/O Terminal Application
7.5 I/O Terminal Application Typically used in association with programming scripts for developing applications for motion detection, event triggering, alarm notification via e-mail, and a variety of external control functions. The 6-pin I/O Terminal Block is located on the rear panel and provides the interface to: a photo-coupled switch output, a photo-coupled input, and RS-485 interface. -
Page 60: Amera
PTZ Camera... -
Page 61: Specifications
7.6 Specifications Video specification Resolution: 640 x 480 pixel Sensor: Color CMOS sensor Lens: f: 6.0 mm, F: 1.8 Gain control: Automatic Exposure: Automatic White Balance: Automatic Image (Video Setting) Compression: M-JPEG Image frame rate: CIF, QCIF, VGA @ 30fps Support different frame rate for different connections depending on connection bandwidth: Lowest/Low/ Medium/High /Highest Compression rate:... - Page 62 Operating environment Operating temperature: Storage temperature: Humidity: 5% ~ 95%, non-condensing FCC and CE C ~ 40 C ~ 50...
-
Page 63: Technical Support
* Actual data throughput will vary. Network conditions and environmental factors lower actual data throughput rate. Specifications are subject to change without notice. All products and trademarks are the property of their respective owners. Copyright ©2007 AirLink101® Technical Support E-mail: support@airlink101.com Toll Free: 1-888-746-3238 Web Site:...