Advertisement
Quick Links
Quick Start
Guide
Simple Steps
To Get Your "Trellis-Ready"
Up and Growing
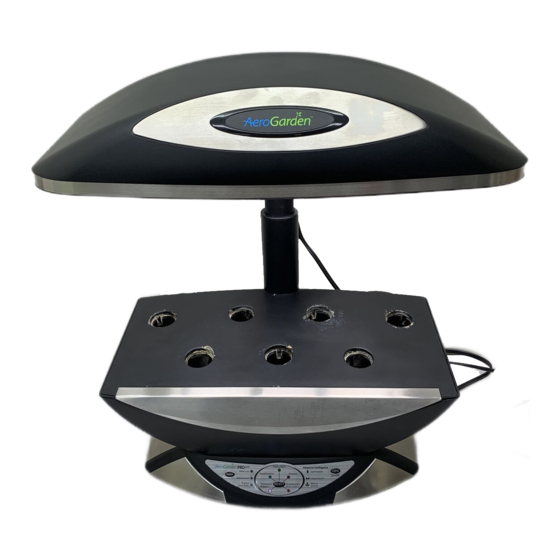
Congratulations
on your purchase of the aerogarden Pro
With this upgraded AeroGarden you get all the features of the original AeroGarden,
enhanced with...
• "24-Hour Light" Setting – that lets you override the built-in light timer and decide
how much light your plants receive (see details on page 10).
• 24" Extendable Arm – which gives you the flexibility to grow tall plants, such as
full-size tomato plants and bell peppers.
• Enhanced Lamp Hood – with 3 Deluxe Grow Bulbs, providing more light than the
original Grow Bulbs, giving larger plants the light needed to grow and thrive.
• "Replace Grow Bulbs" Indicator – alerts you to replace Deluxe Grow Bulbs. With
this feature, you'll be sure plants are always getting the right intensity and full spec-
trum of light needed for optimal growth.
• Optional Deluxe Trellis System (not included) – lets you easily support heavy,
fruit-filled branches on full-size plants such as tomatoes, peppers and cucumbers.
Model #s: 100733-DSS
input Voltage: 115V, 60Hz, 1.5a
200
PRO
!
200
Date Code:
Advertisement

Related Manuals for AeroGarden AeroGarden 100733-DSS


Summary of Contents for AeroGarden AeroGarden 100733-DSS
- Page 1 Up and Growing Congratulations on your purchase of the aerogarden Pro With this upgraded AeroGarden you get all the features of the original AeroGarden, enhanced with… • “24-Hour Light” Setting – that lets you override the built-in light timer and decide how much light your plants receive (see details on page 10).
-
Page 2: Important Safety Instructions
16. Use only approved and supplied parts and accessories. Use only lamp model 100633 (N. America) or 200633 (Europe & Austra- lia) Grow Bulbs with this AeroGarden model. Use of any other kind of accessory is not recommended. Replacement parts can be ordered from www.aerogardensupport.com or from your retailer. -
Page 3: Quick Start Assembly
Quick Start Assembly Unpack Your AeroGarden Lamp Hood (front view) Bowl (front view) Base (front view) Deluxe Grow Bulbs (3) Insert Deluxe Grow Bulbs into Lamp Hood Lamp Hood (bottom view) Push straight in. DO NOT TWIST BULBS! remember to replace Grow Bulbs every 6 months. - Page 4 Hood down until you hear a “click.” Moving Your AeroGarden PRO Use one hand to grasp Lamp Arm Gently slide AeroGarden toward the surface edge and place other hand under Base (back view) For supplies and information, visit… www.aerogardensupport.com (continued)
- Page 5 Place Your Garden Under: A space that allows 35” (89cm) clearance for the full height of raised lamp On: A sturdy, water- tolerant surface (Metal surfaces may cause noise due to vibration) Near: A standard electrical outlet, per local regulations Away From Reach of children and pets Direct sources of heat (e.g., stove, furnace vents)
-
Page 6: Planting Your Garden
It is okay to add water up to “Fill To Here” before “Water Level Low” light blinks. Plant Your Garden The aerogarden Pro comes with a gourmet Herb seed Kit for planting pre-seeded pods and a Master gardener Kit for planting your own seeds. - Page 7 Place Bio-Domes ™ Place a Bio-Dome on each Seed Pod. Press Bio-Dome down until its rim almost touches Grow Surface. Add Starting Nutrient Tablets and Record Planting Date Record Planting Date Record the date Gourmet Herb Seed Kit was planted on front cover of the Tending &...
- Page 8 Starting Your Garden Plug Cord into Electrical Outlet What will happen... A green light next to “Germination” and a white light on Control Panel will illuminate. Deluxe Grow Bulbs will come on. Look under Lamp Hood to check that all 3 bulbs are lit. If not , check to see if: •...
- Page 9 16 hours and will shut off for about 8 hours. • Your lights will come on every day at the time you plugged in your AeroGarden PRO *except when using “24-Hour light” setting, which sets lights to be on for 24 hours.
- Page 10 Flower & Vegetable plants. they require a daily dark period in order to produce flowers. if your plants will receive any room light during the day (natural or artificial), we recommend setting your aerogarden lights to be on during the day.
- Page 11 • When blinking stops (about 5 seconds), the light next to Strawberries will remain on and the green light next to “Germination” will light up. Your AeroGarden PRO is now on the “24-Hour Light” setting. (The lights and pump will remain on 24 hours a day.) •...
- Page 12 After replac- ing Deluxe Grow Bulbs, press “Reset” button to restart grow bulb timer and turn off flashing light. note: if you store your aerogarden between uses, grow bulb timer automatically stops when is unplugged. *see complete replacement instructions on next page.
- Page 13 As plants grow to 1-2” from lights, raise Lamp Arm one notch at a time (each of the three Lamp Arm sections has three notches). Be sure Lamp Arm is set at the lowest setting when you start your AeroGarden PRO Unplug AeroGarden PRO from Base.
- Page 14 Trellis System to it’s Lamp Hood. The Trellis System allows you to easily support heavy, fruit-filled branches on full-size plants such as tomatoes, peppers and cucumbers. If you are interested in purchasing an AeroGarden Trellis System, you may do so at www.aerogardensupport.com or from your retailer.
- Page 15 Prepare For Your Next Garden Cleaning instructions for your aerogarden Use only water and mild soap when cleaning your AeroGarden (except when Sanitizing - Step 7). Do not use abrasive cleaners or run through the dishwasher. When your garden has completed it’s growing cycle…...
- Page 16 Prepare For Your Next Garden Replanting Your AeroGarden If you have already grown a garden in your AeroGarden, please follow the instructions below to reset the nutrient timer: • Press and HOLD “Reset” button until red “Add Nutrient” light blinks (approximately 9 seconds).