Table of Contents
Advertisement
Available languages
Available languages
Quick Links
JOLLY Plus 2
Ventilconvettori tangenziali con ventilatori brushless
Tangential fan coil units with brushless motors
TERMINALE
A BORDO MACCHINA TC PLUS
TERMINAL
ON UNIT TC PLUS
MANUALE UTENTE
I
USER MANUAL
EN
CONTROLLO
ELETTRONICO CC PLUS
ELECTRONIC
CONTROL CC PLUS
+
COMANDO REMOTO A MURO
TERMINALE UTENTE
TC-R PLUS
WALL-MOUNTED REMOTE
CONTROL USER TERMINAL
TC-R PLUS
Advertisement
Chapters
Table of Contents

Related Manuals for Ferroli JOLLY Plus 2


Summary of Contents for Ferroli JOLLY Plus 2
- Page 1 JOLLY Plus 2 Ventilconvettori tangenziali con ventilatori brushless Tangential fan coil units with brushless motors COMANDO REMOTO A MURO TERMINALE CONTROLLO TERMINALE UTENTE A BORDO MACCHINA TC PLUS ELETTRONICO CC PLUS TC-R PLUS WALL-MOUNTED REMOTE TERMINAL ELECTRONIC CONTROL USER TERMINAL...
- Page 2 La marcatura CE, inoltre, garantisce che gli apparecchi rispondano ai requisiti della Direttiva Macchine Europea in materia di sicurezza. Il livello qualitativo è sotto costante sorveglianza, ed i prodotti FERROLI sono pertanto sino- nimo di Sicurezza, Qualità e Affidabilità.
-
Page 3: Table Of Contents
SOMMARIO GENERALITA' . . . . . . . . . . . . . . . . . . . . . . . . . . . . . . . . . . . . . . . . . . . . . . . . . . . . . . . . . . . . . . . . . . . . . . . . . . 4 Informazioni generali. -
Page 4: Generalita
GENERALITA' Informazioni generali Vi invitiamo a leggere questo manuale d'uso e installazione attentamente prima di installare e mettere in funzione l'apparecchio. Seguendo i suggerimenti riportati riuscirete a mantenere nel tempo inalterate le prestazioni dell'apparecchio. In conformità alla normativa europea 99/44/EEC la ditta costruttrice garantisce la macchina 24 mesi dalla data di acquisto (fatto salve eventuali estensioni di garanzia commerciale) per difetti imputabili a vizi di fabbricazione. -
Page 5: Regole Fondamentali Di Sicurezza
GENERALITA' Regole fondamentali di sicurezza Ricordiamo che l’utilizzo di prodotti che impiegano energia elettrica ed acqua, comporta l’osservanza di alcune regole fondamentali di sicurezza quali: È vietato l’uso dell’apparecchio ai bambini e alle persone inabili non assistite. È vietato toccare l’apparecchio se si è a piedi nudi e con parti del corpo bagnate o umide. È... -
Page 6: Descrizione Dell'unita
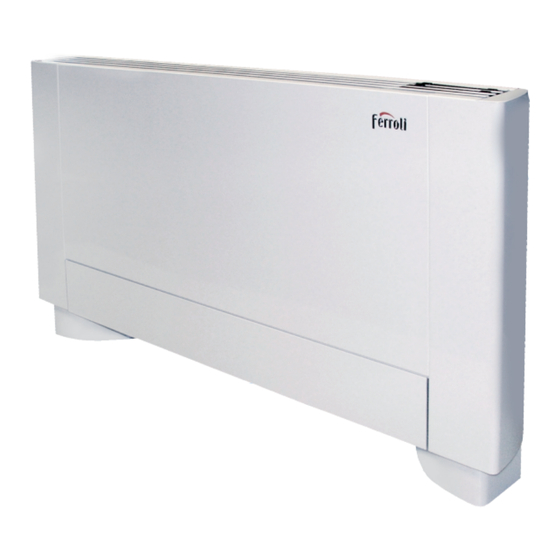
DESCRIZIONE DELL'UNITA' Descrizione dell'unità A - Struttura portante in lamiera elettrozincata ad alta resistenza. B - Batteria di scambio termico ad acqua fredda intubi di rame e alettatura a pacco d’alluminio con turbolenziatura ad alta efficienza. Raccordi filettati tipo eurokonus 3/4, conformi alle nuove esigenze di standardizzazione comunitarie. -
Page 7: Comando Elettronico A Bordo Macchina Tc Plus
COMANDO ELETTRONICO A BORDO MACCHINA TC PLUS Comando Elettronico a Bordo Macchina TC Plus Generalità comando rende completamente autonoma regolazione della temperatura ambiente (con offset Dopo un periodo di 20 secondi dall’ultima azione regolabile da tastiera) tramite i programmi AUTO, la luminosità... - Page 8 COMANDO ELETTRONICO A BORDO MACCHINA TC PLUS Accensione generale Per la gestione dell'apparecchio attraverso il pannello di controllo questo deve essere collegata alla rete elettrica. Nel caso sia stato previsto un interruttore generale sulla linea elettrica di alimentazione, questo deve essere inserito. - Accendere l'impianto inserendo l'interruttore generale Attivazione Per attivare l'apparecchio...
- Page 9 COMANDO ELETTRONICO A BORDO MACCHINA TC PLUS Funzionamento automatico Tasto Operazione Display Tener premuto il tasto AUTO. L’attivazione della funzione viene segnalata dall'accensione del relativo simbolo a display La regolazione della velocità di ventilazione avverrà automaticamente tra un valore minimo ed un valore massimo, secondo la effettiva distanza della temperatura ambiente dal setpoint impostato in base ad un algoritmo di tipo PI.
- Page 10 COMANDO ELETTRONICO A BORDO MACCHINA TC PLUS Disattivazione Tasto Operazione Display Tenere premuto il tasto ON stand-by per circa 2 secondi. La mancanza di qualsiasi segnalazione luminosa dal display identifica lo stato di "stand-by" (assenza di Spento funzione). Il comando garantisce una sicurezza antigelo anche quando è posto in stand-by. Regolazione offset sonda temperatura ambiente Essendo la sonda di rilevazione della temperatura posizionata nella parte inferiore dell'apparecchio può...
-
Page 11: Comando Elettronico A Parete Tc-R Plus
COMANDO ELETTRONICO A PARETE TC-R PLUS Comando Elettronico a Parete TC-R Plus Generalità Il comando remoto a muro TC-R Plus è un termostato Dopo un periodo di 20 secondi dall’ultima azione la elettronico dotato di sonda di temperatura ambiente che luminosità... -
Page 12: Comando Remoto A Parete Tc-R Plus
COMANDO REMOTO A PARETE TC-R PLUS Accensione generale Per la gestione dell'apparecchio attraverso il pannello di controllo questo deve essere collegata alla rete elettrica. Nel caso sia stato previsto un interruttore generale sulla linea elettrica di alimentazione, questo deve essere inserito. - Accendere l'impianto inserendo l'interruttore generale Attivazione Per attivare l'apparecchio... - Page 13 COMANDO REMOTO A PARETE TC-R PLUS Funzionamento automatico Tasto Operazione Display Tener premuto il tasto AUTO. L’attivazione della funzione viene segnalata dall'accensione del relativo simbolo a display La regolazione della velocità di ventilazione avverrà automaticamente tra un valore minimo ed un valore massimo, secondo la effettiva distanza della temperatura ambiente dal setpoint impostato in base ad un algoritmo di tipo PI.
- Page 14 COMANDO REMOTO A PARETE TC-R PLUS Disattivazione Tasto Operazione Display Tenere premuto il tasto ON stand-by per circa 2 secondi. La mancanza di qualsiasi Spento segnalazione luminosa dal display identifica lo stato di "stand-by" (assenza di funzione). Il comando garantisce una sicurezza antigelo anche quando è posto in stand-by. Regolazione offset sonda temperatura ambiente Essendo la sonda di rilevazione della temperatura posizionata nella parte inferiore dell'apparecchio può...
- Page 15 COMANDO REMOTO A PARETE TC-R PLUS Scheda elettronica a modulazione continua per collegamento termostato remoto La scheda elettronica per remotizzazione permette il controllo di tutte le funzioni del ventilconvettore da parte del comando remoto a muro. E' possibile connettere ad un comando remoto fino ad un massimo di 30 ventilconvettori che verranno comandati in broadcast (con i comandi simultanei a tutti i ventilconvettori).
-
Page 16: Manutenzione
MANUTENZIONE La manutenzione periodica è indispensabile per mantenere il ventilconvettore sempre efficiente, sicuro ed affidabile nel tempo. Essa può essere effettuata con periodicità semestrale,per alcuni interventi e annuale per altri, dal Servizio Tecnico di Assistenza, che è tecnicamente abilitato e preparato e può inoltre disporre, se necessario, di ricambi originali. -
Page 17: Estrazione Del Filtro Per Unità Serie Vm-F / Vob / Vt / Vm-G / Vof / Vp
MANUTENZIONE Estrazione del filtro per unità serie VM-F / VOB / VT / VM-G / VOF / VP - Infilare le mani sotto le estremità del pannello mobile (Fig.5 rif. A) - Premere le linguette in plastica (Fig.5 rif. B) - Sollevare ed estrarre il pannello mobile (Fig.5 rif. -
Page 18: Pulizia Dei Setti Filtranti
MANUTENZIONE Pulizia dei setti filtranti - aspirare la polvere dal filtro con un aspirapolvere (Fig.6 rif. A) - lavare sotto acqua corrente, senza utilizzare detergenti o solventi, il filtro (Fig.6 rif. B), e lasciare asciugare. - Rimontare il filtro sul ventilconvettore (Fig.6 rif. A), prestando particolare attenzione ad infilare il lembo inferiore (Fig.6 rif. - Page 19 SUMMARY GENERAL INSTRUCTIONS . . . . . . . . . . . . . . . . . . . . . . . . . . . . . . . . . . . . . . . . . . . . . . . . . . . . . . . . . . . . . . . . 4 General information .
-
Page 20: General Instructions
GENERAL INSTRUCTIONS General information Read this use and maintenance manual carefully before installing and using the unit . Following the advice given will ensure efficient operation of the unit over time . In conformity with European directive 99/44/EEC, the manufacturer guarantees the machine for 24 months from the date of purchase (subject to any commercial warranty extensions) for manufacturing defects . -
Page 21: General Instructions
GENERAL INSTRUCTIONS Basic safety rules Products that use electricity and water require the observance of some basic safety rules such as: The unit must not be used by unassisted incapable persons and children . Do not touch the unit when barefoot or with wet or damp parts of the body . Do not carry out any cleaning before disconnecting the unit from the mains by turning the system main switch off . -
Page 22: Description Of Unit
DESCRIPTION OF UNIT Description of unit A - Supporting structure in high-strength galvanised sheet . B - Heat exchange coil with cold water in copper piping and aluminium fin pack, with high efficiency turbulence. Eurokonus 3/4 threaded fittings complying with the new EC standardisation requirements. The coil is equipped with a sensor holder for detecting the temperature of the water, to be utilised according to the type of control used . -
Page 23: Electronic Control On Unit Tc Plus
ELECTRONIC CONTROL ON UNIT TC PLUS Electronic Control on unit TC Plus General information This control makes the room temperature adjustment completely autonomous (with adjustable offset After 20 seconds from the last action the panel keyboard) through AUTO, SILENT, NIGHT and MAX brightness will be reduced to increase the comfort pictograms by means of a probe located in the lower during night use and on the display will appear... - Page 24 ELECTRONIC CONTROL ON UNIT TC PLUS General start-up In order to control the device from the control panel, it first has to be connected to mains. If the power line is provided with a main switch, it should be on . - Start the system by toggling the main switch Activation To activate the device...
- Page 25 ELECTRONIC CONTROL ON UNIT TC PLUS Automatic operation Operation Display Hold the AUTO key. The function activation will be signalled by the relative symbol on the display The ventilation speed will be adjusted automatically between a minimum and a maximum value, based on the actual distance between the room temperature and the setpoint using a PI algorithm .
- Page 26 ELECTRONIC CONTROL ON UNIT TC PLUS Deactivation Display Operation Press the ON stand-by for about 2 s: When the device is in "stand-by" status (no Spento function) there are no light signals on the display . The control ensures anti-freeze safety even when set to stand-by . Room temperature probe offset adjustment In some cases the detected values might not represent the real temperature due to the fact that the temperature probe is located in the lower section of the device .
-
Page 27: Wall-Mounted Electronic Control Tc-R Plus
WALL-MOUNTED ELECTRONIC CONTROL TC-R PLUS Wall-mounted electronic control TC-R Plus The remote wall-mounted TC-R Plus is an electronic thermostat fitted with temperature probe with After 20 seconds from the last action the panel the possibility of controlling one or more (up to a brightness will be reduced and on the display will maximum of 30) cooler-convector/cooler-radiators appear the room temperature . -
Page 28: Wall-Mounted Remote Control Tc-R Plus
WALL-MOUNTED REMOTE CONTROL TC-R PLUS General start-up In order to control the device from the control panel, it first has to be connected to mains. If the power line is provided with a main switch, it should be on . - Start the system by toggling the main switch Activation To activate the device... - Page 29 WALL-MOUNTED REMOTE CONTROL TC-R PLUS Automatic operation Operation Display Hold the AUTO key. The function activation will be signalled by the relative symbol on the display The ventilation speed will be adjusted automatically between a minimum and a maximum value, based on the actual distance between the room temperature and the setpoint using a PI algorithm .
- Page 30 WALL-MOUNTED REMOTE CONTROL TC-R PLUS Deactivation Display Operation Press the ON stand-by for about 2 s: When the device is in "stand-by" status (no Spento function) there are no light signals on the display . The control ensures anti-freeze safety even when set to stand-by . Room temperature probe offset adjustment In some cases the detected values might not represent the real temperature due to the fact that the temperature probe is located in the lower section of the device .
- Page 31 WALL-MOUNTED REMOTE CONTROL TC-R PLUS Electronic board with continuous modulation for remote thermostat connection The electronic board for remote control allows the control of all cooler- radiator functions from the wall-mounted control panel . You can connect to e remote command up to 30 cooler-radiators that will be controlled in broadcast (with simultaneous commands to all cooler- radiators) .
-
Page 32: Maintenance
MAINTENANCE Regular maintenance is essential to keep the fan coil unit always efficient, safe and reliable over time. It can be done every six months for some interventions and yearly for others, by the After-Sales Service, which is technically qualified and trained and can also provide original spare parts if necessary. Before cleaning maintenance,... -
Page 33: Removing The Filter For Series Vm-F / Vm-G Units
MAINTENANCE Removing the filter for series VM-F / VM-G units - Place hands under the ends of the movable panel (Fig .5 ref . A) - Press the plastic tabs (Fig .5 ref . B) - Lift the and remove the movable panel (Fig .5 ref . C) - Remove the filter (Fig .5 ref . -
Page 34: Cleaning The Filtering Plates
MAINTENANCE Cleaning the filtering plates - remove the dust from the filter with a vacuum cleaner (Fig.6 ref. A) - rinse the filter (Fig.6 ref. B) under running water, without using detergents or solvents, and allow to dry. - Replace the filter on the fan coil unit (Fig.6 ref. A), making sure to insert the bottom edge (Fig. 6 ref. B) in its place (Fig . - Page 36 Ferroli spa ¬ 37047 San Bonifacio (Verona) Italy ¬ Via Ritonda 78/A tel. +39.045.6139411 ¬ fax +39.045.6100933 ¬ www.ferroli.it...