Chapters
Table of Contents

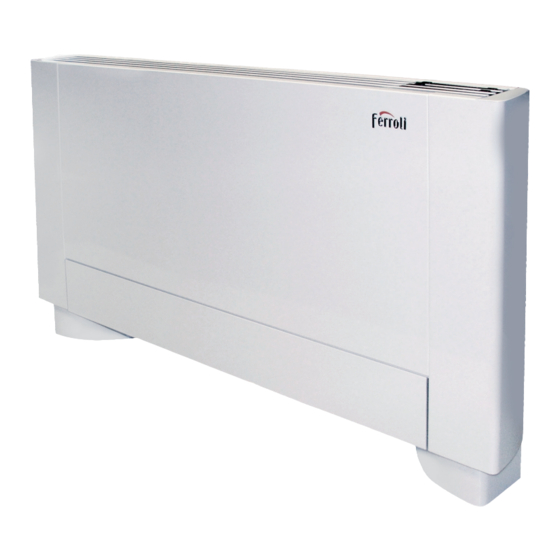
Related Manuals for Ferroli JOLLY Plus 2 VERSIONE VM-F


Summary of Contents for Ferroli JOLLY Plus 2 VERSIONE VM-F
- Page 1 JOLLY Plus 2 Ventilconvettori tangenziali con motore brushless Tangential fan coil units with brushless motos VERSIONE VM-F VERSIONE VM-G VERSIONE VN MANUALE INSTALLAZIONE INSTALLATION MANUAL...
- Page 2 La marcatura CE, inoltre, garantisce che gli apparecchi rispondano ai requisiti della Direttiva Macchine Europea in materia di sicurezza. Il livello qualitativo è sotto costante sorveglianza, ed i prodotti FERROLI sono pertanto sino- nimo di Sicurezza, Qualità e Affidabilità.
-
Page 3: Table Of Contents
SOMMARIO GENERALITA' . . . . . . . . . . . . . . . . . . . . . . . . . . . . . . . . . . . . . . . . . . . . . . . . . . . . . . . . . . . . . . . . . . . . . . . 4 Informazioni generali. -
Page 4: Generalita
GENERALITA' Informazioni generali Vi invitiamo a leggere questo manuale d'uso e installazione attentamente prima di installare e mettere in funzione l'apparecchio. Seguendo i suggerimenti riportati riuscirete a mantenere nel tempo inalterate le prestazioni dell'apparecchio. In conformità alla normativa europea 99/44/EEC la ditta costruttrice garantisce la macchina 24 mesi dalla data di acquisto (fatto salve eventuali estensioni di garanzia commerciale) per difetti imputabili a vizi di fabbricazione. -
Page 5: Regole Fondamentali Di Sicurezza
GENERALITA' Regole fondamentali di sicurezza Ricordiamo che l’utilizzo di prodotti che impiegano energia elettrica ed acqua, comporta l’osservanza di alcune regole fondamentali di sicurezza quali: È vietato l’uso dell’apparecchio ai bambini e alle persone inabili non assistite. È vietato toccare l’apparecchio se si è a piedi nudi e con parti del corpo bagnate o umide. È... -
Page 6: Descrizione Dell'unita
DESCRIZIONE DELL'UNITA' Descrizione dell'unità A - Struttura portante in lamiera elettrozincata ad alta resistenza. B - Batteria di scambio termico ad acqua fredda intubi di rame e alettatura a pacco d’alluminio con turbolenziatura ad alta efficienza. Raccordi filettati tipo eurokonus 3/4, conformi alle nuove esigenze di standardizzazione comunitarie. -
Page 7: Dati Tecnici
DATI TECNICI Dimensioni di ingombro Versione VM-F / VOB / VT / VM-G / VOF / VP Versione VN / VO / VI lato attacchi accessorio termostato (se presente) idraulici accessorio scatola elettrica (se presente) VM-F / VOB / VT / VM-G / VOF / VP 1135 1335 VN / VO / VI... -
Page 8: Installazione
INSTALLAZIONE Posizionamento dell' unità Evitare l’installazione dell’unità in prossimità di: - posizioni soggette all’esposizione diretta dei raggi solari; - in prossimità di fonti di calore; - in ambienti umidi e zone con probabile contatto con l’acqua; - in ambienti con vapori d’olio - in ambienti sottoposti ad alte frequenze. -
Page 9: Distanze Minime Di Installazione
INSTALLAZIONE Distanze minime di installazione Nella Fig.1 sono indicate le distanze minime di montaggio del ventilconvettore da pareti e mobili presenti nell’ambiente. Fig.1 Versione VM-F / VOB / VT Versione VM-G / VOF / VP Versione VN / VO / VI Terminale CC-R (se presente) Modulo... -
Page 10: Apertura Fianchi
INSTALLAZIONE Apertura fianchi Sul lato sinistro sollevare il coperchietto di copertura vite A, svitare la vite B che fissa il fianchetto sinistro C, spostarlo leggermente verso sinistra e sollevarlo. - Sul lato opposto sollevare il coperchietto di copertura vite A e svitarla. - Spostare leggermente verso destra il fianchetto D e sollevarlo Fig.1... -
Page 11: Installazione A Pavimento Verticale
INSTALLAZIONE Installazione a pavimento verticale In caso di montaggio a pavimento con gli zoccoli, per il montaggio di questi, fare riferimento ai singoli fogli istruzione in dotazione e al manuale relativo. Utilizzare la dima di carta, e tracciare sulla parete la posizione delle due staffe di fissaggio (Fig.1) Forare con una punta adeguata ed infilare i tasselli (2 per ogni staffa)(Fig.2 rif. -
Page 12: Installazione Orizzontale A Soffitto
INSTALLAZIONE Installazione orizzontale a soffitto Utilizzare la dima di carta, e tracciare a soffitto la posizione delle due staffe di fissaggio e delle due viti posteriori. Forare con una punta adeguata ed infilare i tasselli (2 per ogni staffa)(Fig.1 rif. A); fissare le due staffe (Fig.1 rif. B). Non stringere eccessivamente le viti. -
Page 13: Diametro Tubazioni
COLLEGAMENTI IDRAULICI Diametro tubazioni Il diametro interno minimo da rispettare per le tubazioni dei collegamenti idraulici varia a secondo del modello: Modello Diametro minimo Per la posizione delle tubazioni per gli attacchi a parete fare riferimento ai disegni riportati nei paragrafi successivi, in base alla specifica configurazione. - Page 14 COLLEGAMENTI IDRAULICI Per unitá con kit valvole 2 vie Uscita attacchi a muro IN 2v OUT 2v Uscita attacchi a pavimento Spazio disponibile nello zoccolo...
- Page 15 COLLEGAMENTI IDRAULICI Per unitá con kit valvole 3 vie Uscita attacchi a muro IN 3v OUT 3v Uscita attacchi a pavimento Spazio disponibile nello zoccolo...
- Page 16 COLLEGAMENTI IDRAULICI Dimensioni dima In relazione al modello selezionato, tagliare la dima e posizionare le due parti da una distanza "L" come indicato in tabella e figura. Modello...
-
Page 17: Collegamenti
COLLEGAMENTI IDRAULICI Collegamenti La scelta ed il dimensionamento delle linee idrauliche è demandato per competenza al progettista, che dovrà operare secondo le regole della buona tecnica e delle legislazioni vigenti. Per effettuare i collegamenti: - posizionare le linee idrauliche - serrare le connessioni utilizzando il metodo “chiave contro chiave” (Fig.1 rif. B) - verificare l’eventuale perdita di liquido - rivestire le connessioni con materiale isolante (Fig.1 rif. -
Page 18: Scarico Condensa
INSTALLAZIONE Scarico condensa La rete di scarico della condensa deve essere opportunamente dimensionata (diametro interno tubo minimo 16 mm) e la tubazione posizionata in modo da mantenere sempre lungo il percorso una determinata pendenza, mai inferiore a 1%. Nell’installazione verticale il tubo di scarico si collega direttamente alla vaschetta di scarico, posizionata in basso sulla spalla laterale, sotto gli attacchi idraulici. -
Page 19: Riempimento Impianto
INSTALLAZIONE Riempimento impianto Durante l’avviamento dell’impianto assicurarsi che il detentore sul gruppo idraulico sia aperto. Se ci si trova in mancanza di alimentazione elettrica e la termo valvola è già stata alimentata precedentemente sarà necessario utilizzare l’apposito cappuccio per premere l’otturatore della valvola per aprirla. Evacuazione dell'aria durante il riempimento dell'impianto - Aprire tutti i dispositivi di intercettazione dell’impianto (manuali o automatici);... -
Page 20: Collegamento Servomotori Pannello Aspirazione Mobile Versione Vm-F / Vob / Vt
INSTALLAZIONE Collegamento servomotori pannello aspirazione mobile versione VM-F / VOB / VT In questa versione i servomeccanismi atti alla movimentazione della griglia sono precablati. Tramite un apposito connettore è possibile collegarli all'alimentazione elettrica 230V / 50Hz presente sui kit elettronici disponibili come optional. -
Page 21: Collegamenti Elettrici
INSTALLAZIONE Collegamenti elettrici Effettuare i collegamenti elettrici secondo quanto riportato nel capitolo delle avvertenze generali e facendo riferimento agli schemi elettrici riportati sull’unità o sulle istruzioni specifiche degli accessori elettrici. ATTENZIONE: prima di effettuare qualsiasi intervento , assicurarsi che l'alimentazione elettrica sia disinserita. Per i collegamenti elettrici fare riferimento alla sezione "schemi elettrici". -
Page 22: Schemi Elettrici
SCHEMI ELETTRICI Per tutte le unità dotate di interfaccia remota INSTALLAZIONE Prima di chiudere la scatola elettrica ricordarsi di eseguire il collegamento con l’interfaccia remota secondo le indicazioni riportate nelle istruzioni specifiche a corredo. Controllo TC PLUS Controllo TC PLUS uscita consenso caldaia (contatto pulito max sonda temperatura acqua 10 kΩ... -
Page 23: Controllo Cc-R Plus + Terminale Termostato Continuo Tc-R Plus
INSTALLAZIONE SCHEMI ELETTRICI Controllo CC-R plus + Terminale Termostato continuo TC-R plus Controllo CC-R Plus+ Terminale continuo TC-R PLUS Eseguire i collegamenti elettrici secondo lo schema indicato: Fig.1 collegamento seriale per comando remoto a -AB+ muro (rispettare la polarizzazione AB) H2** sonda temperatura acqua calda 10 kΩ... -
Page 24: Configurazione Controllo
SCHEMI ELETTRICI INSTALLAZIONE Configurazione controllo Connessione morsetti a molla -AB+ e CP I morsetti a molla destinati alle connessioni elettriche accettano cavi rigidi o flessibili con sezione da 0,2 a 1,5 mm², mentre se gli stessi sono dotati di capocorda con collare in plastica la sezione massima è ridotta a 0,75 mm². Per una corretta e sicura connessione eseguire le seguenti operazioni: - realizzare una spellatura di 8 mm di lunghezza come in figura sottostante;... -
Page 25: Anomalie
ANOMALIE Tabella delle anomalie e dei rimedi Gli interventi devono essere eseguiti da un installatore qualificato o da un centro di assistenza specializzato. Effetto Causa Rimedio La ventilazione si attiva La valvola di circuito richiede un certo in ritardo rispetto tempo per la sua apertura e quindi per Attendere 2 o 3 minuti per l’apertura della alle nuove impostazioni... - Page 27 SUMMARY GENERAL INSTRUCTIONS . . . . . . . . . . . . . . . . . . . . . . . . . . . . . . . . . . . . . . . . . . . . . . . . . . . . . . . . . . . . 4 General information .
-
Page 28: General Instructions
GENERAL INSTRUCTIONS General information Read this use and maintenance manual carefully before installing and using the unit . Following the advice given will ensure efficient operation of the unit over time . In conformity with European directive 99/44/EEC, the manufacturer guarantees the machine for 24 months from the date of purchase (subject to any commercial warranty extensions) for manufacturing defects . -
Page 29: General Instructions
GENERAL INSTRUCTIONS Basic safety rules Products that use electricity and water require the observance of some basic safety rules such as: The unit must not be used by unassisted incapable persons and children . Do not touch the unit when barefoot or with wet or damp parts of the body . Do not carry out any cleaning before disconnecting the unit from the mains by turning the system main switch off . -
Page 30: Description Of Unit
DESCRIPTION OF UNIT Description of unit A - Supporting structure in high-strength galvanised sheet . B - Heat exchange coil with cold water in copper piping and aluminium fin pack, with high efficiency turbulence. Eurokonus 3/4 threaded fittings complying with the new EC standardisation requirements. The coil is equipped with a sensor holder for detecting the temperature of the water, to be utilised according to the type of control used . -
Page 31: Technical Data
TECHNICAL DATA Overall dimensions Version VM-F / VM-G Version VN water connections thermostat accessory (if present) side electrical accessory (if present) U .M VM-F / VM-G 1135 1335 1079 Nominal technical characteristics The table below gives the characteristic data of the units . Model U .M Coil water content... -
Page 32: Installation
INSTALLATION Unit positioning Avoid installing the unit near: - places subject to exposure to direct sunlight; - in the vicinity of heat sources; - in damp places and areas with likely contact with water; - in places with oil vapours - in places subject to high frequencies . -
Page 33: Minimum Installation Distances
INSTALLATION Minimum installation distances Fig .1 shows the minimum installation distances of the fan coil unit from walls and furniture in the room . Fig .1 Version VM-F Version VM-G Version VN Terminale CC-R CC-R Terminal (se presente) Control Modulo module : in relation to the accessory used . -
Page 34: Side Panel Opening
INSTALLATION Side panel opening On the left side lift the cap of screw A, undo screw B securing the left side panel C, move it slightly to the left and lift . - On the opposite side lift the cap of screw A and undo it . - Move the side panel D slightly to the right and lift Fig .1... -
Page 35: Floor Vertical Installation
INSTALLATION Floor vertical installation In case of floor installation with plinths, for these refer to the individual instruction sheets provided and the relevant manual. Use the paper template, and mark on the wall the position of the two fixing brackets (Fig.1) Drill using a suitable bit and insert the plugs (2 per bracket) (Fig.2 ref. -
Page 36: Ceiling Horizontal Installation
INSTALLATION Ceiling horizontal installation Use the paper template, and mark on the ceiling the position of the two fixing brackets and the two rear screws. Drill using a suitable bit and insert the plugs (2 per bracket) (Fig.1 ref. A); fix the two brackets(Fig.1 ref. B). Do not overtighten the screws . -
Page 37: Pipe Diameters
PLUMBING CONNECTIONS Pipe diameters The minimum inside diameter to respect for the pipes of the plumbing connections varies depending on the model: Model U .M Minimum diameter For the position of the pipes for the wall connections refer to the drawings given in the following sections, according to the specific configuration. - Page 38 PLUMBING CONNECTIONS For units with 2-way valve kit Wall connections outlet IN 2v OUT 2v Floor connections outlet Available space in plinth...
- Page 39 PLUMBING CONNECTIONS For units with 3-way valve kit Wall connections outlet IN 3v OUT 3v Floor connections outlet Available space in plinth...
- Page 40 PLUMBING CONNECTIONS Template dimensions In relation to the model selected, cut the template and position the two parts at a distance “L” as indicated in the table and figure. Model U .M...
-
Page 41: Connections
PLUMBING CONNECTIONS Connections The choice and size of the hydraulic lines is left to the designer, who must operate according to the rules of good workmanship and the current regulations . To carry out the connections: - position the hydraulic lines - tighten the connections using the “wrench against wrench”... -
Page 42: Condensate Drain
INSTALLATION Condensate drain The condensate drain system must be appropriately sized (pipe internal diameter min . 16 mm) and the pipe positioned so as to always maintain a certain slope of never less than 1% . With vertical installation the discharge pipe is connected directly to the drain tray, placed at the bottom on the side shoulder, under the plumbing connections . -
Page 43: System Filling
INSTALLATION System filling During system start-up make sure the holder of the hydraulic unit is open . In case of a power failure and the thermal valve has already been previously fed, the special cap must be used to press the valve shutter to open it . Evacuation of air during system filling - Open all system shutoff devices (manual or automatic);... -
Page 44: Movable Suction Panel Servomotor Connection - Version Vm-F
INSTALLATION Movable suction panel servomotor connection - version VM-F In this version, the servomechanisms for moving the grille are pre-wired . Using a special connector they can be connected to the 230V / 50Hz power supply present on the electronic kits available as optional. If an electromechanical thermostat or a non-original control is used, connect the two terminals directly to the 230V / 50Hz power supply intended for the solenoid valve . -
Page 45: Electrical Connections
INSTALLATION Electrical connections Carry out the electrical connections as given in the general instructions section and referring to the wiring diagrams on the unit or in the specific instructions of the electrical accessories . ATTENTION: Before carrying out any work, make sure the power supply is disconnected . For the electrical connections, refer to the section “wiring diagrams”... -
Page 46: Wiring Diagrams
WIRING DIAGRAMS For all units with remote interface INSTALLATION Before closing the electrical box remember to carry out the connection to the remote interface according to the specific instructions supplied . Control TC PLUS Control TC PLUS boiler go-ahead output (free contact max 1A) water temperature probe 10 kΩ... -
Page 47: Control Cc-R Plus + Continuous Thermostat Terminal Tc-R Plus
INSTALLATION WIRING DIAGRAMS Control CC-R Plus+ Continuous terminal TC-R PLUS Control CC-R plus + Continuous thermostat terminal TC-R plus Fig .1 serial connection for wall-mounted remote -AB+ control (respect the AB polarisation) H2** hot water temperature probe 10 kΩ fan motor DC inverter grill safety micro-switch hot water solenoid valve (230V/50Hz 1A powered output) -
Page 48: Control Configuration
WIRING DIAGRAMS INSTALLATION Control configuration Spring clamps -AB+ and CP connection The spring terminals intended for the electrical connections are compatible with 0 .2 to 1 .5 mm² section rigid or flexible cables, while if they are provided with lugs with plastic collar, their maximum section is reduced to 0 .75 mm²... -
Page 49: Faults
FAULTS Troubleshooting The operations must be carried out by a qualified installer or by a specialised service centre. Effect Cause Cure The ventilation is The circuit valve takes activated later than the time to open and therefore to Wait 2 or 3 minutes for the circuit valve to new temperature or circulate the hot or cold water in open . - Page 50 C e r t i f i c a t o d i g a r a n z i a C e r t i f i c a t o d i g a r a n z i a La presente garanzia convenzionale è...
- Page 51 NOTE...
- Page 52 Ferroli spa ¬ 37047 San Bonifacio (Verona) Italy ¬ Via Ritonda 78/A tel. +39.045.6139411 ¬ fax +39.045.6100933 ¬ www.ferroli.it...