Table of Contents
Advertisement
Quick Links
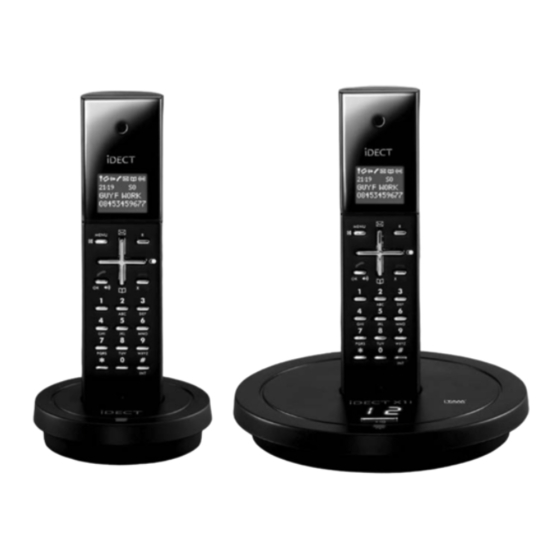
BINATONE " iDECT X1i System "
User Guide - Back Page
U
SER
iDECT X1i System
DIGITAL CORDLESS
TELEPHONE WITH
ANSWERING
MACHINE
Ver. 1,
Feb
. 0 (USA)
8
G
UIDE
THIS EQUIPMENT IS NOT DESIGNED FOR
MAKING EMERGENCY TELEPHONE CALLS
WHEN THE POWER FAILS. ALTERNATIVE
ARRANGEMENTS SHOULD BE MADE FOR
ACCESS TO DIAL EMERGENCY SERVICES.
Before operating this set,
please read these instructions carefully.
BINATONE " iDECT X1i System "
User Guide - Front Page
1)White background and black letters
2)Material: 60lb Book Paper
3) Size: 105mm(w) x 148mm(H) A6
Advertisement
Table of Contents

Related Manuals for Binatone iDECT X1i


Summary of Contents for Binatone iDECT X1i
- Page 1 Before operating this set, Ver. 1, . 0 (USA) please read these instructions carefully. BINATONE “ iDECT X1i System ” BINATONE “ iDECT X1i System ” User Guide - Front Page User Guide - Back Page 1)White background and black letters...
- Page 2 Color profile: Generic CMYK printer profile Composite Default screen IMPORTANTES MESURES DE SÉCURITÉ Certaines mesures de sécurité doivent être prises pendant l’utilisation de matérial téléphonique afin de réduire les risques d’incendie, de choc électrique et de blessures. En voici quelquesunes: Ne pas utiliser l’appareil près de l’eau, p.ex., près d’une baignoire, d’un lavabo, d’un évier de cuisine, d’un bac à...
- Page 3 Color profile: Generic CMYK printer profile Composite Default screen IMPORTANT SAFETY INSTRUCTIONS When using your telephone equipment, basic safety precautions should always be followed to reduce the risk of fire, electric shock and injury to persons, including the following: Do not use this product near water, for example, near a bath tub, wash bowl, kitchen sink or laundry tub, in a wet basement or near a swimming pool.
- Page 4 Color profile: Generic CMYK printer profile Composite Default screen Equipment Approval Information This equipment is approved for connection to the Public Switched Telephone Network and complies with Part 15 and 68 of the FCC rules and the requirements adopted by the ACTA. Notification to Local Telephone Company On the bottom of this equipment is a label that contains, among other information, BINW400BIDECTX1I and Ringer Equivalence...
- Page 5 Color profile: Generic CMYK printer profile Composite Default screen • Connection to a party line service is subject to state tariffs. Contact the state public utility commission, public service commission or corporation commission for information. • AC electrical surges, typically resulting from lightning strikes, are very destructive to the telephone equipment connected to AC power sources.
- Page 6 Color profile: Generic CMYK printer profile Composite Default screen Privacy of communications may not be ensured when using this phone. If this equipment does cause harmful interference to radio or television reception, which can be determined by turning the equipment off and on, the user is encouraged to try to correct the interference by one or more of the following measures: •...
- Page 7 Color profile: Generic CMYK printer profile Composite Default screen Industry Canada Approval information This product meets the applicable Industry Canada technical specifications. The Ringer Equivalence Number is an indication of the maximum number of terminals allowed to be connected to a telephone interface.
- Page 8 Color profile: Generic CMYK printer profile Composite Default screen Important note — emergency calls The iDECT X1i is not designed for making emergency calls if the mains power fails. So you should make alternative arrangements for access to Emergency Services.
- Page 9 Press during a call to increase the volume in the earpiece. You may need the Flash function during a call if your iDECT X1i Press while using Menu functions to move through the is connected to a PBX, or if you use Telephone network Select Services.
- Page 10 Color profile: Generic CMYK printer profile Composite Default screen Symbols on the display 18:44 WED The time and date The handset’s number (if you JANE The handset’s name have more than one handset on HANDSET (the default is your iDECT X1 system) The duration of each call is shown on the display from 5 seconds after you press the PHONE button for a line, until 10 seconds after you end the call.
-
Page 11: Table Of Contents
Color profile: Generic CMYK printer profile Composite Default screen Contents Read these notes first To delete a Phone Book entry To delete all Phone Book entries Choosing a site for the base unit and charger pod 4 Caller Display Radio signals between handset and To check Caller Display records 22 base unit 4 To return a call 22... - Page 12 Color profile: Generic CMYK printer profile Composite Default screen Contents Switching on and off Base unit settings To open the Base Setting menu Recording a memo Returning to default settings Playing your messages Dialling type and recall signal Options during playback Base unit PIN If memory is full …...
-
Page 13: Read These Notes First
Other solid structures, like walls, may reduce the signal strength. Mains power IMPORTANT — The iDECT X1i base unit and charger connection pod must be used with the mains adapter supplied with the unit. Using any other adapter will result in non-... -
Page 14: Installation And Set-Up
Use the telephone line cord RJ11C supplied with your iDECT X1i — other line cords may not work with this phone Plug the mains adapter into a 1 2 0 V AC, 6 0 Hz mains... - Page 15 Color profile: Generic CMYK printer profile Composite Default screen Installation and set-up Fit two rechargeable batteries in each handset A. Insert the batteries in the compartment, with the of each battery facing away from the cover. Always use the rechargeable batteries supplied —...
- Page 16 Color profile: Generic CMYK printer profile Composite Default screen Installation and set-up Charge the batteries for 15 hours Before you use the handset for the first time, it’s important to charge the batteries fully. The ‘battery charge level’ The handset ‘beeps’ when it’s correctly symbol blinks in position on the charging cradle.
-
Page 17: Before You Start
(base unit only); then pull it out by the unplugged cables. ■ NEVER use your iDECT X1i outdoors during a thunder- storm — unplug the base unit from the telephone line and the mains socket when there are storms in your area. -
Page 18: Switching On And Off
Color profile: Generic CMYK printer profile Composite Default screen Switching on and off To switch the To switch the handset off (in case you need to handset on save battery power when the handset is away from the base unit): and off ◗... -
Page 19: Your Handset's Name
Composite Default screen Your handset’s name Before you start to use your iDECT X1i handset, especially if you have a multi-handset system, you’ll probably want to personalise the display with your name. The name can have up to ten characters (including spaces). -
Page 20: To Set The Time And Date
Color profile: Generic CMYK printer profile Composite Default screen To set the time and date Press the MENU button è PHONEBOOK The display shows Press the â button THREE times è SETTING The display shows Press the PHONE/OK button then the â button è... -
Page 21: Ringer Volume And Melody
Color profile: Generic CMYK printer profile Composite Default screen Ringer volume and melody Handset Press the MENU button è ringer The display shows PHONEBOOK Press the â button THREE times è The display shows SETTING Press the PHONE/OK button è The display shows HANDSET SETTING Press the PHONE/OK button... - Page 22 Color profile: Generic CMYK printer profile Composite Default screen Area code To set area Press the MENU button code è The display shows PHONEBOOK Press the â button until display shows SETTING Press the PHONE/OK button è The display shows HANDSET SETTING Press the PHONE/OK button è...
- Page 23 Color profile: Generic CMYK printer profile Composite Default screen Ringer volume and melody Base unit Press the MENU button è ringer The display shows PHONEBOOK Press the â button THREE times è SETTING The display shows Press the PHONE/OK button then the â button è...
-
Page 24: Making And Answering Calls
Color profile: Generic CMYK printer profile Composite Default screen Making and answering calls Using the The speakerphone lets you hear calls without holding speakerphone the handset to your ear. You can switch between speakerphone and earpiece mode during calls at any time by pressing the PHONE/SPEAKERPHONE button. -
Page 25: Earpiece Volume
Color profile: Generic CMYK printer profile Composite Default screen Making and answering calls Earpiece During a call, to adjust the volume in the earpiece volume or speakerphone: ◗ Press the á or â button There are three volume levels. After you end the call, the volume will stay at the level you’ve set. -
Page 26: To Store A Redial Number In The Phone Book
Color profile: Generic CMYK printer profile Composite Default screen Making and answering calls Press the Redial button, then the á or â To store a Redial number button until the number is displayed in the Phone Press and hold the PHONE BOOK button for Book 2 seconds è... -
Page 27: The Phone Book (Memory Dialling)
Color profile: Generic CMYK printer profile Composite Default screen The Phone Book (memory dialling) You can store up to 50 numbers in the Phone Book. Each number can have up to 32 digits, and can be stored with a name of up to 20 characters (including spaces). -
Page 28: To Call A Stored Number
Color profile: Generic CMYK printer profile Composite Default screen The Phone Book (memory dialling) To call a Press the Phone Book button è stored number The display shows the first entry in the Phone Book. If the number has more than nine »... -
Page 29: To Delete A Phone Book Entry
Color profile: Generic CMYK printer profile Composite Default screen The Phone Book (memory dialling) Press the Phone Book button then the á or To delete a â button to go to the number you want Phone Book entry Press the MENU button, then the â button TWICE è... -
Page 30: Caller Display
Caller Display lets you see the phone numbers of your callers on the handset’s display, before you answer. The iDECT X1i will store the numbers of the last 20 callers (whether or not you answered the call) so you can call them back later. -
Page 31: To Check Caller Display Records
Color profile: Generic CMYK printer profile Composite Default screen Caller Display To check Press the Caller Display CID button Caller Display è The most recent record is shown on the display. records To see more details, press the # (HASH) button (Refer to the diagram on page 20.) Press the á... -
Page 32: To Store A Caller Display Number In The Phone Book
Color profile: Generic CMYK printer profile Composite Default screen Caller Display To store a Use steps 1 to 3 above (step 2 is optional) to Caller Display display the record number in Press and hold the Phone Book button for the Phone 2 seconds Book... -
Page 33: Using A Multi-Handset System
Composite Default screen Using a multi-handset system If you have an iDECT X1i multi-handset system, you already have more than one handset registered to your base unit. You can register additional handsets — up to four per base unit. With two or more handsets, you can: ■... -
Page 34: To Answer An Intercom Call
Color profile: Generic CMYK printer profile Composite Default screen Using a multi-handset system To answer an The ringing tune for intercom calls is different from that intercom call for outside calls. When someone makes an intercom call to you, your INTERNAL FROM # handset’s display shows with the... -
Page 35: To Shuttle Between Two Calls
Color profile: Generic CMYK printer profile Composite Default screen Using a multi-handset system To shuttle When you have made or answered an outside between two call and then made an intercom call, you can calls shuttle from one to the other, like this: ◗... -
Page 36: New Call Tone
Color profile: Generic CMYK printer profile Composite Default screen Using a multi-handset system New Call tone When you are on an intercom call and an outside call comes in, you’ll hear New Call tone to tell you that someone is calling you. To answer the outside call and end the intercom call: ◗... -
Page 37: Answering Machine Introduction
Color profile: Generic CMYK printer profile Composite Default screen Answering machine — introduction To operate the answering machine, use the TAM OPERATION menu on the handset’s display (TAM stands for ‘telephone answering machine’). Messages are played through the handset’s earpiece; or you can press the PHONE/OK/ button to turn the speakerphone on or off. - Page 38 Color profile: Generic CMYK printer profile Composite Default screen Answering machine — introduction The display on The display shows the base unit page two digit display - number of message E:\Binatone2006\iDECT_X1i\iDECT_X1i_UK_03.vp 12 June 2006 10:54:01...
-
Page 39: Outgoing Messages
Color profile: Generic CMYK printer profile Composite Default screen Outgoing messages The outgoing message (OGM) is what callers hear when the machine answers their calls. There are two OGMs: ■ OGM1 asks the caller to leave a message. The machine has a default OGM1 : "... - Page 40 Color profile: Generic CMYK printer profile Composite Default screen Outgoing messages When you’ve finished, press PHONE/OK button to stop the recording and your message. will then play back through the handset speaker Press the HANG UP button repeatedly to go back to standby mode.
-
Page 41: To Select An Ogm
Color profile: Generic CMYK printer profile Composite Default screen Outgoing messages To select If you want your callers to leave messages, an OGM make sure you select OGM1 — if OGM2 is selected, callers will not be able to leave messages. -
Page 42: Switching On And Off
Color profile: Generic CMYK printer profile Composite Default screen Switching on and off Press the MENU button then the â button FOUR times è TAM OPERATION The display shows Press the PHONE/OK button Press the â button FOUR times è TAM ON/OFF The display shows Press the PHONE/OK button... -
Page 43: Recording A Memo
Color profile: Generic CMYK printer profile Composite Default screen Recording a memo Memos you record directly into the machine are stored and played back like messages from callers (incoming messages). Press the MENU button then the â button FOUR times è... -
Page 44: Playing Your Messages
Color profile: Generic CMYK printer profile Composite Default screen Playing your messages When the machine is switched on, and OGM1 is selected, it will record messages from callers (incoming messages). To play back your incoming messages (and memos if applicable): Press the MENU button then the â... -
Page 45: Options During Playback
Color profile: Generic CMYK printer profile Composite Default screen Playing your messages Options during During playback, you can press: playback ◗ the PHONE/OK button to switch between the earpiece and the speakerphone ◗ the â or á button to change the volume in the earpiece or speakerphone ◗... -
Page 46: If Memory Is Full
Color profile: Generic CMYK printer profile Composite Default screen Playing your messages Deleting If you select DELETE DELETE ALL from the playback messages options menu ◗ Press the PHONE/OK button to confirm that you want to delete the message(s), or the HANG UP button to cancel If memory is The answering machine has enough memory to record... -
Page 47: Answering Machine Settings
Color profile: Generic CMYK printer profile Composite Default screen Answering machine settings SETTINGS menu lets you customise the way your answering machine works. To use the SETTINGS menu: Press the MENU button then the â button FOUR times è TAM OPERATION The display shows Press the PHONE/OK button Press the â... -
Page 48: Rings To Answer
Color profile: Generic CMYK printer profile Composite Default screen Answering machine settings Rings to The machine can answer calls after five answer rings. Or you can set ‘toll saver’ — it will answer after two rings if there are new messages, or after four rings if there are no new messages. -
Page 49: Call Monitoring
Color profile: Generic CMYK printer profile Composite Default screen Answering machine settings Call With call monitoring turned on, when a caller is monitoring leaving a message you can hear them through the handset’s speakerphone — so you can press the PHONE/OK button to pick up the call and talk to the caller, stopping the message recording. -
Page 50: Default Settings
Color profile: Generic CMYK printer profile Composite Default screen Answering machine settings Default This option returns the answering machine to settings its default settings: answering machine ON default OGM1 selected no recorded incoming messages or memos remote PIN — 123 message recording time —... -
Page 51: Remote Operation
Composite Default screen Remote operation When you’re not at home, you can phone your iDECT X1i to check your messages remotely. First, you need to set up remote operation using the iDECT X1i’s handset. The machine has a three-digit PIN (security code) which you need to key in when you operate it remotely. -
Page 52: To Check Your Messages Remotely
Color profile: Generic CMYK printer profile Composite Default screen Remote operation To check Using a tone dialling phone, dial your home number your When your outgoing message starts playing, messages press then key in your remote PIN remotely press è You hear one long ‘beep’. -
Page 53: Keys To Press During Remote Operation
Color profile: Generic CMYK printer profile Composite Default screen Remote operation Keys to press during remote operation To play your to play all messages messages and memos, press: Ü to play only new messages to pause during playback to restart playback to stop playback To skip to go back to the start of the current... - Page 54 Color profile: Generic CMYK printer profile Composite Default screen Remote operation To select an OGM, to select OGM1 press: to select OGM2 To record a memo, to start recording press: to stop recording (or just hang up) To switch the machine on and off, press: E:\Binatone2006\iDECT_X1i\iDECT_X1i_UK_03.vp 12 June 2006 10:54:04...
-
Page 55: Handset Settings
Color profile: Generic CMYK printer profile Composite Default screen Handset settings HANDSET SETTING menu lets you customise your handset to suit your preferences. Some of the functions in this menu have been covered earlier in this User Guide. To open the Press the MENU button è... -
Page 56: Earpiece Volume
Color profile: Generic CMYK printer profile Composite Default screen Handset settings Ringer volume These are set using the ACOUSTIC SETTING option. See page 12 for details. and melody Earpiece There are three earpiece volume levels. You can volume also change the earpiece volume during a call using the â... -
Page 57: Battery Low Tone
Color profile: Generic CMYK printer profile Composite Default screen Handset settings Battery Low Normally, when the handset’s batteries are tone running low, you’ll hear a warning tone. You can turn this off if you prefer: ACOUSTIC SETTING Select the option by pressing the PHONE/OK button Use the â... -
Page 58: Returning To Default Settings
Color profile: Generic CMYK printer profile Composite Default screen Handset settings To turn auto-answer on and off: AUTOMATIC ANSWER Select the option by pressing the PHONE/OK button è SET AUTO ANSWER The display shows Use the â or á button to go to the option you prefer, then press the PHONE/OK button to confirm Returning to... -
Page 59: Handset Pin
Color profile: Generic CMYK printer profile Composite Default screen Handset settings Registration See page Handset PIN The default PIN (personal identity number, or security code) for the handset is 0000. If you want to protect your handset’s settings, you can change the PIN to any four-digit number you’ll easily remember. -
Page 60: Baby Call
(except MENU) is pressed. Before you can turn Baby Call on, you must set (programme) the Baby Call phone number to be dialled. With Baby Call turned on, the iDECT X1i handset can’t be used for calling Emergency Services. Make sure there’s an alternative phone available for emergencies. -
Page 61: Base Unit Settings
Color profile: Generic CMYK printer profile Composite Default screen Base unit settings BASE SETTING menu lets you customise your base unit to suit your preferences. Some of the functions in this menu have been covered earlier in this User Guide. To open the Press the MENU button Base Setting... -
Page 62: Returning To Default Settings
You should always leave the dialling type at its TONE default setting — . You should not need to change the recall signal setting unless you’re having problems using your iDECT X1i on a PBX. Refer to page 66 for more information. E:\Binatone2006\iDECT_X1i\iDECT_X1i_UK_03.vp 12 June 2006 10:54:05... -
Page 63: Base Unit Pin
Color profile: Generic CMYK printer profile Composite Default screen Base unit settings DEREGISTER Deregistering For details of the option, see page handsets Base unit PIN The default PIN (personal identity number, or security code) for the base unit is 0000. If you want to protect your base unit’s settings, you can change the PIN to any four-digit number you’ll easily remember. -
Page 64: Call Control
Default screen Base unit settings CALL CONTROL Call control options let you monitor and control the calls made on your iDECT X1i. You can: ■ Use the call timer to see how much time has been spent making outside calls. ■... -
Page 65: To Bar Certain Types Of Call
Color profile: Generic CMYK printer profile Composite Default screen Base unit settings CALL CONTROL To bar certain Select the option by pressing PHONE/OK, then press the â button types of call è CALL LIMIT The display shows Press the PHONE/OK button è... - Page 66 Color profile: Generic CMYK printer profile Composite Default screen Base unit settings Press the â button è The display shows BARRING NUMBER Press the PHONE/OK button è SELECT BARRING NO The display shows BARR NUM 1 . This lets you set the first barred number.
-
Page 67: Emergency Numbers
Color profile: Generic CMYK printer profile Composite Default screen Base unit settings Emergency You can set up to four emergency (SOS) numbers, each numbers with up to ten digits. These numbers can always be dialled using any handset, even when call barring is turned on. -
Page 68: Registering New Handsets
Troubleshooting Registering new handsets Important — The handset(s) supplied with your iDECT X1i base unit are already registered to it, so you don’t need to register them. But if you’ve bought extra handsets separately, you’ll need to register them. Each iDECT X1i handset can be registered to one base at a time. -
Page 69: To De-Register A Handset
Color profile: Generic CMYK printer profile Composite Default screen Registering new handsets Registration If registration has failed, the handset’s display will show REGISTRATION FAILED failed? for a few seconds then return to standby mode. If this happens, try again, making sure you don’t leave too long between steps. - Page 70 Composite Default screen Registering new handsets To register to Your iDECT X1i can be registered to any GAP- a different compatible base unit; or your can register other GAP- brand of base compatible handsets to your iDECT X1i base unit.
- Page 71 Color profile: Generic CMYK printer profile Composite Default screen Troubleshooting The iDECT X1i must be serviced by trained engineers. NEVER attempt any repairs or adjustments yourself — you could make the problem worse and invalidate the Guarantee. ALWAYS check ■...
- Page 72 — not just for charging the batteries. Make sure you’re using the telephone line cable that was supplied with your iDECT X1i. Other telephone line cables might not work. Check that the total REN value of all equipment connected to your telephone line is no more than 4 (see page 3).
- Page 73 Color profile: Generic CMYK printer profile Composite Default screen Troubleshooting You’ll get the best results if you site the base unit as high as possible. For example, in a two-storey house, the first-floor landing is an ideal place for the base unit. “My call was cut Move the handset closer to the base unit before you try off when I went...
- Page 74 Color profile: Generic CMYK printer profile Composite Default screen Troubleshooting Using a multi-handset system “I can’t transfer Make sure the other handset is in range of the base unit. a call.” Make sure you’re dialling the correct number for the other handset (1 to 6, or Ø...
- Page 75 ALWAYS use the batteries supplied with your iDECT X1i they are low.” — other batteries may burst, causing damage. Use only with SANIK SN-2/3AAA40H J NiMH 400Ah 1.2V rechargeable battery.
- Page 76 Troubleshooting If the fault persists … Disconnect all other instruments connected to the same line as the iDECT X1i and see whether you can make a call. Disconnect the base unit from the telephone line and plug a different phone into the master telephone socket.
-
Page 77: Cleaning And Care
Default screen Cleaning and care ■ Do not clean any part of your iDECT X1i with benzene, thinner or other solvent chemicals — this may cause permanent damage which is not covered by the Guar- antee. When necessary, clean it with a damp cloth. -
Page 78: Guarantee And Service
Please keep your sales (till) receipt — this is your guarantee. You should also keep the original packaging material. If you think your iDECT X1i has developed a fault, please: Disconnect the base unit from the telephone line and the mains electricity supply Pack up all parts of your iDECT X1i, using the original packaging. -
Page 79: Technical Details
Color profile: Generic CMYK printer profile Composite Default screen Technical details Standard 1.9 GHz DECT 6.0 Frequency range 1.92 ~ 1.93 GHz Channel bandwidth 1.28 MHz Operating range up to 300 m outdoors; up to 50 m indoors Operating time standby: 100 hours approx. - Page 80 Color profile: Generic CMYK printer profile Composite Default screen Index answering a call, 15 barg certain types of call, answering an intercom call, call timer, 55 emergency numbers, 58 answering machine, 28 call limit, 58 call monitoring, 46 cleaning and care, 68 calling back the caller, 16 clock setting, 11 default settings, 49...
- Page 81 Color profile: Generic CMYK printer profile Composite Default screen Index registering new handsets, making a call, 15 memory dialling, 19 registration and de- multi-handset use, 24 registration, 59-60 name, 18 REN (ringer equivalence number), 63 New Call tone, 27 ringer volume and melody ‘Out of range’...