Table of Contents
Advertisement
Quick Links
We advise you to read this manual carefully, which contains all the instructions for
maintaining the appliance's aesthetic and functional qualities.
For further information on the product: www.smeg.com
Contents
40
40
41
41
41
41
42
42
43
43
44
45
46
46
48
48
49
50
52
57
58
59
61
65
65
65
66
67
67
69
70
70
71
39
Advertisement
Table of Contents

Related Manuals for Smeg TR90IX


Summary of Contents for Smeg TR90IX
-
Page 1: Table Of Contents
4.5 Cleaning the inside of the oven 4.6 Extraordinary maintenance 5 Installation 5.1 Electrical connection 5.2 Positioning We advise you to read this manual carefully, which contains all the instructions for maintaining the appliance’s aesthetic and functional qualities. For further information on the product: www.smeg.com... -
Page 2: Instructions
Instructions 1 Instructions objects (cutlery or utensils) into the slots in the appliance. 1.1 General safety instructions • Do not try to repair the appliance yourself or without the intervention Risk of personal injury of a qualified technician. • If the power supply cable is •... -
Page 3: Identification Plate
Instructions • Do not use the appliance to heat • In conformity with the provisions rooms for any reason. regarding electromagnetic compatibility, the electromagnetic • Remove any food residues or induction cooking hob comes large spills from previous cooking under group 2 and class B (EN operations from the inside of the 55011). -
Page 4: This User Manual
Instructions To dispose of the appliance: 1.7 How to read the user manual • Remove the doors and leave the This user manual uses the following reading accessories (racks and trays) in their conventions: usual working positions, so that children cannot get stuck in the oven Instructions compartment. -
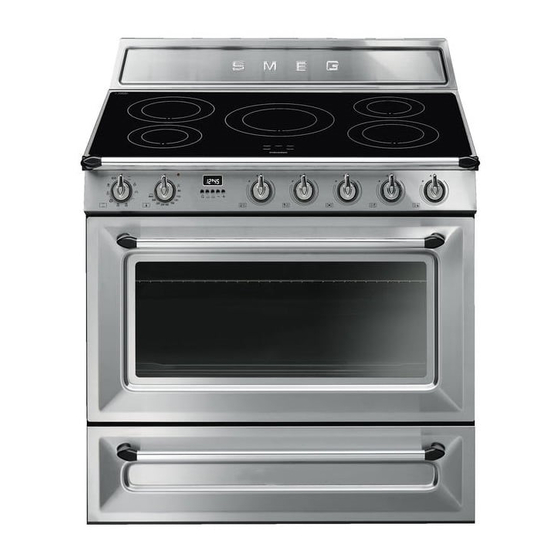
Page 5: Description
Instructions 2 Description 2.1 General Description 1 Upstand 6 Door 2 Cooking hob 7 Fan 3 Control panel 8 Storage compartment 4 Oven light Rack/tray support frame shelf 5 Seal... -
Page 6: Cooking Hob
Description 2.2 Cooking hob Outer diameter Max. power absorbed Power absorbed in Zone (mm) (W)* Booster function (W)* 1300 1400 2300 3000 2300 3000 * power levels are indicative and can vary according to the pan used or the settings made. •... -
Page 7: Control Panel
Description 2.3 Control panel Temperature knob (1) Programmer clock (4) This knob allows you to select the cooking Useful for displaying the current time, setting temperature. programmed cooking operations and programming the minute minder timer. Turn the knob clockwise to the required value, between the minimum and maximum Cooking zone control knobs (5) setting. -
Page 8: Other Parts
Description 2.4 Other parts 2.5 Available accessories Shelves Some models are not provided The appliance features shelves for with all accessories. positioning trays and racks at different heights. The insertion heights are indicated Rack from the bottom upwards (see 2.1 General Description). - Page 9 Description Rotisserie rod Self-cleaning panels Useful for absorbing small grease residues. Useful for cooking chicken and all foods The accessories intended to come which require uniform cooking over their into contact with food are made of entire surface. materials that comply with the provisions of current legislation.
-
Page 10: Use
3 Use Improper use Danger of burns 3.1 Instructions High temperature inside the oven • Oils and fats could catch fire if during use overheated. Be very careful. Danger of burns • Never place metal objects, such as dishes or cutlery, on the induction hob •... -
Page 11: First Use
3.2 First use Improper use 1. Remove any protective film from the Risk of damage to surfaces outside or inside of the appliance, including accessories. • Do not cover the bottom of the oven 2. Remove any labels (apart from the cavity with aluminium or tin foil sheets. -
Page 12: Using The Accessories
3.3 Using the accessories Tray rack The tray can be used two different ways: Racks and trays • Inside the rack (with the anti-tip stop Racks and trays have to be inserted into the facing upwards) to collect grease during side guides until they come to a complete cooking stop. - Page 13 Rotisserie rod (on some models only) 1. Prepare the rotisserie rod with the food using the clip forks provided. 2. Screw on the handle provided so that you can handle the rod with the food on 4. To activate the rotisserie, turn the function it readily.
-
Page 14: Using The Hob
3.4 Using the hob Cookware suitable for use in induction cooking On first connection to the electrical Cookware used on the induction cooking mains, an automatic check will be surface must be made of metal, with carried out that will switch on all magnetic properties and a sufficiently large indicator lights for a few seconds. - Page 15 Limiting the cooking duration Use only cookware with a The hob has an automatic device which perfectly flat bottom and suitable limits the duration of use. for induction cooking zones. Using If the cooking zone settings are not cookware with an irregular bottom changed, the maximum duration of could jeopardise the efficiency of operation for each zone depends on the...
- Page 16 Protection from overheating • Choose a pan suitable for the quantity of food to be cooked. A large, half-empty If the hob is used on full power for a long pan leads to a waste of energy. period, the electronics will have trouble cooling down if the room temperature is Under certain circumstances, if the high.
- Page 17 The power level can be increased at any Residual heat moment. The “maximum power” period will Improper use automatically be modified. Danger of burns Once the acceleration period is over the power level will remain the same as the one previously selected.
- Page 18 Power control Control lock The hob is fitted with a power control The control lock is a device that module that optimises/limits consumption. If protects the appliance from the overall set power level exceeds the accidental or inappropriate use. maximum limit permitted, the electronic circuit board will automatically manage the 1.
-
Page 19: Using The Storage Compartment
3.5 Using the storage compartment 3.6 Using the oven The storage compartment is at the bottom of Switching on the oven the cooker. To open it, pull the handle To switch on the oven: towards you. It can be used to store cookware or metallic objects necessary 1. - Page 20 Lower element Fan with circulaire The heat coming just from the The combination of the fan and the bottom allows you to complete the circulaire heating element cooking of foods that require a (incorporated in the rear of the higher bottom temperature, without oven) allows you to cook different affecting their browning.
-
Page 21: Cooking Advice
3.7 Cooking advice • Foods should be seasoned before cooking. Foods should also be coated General advice with oil or melted butter before cooking. • Use a fan assisted function to achieve • Use the oven tray on the first bottom shelf consistent cooking at several levels. - Page 22 Advice for defrosting and proving 3.8 Programmer clock • Place frozen foods without their packaging in a lidless container on the first shelf of the oven. • Avoid overlapping the food. • To defrost meat, use the rack placed on the second level and a tray on the first level.
-
Page 23: Programmer Clock
Setting the time 3. Wait approx. 5 seconds without pressing any key in order for the function to On the first use, or after a power failure, the activate. The current time and the digits will be flashing on the symbols will appear on the appliance's display. - Page 24 Programmed cooking 7. Press keys at the same time to reset the programmer clock. Programmed cooking is the function which allows a cooking After the setting, to display the operation to be started at a set cooking time left press the key.
- Page 25 3. Wait approx. 5 seconds without pressing any key to finish setting the minute minder. The current time and the symbols appear on the display. It is not possible to set a cooking time of more than 24 hours. After the minute minder timer has been programmed, the display will go back to showing the current time;...
- Page 26 Cooking information table Runner Temperature position Food Weight (Kg) Function Time (minutes) (°C) from the Lasagne 3 - 4 Static 220 - 230 45 - 50 Pasta bake 3 - 4 Static 220 - 230 45 - 50 Roast veal Turbo 180 - 190 90 - 100...
-
Page 27: Cleaning And Maintenance
Cleaning and maintenance 4 Cleaning and maintenance Ordinary daily cleaning Always use only specific products that do 4.1 Instructions not contain abrasives or chlorine-based acids. Improper use Pour the product onto a damp cloth and Risk of damage to surfaces wipe the surface, rinse thoroughly and dry with a soft cloth or a microfibre cloth. -
Page 28: Removing The Door
Cleaning and maintenance Dirt which may have fallen on the hob 4.3 Removing the door while cleaning lettuce or potatoes can For easier cleaning, the door can be scratch the hob when moving pans. removed and placed on a canvas. Consequently, remove any dirt from the To remove the door proceed as follows: cooking surface immediately. -
Page 29: Cleaning The Door Glazing
Cleaning and maintenance 4.5 Cleaning the inside of the oven 3. To reassemble the door, put the hinges in the relevant slots in the oven, making sure For the best oven upkeep, clean it regularly that grooved sections A are resting after having allowed it to cool. - Page 30 Cleaning and maintenance Removing racks/trays support frames Regeneration of self-cleaning panels (catalytic cycle) Removing the guide frames enables the sides to be cleaned more easily. The regeneration cycle of the self-cleaning panels is a cleaning method through To remove the guide frames: heating suitable for removing small grease 1.
-
Page 31: Extraordinary Maintenance
Cleaning and maintenance 4.6 Extraordinary maintenance 5. Replace the lamp with one of the same type (40W). Live parts 6. Refit the cover correctly, so that the Danger of electrocution moulded part of the glass is facing the door. • Disconnect the oven power supply. 7. -
Page 32: Installation
Installation 5 Installation The appliance can work in the following modes: 5.1 Electrical connection • 220-240 V 2~ Power voltage Danger of electrocution • Have the electrical connection 3 x 10 mm² three-core cable. performed by authorised technical • 220-240 V 3~ personnel. -
Page 33: Positioning
Installation 5.2 Positioning The aforementioned power cables are sized taking into account the Heavy appliance coincidence factor (in compliance Danger of crushing injuries with standard EN 60335-2-6). • Position the appliance into the cabinet In the event of connection to a two- cutout with the help of a second person. - Page 34 Installation General information This appliance may be installed next to walls, one of which must be higher than the worktop, at a minimum distance of 50 mm from the side of the appliance, as shown in figures A and C relative to the installation classes.
- Page 35 Installation Assembling the upstand Mounting the toe skirt The upstand provided is an The toe skirt provided is an integral integral part of the product; it must part of the product; it must be be fastened to the appliance prior fastened to the appliance prior to to installation.
- Page 36 Installation Positioning and levelling the appliance After making the electrical connections, properly level the appliance on the floor to ensure better stability: • Screw or unscrew the bottom part of the foot until the appliance is stable and level on the floor.