Table of Contents
Advertisement
. . . . . . . . . . . . . . . . . . . . . . . . . . . .
. . . . . . . . . . . . . . . . . . . . . . . . . . . . . . . . .
. . . . . . . . . . . . . . . . . . . . . . . . . . . . . . . . . . . . . . .
Top Panel . . . . . . . . . . . . . . . . . . . . . . . . . . . . . . . . . . . . . . . . . . . . .
Rear Panel (Connecting Your Equipment) . . . . . . . . . . . . . . . .
Turning the Power On/Off . . . . . . . . . . . . . . . . . . . . . . . . . . . . . .
Phantom Power Settings . . . . . . . . . . . . . . . . . . . . . . . . . . . . . . .
Switching Between Play Screens . . . . . . . . . . . . . . . . . . . . . . . .
Adjusting the Input/Output Level . . . . . . . . . . . . . . . . . . . . . . .
Pedal Mode . . . . . . . . . . . . . . . . . . . . . . . . . . . . . . . . . . . . . . . . . . .
. . . . . . . . . . . . . . . . . . . . . . . . . . . . . 10
Recording on a Single Track . . . . . . . . . . . . . . . . . . . . . . . . . . . . . 10
Recording on Multiple Tracks . . . . . . . . . . . . . . . . . . . . . . . . . . . 11
Record While Listening to the Rhythm Sound . . . . . . . . . . . . 12
. . . . . . . . . . . . . . . . . . . . . . . . . . . . . . . . . . . . . 12
. . . . . . . . . . . . . . . . . . . . . . . . . . . . . 12
Using the Input FX . . . . . . . . . . . . . . . . . . . . . . . . . . . . . . . . . . . . . 12
. . . . . . . . . . . . . . . . . . . . . . . . . . . . . . . . . . . . 13
Saving a Memory (WRITE) . . . . . . . . . . . . . . . . . . . . . . . . . . . . . . 13
Erasing Data from a Memory (CLEAR) . . . . . . . . . . . . . . . . . . . . 13
. . . . . . . . . . . . . . . . . . . . . . . . . . . . . . . . . . . 14
Editing the Settings of a Memory . . . . . . . . . . . . . . . . . . . . . . . 14
Editing the Track Settings . . . . . . . . . . . . . . . . . . . . . . . . . . . . . . 15
Editing the Rhythm Settings . . . . . . . . . . . . . . . . . . . . . . . . . . . . 16
Editing the Input FX/Track FX Settings . . . . . . . . . . . . . . . . . . . 17
Owner's Manual
(this document)
Read this first. It explains the basic things you need to know in order to
use the RC-600.
Parameter Guide
(download from the Web)
This explains all of the parameters of the RC-600.
Before using this unit, carefully read "USING THE UNIT SAFELY" and "IMPORTANT NOTES" (the leaflet "USING THE UNIT SAFELY" and the
Owner's Manual (p. 2)). After reading, keep the document(s) where it will be available for immediate reference.
© 2021 Roland Corporation
2
2
. . . . . . . . . . . . . . . . . . . . . . .
3
4
4
7
7
7
8
8
9
. . . . . . . . . . . . . . . . . 16
Backing Up or Recovering Data . . . . . . . . . . . . . . . . . . . . . . . . . 20
MIDI Settings . . . . . . . . . . . . . . . . . . . . . . . . . . . . . . . . . . . . . . . . . . 21
Connecting Two RC-600 Units . . . . . . . . . . . . . . . . . . . . . . . . . . . 22
. . . . . . . . . . . . . . . . . . . . . . . . . . . . . . . . . . . . . . . . . . . . 23
Troubleshooting . . . . . . . . . . . . . . . . . . . . . . . . . . . . . . . . . . . . . . . 23
Error Message List . . . . . . . . . . . . . . . . . . . . . . . . . . . . . . . . . . . . . 24
Main Specifications . . . . . . . . . . . . . . . . . . . . . . . . . . . . . . . . . . . . 26
To obtain the Parameter Guide
1 .
Enter the following URL on your computer.
https://www .boss .info/manuals/
2 .
Choose "RC-600" as the product name.
Owner's Manual
. . . . . . . . . . . . . . . . . . . . . . . . . . . . 18
. . . . . . . . . . . . . . . . . 20
. . . . . . . . . . . . . . . . . . . . . . . . . . . 21
. . . . . . . . . . 21
. . . . . . . . . . 22
Advertisement
Table of Contents

Related Manuals for Boss RC-600


Summary of Contents for Boss RC-600
-
Page 1: Table Of Contents
Connecting Two RC-600 Units . . . . . . . . . . . . . . . . . . -
Page 2: Using The Unit Safely
Licensed under the MIT license https://opensource.org/licenses/mit-license.php • Roland, BOSS, and LOOP STATION are either registered trademarks or trademarks of Roland Corporation in the United States and/or other countries. • Company names and product names appearing in this document are registered... -
Page 3: How The Rc-600 Is Organized
System settings Effects that are applied to the input audio are called “input FX, ” Settings that are common to the RC-600 overall such as the and effects that are applied to the tracks are called “track FX. ” display contrast, USB and MIDI settings are called “system settings. ”... -
Page 4: Getting Ready
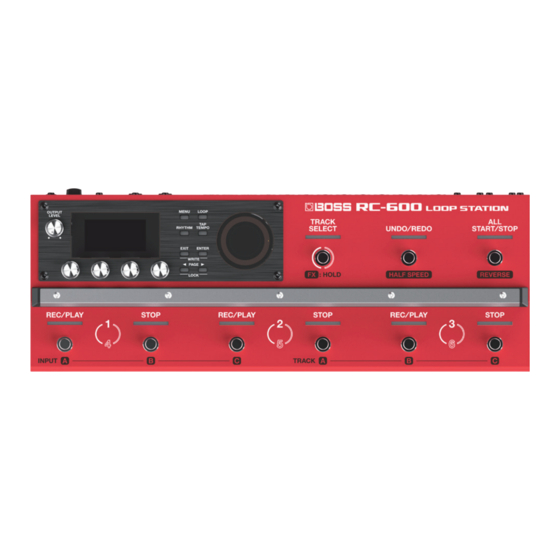
Getting Ready Top Panel [OUTPUT LEVEL] knob [EXIT] button Adjusts the volume of the RC-600. Press to return to the previous screen. Display [ENTER] button Shows various information of the RC-600. Press to confirm an operation. 5 If you press the [ENTER] button while the play screen is [1]–[4] knobs... - Page 5 Getting Ready [TRACK SELECT] switch/indicator [REC/PLAY] 1–6 switches/indicators Switches between tracks 1–3 and 4–6. Switches between recording, playback, and overdubbing. Indicator Explanation For an empty phrase: Lit white Tracks 1–3 Recording0Playback0Overdubbing Lit red Tracks 4–6 For a phrase that contains data: Playback0Overdubbing When you hold down the [TRACK SELECT] switch, the indicator lights up blue, and the switches on this unit change their functions.
-
Page 6: Rear Panel (Connecting Your Equipment)
Getting Ready Rear Panel (Connecting Your Equipment) To prevent malfunction and equipment failure, always turn down the volume, and turn off all the units before making any connections. Pin assignment MIC IN 1, 2 connectors 2: HOT 1: GND 3: COLD Ground terminal Connect this to an external earth or ground. -
Page 7: Turning The Power On/Off
Getting Ready Connecting footswitches Connect one or more footswitches and set their mode/polarity switches by referring to the illustrations below. FS-6 FS-5U x 2 FS-5U x 1 FS-7 Stereo 1/4” phone type 1/4” phone type Stereo 1/4” phone type Stereo 1/4” phone type Mode/Polarity switch FS-5U 1/4”... -
Page 8: Switching Between Play Screens
Getting Ready Switching Between Play Screens The screen that appears after you turn on the power is called the “play screen. ” Icon Explanation Memory number Tempo Phantom power for MIC 1, 2 connectors is on (off when not displayed) Memory name Knob lock function is on (off when not displayed) Parameters to set using the [1]–[4] knobs... -
Page 9: Pedal Mode
5 The settings for modes 1–3 can be saved in memory, letting you use different settings for each pedal mode in memory. Examples of settings These are the basic (factory default) settings of the PEDAL MODE Tracks 1–3 RC-600. (Track select) Tracks 4–6 REC/PLAY STOP... -
Page 10: Creating A Loop Phrase
Adjusts the input/output level (p. 8). Play your guitar or vocalize into your mic to input audio. Use the [OUTPUT LEVEL] knob to adjust the overall volume of the RC-600. Playback Press the [REC/PLAY] 1 switch. The REC/PLAY indicator is lit green. -
Page 11: Recording On Multiple Tracks
Creating a Loop Phrase Recording on Multiple Tracks You can use multiple tracks to create a single loop phrase. This shows you how to record the tracks in ascending order (track 1 0 track 2 0 ... track 6). Track 2 Overdubbing Press the [TRACK SELECT] switch to the tracks 1–3. -
Page 12: Record While Listening To The Rhythm Sound
Record While Listening to the Rhythm Sound Using the Input FX In addition to the track, the RC-600 can also play a “Rhythm. ” You can apply input FX to the input sound. You can record while sounding a rhythm at the tempo you specify. -
Page 13: Saving A Memory
Saving a Memory Saving a Memory (WRITE) Erasing Data from a Memory (CLEAR) If you select a different memory or turn off the power after You can erase the data that is saved in a memory, clearing that recording or editing the settings, the recorded content or edited memory to an empty state. -
Page 14: Editing A Memory
Editing a Memory Editing the Settings of a Memory Here’s how to edit the settings of each memory. For details on the parameters, refer to “Parameter Guide” (PDF). Item Explanation Configures tracks 1–6. TRACK Turn the [1] knob to select the track to edit. Configures the settings related to recording/ overdubbing. -
Page 15: Editing The Track Settings
Editing a Memory Editing the Track Settings Here’s how to configure the volume, playback method and other settings for tracks 1–6. For details on the parameters, refer to “Parameter Guide” (PDF). Item Explanation Specifies whether to play back normally or in REVERSE reverse. -
Page 16: Editing The Rhythm Settings
Editing a Memory Editing the Rhythm Settings For details on the parameters, refer to “Parameter Guide” (PDF). Press the [LOOP] button. Changing How the Rhythm Starts and Stops The LOOP screen appears. As appropriate for your recording method or the phrase that you’re recording, you can change the way in which the rhythm starts and stops. -
Page 17: Editing The Input Fx/Track Fx Settings
Editing a Memory Editing the Input FX/Track FX Settings For details on the parameters, refer to “Parameter Guide” (PDF). Select the memory for which you want to edit the input FX/track FX settings. Press the [LOOP] button. The LOOP screen appears. Use the PAGE [J] button to switch the page, and then press the [1] (INPUT FX) or [2] (TRACK FX) knob. -
Page 18: System Settings (Menu)
System Settings (MENU) For details on the parameters, refer to “Parameter Guide” (PDF). Item Parameter/Explanation SETUP Settings related to the input and output jacks, such as phantom power on/off. INPUT Settings for applying an equalizer effect to the input sound for each connector/jack. Press the [MENU] button. - Page 19 Configures the USB audio output level. RX CH CTL Specifies the receive channel for messages (control changes) that switch memories or control the RC-600. RX CH RHYTHM Specifies the receive channel for note messages that play the drum sounds. RX CH VOICE Specifies the receive channel for note messages used to create harmonies or vocoder effects.
-
Page 20: Connecting To A Computer Via Usb
Connecting to a Computer via USB Connecting to your computer Here’s what you can do when you connect the RC-600 via USB to your computer. Use a commercially available USB cable to connect the RC-600’s 5 Back up the RC-600’s data to your computer. -
Page 21: Controlling Devices Via Midi
If you select a Control Change as the “ASSIGN” (p. 18) target, you can transmit MIDI control and an external expression pedal change messages by operating the buttons and knobs on the RC-600, or by using an external or footswitch is transmitted as footswitch or expression pedal (connected to the CTL 1, 2/EXP 1 jack or the CTL 3, 4/EXP 2 jack). -
Page 22: Controlling The Rc-600 From An External Midi Device
5 Tracks for which TEMPO SYNC (p. 15) is ON play at the tempo set in the memory of the transmitting unit. 5 Tracks for which LOOP SYNC (p. 15) is ON loop in time with the first-recorded phrase on the transmitting RC-600. -
Page 23: Appendix
TEMPO SYNC setting to “ON. ” If MIDI clocks are being received via the MIDI IN connector or the USB port, the RC-600 synchronizes its tempo to the MIDI clocks. Playback tempo not Is the unit synchronized via MIDI? changing If you don’t want to synchronize with an external device, set SYNC to... -
Page 24: Error Message List
Stop all of these, and then save the memory (p. 13). is also unsaved data. Check the format of the audio file. UNSUPPORTED FILE This audio file is unplayable. To import an audio file into the RC-600, use BOSS TONE STUDIO. -
Page 25: Restoring The Factory Default Settings (Factory Reset)
Appendix Restoring the Factory Default Settings (Factory Reset) You can restore all of the settings to their factory-set values, and you can also specify certain items to be reset. * When you execute “Factory Reset, ” the settings you made are lost. -
Page 26: Main Specifications
Appendix Main Specifications Sampling Frequency 44.1 kHz AD/DA Conversion 32 bits Processing 32-bit floating point Number of Tracks: 6 Recording/Playback Data Format: WAV (44.1 kHz, 32-bit float, stereo) Maximum Recording Time: Approx. 1.5 hours (1 track), Approx.13 hours (total of All memories) Rhythm Type 200 types or greater Rhythm Kit...