Table of Contents
Advertisement
Available languages
Available languages
Quick Links
COFFEE MAKER
Instructions for use. Keep these instructions
Visit www.delonghi.com
for a list of service centers near you.
ELECTRIC CHARACTERISTICS
MACHINE À CAFÉ
Mode d' e mploi . Conservez cette notice
Visitez www.delonghi.com pour y voir une liste des
centres de réparation proches de chez vous.
CARACTÉRISTIQUES ÉLECTRIQUES
Repase y guarde estas instrucciones.
Lea cuidadosamente este instructivo
antes de usar su aparato.
Visite www.delonghi.com para ver la lista de
centros de servicios cercanos a usted.
CARACTERISTICAS ELECTRICAS:
BCO43X
115 V~ 60 Hz 1500 W
115 V~ 60 Hz 1500 W
CAFETERA
115 V~ 60 Hz 1500 W
Advertisement
Table of Contents

Related Manuals for DeLonghi BCO43X


Summary of Contents for DeLonghi BCO43X
- Page 1 115 V~ 60 Hz 1500 W MACHINE À CAFÉ Mode d’ e mploi . Conservez cette notice Visitez www.delonghi.com pour y voir une liste des centres de réparation proches de chez vous. CARACTÉRISTIQUES ÉLECTRIQUES 115 V~ 60 Hz 1500 W CAFETERA Repase y guarde estas instrucciones.
- Page 2 page 6 pag. 15 pág.24...
- Page 3 A10*...
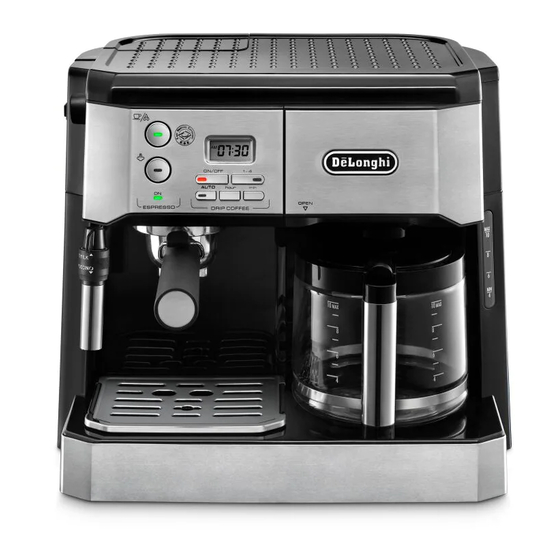
- Page 4 7.30 7.30...
- Page 5 Adjustable Capuccino system*...
-
Page 6: Important Safeguards
1. IMPORTANT SAFEGUARDS When using electrical appliances, basic safety precautions should always be followed, including the following: • Read all instructions. • Do not touch hot surfaces. Use handles and knobs. • To protect against fire, electrical shock and personal injury, do not immerse cord, plug or appliance in water or other liquid. -
Page 7: Safety Warnings
Read this instruction booklet carefully before installing and using the appliance. This is the only way to ensure the best results and maximum safety for the user. 3. SAFETY WARNINGS A13. Steam dial for cappuccino A14. Espresso coffee ON/OFF switch •... -
Page 8: First Use
• Release the filter support from its slot by pulling it upwards 3. Set the minutes by pressing the “min” button repeatedly. (fig. 1). 4. After 5 seconds, the display will stop flashing and the pro- • Remove the Antichlorine filter from the plastic sachet and grammed time will be stored. -
Page 9: Espresso Coffee
8.2 How to make espresso coffee using pre- • Then pour the water into the water-fill compartment of the appliance (fig. 9). ground coffee • Position the gold tone filter into the filter-holder (fig. 10). 1. After preheating the appliance and filter holder as de- •... - Page 10 turning the steam dial to the OFF position and press the Please note: button. Use pods conforming to the ESE standard, indicated on the pack 9. Pour the frothed milk into the cups containing the espresso by the following symbol. coffee prepared previously.
-
Page 11: Hot Water
* Models with cappuccino maker: • Rinse all components and clean the metal filter thoroughly 2. With one hand, hold the cappuccino maker spout firmly, in hot water using a brush (fig. 31). Make sure the holes in with the other, release the cappuccino maker by turning it the metal filter are not blocked. -
Page 12: Technical Characteristics
6. Turn the appliance on and deliver the water until the tank Danger! is completely empty. While cleaning, never immerse the coffee maker in water. It is 7. Rinse by operating the appliance with water only at least 3 an electrical appliance. times (3 complete tanks of water). -
Page 13: Troubleshooting
16. TROUBLESHOOTING Below is a list of some of the possible malfunctions. If the problem cannot be resolved as described, contact Customer Services. PROBLEM POSSIBLE CAUSE SOLUTION No espresso coffee is delivered No water in the tank Fill the tank with water The holes in the filter holder are blocked Clean the filter holder spout holes The espresso boiler outlet is blocked... - Page 14 PROBLEM POSSIBLE CAUSE SOLUTION The coffee froth is too dark (delivered The pre-ground coffee is pressed down Press the coffee down less firmly (fig. 17) from the spout too slowly) too firmly There is too much pre-ground coffee Reduce the quantity of pre-ground coffee The espresso boiler outlet is blocked Clean as described in the section “13.2 Cleaning the boiler outlet”.
-
Page 15: Precauciones Importantes
1. PRECAUCIONES IMPORTANTES Siempre que se utilicen artefactos eléctricos, se deberán seguir precauciones básicas de seguridad, incluidas las siguientes: • Lea todas las instrucciones. • No toque superficies calientes. Utilice asas y palancas. • Para evitar incendios, descargas eléctricas o daños personales, no sumerja el cable, la clavija o el artefacto en agua o en cualquier otro medio líquido. -
Page 16: Advertencias De Seguridad
Lea este manual de instrucciones detenidamente antes A8. Bandeja de la taza de café expreso de instalar y utilizar el artefacto. Esta es la única manera A9. Bandeja de goteo de garantizar resultados óptimos y seguridad máxima A10. Capuchinador (*diferente, dependiendo del modelo) para el usuario. -
Page 17: Configuración Del Reloj
5. FILTRO ANTICLORO demora (es decir, la hora en que usted desea que se prepare el café), siga los siguientes pasos: El filtro elimina el sabor a cloro del agua. Para colocar el filtro 1. Presione el botón AUTO (Fig. 4) durante aproximadamente 2 siga los siguientes pasos: segundos hasta que el valor 0:00 titile en el visor. -
Page 18: Preparación De Café De Filtro
Se recomienda utilizar el botón aroma cuando se preparan 5 o ra. Coloque el soporte del filtro con el filtro en el aparato menos tazas: no utilice esta opción para elaborar una jarra en- (fig. 14) sin añadir café premolido. Utilice el filtro más pe- tera de café. - Page 19 4. *Solo modelos con cappuccinatore ajustable: Asegú- Danger of burns! rese que el manguito del cappuccinatore esté en posición Para evitar salpicaduras, nunca quite el soporte del filtro mien- “CAPPUCCINO” y coloque el recipiente que contiene la leche tras el aparato esté haciendo café. bajo el capuchinador.
-
Page 20: Agua Caliente
10. PREPARACIÓN DE LATTE CALIENTE (HOT 12. AGUA CALIENTE MILK) (SOLO MODELOS CON CAPPUCCINATORE 1. Pulse el interruptor ON / OFF (fig. 12) para encender el apa- rato. La luz de alimentación se enciende. AJUSTABLE) 2. Espere hasta que la luz se encienda Para preparar un latte caliente sin espuma, proceder como se ha 3. - Page 21 1. Retire el filtro y llene el depósito con la solución descal- cificante, obtenida diluyendo el descalcificador con agua siguiendo las instrucciones del paquete. 2. Pulse el interruptor ON/OFF (fig. 12) para encender el apa- rato. La luz de alimentación se enciende. 3.
-
Page 22: Datos Técnicos
15. DATOS TÉCNICOS Hervidor de café expreso: Acero inoxidable Capacidad del depósito de café expreso: 1,2 L Voltaje: 115V˜60Hz Capacidad del depósito de café de filtro: 1,4 L Potencia: 1500 W Longitud del cable de alimentación: 1200 mm Dimensiones (l x a x a): 370 x 305 (or 400) x 325 mm Peso: 13,89Lb/6,3 kg... - Page 23 La espuma del café es demasiado clara El café premolido no está presionado ha- Presione el café premolido hacia abajo (vertida del pico demasiado rápido) cia abajo con firmeza suficiente con más firmeza (Fig. 18) No hay suficiente café premolido Aumente la cantidad de café...
- Page 24 De’Longhi Appliances via Seitz, 47 31100 Treviso Italia www.delonghi.com...
-
Page 25: Mesures De Securite Importantes
1. MESURES DE SECURITE IMPORTANTES Lorsque vous utilisez des appareils électriques, des précautions basiques de sécurité doivent être suivies, dont les précautions suivantes: • Lire toutes les instructions. • Ne pas toucher les surfaces chaudes. Utiliser les poignées. • Pour prévenir un incendie, un choc électrique, ou une blessure corporelle, ne pas immerger de câble, de prise ou d’appareil dans l’... -
Page 26: Avertissements De Sécurité
- Votre produit est équipé d’une fiche de ligne de courant alternative polarisée (une fiche ayant une broche plus large que l’autre). La fiche peut pénétrer dans la prise de courant dans un seul sens. Il s’agit là d’une fonction de sécurité. -
Page 27: Première Utilisation
4.4 Installation 2. Avant que l’ é cran d’affichage ne cesse de clignoter (environ 5 secondes), configurer l’heure en appuyant sur le bouton • Placer l’appareil sur une surface de travail, à l’ é cart des rob- HEURE répétitivement. inets d’ e aux et des éviers. 3. - Page 28 8. PRÉPARATION DE L’ESPRESSO HEURE (et aussi sur le bouton MIN si nécessaire). 3. Après avoir configuré l’heure, attendre 5 secondes. Lorsque Avant la première utilisation, il faut laver tous les accessoires l’affichage cesse de clignoter, le temps est enregistré. et rincer l’intérieur des tubes, en le mettant en marche comme A remarquer: Si 0:00 est configuré, l’appareil s’...
-
Page 29: Préparation Du Cappuccino
(fig. 14) pour prévenir les fuites d’ e au. 2. Appuyer sur le bouton . La lumière s’allume (fig. 21). 5. Poser la tasse ou les tasses sous le bec du porte-filtre (fig. 3. Pendant ce temps, remplir le containeur d’à peu près 3.5 18). - Page 30 Il est recommandé de distribuer de la va- *Tous les modèles 6. Repositionner la buse à l’ e au en l’insérant correctement sur peur pendant 60 secondes au plus. Ne pas le tube de vapeur. produire de la mousse de lait plus de 3 fois 7.
-
Page 31: Nettoyage De La Chaudière
• Repositionner le filtre et le joint d’ é tanchéité sur le disque ensuite le bac récepteur. Nettoyer le réservoir d’ e au à l’aide en plastique comme montré dans la figure 32. Vérifier que d’une brosse douce pour atteindre le fond. l’aiguille soit insérée dans le disque en plastique dans le Danger! trou du joint d’... -
Page 32: Caractéristiques Techniques
15. CARACTÉRISTIQUES TECHNIQUES 5. Laisser la solution se reposer pendant 15 minutes. Répéter la procédure 4 ou 5 fois. Tension : 115V˜60Hz 6. Mettre la machine en marche et laisser la solution s’ é couler Puissance : 1500 W jusqu’à ce que le réservoir soit complètement vide. Dimensions (l x p x h): 370 x 305 (or 400) x 325 mm 7. - Page 33 Le café est froid La lumière OK pour l’ e spresso ne s’allume pas Attendre que la lumière s’allume en appuyant le bouton de distribution du café Le préchauffement n’a pas été effectué Effectuer le préchauffement comme dé- crit dans le paragraphe “8.1 Préchauffe- ment du groupe cafetier”...