
Related Manuals for Stanley TIMEIT TM201


Summary of Contents for Stanley TIMEIT TM201
- Page 1 TIMEIT OUTDOOR TWIN ™ User manual Manual de usuario / Manuel utilisateur Model/Modelo/Modèle# TM201...
-
Page 2: Initial Use
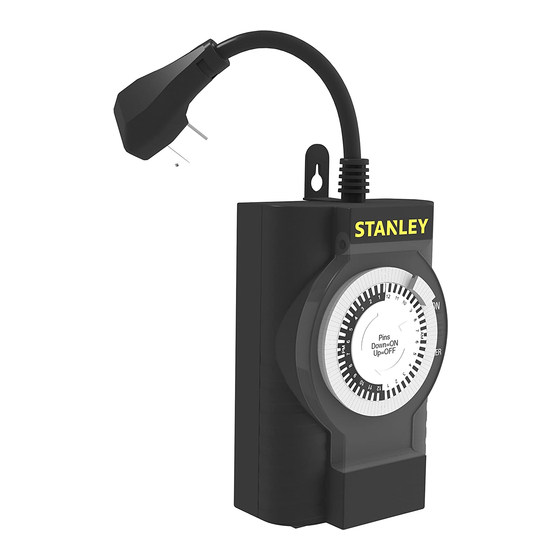
Timer pins are factory preset in the “pushed down” (‘ON’) position. Pull pins up for timers ‘OFF’ intervals. INITIAL USE: Install the cord and unit at least 5ft (1.5m) above ground level with the outlet receptacle facing downward. Let the switch hang downward so moisture doesn’t accumulate in the outlet. -
Page 3: Specifications
slices around the dial.) For example: to turn the timer ON at 5pm and OFF at 10pm, push down all the pins from 5pm to 10pm. 5 - Plug your electrical device directly into the timer. The electrical device must be set to “ON” position for the timer control to work properly. -
Page 4: Three-Year Limited Warranty
THREE YEAR LIMITED WARRANTY If within the first year from date of purchase, this unit fails due to a defect, exchange where purchased, or ship it prepaid with proof of purchase to The NCC, 1840 McDonald Avenue, Brooklyn, New York 11223. Units that fail to operate during the second or third year from date of purchase must be shipped prepaid with proof of purchase to The NCC. -
Page 5: Uso Inicial
Los ganchos del cronómetro son valores predeterminados de la fábrica y estan “empujados hacia abajo” la posición ’ON’ (encendido). Hale los ganchos para intervalos en posición ‘OFF’ (apagado). USO INICIAL: Instale el cable y la unidad por lo menos 5ft (1.5m) por encima del nivel del suelo con el receptáculo de salida hacia abajo. - Page 6 para establecer la hora actual. NOTA: El marcado en la esfera se basa en AM/PM. 4 - Determinar la hora de inicio deseada y presione “hacia abajo” todos los ganchos deseados hasta el tiempo de apagar (OFF). Cuando empujen los ganchos, el temporizador estará...
-
Page 7: Especificaciones
Asegúrese de ajustar el interruptor a la posición TIMER para el funcionamiento correcto. En caso de fallo de energía, restablezca la hora del día, como se indica en el paso 3. ESPECIFICACIONES 2 Tomacorrientes y 1 Enchufe a Tierra Clasificasión: 125VAC/60Hz/8A/1000W Resistiva 8A/1000W Tungsteno 500VA Lastre Eletrónico 1/2 HP Motor de Carga... -
Page 8: Première Utilisation
ADVERTENCIA • NO ENCHUFE EL TEMPORIZADOR A UN CABLE DE EXTENSIÓN U OTRO ADAPTADOR ELÉCTRICO. CONECTE DIRECTAMENTE UNA TOMA DE CORRIENTE. • NO CONECTE EL CONTADOR A APARATOS QUE CONTIENEN ELEMENTOS DE CALENTAMIENTO (COCINA ELECTRODOMÉSTICOS, CALENTADORES, PLANCHAS, ETC) EL FALLO DEL TEMPORIZADOR PARA APAGAR ESTOS DISPOSITIVOS PUEDE PROVOCAR UN SOBRECALENTA MIENTO Y UN POSIBLE INCENDIO. -
Page 9: Mode D'opération
MODE D’OPÉRATION 1 - Localisez la sortie électrique la plus rapprochée de l’appareil à contrôler. 2 - Réglez le ON / TIMER situé à côté de la molette sur la position TIMER. Branchez la Pins Down=ON minuterie dans la prise. Up=OFF 3 - Placer à... -
Page 10: Caractéristiques
5 - Branchez votre appareil électrique directement dans la minuterie. L’appareil doit être en position d’opération ON pour que la minuterie puisse le contrôler efficacement. 6 - L’interrupteur sur la minuterie doit être en TIMER position pour que la minuterie opère. Pour utiliser le manuel “Toujours ON”... -
Page 11: Garantie Limitée De Trois Ans
GARANTIE LIMITÉE DE TROIS ANS Si au cours de la première année à compter de la date d’achat cet appareil tombe en panne en raison d’un défaut, échangez-le là où il a été acheté ou expédiez-le en port payé ccompagné d’une preuve d’achat à... - Page 12 Stanley Black & Decker, Inc., or one of its affiliates, and are used under license. STANLEY® y el STANLEY® logo son marcas registradas de Stanley Black & Decker, Inc., o uno de sus afiliados, y se usan con licencia. STANLEY® et le STANLEY® logo sont des marques déposées de Stanley Black &...