Advertisement
Quick Links
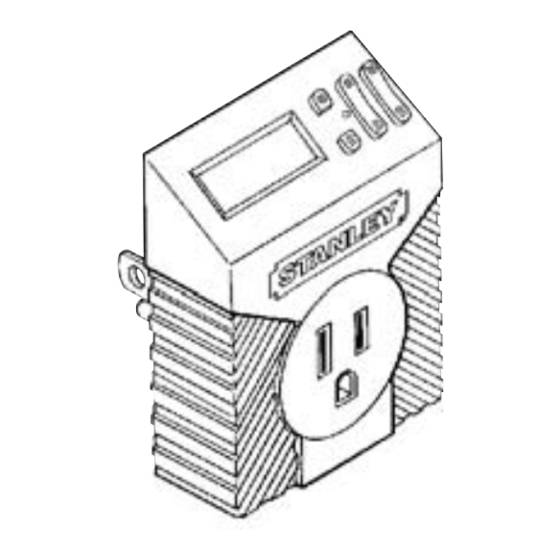
TimerMax
TimerMaxOutdoor
™
Day Timer
R
m+
h+
LCD
Liquid Crystal Display (
)
DO NOT EXCEED 1875 WATT, 15 AMP MAX. LOAD
B U T TO N F U N C T I O N S
/Time –
Set and display present day and time.
Timer
6
– Set/view
"ON/OFF" programs.
Day
– Set day(s). See eleven different settings
below [Hold for fast forward].
h+
– Set hours. [Hold for fast forward]
m+
– Set minutes. [Hold for fast forward]
/Override
– Manual "ON/OFF". When this
button is pressed it will change the current state
from "OFF" to "ON" or vice versa. When the next
programmed time is reached the timer will revert
to the programs control.
R /Reset
– Clear all settings.
T i m e r bu t t o n
The first press of the
MO TU WE TH FR SA SU
"Timer" button displays
TIMER
1
the ON settings for the
ON
1
st program, the second
press– its OFF settings.
This number shows
The third press displays
which program of
the ON settings for the
six is being viewed.
2
nd program, and so on
to the twelfth press of the "Timer" button, which
displays the OFF settings for the
You don't need to use all six "ON/OFF" programs.
D a y button settings fo r T i m e r m o d e
1. MO TU WE TH FR SA SU – Daily
"ON/OFF" settings will repeat every day.
2. MO will only operate Monday.
3. TU will only operate Tuesday.
4. WE will only operate Wednesday.
5. TH will only operate Thursday.
6. FR will only operate Friday.
7. SA will only operate Saturday.
8. SU will only operate Sunday.
9. MO TU WE TH FR – Weekday
will operate Monday to Friday.
10. SA SU – Weekend
will operate Saturday and Sunday.
11. MO TU WE TH FR SA – 6 Day
will operate Monday to Saturday.
http://waterheatertimer.org/Woods-timers-and-manuals.html#6-week
™
TimerMax
Read instructions carefully in order to set-up your TimerMax properly.
1 PLUG THE TIMER INTO AN 125V OUTLET that is visually and manually
accessible. Allow built-in batteries to initially charge for ten minutes,
fully charge in five hours. [Once fully charged the battery will
Time Timer Day
h+
m+
remember your settings for up to six months.] If the display appears as
Reset
Override
shown here (flashing), proceed to step 2. If not, press and release small "R /Reset" button
gently with a pencil point or opened paper clip.
2 To SET CURRENT DAY AND TIME, the " /Time" button must be
pressed and held, throughout this step. Press the "Day" button until
the present day of the week appears. Do the same with the "h+"and
"m+" buttons to set the time. Note that either A or P appears in the
bottom right of display window to indicate AM or PM.
3 To SET THE TIMER, press the "Timer" button once and the display
will appear as shown here. Next, set the time [with the "h+" and
"m+" buttons, as above] and day(s) you want your appliance/light
"ON" [refer to the Day button section on the bottom LEFT of this
page for a list of 11 different day(s) options]. Press the "Timer" but-
ton a second time [note that OFF appears in the display] and set the
time and day(s) you want your appliance/light "OFF". For more detail,
see examples on other side. This step can be repeated five times,
for a total of 6 "ON/OFF" programs.
4 Press the " /Time" button to return to current day and time display.
5 Finally, plug your appliance/light into the timer. Be sure that the item plugged into the
timer is switched "ON".
HINTS and TIPS
- -
- -
:
The rechargeable battery in the timer should be charged first by plugging it into a
(
regular household outlet (125V) for ten minutes.
Ensure the "ON/OFF" switch on your appliance or light is in the "ON" position when
(
connected to the timer.
Do not expose the timer to extremely high or low temperatures. Do not place in
(
6
direct sunlight.
th program.
TimerMax is for indoor use only. TimerMax Outdoor is weatherproof.
(
Display is clearer when viewed from above.
(
To fast forward, press and hold the "h+", "m+" or "Day" button.
(
Check your programmed times by pressing the "Timer" button (up to 12 commands
(
available).
Ensure the hour has been set correctly to AM or PM, indicated either by A or P.
(
(
Return to the clock function by pressing the " /Time" button.
(
/TimerMaxOutdoor
™
O P E R AT I N G I N S T RU C T I O N S
For any given day and time, if one program is set to ON, and another program OFF,
TimerMax will turn your appliance/light OFF.
140 58th Street, PO Box 67, Brooklyn, NY 11220
718-943-7000 • Toll Free 800-730-3707
is the trademark of The Stanley Works and Subsidiaries. Produced under license by The NCC, Brooklyn, New York.
Customer Service Assistance
Toll Free 800-730-3707
MO
12
00
:
OFF
MO TU WE
TH
FR SA SU
3
35
:
OFF
MO TU WE TH FR SA SU
- -
- -
:
TIMER
1
ON
This number
represents which
program of six is
being viewed.
www.thencc.com
•
™
P
Advertisement

Related Manuals for Stanley TimerMax


Summary of Contents for Stanley TimerMax
- Page 1 Saturday and Sunday. www.thencc.com • 11. MO TU WE TH FR SA – 6 Day will operate Monday to Saturday. is the trademark of The Stanley Works and Subsidiaries. Produced under license by The NCC, Brooklyn, New York.
- Page 2 Customer Service Assistance TimerMax TimerMaxOutdoor ™ ™ Toll Free 800-730-3707 TimerMax /TimerMaxOutdoor ™ ™ Here below, are step-by-step instructions for setting your timer in two different examples: Example A Example B To switch an appliance or light “ON” To switch an appliance or light “ON” at 1:30 pm every day of the week at 8:10 pm Saturday and “OFF”...