Table of Contents
Advertisement
Advertisement
Table of Contents

Related Manuals for AEG 9000 Series


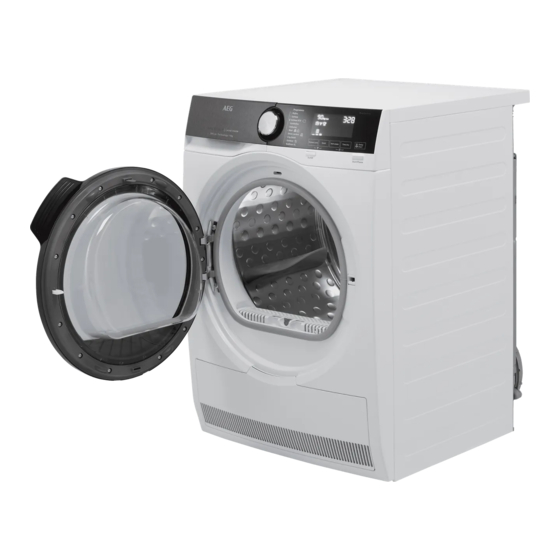
Summary of Contents for AEG 9000 Series
- Page 1 L9FEC966R User Manual Washing Machine USER MANUAL...
-
Page 2: Table Of Contents
17. CONSUMPTION VALUES................44 FOR PERFECT RESULTS Thank you for choosing this AEG product. We have created it to give you impeccable performance for many years, with innovative technologies that help make life simpler – features you might not find on ordinary appliances. Please spend a few minutes reading to get the very best from it. -
Page 3: Safety Information
ENGLISH SAFETY INFORMATION Before the installation and use of the appliance, carefully read the supplied instructions. The manufacturer is not responsible for any injuries or damage that are the result of incorrect installation or usage. Always keep the instructions in a safe and accessible location for future reference. -
Page 4: Safety Instructions
– working environments; by clients in hotels, motels, bed & breakfast and – other residential type environments; areas for communal use in blocks of flats or in – launderettes. Do not exceed the maximum load of 9 kg (refer to the •... - Page 5 ENGLISH • Do not install or use a damaged • Do not touch the mains cable or the appliance. mains plug with wet hands. • Do not install or use the appliance • Do not pull the mains cable to where the temperature can be less disconnect the appliance.
-
Page 6: Product Description
• Do not touch the glass door while a motor and drum, pumps, shock programme operates. The glass can absorbers and springs, washing drum, get hot. - Page 7 ENGLISH then fabric softener in the water steam programmes remove odours before they are distributed in the and reduce creases in dry fabrics so laundry. So every fibre is reached and they need little ironing. cared for. The Plus Steam option, finishes •...
-
Page 8: Technical Data
3.3 Detergent dispenser and Compartment for liquid additives salt compartment (fabric conditioner, starch). Compartment for salt. Always follow the Salt instructions that you find on Read carefully 'The the packaging of the Water Softener detergent products. Anyway, technology (Soft we recommend not to Water)'. -
Page 9: Installation
ENGLISH Water supply pressure Minimum 0.5 bar (0.05 MPa) Maximum 8 bar (0.8 MPa) Cold water Water supply Maximum Load Cotton 9 kg Spin Speed Maximum spin speed 1551 rpm 1) The appliance works correctly if the water pressure is not lower than 0.05 MPa (0.5 bar). If you cannot connect the water inlet hose to the cold water tap of the primary hydraulic system, connect it to your do‐... - Page 10 5. Carefully put the appliance down on its rear side. 6. Put the front polystyrene packaging element on the floor under the appliance. • A (FRONT) = Front of the appliance • B (BACK) = Rear of the appliance 10.
- Page 11 ENGLISH To limit vibration we recommend placing a waterproof wooden panel, at least 15 mm thick, under the appliance. It should be screwed to at least 2 floor beams and should extend beyond the front feet. If possible, install the appliance where the floor is more stable.
- Page 12 When the appliance is installed on a plinth or a tumble dryer is stacked on the washing machine, use the accessories described in chapter 'Accessories'. Read carefully the instructions supplied with the appliance and with the accessory. CAUTION! Make sure that there are no leaks from the couplings.
- Page 13 ENGLISH 5. Without the plastic hose guide, to a sink spigot - Put the drain hose in the spigot and tighten it with a clamp. Refer to the illustration. Make sure that the drain hose end is not immersed in the water.
-
Page 14: Accessories
If you install the appliance on a plinth 6.4 Pedestal with the drawer that is not an accessory supplied by AEG, secure the appliance in the fixing plates. Read carefully the instructions supplied with the accessory. -
Page 15: Before First Use
ENGLISH 7. BEFORE FIRST USE the proper water hardness level. During installation or before Refer to "How to set the water first use you may observe hardness level". some water in the appliance. 4. Pour 2 litres of water into the This is a residual water left detergent compartment marked by in the appliance after a full... - Page 16 Once you have entered the menu by during washing only. pressing Stains/Prewash and the Plus Steam buttons: 1. Touch the Plus Steam button. The goes on. This setting increases the salt consumption. 2. Touch the Start/Pause button to confirm your choice and exit the menu.
- Page 17 ENGLISH 8.3 Pouring salt Salt The compartment can contain about The water softener function acts through 600 gr of salt that are sufficient for about special resins present in the appliance. two months if the default water hardness level (C04) is set and the water softener To regenerate the resins and make them is activated during wash phase only.
-
Page 18: Control Panel
The appliance works the Time Save button once. exploiting its full potential The regeneration process is with salt. Salt refilling when automatically ensured when running required by the appliance programmes such as Cottons and maintains the softening Synthetics routinely. - Page 19 ENGLISH Start/Pause touch button (Start/ Anti-stain and prewash touch button Pause) (Stains/Prewash) Extra rinse touch button (Extra Spin reduction touch button (Spin) Rinse) On/Off push button (On/Off) Anti-Allergy touch button (Anti- Temperature touch button (Temp.) Allergy) Super steam touch button (Plus Steam) 9.2 Display Maximum load indicator.
-
Page 20: Dial And Buttons
Soft Plus option is activated. Spin and drain phase indicator. It flashes during spin and drain phase. OKO MIX indicator. Steam phase indicator. Anti-crease phase indicator. Child safety lock indicator. Time saving indicator. Temperature indicator. The indicator appears when a cold wash is set. - Page 21 ENGLISH 10.3 Temp. Touch the Start/Pause button: the appliance performs only the draining When you select a washing programme, phase. the appliance automatically proposes a The appliance empties the default temperature. water out automatically after Touch this button repeatedly until the approximately 18 hours.
- Page 22 Useful for people allergic to detergents This option can also be used and with sensitive skin. to shorten the Steam programme duration. indicator shows the selected number of rinses. 10.9 Skipping phase button This option increases the programme (Options) duration.
-
Page 23: Programmes
ENGLISH 10.12 Start/Pause several minutes. This helps in removing germs, bacteria, micro-organism and Touch the Start/Pause button to start, particles. The addition of vapour together pause the appliance or interrupt a with an additional rinsing phase ensures running programme. a proper removal of detergent residues and pollens/allergenic items, making it suitable for delicate and sensitive skins. - Page 24 Programme Programme description Steam programme for cotton and synthetic items. Steam can be used for dried , washed or worn once laundry. This Steam programme reduce creases and odours and relaxes the fi‐ bres. When the programme is completed, quickly remove the laundry from the drum.
- Page 25 ENGLISH Programme temperature, maximum spin speed and maximum load Programme Default temperature Reference spin Maximum load Temperature range speed Spin speed range 40 °C 1600 rpm 9 kg Eco 40-60 1600 rpm - 400 rpm 60 °C - 30 °C 40 °C 1600 rpm 9 kg...
- Page 26 Programme options compatibility Spin ■ ■ ■ ■ ■ ■ ■ ■ ■ ■ ■ ■ ■ ■ ■ ■ ■ ■ ■ ■ ■ ■ ■ ■ ■ Stains Prewash ■ ■ ■ Extra Rinse ■ ■ ■...
-
Page 27: Settings
ENGLISH Programme Universal Liquid Uni‐ Liquid for Delicates Special versal coloureds woollens powder Delicates ▲ ▲ Wool/Silk ▲ ▲ OKOPower ▲ ▲ ▲ 20 min. - 3 kg ▲ ▲ Outdoor ▲ ▲ 1) At temperature higher than 60 °C the use of powder detergent is recommended. ▲... -
Page 28: Daily Use
12.4 Soft Plus If you deactivate the acoustic signals, they Set the Soft Plus option to optimise the continue operate when the fabric softener distribution and improve appliance has a malfunction. the fabric softness. It is suggested when you use the fabric 12.3 Permanent Extra Rinse... - Page 29 ENGLISH 1. Open the detergent dispenser. Filling the liquid detergent 2. Put the powder detergent in the 1. Insert the proper container for liquid compartment . If using liquid detergent. detergent, refer to 'Filling the liquid detergent'. 2. Pour the liquid detergent in the compartment 3.
- Page 30 1. Touch the Start/Pause button to (when available) and an indicative pause the appliance. The related programme duration. indicator flashes. 2. To change the temperature and/or 2. Touch the Delay Start button the spin speed, touch the related repeatedly until the display shows buttons.
- Page 31 ENGLISH Once removed the exceeding garments, The anti-crease phase is running: touch the Start/Pause button to start the programme again. The ProSense phase can be repeated up to three times (see point 1). 13.9 Interrupting a programme and changing the Important! If the laundry amount will not be reduced, the washing programme options...
- Page 32 13.13 Draining water out after If the temperature and level end of cycle of the water in the drum are too high and/or the drum still If you have chosen a programme or an rotates you cannot open the option that does not empty out the water door.
-
Page 33: Hints And Tips
ENGLISH Press the On/Off button to activate If you set a programme or an the appliance again. option that ends with water The display shows the end of the last in the drum, the Stand-by set programme. function doesn't deactivate Turn the programme dial to set a new the appliance to remind you cycle. -
Page 34: Care And Cleaning
14.3 Detergent type and • Use less detergent if: – you are washing a small load, quantity – the laundry is lightly soiled, – there is large amounts of foam The choice of detergent and use of during washing. - Page 35 ENGLISH The following paragraphs explain how Regularly examine the drum to check for you should clean each part. limescale. The regular detergents already contain 15.2 Removing foreign water softening agents, but we objects recommend to run a cycle with empty drum and a descaling product Make sure that pockets are occasionally.
- Page 36 Always obey the instructions that you find on the packaging of the product. 15.7 Cleaning the drum Regularly examine the drum to prevent unwanted deposits. Rust deposits in the drum may occur due to rusting foreign body in the washing or tap water containing iron.
- Page 37 ENGLISH 4. Make sure that all detergent residue Regularly check the drain is removed from the detergent pump filter and make sure conveyor. Use a cloth. that it is clean. Clean the drain pump if: • The appliance does not drain the water.
- Page 38 Authorised Service Centre. 4. Turn the filter 180 degrees in anti- clockwise direction to open it, without removing. Let the water flow out. 10. Clean the filter under the water tap. 11. Put the filter back into the special guides by turning it clockwise.
- Page 39 ENGLISH When you drain the water with the 3. Clean the valve filter on the back of emergency drain procedure, you must the appliance with a toothbrush. activate the drain system again: a. Put 2 litres of water in the main wash compartment of the detergent dispenser.
-
Page 40: Troubleshooting
1. Put 2 litres of water in the main wash 3. Put the two ends of the inlet hose in compartment of the detergent a container and let the water flow out dispenser. of the hose. 2. Start the programme to drain the 4. - Page 41 ENGLISH • Make sure that the water tap is open. • Make sure that the pressure of the water supply is not too low. The appliance does For this information, contact your local water authority. not fill with water prop‐ •...
- Page 42 Problem Possible solution • Make sure that the mains plug is connected to the mains socket. • Make sure that the appliance door is closed. • Make sure that there is no damaged fuse in the fuse box. The programme does •...
- Page 43 ENGLISH Problem Possible solution • Increase the detergent quantity or use a different detergent. • Use special products to remove the stubborn stains before you wash the laundry. • Make sure that you set the correct temperature. • Decrease the laundry load. •...
-
Page 44: Consumption Values
16.3 Eliminating detergent or Make sure that the water other additives from salt level inside the drum is not too high. If necessary, Salt compartment proceed with an emergency drain (refer to Any type of detergent and additives «Emergency drain» in inadvertently poured in the compartment «Care and cleaning»... - Page 45 ENGLISH The QR code on the energy label supplied with the appliance provides a web link to the information related to the performance of the appliance in the EU EPREL database. Keep the energy label for reference together with the user manual and all other documents provided with this appliance.
- Page 46 Power consumption in different modes Off (W) Stand-by (W) Delay start (W) 0.30 0.30 4.00 Time to Off/Standby mode is 15 minutes maximum. 17.4 According to Regulation 1061/2010 Standard cotton pro‐ Load Energy Water Approxi‐ Remain‐ (kg) consump‐ consump‐...
- Page 47 ENGLISH Programme Litres h:mm °C Cottons 0.35 3:10 1600 20°C Synthetics 0.80 2:25 1200 40°C Delicates 0.30 1:10 1200 30°C Wool 0.25 1:05 1200 30°C 1) Reference indicator of the spin speed. 2) Suitable for washing heavily soiled textiles. 3) Suitable for washing lightly soiled cottons. 4) It also performs as quick washing cycle for lightly soiled laundry.
- Page 48 www.aeg.com/shop...