Table of Contents
Advertisement
BEFORE YOU BEGIN
BEFORE YOU BEGIN
·
Please read these instructions carefully to familiarize
yourself with the required tools, materials, and installation
sequences. Follow the sections that pertain to your
particular installation. This will help you avoid costly
mistakes. In addition to proper installation, read all
operating and safety instructions.
·
All information in these instructions is based upon the
latest product information available at the time of
publication. Kohler China reserves the right to make
changes in product characteristics, packaging, or
availability at any time without notice.
·
These instructions contain important care, cleaning, and
warranty information -
consumer
.
RECOMMENDED TOOLS AND MATERIALS
RECOMMENDED TOOLS AND MATERIALS
·
Open end/adjustable wrenches
·
Tape measure
·
Basin wrench
·
Pipe wrench
·
Square
·
Level
·
Pliers
·
Socket wrench with sockets
·
Screw driver
·
Seal tape
·
Connection wire
·
Wire cutter
·
Insulation tape
·
Bushing
·
Drill
·
Sealant
1070157-T01-E
please leave instructions for the
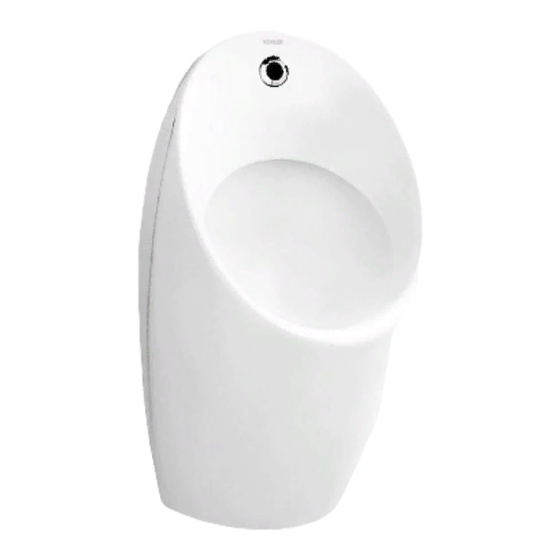
VITREOUS CHINA TOUCHLESS URINAL
K-16320T-M/K-16321T-M(DC/
K-16320T-MC05/K-16321T-MC05(AC/
·
·
·
·
/
·
·
·
·
·
·
·
·
·
·
·
·
·
·
·
528137
-1-
INSTALLATION INSTRUCTIONS
Copyright Kohler China Ltd., 2009
PATIO
)
)
-
, 2009
Advertisement
Table of Contents

Summary of Contents for Kohler PATIO Series
- Page 1 · · All information in these instructions is based upon the latest product information available at the time of publication. Kohler China reserves the right to make changes in product characteristics, packaging, or availability at any time without notice. ·...
-
Page 2: Sensor Specifications
SENSOR SPECIFICATIONS SENSOR SPECIFICATIONS Model 16320T-M 16320T-MC05 Power 2 AAA size alkaline batteries " " 220V AC 50/60Hz Water pressure at 0.18~0.55 MPa:no more than 3.8L Liter per flushing Water pressure at 0.1 MPa:No more than 3L Temperature Environmental temperature: 1 to 55 C 0.05~0.86MPa Starting pressure 70cm away from sensing window (Automatic adjustiment range: 50~70cm) - Page 3 Reference Value G1/2 180 5 50 ext K-16320T-M/K-16320T-MC05/K-16321T-M/K-16321T-MC05 Kohler reserves the right to change marked dimensions without prior notice. Notice: a. The dimensions above are just for reference. b. The layout dimensions of water inlet and outlet see installation step B(Install the hook).
-
Page 4: Installation
INSTALLATION 1. Please install 16320T-MC05/16321T-MC05(AC) as below: Please directly reference to Step 2 when installing 16320T-M/ 16321T-M (DC). Please match 16306T-NA AC power unit when installing Outlet Downwards Outlet Upwards 16320T-MC05/16321T-MC05 (AC). CAUTION: a. Outlet of AC power unit upward prohibited. b. - Page 5 Notice: a. Keep the connector away from water. b. Do not connect the DC output of AC power unit to AC power supply. c. Do not connect to power supply while installing. Connection line is not supplied. 0.5mm AC connection wire with insulating sleeving 0.3mm is recommended.
- Page 6 Install hook Drill 2 mounting holes on the wall and install hook. Fix hook on the wall by tightening screws. Supply Pipe (600~700) Install the inlet hose of valve assy. Take out the bracket of valve assy. Install the limited board (1). Tighten the tighten screw (2).The inserting depth postion is shown as (3).
- Page 7 Inlet Hose of Valve Assy Install urinal Lift up the urinal, level the installing hole on the back of the urinal with the hook. Level the outlet connection which is installed together with the strainer and the gasket on the S- trap way.
- Page 8 3. Install the bracket assy. Connect the outlet of valve assy, with the inlet hose. The way of 16320T-M/ 16321T-M (DC) installation is as below: Take out the battery box from the bracket assy. Loose the screws of the battery box assy with a screw driver. Put 2 "AAA"...
- Page 9 Push the bracket away from the wall(3), until the front hook of the bracket hanging on the urinal. Loose the tighten screw. Push the limited board to the urinal withstanding the wall (4) and then tighten the tighten screw (5). Front Hook Note: a.
- Page 10 USER S GUIDE Don t use this system until the power is on for 10 minutes. The sensing distance will be adjusted and the system will not work during this time. Working Status Before powering the system on, chear the unwanted objects in front of the sensor window lest shortening the sensing distance.
- Page 11 Manual Flushing Approach the supplied special magnetic stick (flushing control stick) to the sensor lens. The system is now at a manual status and the indicator will flash every 1 seconds. Approach the flushing control stick to the sensor lens once, it ll flush once.
-
Page 12: Maintenance
MAINTENANCE Urinal Repair When repairing, you don t have to dismount the sensor. Cover the sensing window with tape and work with ease. Notice : Don t use very adhesive tape in case the scar will be hard to remove. Clean the Filter Screen When installing 16320T-MC05/16321T-MC05, connect DC output... -
Page 13: Troubleshooting
TROUBLESHOOTING Please make following checks before repair: Symptoms Probable causes Corrective actions 1. No power or mistake connected. 1. Check the power connect. No flushing 2. There is an object within the sensing distance. 2. Remove the object . (Indicator not flashing). 3. -
Page 14: Important Consumer Information
IMPORTANT CONSUMER INFORMATION Consumer Responsibilities 1. Do not attack the sensor. 2. Do not directly flush the sensor with water. The sensor is an electronic instrument. 3. Do not let sunlight or other light source enter or be reflected into Sensor Window. 4.


