Canon ImagePRESS C850 Quick Manual
Hide thumbs
Also See for ImagePRESS C850:
- Practical manual (146 pages) ,
- Quick manual (59 pages) ,
- Troubleshooting manual (78 pages)
Table of Contents
Advertisement
Advertisement
Table of Contents

Related Manuals for Canon ImagePRESS C850


Summary of Contents for Canon ImagePRESS C850
- Page 1 Quick Guide Read this guide first. You can access http://canon.com/oip-manual to Please read this guide before operating this product. read the User’s Guide that describes After you finish reading the guide, store it in a safe all functions of this machine.
- Page 2 C850/C750/C650/C65 Practical Features Auto Gradation Adjustment for Various Paper Types The Auto Adjust Gradation function adjusts the gradation, density, and colour tone of images, and only requires you to scan the test page. This function can be used for various weights of paper so that a high quality print result can be obtained in different paper types.
- Page 3 Easy Operation for Adjusting Image Position You can adjust the image positions easily with this machine. All you need is measuring marks on the test page and then entering the measured values on the touch panel display. After that, the machine will automatically adjust the image positions.
-
Page 4: Table Of Contents
When an Error Message Is Displayed ......25 Contacting Your Local Authorized Canon Dealer ... . .26 How to Turn ON the Main Power . -
Page 5: Attached To It
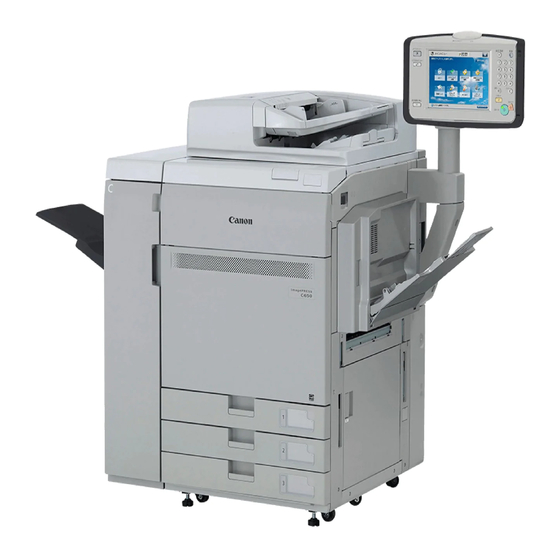
[OK], [Add], [Cancel] Illustrations Used in This Manual Illustrations used in this manual are those displayed when the imagePRESS C850 has the following optional equipment attached to it: the Duplex Color Image Reader Unit-K1, Upright Control Panel-G1, and Copy Tray-R2. -
Page 6: Parts And Their Functions
Parts and Their Functions This section provides you with the names and functions of all the parts of the machine. The keys and display on the control panel are also described. Read this section to use the machine’s various functions smoothly. "Optional Products"... -
Page 7: Internal View
Parts and Their Functions ▀ Internal View Toner Cartridge Waste Toner Container This cartridge contains toner. Pull out this cartridge Waste toner accumulates in this container. Pull out when replacing it with a new one. this container when replacing it with a new one. Front Cover Left Cover on the Front Side Open this cover to clear a paper jam in the... -
Page 8: Control Panel (Upright Control Panel-G1)
Main Power Indicator When the Error indicator maintains a steady red Lights when the main power is turned ON. light, contact your local authorized Canon dealer. Edit Pen Settings/Registration key Use when operating the touch panel display, such Press to register and specify settings. - Page 9 Parts and Their Functions Reset key Status Monitor/Cancel key Press to restore the standard settings of the Press to check the status of jobs or to cancel print machine. jobs. Also, press to check status of the machine, such as checking the amount of paper remaining. ID (Log In/Out) key Quick Menu key Press to log in/out when a login service such as...
-
Page 10: Status Monitor/Cancel Screen
Status Monitor/Cancel Screen If you press , the Status Monitor/Cancel screen appears, and you can confirm the status of jobs and consumables on this screen. By obtaining information, such as the completion time of the current job or the amount of paper remaining, you can perform smooth printing operation without interruption. -
Page 11: How To Turn On The Main Power
How to Turn ON the Main Power This section explains how to turn ON the main power. ▀ Turning ON the Main Power Make sure that the power plug is firmly inserted into the power outlet, and the breaker is turned ON. Open the main power switch cover. -
Page 12: Loading Paper
Loading Paper Load paper by following the procedure below. In this section, A4 custom size paper is used as an example. Confirm the paper types that can be loaded. Confirmation "Available Paper," on p. 12 Register all paper types you are going to use. Preparation "Registering Paper Types in the Paper Database,"... - Page 13 Loading Paper Paper Drawer Paper Capacity Upper, middle, and lower decks: 550 sheets (20 lb bond (80 g/m )) each Paper Type Thin 1 to 2, Plain 1 to 2, Heavy 1 to 4, Color, Recycled, Pre-Punched, Transparency, Clear Film, Tab, Bond, Letterhead, Textured, Vellum, and Envelopes Paper Size 13"...
-
Page 14: Registering Paper Types In The Paper Database
▀ Registering Paper Types in the Paper Database Register all paper types you are going to use with this machine. You can register paper types by selecting paper types from the Paper Database. NOTE If you load paper which is already registered in the machine, such as plain or recycled paper, this step is not necessary. Proceed to the next step "Loading Paper into the Paper Drawer". -
Page 15: Loading Paper Into The Paper Drawer
Loading Paper ▀ Loading Paper into the Paper Drawer Open the paper drawer. • Gently pull out the paper drawer until it stops. Adjust the position of the paper drawer guides. • Slide each guide while squeezing it on the top to align for the desired paper size. -
Page 16: Selecting Paper Types From The Paper Database
▀ Selecting Paper Types from the Paper Database Select the loaded paper type from the Paper Database. Press (Settings/Registration). Press [Preferences] [Paper Settings] [Paper Settings]. Select the paper source in which you loaded paper press [Set]. • If you load paper other than standard paper, select [Custom Size] or [Envelope]. -
Page 17: Cleaning And Maintenance
Cleaning and Maintenance For optimum operation of the machine, we recommend to clean and check the machine regularly. ▀ Cleaning the Platen Glass If originals cannot be scanned properly, follow the cleaning procedure below. Clean with a cloth which is wrung after being dampened in water, and then clean with a soft and dry cloth. -
Page 18: Cleaning The Feeder
▀ Cleaning the Feeder If originals which are fed from the feeder become dirty, follow the cleaning procedure below. Clean with a cloth which is wrung after being dampened in water, and then clean with a soft and dry cloth. Use the provided glass cleaning cloth for simple cleaning. -
Page 19: Automatic Feeder Cleaning
Cleaning and Maintenance ▀ Automatic Feeder Cleaning If originals which are fed from the feeder become dirty, follow the procedure below. Place 10 sheets of blank paper into the feeder. • Use LTR plain paper. Press (Settings/Registration). Press [Adjustment/Maintenance] [Maintenance] [Clean Feeder]. Press [Start]. -
Page 20: Refreshing The Fixing Belt
▀ Refreshing the Fixing Belt If streaks appear on the output paper, or gloss unevenness occurs in the high density area of the printed heavy paper, follow the procedure below. Press (Settings/Registration). Press [Adjustment/Maintenance] [Maintenance] [Refresh Fixing Belt]. Press [Start]. -
Page 21: Inspection Of The Breaker
2. If the breaker lever is not switched to the OFF position, despite carrying out the above procedure two or three times, contact your local authorized Canon dealer. Switch the breaker lever to ON. Turn ON the main power. -
Page 22: Consumables
The waste toner is accumulated in the waste toner container, and when the container is nearly full, a message prompting you to replace the container appears on the touch panel display. For information on how to replace the waste toner container, see the User's Guide. Your local authorized Canon dealer will dispose of the used waste toner container. - Page 23 Staple Cartridge-D3 Genuine Supplies Canon has developed and manufactured Toner, Cartridge, and Parts specifically for use in this machine. For optimal print quality and for optimal machine performance and productivity, we recommend that you use Genuine Canon Toner, Cartridge, and Parts.
-
Page 24: Troubleshooting
Troubleshooting This section explains how to solve problems when paper jam occurs frequently or error messages are displayed. For information on the detailed procedures and precautions, see the User's Guide. "Problem Solving" in the User's Guide ▀ Clearing Paper Jams and Staple Jams If a paper jam or staple jam occurs, follow the instructions displayed on the touch panel display to clear the jam. -
Page 25: When An Error Message Is Displayed
If the machine cannot operate normally after turning the main power OFF and then ON, contact your local authorized Canon dealer. "Contacting Your Local Authorized Canon Dealer, " on p. 26 If a key for the Limited Functions mode is displayed:... -
Page 26: Contacting Your Local Authorized Canon Dealer
• Write down the error code "EXXXXX-XXXX". Turn OFF the main power. • Press the main power switch to the " " side. Remove the power plug from the power outlet. Confirm the product name, and contact your local authorized Canon dealer. -
Page 27: If Memory Becomes Full
If the machine cannot operate when the main power is turned ON, check the breaker. If the breaker is switched to the OFF position, do not attempt to turn ON the breaker yourself, and be sure to contact your local authorized Canon dealer. -
Page 28: Specifications
Perfect Binder-E1 • Multi Function Professional Puncher-A1 ▀ Main Unit Item Specifications Name Canon imagePRESS C850/C750/C650/C65 Type Reader-Printer Separated, Console type Color Supported Full Color Resolution for Writing 2,400 dpi x 2,400 dpi Paper Weight/Type Paper Drawer 1, 2, 3:... - Page 29 Black-and-White: 6.9 seconds* When "Color Priority" is selected. When "Black & White Priority" is selected. Copy Speed* Direct (sheets/minute) imagePRESS C850 imagePRESS C750 imagePRESS C650 / C65 <Full Color> 13" x 19" 12 5/8" x 17 3/4" 12" x 18"...
- Page 30 Item Specifications Power Consumption Maximum Power Consumption: 3,520 W or less Power Consumption: When in the Sleep mode: 1 Wh When the main power switch is turned OFF: [Quick Startup Settings for Main Power] is set to 'OFF' : 0.5 Wh [Quick Startup Settings for Main Power] is set to 'ON' : 1.0 Wh * The power consumption may vary, depending on the environment and conditions under which the machine is being used.
- Page 31 Specifications Item Specifications Magnification Regular paper size: Same Ratio: Direct Reduction: 1 : 0.78 (LGL LTR) 1 : 0.73 (11" x 17" LGL, 11" x 15" LTR) 1 : 0.64 (11" x 17" LTR) 1 : 0.50 (11" x 17"STMT) 1 : 0.25 Enlargement: 1 : 1.21 (LGL ...
- Page 32 ▀ POD Deck Lite-C1 Item Specifications Paper Size / Weight / Type Size: 13" x 19", 12 5/8" x 17 11/16", 12" x 18", 11" x 17", LGL, LTR, LTRR, EXEC, STMTR, Custom Size (5 1/2" x 5 7/8" to 13" x 19 1/4" (139.7 mm x 148 mm to 330.2 mm x 487.7 mm)), and Envelopes* The following envelope types can be used: Standard Paper Size : Nagagata 3, Yougatanaga 3, Kakugata 2, No.
- Page 33 Specifications Item Specifications Paper Size / Weight / Type Type: Thin 2 (14 lb bond to 16 lb bond (52 g/m to 63 g/m )), Thin 1 (17 lb bond to 20 lb bond (64 g/m to 79 g/m )), Plain 1 (20 lb bond to 24 lb bond (80 g/m to 90 g/m )), Plain 2 (25 lb bond to 28 lb bond (91 g/m...
- Page 34 ▀ Stack Bypass Alignment Tray-C2 Item Specifications Paper Size / Weight / Type See "Specifications" of the "Stack Bypass-B1, " on p. 33. Paper Capacity See "Specifications" of the "Stack Bypass-B1, " on p. 33. Weight 2.4 lb (1.1 kg) If the basis weight of the paper is below 156 g/m (42 lb bond), or the side of the paper parallel to the feeding direction is shorter than A4R or LTRR, the amount of skew correction...
- Page 35 Specifications ▀ Envelope Feeder Attachment-F1 Item Specifications Acceptable Envelopes Standard Paper Size: Nagagata 3, Yougatanaga 3, No. 10(COM10), DL, and Monarch Custom Paper Size: 6" x 9" Loading Limit (Height) 50 sheets Weight 0.1 lb (30 g) ▀ Envelope Feeder Attachment-G1 Item Specifications Acceptable Envelopes...
-
Page 36: Paper Folding Unit-J1
Item Specifications Power Source/Maximum Power 100-240 V AC, 50/60 Hz, 1.0 A/120 W or less Consumption Dimensions (W x D x H) 29 3/8" x 31 1/4" x 55 3/8" (746 mm x 793 mm x 1,407 mm) Weight Approximately 134 lb (61 kg) Installation Space Including the Main Unit 105 3/8"... - Page 37 Specifications ▀ Copy Tray-R2 Item Specifications Paper Size/Weight/Type Size: 13" x 19", 12 5/8" x 17 11/16", 12" x 18" , 11" x 17", LGL, LTR, LTRR, EXEC, STMTR, Custom Size (4" x 5 7/8" to 13" x 19 1/4" (100 mm x 148 mm to 330.2 mm x 487.7 mm))*, and Envelopes Weight: 14 lb bond to 110 lb cover (52 g/m...
- Page 38 ▀ Staple Finisher-W1 PRO Item Specifications Paper Size/Weight/Type Size: 13" x 19", 12 5/8" x 17 11/16", 12" x 18", 11" x 17", LGL, LTR, LTRR, EXEC, STMTR, Custom Size (4" x 5 7/8" to 13" x 19 1/4" (100 mm x 148 mm to 330.2 mm x 487.7 mm))* , and Envelopes Weight:...
- Page 39 Specifications Item Specifications Capacity Per Tray* Staple mode Tray B: LTR, and EXEC: 3,000 sheets/200 sets (or 16 5/8" (423 mm) in height) LTRR: 2,000 sheets/200 sets (or 11 1/4" (285 mm) in height) 11" x 17" and LGL: 1,500 sheets/200 sets (or 8 1/2" (216 mm) in height) No Collating/Collate/Group mode with different paper sizes Tray A: 1,000 sheets (or 5 3/4"...
- Page 40 Item Specifications Power Source/Maximum Power 120-240 V AC, 50/60 Hz, 8 A/500 W or less Consumption Dimensions (W x D x H) 31 1/2" x 31 1/4" x 48 3/4" (800 mm x 792 mm x 1,239 mm) Weight Approximately 287 lb (130 kg) Installation Space Including the Main Unit 92"...
- Page 41 Specifications Item Specifications Capacity Per Tray No Collating mode Tray A: LTR, STMTR, and EXEC: 250 sheets (or 1 3/4" (43 mm) in height) 13" x 19", 12 5/8" x 17 3/4", 12" x 18", 11" x 17", LGL, and LTRR: 125 sheets (or 7/8"...
-
Page 42: Booklet Finisher-W1 Pro
Item Specifications Max. Stapling Capacity/Available Staple Size When the standard staple cartridge is attached (The maximum stapling capacity may vary, depending on the paper type and weight.) LTR and EXEC: 50 sheets (20 lb bond (80 g/m 11" x 17", LGL, and LTRR: 30 sheets (20 lb bond (80 g/m Corner Staple mode/Double Staple mode: 11"... - Page 43 Specifications Item Specifications Capacity Per Tray* No Collating/Collate/Group mode Tray A: 13" x 19", 12 5/8" x 17 11/16", 12" x 18", 11" x 17", LGL, LTR, LTRR, EXEC, and STMTR: 1,000 sheets (or 5 3/4" (147 mm) in height) Tray B: If the High Volume Stack Mode is set to 'Off': LTR and EXEC:...
- Page 44 Item Specifications Capacity Per Tray* No Collating/Collate/Group mode with different paper sizes Tray A: 1,000 sheets (or 5 3/4" (147 mm) in height) Tray B* If the High Volume Stack Mode is set to 'Off': LTR and EXEC: 2,000 sheets (or 11 1/4" (285 mm) in height) 13"...
- Page 45 Specifications Item Specifications Available Saddle Stitch Capacity/Size Saddle Stitch: 25 sheets (20 lb bond (80 g/m )) (including 1 cover sheet) Saddle Folding: 5 sheets (20 lb bond (80 g/m Size: 13" x 19", 12 5/8" x 17 11/16", 12" x 18", 11" x 17", LGL, LTRR, and Custom Size (8 1/4" x 11" to 13"...
- Page 46 Item Specifications Capacity Per Tray No Collating mode Tray A: LTR, STMTR, and EXEC: 250 sheets (or 1 3/4" (43 mm) in height) 13" x 19", 12 5/8" x 17 3/4", 12" x 18", 11" x 17", LGL, and LTRR: 125 sheets (or 7/8"...
- Page 47 Specifications Item Specifications Max. Stapling Capacity/Available Staple Size When the standard staple cartridge is attached: (The maximum stapling capacity may vary, depending on the paper type and weight.) LTR and EXEC: 50 sheets (20 lb bond (80 g/m 11" x 17", LGL, and LTRR: 30 sheets (20 lb bond (80 g/m Corner Staple mode/Double Staple mode: 11"...
-
Page 48: Puncher Unit-Bt1
▀ Puncher Unit-BS1 / Puncher Unit-BT1 Item Specifications Paper Size/Weight/Type Size: Puncher Unit-BS1: Two Holes: LGL, LTRR, and Custom Size (7 1/8" x 7 1/8" to 11 3/4" x 17" (182 mm x 182 mm to 297 mm x 432 mm)) Three Holes: 11"... - Page 49 Specifications ▀ External 2/3 Hole Puncher-C1 Item Specifications Paper Size/Weight/Type Size: 2 Holes: 11 x 17, LTR, LGL, and LTRR 3 Holes: 11” x 17” and LTR Weight: 14 lb bond to 140 lb index (52 g/m to 256 g/m Type: Thin 2 (14 lb bond to 16 lb bond (52 g/m to 63 g/m...
- Page 50 ▀ Send Function Scan Features • Item Specifications Communication Protocol FTP (TCP/IP), SMB (TCP/IP), WebDAV Data Format TIFF, JPEG, PDF, XPS, OOXML (PowerPoint) Resolution 100 x 100 dpi, 150 x 150 dpi, 200 x 100 dpi, 200 x 200 dpi, 200 x 400 dpi, 300 x 300 dpi, 400 x 400 dpi, 600 x 600 dpi System Environment Windows Server 2003 R2 SP2, Windows Vista SP2, Windows Server 2008 SP2*...
- Page 51 Item Specifications Original Size E-mail 11" x 17", LGL, LTR, LTRR, STMT, STMTR I-Fax 11" x 17", LGL* , LTR, LTRR, STMT* , STMTR* Server Software Microsoft Exchange 2003 SP2, Microsoft Exchange 2007 SP2, Sendmail 8.14.4, Lotus Domino R7.0 Other Searches a destination via the LDAP Server, Preview Optional PDF / XPS / OOXML Functions (E-mail only)
- Page 52 ▀ Printer Settings Software Specifications • Item Specifications Command Language PCL5e, PCL6, PostScript 3 Resident Fonts PCL: 93 Scalable fonts, 2 OCR fonts, and 10 Bitmap fonts PS: 136 Scalable fonts Printable Area PCL5e, PCL6: Reduced to 1/6" (4.23 mm) from the top, bottom, left, and right edges of the paper. PostScript 3*: Reduced to 1/6"...
-
Page 53: Appendix
• perform any operations not described in this with this machine. Do not connect the power reactions occur manual. Canon will not be responsible for any cord to other devices. • A location exposed to corrosive or toxic gases damages resulting from operations not described •... - Page 54 • Do not disassemble or modify this machine. There Energy Saver key (only for products with an • Check the power cord and plug periodically for are high-voltage and high-temperature Energy Saver key) rust, bent prongs, fraying, cracks, or excessive heat components inside the machine.
- Page 55 If you intend to move the machine, even to a location on the same fl oor Electrical interference and vibrations generated by the machine while of your building, contact your local authorized Canon dealer printing can adversely aff ect the operation of such equipment.
- Page 56 Full option (maximum maximum ) confi gurationconfi guration When the Two-Knife Booklet Trimmer-A1, Booklet Trimmer-F1, Booklet Finisher-W1 PRO, Paper Folding Unit-J1, High Capacity Stacker-H1, Perfect Binder-E1, Multi Function Professional Puncher-A1, Document Insertion Unit-N1, Duplex Color Image Reader Unit-K1, Upright Control Panel-G1, and Multi-drawer Paper Deck-C1 are attached.
- Page 57 When pulling out the waste toner container, NON-INFRINGEMENT. you purchased the equipment (if under be careful not to let it fall. This may result in CANON INC. SHALL NOT BE LIABLE FOR ANY warranty), or with whom you have a servicing injury. DIRECT, INCIDENTAL, OR CONSEQUENTIAL contract.
- Page 58 Canon published materials available from your property rights in and to the SOFTWARE. dealer or on the web sites of Canon USA [www.usa. Illustrations Except as expressly provided herein, no canon.com] or Canon Canada [www.canon.ca.].
- Page 59 Canon, including any implied warranty regarding merchantability or fitness for a particular purpose, and all such warranties are disclaimed. The sole warranty, if any, with respect to such non-Canon brand items is given by the supplier or producer thereof. For further information on software, see below.
- Page 63 8000 Mississauga Road Brampton ON L6Y 5Z7, Canada CANON EUROPA N.V. Bovenkerkerweg 59, 1185 XB Amstelveen, The Netherlands (See http://www.canon-europe.com/ for details on your regional dealer) CANON AUSTRALIA PTY. LTD Building A, The Park Estate, 5 Talavera Road, Macquarie Park, NSW 2113, Australia CANON CHINA CO., LTD...