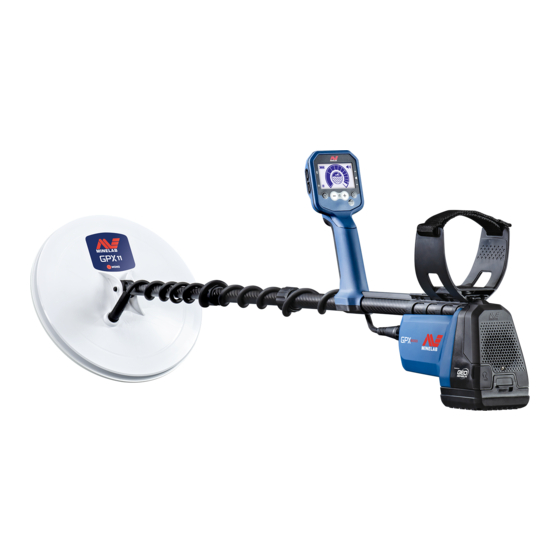
Minelab GPX 6000 Pocket Manual
Hide thumbs
Also See for GPX 6000:
- User manual (28 pages) ,
- Quick start manual (10 pages) ,
- Quick start manual (10 pages)

Related Manuals for Minelab GPX 6000


Summary of Contents for Minelab GPX 6000
-
Page 1: Table Of Contents
POCKET GUIDE This is an abbreviated guide. Read the full-length GPX 6000™ User Manual at www.minelab.com/GPX6000manual Contents Quick Start Factory Reset Procedure Controls Display Bluetooth® Headphones Pairing the ML 100 headphones Intelligent Automatic Operation Manual Sensitivity Adjustment Procedure Noise Cancel Procedure... -
Page 2: Quick Start
Quick Start Beginning with Factory Default Settings is recommended before using this Quick Start procedure. 100 mm (4") TURN ON 10 s RAISE AND LOWER COIL FOR 10 s BEGIN DETECTING Return to Contents... -
Page 3: Factory Reset Procedure
Factory Reset Procedure Factory default settings can be restored at any time by conducting a Factory Reset. START Ensure the detector is powered off. Press and hold the power button for 7 seconds. ‘FP’ (Factory Preset) is displayed. Return to Contents... -
Page 4: Controls
Controls 1. Bluetooth® Control Enables Bluetooth® for connection of wireless headphones. Initiates Bluetooth® pairing mode for connecting Bluetooth® headphones (long-press for at least 2.5 s). 2. Backlight Adjust Cycles through the backlight brightness settings — high, medium, low and off. 3. -
Page 5: Display
Display 1. Bluetooth® Indicator Indicates that Bluetooth® wireless audio is Bluetooth® Qualcomm® aptX™ Low Latency Standard Bluetooth 2. Double-D Mode Indicator Only available when using a Double-D coil. Electromagnetic Interference (EMI) Cancel (default) Conductive Ground Cancel 3. Backlight Indicator Indicates that the backlight is on. 4. -
Page 6: Bluetooth® Headphones
Bluetooth® Headphones 1. Volume Plus button (+) 2. Multi-function button 3. Volume Minus button (−) 4. Status LED Pairing mode (alternating blue and red) Connected (flash every 3 sec) On, not connected (flash every 2 sec) Charging Charging complete (Off) 5. -
Page 7: Pairing The Ml 100 Headphones
Enable Bluetooth® on the detector and enter pairing mode. Press and hold the Bluetooth® button on the side of the GPX 6000™ control panel until the Bluetooth® indicator begins to flash rapidly. For first-time use of the detector or following a factory reset, a short press of the Bluetooth®... -
Page 8: Intelligent Automatic Operation
Intelligent Automatic Operation The procedure below is a fail-safe way to begin detecting in a high-sensitivity automatic mode. Once complete, the GPX 6000™ will automatically maximise sensitivity while minimising noise, so you can concentrate on finding gold. START Factory Reset the detector. -
Page 9: Manual Sensitivity Adjustment Procedure
Manual Sensitivity Adjustment Procedure Always try the Noise Cancel Procedure and the Quick-Trak Ground Balance Procedure resolve noise before reducing the sensitivity level. Generally start with a Mono coil unless you are detecting in areas with known high levels of EMI or soil conductivity. START ... -
Page 10: Noise Cancel Procedure
Noise Cancel Procedure If audio responses become erratic due to EMI, initiate the Noise Cancel process to automatically select a quieter detecting channel. START Hold the coil 100 mm (4 in) above the ground. 100 mm (4") Press the Noise Cancel button. -
Page 11: Double-D Coil Noise Cancel Procedure
Double-D Coil Noise Cancel Procedure Generally, a Double-D coil should only be used if noise cannot be managed by using a Mono coil with the Noise Cancel Procedure. This procedure can be used in areas that have known high levels of EMI or very conductive (salty) soils. -
Page 12: Quick-Trak Ground Balance Procedure
Quick-Trak Ground Balance Procedure Follow the Quick-Trak Ground Balance procedure to quickly recalibrate the detector to the new ground. START Press and hold the Quick-Trak button. Raise and lower the coil until noise reduces. Swing coil the from side-to-side. Release the Quick-Trak button. -
Page 13: Ground Balance Procedure
Ground Balance Procedure A complete Ground Balance procedure is recommended below. This guides you through the ideal steps to deal with a number of different ground conditions. START Normal (Quiet) Ground Set the Ground Type to Normal. Quick-Trak. Adjust the sensitivity. Begin detecting. - Page 14 The Bluetooth® word mark and logos are registered trademarks owned by the Bluetooth SIG, Inc. and any use of such marks by Minelab is under license. Qualcomm aptX is a product of Qualcomm Technologies, Inc. and/or its subsidiaries. Qualcomm is a trademark of Qualcomm Incorporated, registered in the United States and other countries.
- Page 15 For instruction manuals, videos and training, visit: www.minelab.com/LearnGPX6000 Return to Contents...