Table of Contents
Advertisement
Advertisement
Table of Contents

Related Manuals for Hyundai HYCH15100TE


Summary of Contents for Hyundai HYCH15100TE
- Page 1 PETROL WOOD CHIPPER HYCH15100TE Instruction Manual...
-
Page 2: Specifications
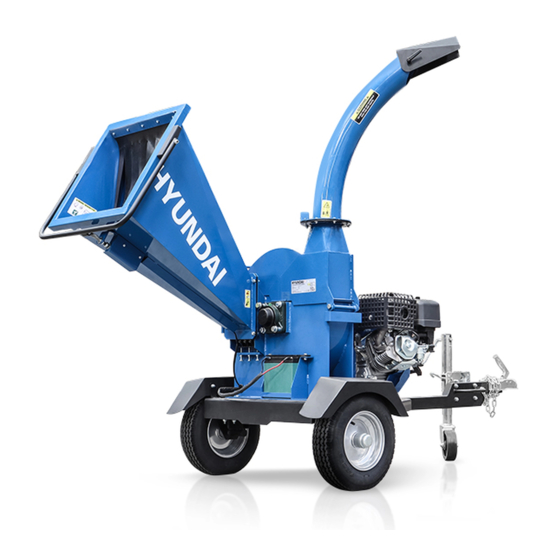
SPECIFICATIONS Model Number HYCH15100TE Engine Hyundai IC420E Engine Displacement 420cc 14hp Power Chipping capacity 120mm Weight 260kg Length 2270mm Width 1000mm 1655mm Height Operating 3600rpm Unleaded Petrol Type of Fuel Recoil/Electric Start Starting Method 4.8" x 8" Wheel Tire Disc... -
Page 3: Table Of Contents
TABLE OF CONTENTS SPECIFICATIONS SECTION I – SAFETY SAFE OPERATION PRACTICES SECTION II - ASSEMBLY INSTRUCTIONS SECTION III - OPERATION SECTION IV - CHIPPING SECTION V - MAINTENANCE AND STORAGE REMOVAL, SHARPENING AND RE-INSTALLATION OF CHIPPER KNIFE INSTRUCTIONS FOR ADJUSTING OR REPLACING BELT CENTRIFUGAL CLUTCH TECH TIPS TROUBLESHOOTING LUBRICATION AND MAINTENANCE... - Page 4 SECTION I - SAFETY This symbol points out important safety instructions which, if not followed,could endanger the personal safety and/or property of yourself and others. Read and follow all instructions in this manual before attempting to operate your chipper. Failure to comply with these instructions may result in personal injury.
- Page 5 WARNING: MAKE CERTAIN THAT ALL SAFETY LABELS ON THIS EQUIPMENT ARE KEPT CLEAN AND IN GOOD CONDITION. IF YOU NEED REPLACEMENT LABELS, ORDER BY PART NUMBER. 12cm...
- Page 6 CARBON MONOXIDE DANGER! Engine exhaust fumes contain Carbon Monoxide. This is a poisonous gas and can kill in minutes. NEVER use inside a building or in an area with poor ventilation. NEVER use inside a confined space, such as but not limited to a house, garage, vehicle, boat or tent. ONLY use outside and far away from windows, doors and vents.
-
Page 7: Safe Operation Practices
SAFE OPERATION PRACTICES TRAINING • Read this owner’s manual carefully in its entirety before attempting to assemble this machine. Read, Ensure you are understand, and follow all instructions on the machine before operation. familiar with the controls and the proper use of the machine before operating it. Keep this manual in a safe place for future and regular reference and for ordering replacement parts. - Page 8 ENGINE SAFETY • This machine is equipped with an internal combustion engine. Do not use on, or near, forest-covered or brush-covered land unless the exhaust system is equipped with a spark arrester meeting applicable local, state, or federal laws. A spark arrester, if used, must be maintained in effective working order by the operator •...
- Page 9 FUEL SAFETY (CONTINUED) FUELING / DE-FUELING ALWAYS fuel and de-fuel in a well ventilated area outside of buildings. Use a funnel to add fuel, only • outdoors. Do not smoke during this and each time fuel is handled. Add fuel before igniting the engine, never remove the fuel tank cap or add fuel whilst the engine is •...
- Page 10 See Certificate of Conformity section for Outdoor Noise declaration of conformity. • INTENDED USE The HYCH15100TE is a petrol powered wood chipper from HYUNDAI intended for wood chipping of • branches and sticks for personal use in your garden or estate. Only to be towed when off-road. The HYCH15100TE is powered by a 420cc petrol engine.
- Page 11 PERSONAL PROTECTIVE EQUIPMENT Appropriate Personal Protective Equipment (PPE), MUST be worn at all times when operating or repairing the machine. No protective equipment can ensure 100% protection. When selecting PPE, make sure it’s CE marked and it suits the user in terms of size, fit, etc. If more than one item of PPE is worn at the same time, make sure they can be used together, e.g.
- Page 12 OPERATION • Never place your hands, feet, or any part of your body in the chipper chute, discharge opening, or near or under any moving part while the engine is running. Keep clear of the discharge opening at all times. If it becomes necessary to push material into the chipper chute, use a small diameter stick, NOT YOUR HANDS.
- Page 13 • Do not allow an accumulation of processed material to build up in the discharge area as this will prevent proper discharge and can result in kick-back from the chipper chute. • Do not allow any part of the engine, especially around the cooling fans and muffler, to become clogged with processed material, leaves, oil, grease or any other combustible material.
- Page 14 • Only operate your chipper from the operator zone. • Know how to turn your unit off. • Never move your chipper or leave it unattended with the engine running. • Follow engine owner’s manual for engine maintenance and repair. Foot plate Operate zone Infeed...
-
Page 15: Section Ii - Assembly Instructions
SECTION II - ASSEMBLY INSTRUCTIONS PACKAGE CONTENTS SKID PARTS BOX BOLT BAG CHIPPER HOPPER 4 EA – 5/16-18 X ¾” CARRIAGE BOLTS CHIPPER 4 EA – 5/16-18 NYLOCK NUT HITCH ARMS STAND 4 EA – 5/16 USS FLATWASHER HITCH ASSEMBLY GLASSES PARTS BOX OWNER’S MANUAL... - Page 16 WOOD CHIPPER ASSEMBLY Set the shipping crate on a solid flat surface and carefully remove the lid. Use two people and take all parts out of the crate and inspect the components to ensure there are no missing pieces following before starting to assemble the log splitter steps 1 through 3.
- Page 17 STEP III – ATTACHING THE TYRE AND TAIL LIGHT FRAME • Attach the wheel axis (#2) to chassis (#1), using hex bolt M12x70 (#65), flat washer 12 (#57), lock nut M12 (#58). • On the wheel (#3) to wheel axis (#2), lock the hex slotted nut M24x1.5 (#60) in place using the split pin 4x45 (#59).
-
Page 18: Section Iii - Operation
SECTION III - OPERATION BEFORE STARTING ENGINE, ALWAYS CHECK OIL LEVEL! Refer to the engine owner’s manual for further details regarding OPERATION AND MAINTENANCE the engine. NOTE: ENGINE IS SHIPPED WITHOUT OIL! FILL CRANKCASE WITH OIL BEFORE STARTING ENGINE. BE VERY CAREFUL NOT TO ALLOW DIRT TO ENTER THE ENGINE WHEN CHECKING OR ADDING OIL OR FUEL. - Page 19 CHECKING AND ADDING OIL • Check oil level before starting the engine. • Check level daily, or after every eight hours. • mark on dipstick. Keep oil level at FULL • Do not overfill. Oil filling procedure: First add 1100ml Start and run engine at idle for 30 seconds. Shut engine off and wait 30 seconds.
- Page 20 STARTING AND STOPPING STARTING AND OPERATING TIPS • Store and fuel equipment in level position. • Use fresh fuel. • Use correct type of oil for expected starting temperature. • Remove external equipment/engine loads. • Periodically remove any debris buildup from the machine. •...
-
Page 21: Section Iv - Chipping
SECTION IV - CHIPPING THIS CHIPPER WAS DESIGNED FOR CHIPPING LIMBS OR BRANCHES. NEVER USE THIS MACHINE FOR ANY OTHER PURPOSE AS IT COULD CAUSE SERIOUS INJURY. SAFETY FIRST • Always wear protective gloves and safety glasses during operation of the chipper. •... - Page 22 • USE COMMON SENSE WHEN USING YOUR CHIPPER. • LEARN TO RECOGNIZE THE CHANGE IN THE SOUND OF YOUR MACHINE WHEN IT IS OVERLOADED. • BECOME FAMILIAR WITH SUCCESSFUL OPERATING CONDITIONS AND AVOID THOSE THAT CAN OVERLOAD AND DAMAGE THE MACHINE. •...
- Page 23 TO FREE A JAMMED FLYWHEEL • Stop the engine. • Remove the spark plug wire and keep away from the spark plug. • Disconnect battery at negative terminal (if so equipped). • Remove any material left in the chipper hopper. •...
-
Page 24: Section V - Maintenance And Storage
SECTION V - MAINTENANCE AND STORAGE IMPORTANT: The knife should be checked for sharpness and the nuts and bolts attaching them to the flywheel for tightness every 8-10 hours of operation. IMPORTANT: Every time you perform maintenance or any kind of service or check on the knife, be sure to check the gap between the knife and wear plate for proper setting. -
Page 25: Removal, Sharpening And Re-Installation Of Chipper Knife
REMOVAL, SHARPENING AND RE-INSTALLATION OF CHIPPER KNIFE HOW TO REMOVE THE KNIFE • Stop the engine. • Open the upper disk housing. • Rotate the chipper disk until the four countersunk screws and lock nuts attaching the knife to the flywheel are visible through the access doors. •... - Page 26 • The knife should never be sharpened to the extent that more than 2.5mm is taken off this measurement. • Once this measurement is below 16.5mm, the knife should be replaced. • If you are unable to remove dents or gouges with these guidelines, replace the knife. KNIFE INSTALLATION •...
- Page 27 AFTER ANY BLADE OR WEAR PLATE MAINTENANCE OR ADJUSTMENT, ROTATE THE CHIPPER DISK BY HAND. WATCH AND LISTEN CAREFULLY FOR ANY UNUSUAL NOISES, CLICKING OR VIBRATION. IF ANY OF THESE ARE DETECTED, INSPECT THE MACHINE FOR DAMAGE, REPAIR OR REPLACE ANY DAMAGED PARTS AND CHECK FOR ANY LOOSE PARTS AND RETIGHTEN.
-
Page 28: Instructions For Adjusting Or Replacing Belt
INSTRUCTIONS FOR ADJUSTING OR REPLACING BELT BELT ADJUSTMENT The belt on your chipper should deflect 3/8” under three pounds of pressure as shown in figure 1 below. If it doesn’t, adjust per the following directions. Figure 1 • Remove belt guard. •... -
Page 29: Centrifugal Clutch Tech Tips
CENTRIFUGAL CLUTCH TECH TIPS THE SHOES AND SPRINGS ON THE CLUTCH ARE NORMAL WEAR ITEMS. IF YOU NOTICE DECREASED PERFORMANCE OF THE CLUTCH THEY SHOULD BE CHECKED AND REPLACED IF NECESSARY. However, it is important to The clutch on your machine is designed for rugged, dependable service. - Page 30 CLUTCH MAINTENANCE The centrifugal clutch on this machine is permanently lubricated and does not require oil or grease. If, after long periods of use, the drum wobbles excessively, replace the drum assembly. Always replace shoes and springs in sets. Whenever shoes are changed, replace all springs.
-
Page 31: Troubleshooting
TROUBLESHOOTING SYMPTOM PROBLEM CORRECTION • Immediately stop engine. • Remove spark plug wires. Clutch is slipping or Clutch overheats. jammed or stopped. • Turn flywheel by hand to flywheel is jammed or Belt burns. be sure it turns freely. stopped. Flywheel won’t turn. -
Page 32: Lubrication And Maintenance
LUBRICATION AND MAINTENANCE OPERATION TIME PROCEDURE COMMENTS • • Change engine oil and Follow oil filter after first five recommendations per BREAK IN the engine & owner’s hours. • manual. Check belt tension. • • Adjust per directions. Check all nuts and •... -
Page 33: Parts List
PARTS LIST Description Qty. Description Qty. Chassis Fenders Wheel axis Hyundai IC420E Engine Wheel Safety chain Dust cap Tow bar Anvil adjusting plate Coupler Cutter disk base Jockey wheel Hex bolt M10x60 Protective ring Switch Flat washer 10 Switch cover... -
Page 34: Parts Diagram
PARTS DIAGRAM... -
Page 35: Declaration Of Conformity
DECLARATION OF CONFORMITY... -
Page 36: Contact Us
CONTACT US Our friendly aftersales team will be more than happy to help you. Phone Call our team on 01646 687880, open Monday-Friday 8.30am-5pm. Email aftersales@hyundaipowerproducts.co.uk Online Live Chat Go to www.hyundaipowerproducts.co.uk Live chat is open Monday-Friday from 8.30am-5pm. Post Genpower Limited, Isaac Way, Pembroke Dock, Pembrokeshire, SA72 4RW, UK. - Page 40 Isaac Way, London Road Pembroke Dock, UNITED KINGDOM, SA72 4RW T: +44 (0) 1646 687 880 F: +44 (0) 1646 68 6 19 8 E: info@hyundaipowerproducts.co.uk www.hyundaipowerproducts.co.uk Imported/Distributed by GENPOWER LTD for the United Kingdom & Ireland Licensed by Hyundai Corporation, Korea...