Table of Contents
Advertisement
Quick Links
Model: WS-1517U
Instruction Manual
DC: 120314
Professional Wireless Weather Station
La Crosse Technology
, the world leader in atomic time and weather instruments, introduces a Professional Wireless
®
Weather Station that provides accurate, real-time weather data straight from your backyard. This sleek weather station
offers weather forecasting, indoor/outdoor temperature & humidity, wind & rain data, and precise atomic time & date—all
on one comprehensive device.
Model: WS-1517
www.lacrossetechnology.com/support
1
Advertisement
Table of Contents

Related Manuals for La Crosse Technology WS-1517U


Summary of Contents for La Crosse Technology WS-1517U
- Page 1 Model: WS-1517U Instruction Manual DC: 120314 Professional Wireless Weather Station La Crosse Technology , the world leader in atomic time and weather instruments, introduces a Professional Wireless ® Weather Station that provides accurate, real-time weather data straight from your backyard. This sleek weather station offers weather forecasting, indoor/outdoor temperature &...
-
Page 2: Table Of Contents
Carefully open the package and check that the following contents are complete: Wind Sensor Rain Sensor Thermo-Hygro Sensor Wireless Display TS805 TS906 TS21 WS-1517 7.5 V AC/DC adapter Requires 4 mounting screws Wall mount adapter Requires 4 mounting screws ... -
Page 3: Features
Comfort Level Statement Rain Window Rain Statistics Select Rain Display: inches or mm 24 Hour Rainfall Alert Wind Window Wind Display Wind Direction Wind Speed, Wind Gust, Wind Chill Select Wind Speed Unit of Measure: km/h, mph, m/s, knots Wind MAX/MIN Data Set Wind Alerts Disable Wind Alerts Backlight Options... - Page 4 Note: Setup all three remote sensors and allow them to run for at least two minutes before powering the weather station. Ensure all sensor readings are received on the weather station before mounting sensors outside. STEP 1: Complete the initial setup on a table with all components within 10 feet of each other. This allows all the sensors to connect repeatedly with the weather station during setup to lock the signal.
- Page 5 IMPORTANT: Make sure to observe the correct polarity when inserting batteries (not included). The markings on the batteries must line up with the diagrams inside the battery compartments. Inserting the batteries incorrectly may result in permanent damage to the weather station. During the setup process, place the wireless display and the outdoor sensors on a surface with 5-10 feet between each sensor and the display.
-
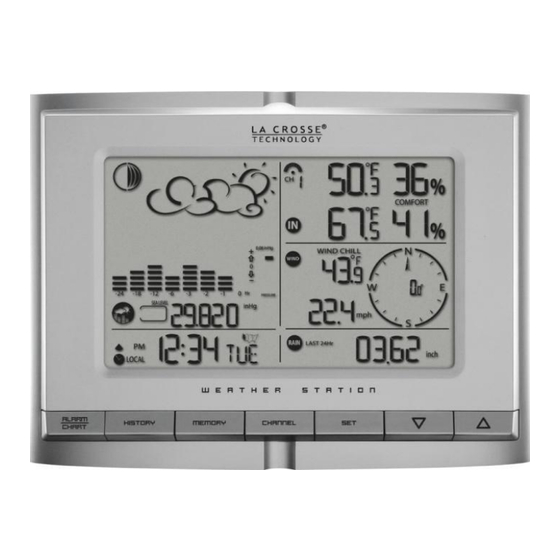
Page 6: Lcd Screen
LCD Screen The LCD screen illustrates the five programmable sections of the display. Each section will flash an icon while active and available to have features programmed. Clock and Alarm icon Pressure and Weather icon Temperature and Humidity icon Wind icon Rain icon Buttons Note: This weather station has a channel button and the ability to read additional outdoor sensors. -
Page 7: Set Calendar
1. The default city code, LAX (Los Angeles) will flash. Use the UP and DOWN buttons to select the desired city code for your time zone. 2. Refer to table in the back of this manual for a list of available cities. 3. -
Page 8: Wwvb Radio-Controlled Time Signal
Month/Day/Year or Day/ Month/ Year Current UTC (Universal Coordinated Time Simply press and release the SET button to change the display of the weather station (when the clock and alarm icon is flashing) WWVB Radio-controlled Time Signal The radio controlled weather station searches for, and periodically synchronizes to, the NIST (National Institute of Standards and Technology) atomic clock signal transmitted from Ft. -
Page 9: Activate/Deactivate Alarm
3. To enable or disable any of these alarms, press the UP or DOWN button arrow button. 4. Press the ALARM/CHART button to confirm your setting. The alarm symbol will show when that alarm is active. Note: Press the SET button anytime during alarm programming mode to return to the default clock display. Snooze Function When either alarm sounds, press the LIGHT/SNOOZE button to activate the snooze feature for the time interval set. -
Page 10: Local-Change Or Set Altitude
3. Press the UP or DOWN button arrow buttons to set altitude in feet or meters 4. Press MEMORY button once to confirm your selection 5. Hold the SET button until the altitude digits are flashing. 6. Set the altitude value with the UP or DOWN arrow buttons. 7. -
Page 11: Moon Phase
For every sudden or significant change in the air pressure, the forecast icons will update accordingly to represent the change in weather. If the icons do not change, then it means either the air pressure has not changed or the change has been too slow for the weather station to register. -
Page 12: Temperature And Humidity Window
The weather station supports indoor temperature & humidity and up to five remote thermo-hygro sensors (1 remote sensor is included). There are no additional thermo-hygro sensors available for purchase. La Crosse Technology ® does not plan to carry add-on sensors. The TS21 thermo-hygro sensor will not read to other channels. -
Page 13: Set Temperature Alarms
Set Temperature Alarm 1. With temperature and humidity icon flashing, press and release the ALARM/CHART button once selecting the desired alarm limit–-Upper or Lower 2. Hold the ALARM/CHART button until the temperature alarm icon starts flashing. 3. Use the UP or DOWN arrows to select the temperature alarm value. Press and hold either button for fast digits advance. -
Page 14: Rain Statistics
Rain Statistics View: With the rain icon flashing, press either the SET or the MEMORY button to recall a rain statistics for the past hour, past 24 hours, yesterday, past week or past month. Note: Last Hour rainfall value is displayed as a rate of rain in either “inch/hr.” or “mm/hr.” Reset: With the rain icon flashing, press and hold the MEMORY button to reset all rainfall statistics. -
Page 15: Wind Direction
Wind Direction Wind Direction is set to North during setup. Failure to set the wind direction or mount the wind sensor facing north will result in incorrect wind direction readings. If your wind direction is incorrect, follow the instructions in step 6 of the “Setup Instructions Step-by-step”... -
Page 16: Disable Wind Alerts
Backlight Options The weather station includes a light sensor that detects low light conditions and will turn the backlight on automatically (A/C power cord use required). When operating with the optional A/C power cord, the weather station backlight can be turned ON, OFF or automatic (depending on light conditions). -
Page 17: Position Sensors Outside
When the batteries are properly installed, the remote sensor will resume sending signals to the weather station. Hold the DOWN arrow button for 4–5 seconds on the weather station to search for the remote sensors. Positioning Sensors Outside ... -
Page 18: Rain
Ground Mounting: Place at least 6 feet up on a pole in an open area. Higher is better. The wind sensor should be the highest item in the immediate area. Mount the wind sensor away from all obstacles that will block wind activity, such as trees and houses. -
Page 19: Specifications
Specifications Radio Frequency: 433 MHz RF Reception range: 100 feet (30 m) open air Barometric Pressure Measuring Range: 14.75 inHg to 32.44 inHg (500 hPa to 1100hPa); (374.5 mmHg to 823.8 mmHg) Resolution: 0.003 inHg (0.1 hPa, 0.08 mmHg) Operating range: 100 feet (30 m) open air Sampling interval: 20 minutes... -
Page 20: Warranty Information
6.49 (L) x 6.89 (H) x 4.72 (D) inches (165 (L) x 175 (H) x 119 (D) mm) Warranty Information La Crosse Technology, Ltd. provides a 1-year limited time warranty (from date of purchase) on this product relating to manufacturing defects in materials & workmanship. -
Page 21: City Codes
City Codes Time zone is based on a city code. Select a city near you, in the same time zone. Pacific, Mountain, Central and Eastern time zones will display a map of the USA. Time Time Time Zone Other Zone Other Zone Offset...