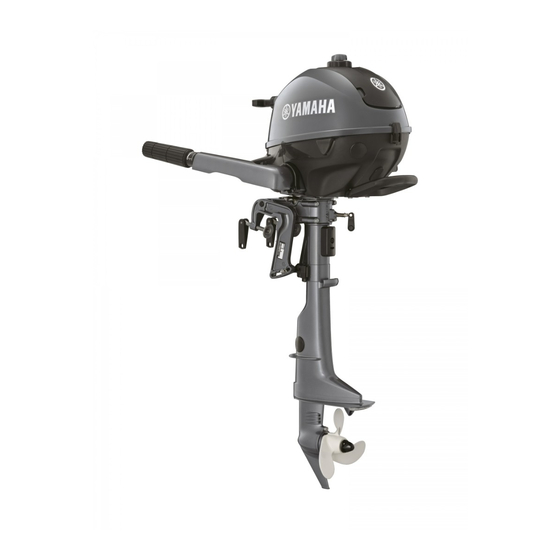

Related Manuals for Yamaha F2.5B


Summary of Contents for Yamaha F2.5B
- Page 1 F2.5B OWNER’S MANUAL Read this manual carefully before operating this outboard motor. 6EG-F8199-74-E0...
- Page 2 Read this manual carefully before operating this outboard motor. Keep this manual onboard in a waterproof bag when boating. This manual should stay with the outboard motor if it is sold.
- Page 3 If EMU25108 To the owner there is any question concerning this manual, Thank you for selecting a Yamaha outboard please consult your Yamaha dealer. motor. This Owner’s Manual contains infor- To ensure long product life, Yamaha recom-...
-
Page 4: Table Of Contents
Table of contents Anti-fouling paint ......13 Safety information......1 Outboard motor disposal Outboard motor safety....1 requirements......13 Propeller ..........1 Emergency equipment....13 Rotating parts........1 Hot parts ..........1 Electric shock........1 Components ........15 Engine shut-off cord (lanyard) .... 1 Components diagram .... - Page 5 Table of contents Filling fuel ........29 Changing engine oil......53 Why Yamalube ......... 55 Operating engine......30 Checking electrical connectors and Supplying fuel to engine....30 electrical leads ......56 Starting engine ......... 30 Checking propeller ......56 Checks after starting engine ..32 Removing propeller ......
-
Page 6: Safety Information
Safety information EMU33623 EMU33672 Outboard motor safety Engine shut-off cord (lanyard) Attach the engine shut-off cord so that the Observe these precautions at all times. engine stops if the operator falls overboard or leaves the helm. This prevents the boat from EMU36502 Propeller running away under power and leaving peo-... -
Page 7: Carbon Monoxide
Personal flotation devices (PFDs) Have an approved PFD on board for every EMU33763 Overloading occupant. Yamaha recommends that you Do not overload the boat. Consult the boat must wear a PFD whenever boating. At a capacity plate or boat manufacturer for max-... -
Page 8: Avoid Collisions
If anything abnormal is found, return to the nearest harbor at low speed and have a Yamaha dealer inspect the ZMU06025 outboard motor. Operate defensively at safe speeds and keep a safe distance away from people, objects, and other boats. -
Page 9: Boating Safety Publications
Safety information EMU33891 Boating safety publications Be informed about boating safety. Additional publications and information can be obtained from many boating organizations. EMU33602 Laws and regulations Know the marine laws and regulations where you will be boating—and obey them. Several sets of rules prevail according to geographic location, but all are basically the same as the International Rules of the Road. -
Page 10: General Information
Each conformed outboard motor accompa- spare parts from your Yamaha dealer or for nied with EC DoC. EC DoC contains the fol- reference in case your outboard motor is sto- lowing information;... - Page 11 General information ZMU06040...
-
Page 12: Read Manuals And Labels
Read any manuals supplied with the boat. Read all labels on the outboard motor and the boat. If you need any additional information, contact your Yamaha dealer. EMU33836 Warning labels If these labels are damaged or missing, contact your Yamaha dealer for replacements. - Page 13 General information 6EE-H1994-40 6EE-G2698-40 6EE-H1994-50 6EE-G2698-50 6EF-G2794-40 6EF-G2794-50 EMU33923 Contents of labels EWM01712 The above warning labels mean as follows. Read Owner’s Manuals and labels. EWM01702 Wear an approved personal flotation de- vice (PFD). Gasoline is highly flammable and explo- ...
- Page 14 General information Electrical hazard EMU35133 Symbols The following symbols mean as follows. Notice/Warning ZMU05666 ZMU05696 Read Owner’s Manual ZMU05664 Hazard caused by continuous rotation ZMU05665...
-
Page 15: Specifications And Requirements
Specifications and requirements Spark plug (NGK): EMU38092 Specifications CR6HSB TIP: Spark plug gap: “(AL)” stated in the specification data below 0.6–0.7 mm (0.024–0.028 in) represents the numerical value for the alumi- Steering system: num propeller installed. Tiller handle Starting system: EMU48360 Manual starter Starting carburetion system:... -
Page 16: Installation Requirements
Boat horsepower rating appropriate. EWM01561 Your Yamaha dealer can help you select the right propeller for your boating needs. Select Overpowering a boat can cause severe in- a propeller that will allow the engine to reach stability. -
Page 17: Engine Oil Requirements
Specifications and requirements Recommended engine oil grade 1 122˚F 50˚C 10W–30 10W–40 5W–30 ZMU04604 ZMU06854 1. Propeller diameter in inches Recommended engine oil grade 2 2. Propeller pitch in inches 3. Type of propeller (propeller mark) 122˚F EMU44831 50˚C Engine oil requirements 15W–40 Select an oil grade according to the average temperatures in the area where the outboard... -
Page 18: Anti-Fouling Paint
EMU36353 Emergency equipment Yamaha does not recommend gasohol con- Keep the following items onboard in case taining methanol because it can cause fuel there is trouble with the outboard motor. - Page 19 Specifications and requirements Spare parts, such as an extra set of spark plugs. Consult your Yamaha dealer for details.
-
Page 20: Components
Components EMU46722 Components diagram TIP: * May not be exactly as shown; also may not be included as standard equipment on all models (order from dealer). 1. Top cowling 10.Carrying handle 2. Tiller handle 11.Steering friction adjuster 3. Clamp bracket 12.Idle hole 4. -
Page 21: Fuel Tank (Built-In Fuel Tank)
Components Air vent screw 1. Air vent screw This screw is on the fuel tank cap. To loosen 2. Fuel tank cap the screw, turn it counterclockwise. 3. Gear shift lever 4. Choke knob 5. Restraint cable attachment 6. Clamp screw 7. -
Page 22: Fuel Cock
Components EMU42995 Fuel cock The fuel cock turns on and off the supply of fuel from the fuel tank to the engine. 1. Open position EMU25914 Tiller handle To change direction, move the tiller handle to 1. Fuel cock the left or right as necessary. Closed position To stop the fuel flow to the engine, turn the fuel cock to the closed position. -
Page 23: Throttle Grip
Components 1. Forward position 1. Fully open 2. Neutral position 2. Fully closed 3. Throttle indicator EMU25943 4. Notch Throttle grip The engine start mark “ ” on the throttle indi- The throttle grip is on the tiller handle. Turn cator shows the throttle position for starting the grip counterclockwise to increase speed the engine. -
Page 24: Engine Shut-Off Cord (Lanyard) And Clip
Components the throttle friction adjuster. If there is too much resistance, it could be difficult to turn the throttle grip, which could result in an accident. [EWM02262] 1. Clip 2. Engine shut-off cord (lanyard) 3. Engine shut-off switch EMU26004 1. Throttle friction adjuster Engine stop button The engine stop button stops the engine EMU25996... -
Page 25: Manual Starter Handle
Components 1. Choke knob 1. Steering friction adjuster To increase resistance, turn the steering fric- EMU26075 Manual starter handle tion adjuster clockwise. The manual starter handle is used to crank To decrease resistance, turn the steering fric- and start the engine. tion adjuster counterclockwise. -
Page 26: Cowling Lock Lever
Components 1. Tilt support lever 1. Cowling lock lever ECM00661 EMU39373 Carrying handle Do not use the tilt support lever or knob The carrying handle is used to carry the out- when trailering the boat. The outboard board motor. For information on carrying and motor could shake loose from the tilt sup- transporting the outboard motor, see page port and fall. -
Page 27: Installation
If you are not able to mount the outboard motor properly, consult a Yamaha dealer. ZMU08362 (4) Hold the carrying handle and the hand- EMU42942... - Page 28 Installation 1. Steering friction adjuster EMU39742 Mounting height To run your boat at optimum efficiency, the water resistance (drag) of the boat and out- ZMU08364 board motor must be made as little as possi- (5) Mount the outboard motor on the center ble.
-
Page 29: Clamping The Outboard Motor
Test runs at different heights can help de- termine the optimum mounting height. Consult your Yamaha dealer or boat man- ufacturer for further information on deter- mining the proper mounting height. For instructions on setting the trim angle of the outboard motor, see page 36. -
Page 30: Operation
Operation life. NOTICE: Failure to follow the break-in EMU36382 First-time operation procedure could result in reduced engine life or even severe engine damage. [ECM00802] EMU36393 EMU40061 Fill engine oil Procedure for 4-stroke models The engine is shipped from the factory with- Your new engine requires a period of 10 out engine oil. -
Page 31: Fuel Level
For details, consult a good rule is to use 1/3 of your fuel to get to Yamaha dealer. the destination, 1/3 to return, and to keep 1/3 If the top cowling is removed while the en- as an emergency reserve. -
Page 32: Controls
Operation EMU36453 Check for fuel leaks Check for fuel leaks or gasoline fumes in the boat. Check for fuel leakage from the fuel sys- tem. Check the fuel tank and fuel lines for cracks, swellings, or other damage. EMU36893 Controls ZMU06873... -
Page 33: Engine
Check the propeller for damage. 1. Cowling lock lever Check for engine oil leaks. EMU42982 Installing top cowling (1) Check the rubber seal for damage. If the rubber seal is damaged, have it replaced by a Yamaha dealer. 1. Cowling lock lever... -
Page 34: Filling Fuel
Operation Securely moor the boat in a well-ventilated (6) Check the fitting of the top cowling with both hands. NOTICE: If the top cowling area and stop the engine. If the boat is is not installed correctly, water can trailered, make sure that it is stable. -
Page 35: Operating Engine
Operation (3) Tighten the fuel tank cap securely. (4) Wipe up any spilled gasoline immediate- ly with dry rags. Dispose of rags properly according to local laws or regulations. If you use a portable container to store and dispense fuel, only use a locally ap- proved GASOLINE container. - Page 36 Operation ating. Do not attach the cord to clothing that could tear loose. Do not route the cord where it could become entangled, preventing it from functioning. Avoid accidentally pulling the cord dur- ing normal operation. Loss of engine power means the loss of most steering control.
-
Page 37: Checks After Starting Engine
Operation ZMU08381 ZMU08382 (4) Pull out the choke knob fully. (6) After the engine starts, slowly return the manual starter handle to its original posi- tion before releasing it. (7) Warm up the engine. For further informa- tion, see page 33. (8) Return the choke knob to its original po- sition gradually. -
Page 38: Warming Up Engine
EMU36973 the lower case or the cooling water pilot Stop switches hole is blocked. Consult your Yamaha Perform the following procedure to check dealer if the problem cannot be located that the engine stop button and engine shut- and corrected. - Page 39 Operation To shift out of neutral (forward) Move the gear shift lever firmly and crisply to- ward the bow. ZMU08386 To shift from in gear to neutral (1) Close the throttle so that the engine ZMU08384 slows to idle speed. To shift out of neutral (reverse) (1) Turn the outboard motor around 180°, and then move the tiller handle so that it...
-
Page 40: Stopping Boat
Operation 1. Neutral position 1. Engine stop button (2) After stopping the engine, tighten the air vent screw on the fuel tank cap and set the fuel cock to the closed position. 1. Neutral position EMU46290 Stopping boat The boat is not equipped with a separate 1. -
Page 41: Trimming Outboard Motor
Operation EMU27865 EMU42832 Trimming outboard motor Adjusting trim angle EWM04300 EWM00741 Stop the engine before adjusting the Excessive trim for the operating condi- trim angle. tions (either trim up or trim down) can Use care to avoid being pinched when cause boat instability and can make steer- moving the trim rod. -
Page 42: Adjusting Boat Trim
Operation Bow Up Too much trim-out puts the bow of the boat too high in the water. Performance and econ- omy are decreased because the hull of the boat is pushing the water and there is more air drag. Excessive trim-out can also cause the propeller to ventilate, which reduces per- formance further, and the boat may “por- poise”... -
Page 43: Tilting Up And Down
Operation ECM00232 TIP: Depending on the type of boat, the outboard Before tilting the outboard motor, follow motor trim angle may have little effect on the the procedure under “Stopping engine” trim of the boat when operating. in this chapter. Never tilt the outboard EMU27924 Tilting up and down motor while the engine is running. -
Page 44: Procedure For Tilting Down
Operation “C”: When the outboard motor is tilted up ful- (4) Align the fuel cock with the closed posi- ly, the tilt support lever automatically turns to tion. the locked position. (1) Place the gear shift lever in neutral and face the outboard motor forward. -
Page 45: Cruising In Other Conditions
Operation 1. Tilt support lever (3) Loosen the steering friction adjuster by turning it counterclockwise, and adjust the steering friction according to opera- tor preference. WARNING! If there is too much resistance it could be diffi- cult to steer, which could result in an accident. -
Page 46: Maintenance
Gasoline will expand consider- such as a transom saver bar. Consult your ably as it warms up and can build up Yamaha dealer for further details. pressure in the fuel container. This can cause fuel leakage and a potential fire... - Page 47 Maintenance 1. Closed position 1. Clamp screw (4) To prevent steering movement, turn the (7) Hold the carrying handle and the hand- steering friction adjuster clockwise. grip on the front side of the bottom cowl- ing and lift up the outboard motor to dismount it from the boat.
- Page 48 Maintenance To transport the outboard motor When transporting or storing the outboard motor while removed from a boat, it is recom- mended that you use an outboard motor stand. ZMU08399 ZMU08398 To transport the outboard motor horizontally When transporting the outboard motor on its side, observe the following precautions.
-
Page 49: Storing Outboard Motor
It is advisable to have your outboard motor (3) Remove the propeller. For further infor- serviced by an authorized Yamaha dealer pri- mation, see page 56. or to storage. However, the following proce- (4) Install the outboard motor in the test dures can be performed by the owner. - Page 50 Maintenance If “Fogging Oil” is not available, run the en- gine at a fast idle until the fuel system emp- ties and the engine stops. Then, remove the spark plug. Pour a tea- spoonful of clean engine oil into the cylin- der.
-
Page 51: Lubrication
(2) Drain the cooling water completely out of Seal replacement should be performed the outboard motor. Clean the body by an authorized Yamaha dealer prior to thoroughly. use. (2) Lubricate all grease fittings. For further... -
Page 52: Replacement Parts
EMU28512 Replacement parts If replacement parts are necessary, use only genuine Yamaha parts or parts of equivalent design and quality. Any part of inferior quality may malfunction, and the resulting loss of control could endanger the operator and pas- sengers. -
Page 53: Maintenance Chart 1
When operating in salt water, muddy, other turbid (cloudy), acidic water, the engine should be flushed with clean water after each use. The “ ” symbol indicates the check-ups which you may carry out yourself. The “ ” symbol indicates work to be carried out by your Yamaha dealer. Initial Every... - Page 54 Maintenance Initial Every 20 hours Item Actions Page 100 hours 300 hours 500 hours (1 year) (3 years) (5 years) months) Fuel/engine oil Inspection — leakage Gear oil Replacement Greasing points Greasing Inspection or re- Impeller/water placement as nec- — pump housing essary Impeller/water...
-
Page 55: Maintenance Chart 2
Maintenance Initial Every 20 hours Item Actions Page 100 hours 300 hours 500 hours (1 year) (3 years) (5 years) months) Connector con- Inspection or re- nections/lead con- placement as nec- — nections essary Inspection and Fuel tank (built-in cleaning as neces- —... -
Page 56: Greasing
Maintenance EMU46620 Greasing Yamaha grease A “ ” (water resistant grease) Yamaha grease D “ ” (corrosion resistant grease) ZMU08459... -
Page 57: Inspecting The Spark Plug
Do not attempt to diagnose any problems yourself. Instead, take the out- board motor to a Yamaha dealer. You should periodically remove and check the spark plug because heat and deposits will cause the spark plug to slowly break down and erode. -
Page 58: Checking Fuel Filter
Yamaha dealer. at the intervals specified in the periodic main- (1) Put the outboard motor in an upright po- tenance chart, consult a Yamaha dealer. sition (not tilted). NOTICE: If the out- board motor is not level, the oil level... - Page 59 Maintenance ZMU08448 1. Oil changer (2) Start the engine. Warm it up and keep the idle speed for 5-10 minutes. TIP: (3) Stop the engine and leave it for 5-10 min- When using an oil changer, skip steps 7 and utes.
-
Page 60: Why Yamalube
EMU48060 Why Yamalube tween the upper and lower marks. If the YAMALUBE oil is a Genuine YAMAHA Part oil level is not at the proper level, add or born of the engineers’ passion and belief that extract oil until the oil is between the up- engine oil is an important liquid engine com- per and lower marks. -
Page 61: Checking Electrical Connectors And Electrical Leads
Yamaha’s experience gained over many years of research and development into oil since the 1960’s helps make Yamalube the best choice for your Yamaha engine. ZMU06879 Checkpoints Check each of the propeller blades for ero- sion from cavitation or ventilation, or other damage. -
Page 62: Installing Propeller
(1) Apply Yamalube Marine Grease or Yamaha grease D (corrosion resistant grease) to the propeller shaft. (2) Install the thrust washer and propeller onto the propeller shaft. NOTICE: Make... -
Page 63: Changing Gear Oil
Yamaha dealer check and repair the outboard motor. [ECM00714] EMU39333 Inspecting and replacing anode (ex- TIP: ternal) For disposal of used oil, consult your Yamaha Yamaha outboard motors are protected from dealer. corrosion by sacrificial anode. Inspect the ex- ternal anode periodically. Remove scales... - Page 64 Maintenance from the surface of the anode. Consult a Yamaha dealer for replacement of the exter- nal anode. ECM00721 Do not paint anodes, as this would render them ineffective. 1. Anode...
-
Page 65: Trouble Recovery
Trouble Recovery A. Have serviced by a Yamaha dealer. EMU46680 Troubleshooting This section describes the likely causes and Engine idles irregularly or stalls. remedies for problems, such as those in the Q. Is fuel system obstructed? fuel, compression, and ignition systems, poor A. - Page 66 Trouble Recovery A. Have serviced by a Yamaha dealer. A. Check for pinched or kinked fuel line or other obstructions in fuel system. Q. Is fuel joint connection incorrect? A. Connect correctly. Q. Is fuel filter clogged? A. Clean or replace filter.
-
Page 67: Temporary Action In Emergency
Do not install the (4) Have a Yamaha dealer check the out- starter mechanism or top cowling after board motor before operating it again. -
Page 68: Emergency Engine Starting
Trouble Recovery Do not touch the ignition coil, spark plug wire, spark plug cap, or other electrical components when starting or operating the motor. You could get an electrical shock. EMU42923 Emergency engine starting Before performing the following procedure, make sure to read the emergency starting la- bel on the inside of the top cowling. - Page 69 Trouble Recovery (9) Attach the engine shut-off cord to a se- cure place on your clothing, or your arm or leg. Then, install the clip on the other end of the cord to the engine shut-off switch. 1. Bolt 2. Bracket (7) Place the fuel tank in its original position, and then install the bolts.
-
Page 70: Treatment Of Submerged Motor
EMU33502 Treatment of submerged motor If the outboard motor is submerged, immedi- ately take it to a Yamaha dealer. Otherwise some corrosion may begin almost immedi- ately. NOTICE: Do not attempt to run the outboard motor until it has been com- pletely inspected. -
Page 71: Index
INDEX Engine, checking ........28 Engine oil ..........27 Alcohol and drugs........2 Engine oil, changing ......53 Anode (external), inspecting and Engine oil, filling ........25 replacing..........58 Engine oil requirements ......12 Anti-fouling paint ........13 Engine shut-off cord (lanyard) ..1, 27 Avoid collisions........ - Page 72 INDEX Maintenance chart 2......50 Stop switches ........33 Manual starter handle......20 Stopping boat ........35 Modifications .......... 2 Stopping engine ........35 Mounting height........23 Storing outboard motor ......44 Mounting outboard motor ....11 Submerged outboard motor ....65 Mounting the outboard motor ....
- Page 74 Printed in Thailand January 2020...