Table of Contents
Advertisement
Quick Links
NOTE:
Please read all instructions
carefully before using this
product
®
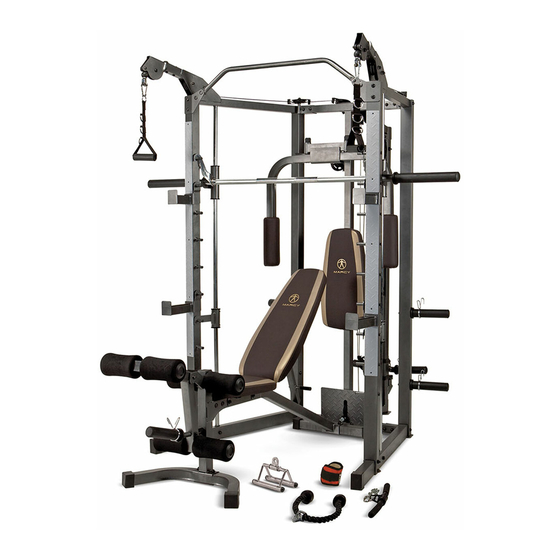
MARCY
SMITH MACHINE
Table of Contents
SM-4008
Safety Notice
Important Assembly
Information
Care and Maintenance
Parts List
Warranty
Ordering Parts
Model
SM-4008
Retain This
Manual for
Reference
200417
IMPORTANT:
Please read this manual before commencing
OWNER'S
assembly of this product.
MANUAL
®
IMPEX
INC.
2801 S. Towne Ave, Pomona, CA 91766
Tel: 800- 999-8899
www.marcypro.com
support@impex-fitness.com
Advertisement
Table of Contents

Related Manuals for Impex MARCY SM-4008


Summary of Contents for Impex MARCY SM-4008
- Page 1 Parts List Warranty Ordering Parts Model SM-4008 Retain This Manual for Reference 200417 IMPORTANT: Please read this manual before commencing OWNER'S assembly of this product. MANUAL ® IMPEX INC. 2801 S. Towne Ave, Pomona, CA 91766 Tel: 800- 999-8899 www.marcypro.com support@impex-fitness.com...
-
Page 2: Table Of Contents
ORDERING PARTS BEFORE YOU BEGIN ® Thank you for selecting MARCY SMITH MACHINE SM-4008 by IMPEX INC. For your safety and benefit, read this manual carefully before using the equipment. As a manufacturer, we are committed to providing you with complete customer satisfaction. -
Page 3: Imporant Safety Notices
PHYSICIAN. THIS IS ESPECIALLY IMPORTANT FOR INDIVIDUALS OVER THE AGE OF 35 OR PERSONS WITH PRE-EXISTING HEALTH PROBLEMS. READ ALL INSTRUCTIONS BEFORE USING ANY FITNESS EQUIPMENT. IMPEX INC. ASSUMES NO RESPONSIBILITY FOR PERSONAL INJURY OR PROPERTY DAMAGE SUSTAINED BY OR THROUGH THE USE OF THIS PRODUCT. -
Page 4: Exercise Guidelines
Muscle soreness is common, especially when you first start exercising. If you are painfully sore for a long time, it may be time to change your program. Eventually, your muscle system will become accustomed to the stress and strain placed on it. ©IMPEX INC. www.marcypro.com... - Page 5 Although you may not feel like doing it, taking a rest day at least once a week is important because it gives your body a chance to heal itself. Continuously working your muscles will result in over- training, which will not benefit you in the long run. ©IMPEX INC. www.marcypro.com...
-
Page 6: Warning Label Placement
WARNING LABEL PLACEMENT The warning labels shown here have been placed on the Base Frame, Rear Stabilizer. If the labels are missing or illegible, please call customer service at 1-800-999-8899 for replacements. Apply the labels in the location shown. ©IMPEX INC. www.marcypro.com... -
Page 7: Free And Training Area
FREE AND TRAINING AREA ©IMPEX INC. www.marcypro.com... -
Page 8: Important Assembly Instruction
Tools required for assembling this equipment: Allen Wrenches (provided by manufacturer), and Adjustable Wrench, or Socket Wrench, or Ratchet Wrench. NOTE: It is strongly recommended that this machine be assembled and moved by two or more people to avoid possible injury. ©IMPEX INC. www.marcypro.com... - Page 9 Please ensure that the incline support arm is properly and fully seated and engaged with the frame slot before engaging in any exercise. ©IMPEX INC. www.marcypro.com...
- Page 10 Secure the Weight Bar to each Safety Stop Frame with two pre-installed M8 x 3/8” Allen Bolts (#104) on each Safety Stop Frame. Ensure the Bolts are fastened so the Weight Bar won’t slide through the Safety Stop Frame. ©IMPEX INC. www.marcypro.com...
-
Page 11: Cable Assembly Instruction
SMITH MACHINE CABLE ASSEMBLY INSTRUCTION Cable Loop Diagram ©IMPEX INC. www.marcypro.com... - Page 12 D.) Draw the Cable around the Pulley then upward to the left Swivel Pulley Bracket. Repeat Procedure B above to install a Pulley to the Bracket. E.) Draw the Cable around the Pulley then clip to the Left Butterfly (#12). ©IMPEX INC. www.marcypro.com...
- Page 13 ©IMPEX INC. www.marcypro.com...
- Page 14 H.) Connect a Single Handle (#79) to the Cable End under the right Swivel Pulley Bracket with a Hook (#73). Secure the Hook to the U-shaped Connector with one M10 x 1 ⅛” and one M10 Aircraft Nut (#110). ©IMPEX INC. www.marcypro.com...
- Page 15 ©IMPEX INC. www.marcypro.com...
- Page 16 G.) Draw the Cable to next open shaft. Attach a Pulley to the open shaft. Secure it with one M10 x 1 ¾” Allen Bolt (#93), one Ø ¾” Washer (#107), and one Cable Retainer (#78). H.) Draw the Cable to the opening on the left Upper Side Frame (#7). ©IMPEX INC. www.marcypro.com...
- Page 17 ©IMPEX INC. www.marcypro.com...
- Page 18 H.) Connect a Single Handle (#79) to the end of the Cable with a Hook (#73). Secure the Hook to the U-shaped Connector with one M10 x 1 ⅛” Allen Bolt (#92) and M10 Aircraft Nut (#110). ©IMPEX INC. www.marcypro.com...
- Page 19 ©IMPEX INC. www.marcypro.com...
- Page 20 ©IMPEX INC. www.marcypro.com...
- Page 21 F.) Draw the Cable around the Pulley and upward to the opening under the Rear Upper Frame (#18). G.) Secure the end of the Cable to the opening with one M10 x 2 ⅜” Allen Bolt (#118), two Ø ¾” Washers (#107), and one M10 Aircraft Nut (#110). ©IMPEX INC. www.marcypro.com...
- Page 22 ©IMPEX INC. www.marcypro.com...
- Page 23 ©IMPEX INC. www.marcypro.com...
- Page 24 N.) Attach the Shiver Bar (#54) to the Lower Cable with one 15-link Chain (#72) and two Hooks (#72). Replace the Shiver Bar with Ankle Strap (#75) or Triceps Rope (#53) for various exercises. ©IMPEX INC. www.marcypro.com...
- Page 25 ©IMPEX INC. www.marcypro.com...
- Page 26 ©IMPEX INC. www.marcypro.com...
-
Page 27: Weight Capacity And Dimension
4. Examine the equipment regularly for signs of damage or wear. 5. Replace any defective components immediately and/or keep the equipment out of use until repair. 6. Failure to examine regularly may affect the safety level of the equipment. ©IMPEX INC. www.marcypro.com... -
Page 28: Operating Notes
If the tension is too loose, move the lower pulley up by one hole. If the tension is too tight, move the lower pulley down by one hole Lower Pulley Bench Backrest Adjustment Angles Backrest adjustment angle ranges from -18 to 71 ©IMPEX INC. www.marcypro.com... -
Page 29: Weight Resistance Chart
100% 10 lb. plate creates 10 lb. resistance Butterfly (both arms) 100% 10 lb. plate creates 5 lb. resistance Left Cross-Over 10 lb. plate creates 5 lb resistance Right Cross-Over 10 lb. plate creates 5 lb resistance *Numbers are approximate. Actual resistance may vary. ©IMPEX INC. www.marcypro.com... -
Page 30: Smith Machine Parts List
Double Floating Pulley Bracket Single Floating Pulley Bracket Lock Ring 3 ⅛” x 1 ¾” Bracket Rotating Handle Weight Post Backrest Board Ø 2 ⅝” x 1 ½” Rubber Bumper Guide Bushing Ø 1 ½” x 1” ©IMPEX INC. www.marcypro.com... - Page 31 Hook Rivet Ankle Strap Grip 6” Cable Retainer Bushing Cable Retainer Single Handle Ø 2” x 1 ⅝” Sleeve Ø ⅝” End Cap End Cap Ø ¾” End Cap Ø ¾” x 2” End Cap Ø 1” ©IMPEX INC. www.marcypro.com...
- Page 32 Washer Ø 1” Aircraft Nut Aircraft Nut Aircraft Nut Plastic Ring V-Bar Right Safety Rubber Bumper Right Holder Rubber Bumper Cone-shaped End Cap Ø 1” Square End Cap 2” x 2” M10 x 2 ⅜” Allen Bolt ©IMPEX INC. www.marcypro.com...
-
Page 33: Smith Machine Exploded Diagram
SM-4008 CAGE EXPLODED DIAGRAM ©IMPEX INC. www.marcypro.com... -
Page 34: Bench Parts List
M8 x 1 ⅛” Allen Bolt M8 x 1 ⅝” Allen Bolt Aircraft Nut End Cap Ø 1” Washer Ø ¾” Ø ⅝” Washer Aircraft Nut Ø 1” x Ø ⅜” Washer Allen Wench (Tool) Allen Wrench (Tool) ©IMPEX INC. www.marcypro.com... -
Page 35: Bench Exploded Diagram
SM-4008 BENCH EXPLODED DIAGRAM ©IMPEX INC. www.marcypro.com... -
Page 36: Warranty
IMPEX. IMPEX is not responsible or liable for indirect, special or consequential damages arising out of or in connection with the use or performance of the product or other damages with respect to any economic loss, loss of property, loss of revenues or profits, loss of enjoyments or use, costs of removal, installation or other consequential damages of whatsoever natures.