Table of Contents

Related Manuals for JUKI MCS-1500N


Summary of Contents for JUKI MCS-1500N
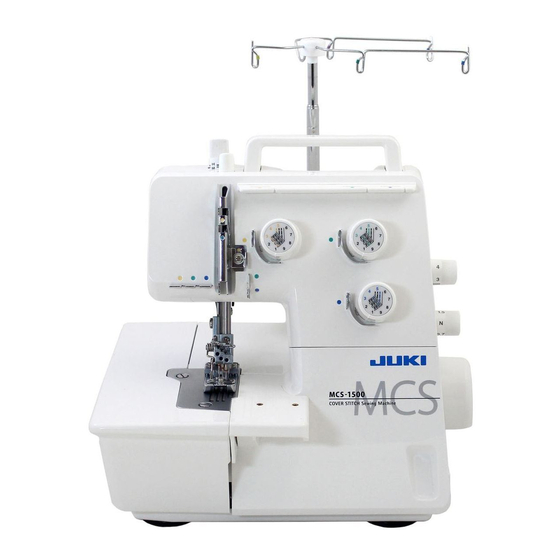
- Page 1 3-Needle, 2/3/4-Thread Cover Stitch Sewing Machine MCS-1500N INSTRUCTION MANUAL IMPORTANT: Read all safety regulations carefully and under- stand them before using your sewing machine. Retain this instruction manual for future reference.
-
Page 2: Safety Instructions
“IMPORTANT SAFETY INSTRUCTIONS” When using an electrical appliance, basic safety precautions should always be followed, including the following: Read all instructions before using this sewing machine. “DANGER To reduce the risk of electric shock:” ____ 1. The appliance should never be left unattended when plugged in. 2. - Page 3 Congratulations on your purchase of a JUKI sewing machine. Please be sure to read safety precautions in “To use the sewing machine safely” in the Instruction Manual before use to fully understand the functions and operating procedures of the sewing machine so as to use the sewing machine for a long time.
- Page 4 WARNING For the combination of the material and the thread and needle, in particular, refer to the explanation table in “Replacement of the needle”. If the needle or thread does not match the material used such as in the case that an extra heavy- weight material (e.g., denim) is sewn with a thin needle (#11 or higher), the needle can break result- ing in an unexpected personal injury. Other precautions ● Do not put the sewing machine under the ● Do not wipe the sewing machine with solvent direct sunlight or in a humid place. such as thinner. When the sewing machine is soiled, put a small quantity of neutral detergent on a piece of soft cloth and carefully wipe off the sewing machine with it. Be aware that the following state can take place since the sewing machine incorporates semi-con- ductor electronic parts and precise electronic circuits. ● Be sure to use the sewing machine in the temperature range from 5ºC to 40ºC. If the temperature is excessively low, the machine can fail to operate normally. * The operating temperature of the sewing machine is between 5ºC and 40ºC. Do not use the sewing machine under the direct sunlight, near the burning things such as a stove and candle, or in a humid place. By so doing, the temperature in the interior portion of the sewing machine can rise or the coating of the power cord can melt, causing fire or electrical shock.
-
Page 5: Table Of Contents
Contents Safety instructions ·································· 1-3 Trial sewing, Thread tension Contents··················································4 • Sewing test ········································· 20 Details of the machine ···························· 5, 6 • Tension adjustments ····························· 21 • Accessories ···········································6 • Thread tension ····································· 21 Preparing the machine Adjustments and settings •... -
Page 6: Details Of The Machine
Details of the machine Details of the machine 1. Looper cover 2. Extension plate 3. Cloth plate 4. Sewing plate 5. Presser foot 6. LED light 7. Thread take-up cover 8. Left needle thread tension dial 9. Center needle thread tension dial 10. -
Page 7: Accessories
Details of the machine Accessories 1. Electronic foot control 2. Needle set 130/705H 3. Spool caps 4. Tweezers 5. Brush/needle inserter 6. Net 7. Hexagonal screwdriver 8. Accessory bag 9. Dust cover 10. Chainstitch presser foot (Optional Accessory) -
Page 8: Preparing The Machine
Preparing the machine Thread guide Raise the support rod fully, turning slightly until the positioning catches engage (A). Position the thread guide on the thread stand so that the arrow is to the front (B). Attaching the spool holders Attach the separately packed spool holder (equipped with two spool holders pins) to the fixed spool holder, by pushing until it snaps in place. -
Page 9: Attaching The Foot Control
Preparing the machine Attaching the foot control Plug foot control into the machine socket (A) and then into the main socket (B). The foot control regulates the sewing speed. The sewing speed can be adjusted by increasing or decreasing the pressure on the foot control. CAUTION: Be sure to turn OFF the power switch before plugging/un- plugging the controller. -
Page 10: Two-Step Presser Foot Lifter
Using the machine Two-step presser foot lifter To raise the presser foot push the presser foot lifter up until it en- gages (A). It can be raised again to maximum height and held in this position to provide more space between presser foot and stitch plate for bulky items (B). -
Page 11: Looper Cover
Using the machine Looper cover Caution, moving parts, switch the machine off (power switch "0"). To open, push to the right and tilt the cover towards you. To close, push it up. Cloth plate Caution, moving parts, switch the machine off (power switch "0"). -
Page 12: Inserting Needles
Using the machine Inserting needles ・Switch the machine off (power switch "0"). ・ Raise the needles fully by turning the handwheel. ・ Lower the presser foot. ・ To remove the needles loosen the needle set screws (A). ・ Place a needle, flat side towards the back into the hole of the nee- dle inserter (B). -
Page 13: Threading
Threading Threading preparation / TIPS ・Switch the machine off (power switch "0"). ・ Fully raise support rod with thread guide. ・ Open the looper cover and cloth plate. ・ Turn handwheel until the looper is at its leftmost position. ・ Raise the presser foot to release the tensions. ・... -
Page 14: Threading 4 Thread Cover Stitch
Threading 4 thread cover stitch 1. Threading cover stitch looper (purple) • Switch the machine off (Power switch to “0”). Place the spool on the spool holder pin as illustrated. (1) Bring the thread up from the spool and lay it from the back to the front into the guides. -
Page 15: Threading Right Cover Stitch Needle
Threading 4 thread cover stitch 2. Threading right cover stitch needle (blue) • Switch the machine off (Power switch to “0”). Place the spool on the spool holder pin as illustrated. (1) Bring the thread up from the spool and lay it from the back to the front into the guides. -
Page 16: Threading Center Cover Stitch Needle
Threading 4 thread cover stitch 3. Threading center cover stitch needle (green) • Switch the machine off (Power switch to “0”). Place the spool on the spool holder pin as illustrated. (1) Bring the thread up and take it from back to front through the guide. -
Page 17: Threading Left Cover Stitch Needle
Threading 4 thread cover stitch 4. Threading left cover stitch needle (yellow) • Switch the machine off (Power switch to “0”). Place the spool on the spool holder pin as illustrated. (1) Bring the thread up and take it from back to front through the guide. -
Page 18: Threading 3 Thread Cover Stitch (Wide)
Threading 3 thread cover stitch (wide) Preparation 3 thread cover stitch (wide) • Switch the machine off (Power switch to “0”). Right cover stitch needle (blue) Left cover stitch needle (yellow) -
Page 19: Threading 3 Thread Cover Stitch (Narrow)
Threading 3 thread cover stitch (narrow) Preparation 3 thread cover stitch (narrow) • Switch the machine off (Power switch to “0”). Left cover stitch needle (yellow) Center cover stitch needle (green) -
Page 20: Threading Chain Stitch
Threading chain stitch Preparation chain stitch • Switch the machine off (Power switch to “0”). Left chainstitch needle (yellow) -
Page 21: Sewing Test
Sewing Test Sewing Test After threading make a sewing test on a double layer of fabric to check the stitch formation and the thread tension. Cover stitch sewing test ・ Plug the machine in and switch it on (power switch to “I”). ・... -
Page 22: Tension Adjustments
Tension adjustments Tension adjustments Cover stitch The right needle thread forms loops on the wrong side: Tighten the right needle tension (blue, C) The center needle thread forms loops on the wrong side: A B C Tighten the center needle tension (green, B) The left needle thread forms loops on the wrong side: Tighten the left needle tension (yellow, A) The looper thread is loose on the wrong side:... -
Page 23: Adjustments And Settings
Adjustments and settings Stitch length The stitch length is infinitely variable from 1-4 mm. It can be adjusted while sewing. Recommended basic stitch length: ・ Cover stitch: 3 ・ Chainstitch: 2.5 Presser foot pressure The presser foot pressure is adjusted to a medium setting, suitable for most sewing applications. -
Page 24: Differential Feed
Adjustments and settings Differential feed There are two feed dogs: one front (A) and one rear (B). The two feed dogs move independently and the distance each feed dog travels during one complete movement can be adjusted. The differential feed prevents fluting or waving in knits or stretch fabrics and movement between the layers of fabric. -
Page 25: Adjusting The Differential Feed
Adjustments and settings Adjusting the differential feed The differential feed can be adjusted by simply turning the differen- tial feed adjustment knob in the direction desired. Always make a trial run. The differential feed is infinitely variable and can be adjusted while sewing. Differential feed adjustments Setting Effect... -
Page 26: Stitch Chart
Stitch chart Stitch Tension Settings Basic Settings Applications 4 thread cover stitch Right needle thread (blue): 3-5 Stitch length: 3 Garments made from very Center needle thread (green): 3-5 Differential feed: N stretchy fabrics. Left needle thread (yellow): 3-5 Hems, hems with elastic, flat Looper thread (purple): M joining seams, stretchy lace, bindings, decorative seams. -
Page 27: Practical Sewing Cover Stitch
Practical Sewing Cover Stitch Securing the seam end Secure the seam end by pulling the loop (1) to the left. If the looper thread is subsequently pulled upwards, the needle threads (2) appear and can be pulled through to the wrong side and knotted. -
Page 28: Simple Hem
Practical Sewing Cover Stitch Simple hem Stitch length: 3-4 mm Differential: N-2 (depending on fabric) - Mark hem depth and fold or press. - Place fabric under the foot and guide the folded edge along a line on the stitch plate. The hem is sewn and the raw edge on the wrong side is neatened si- multaneously. -
Page 29: Edges With Elastic
Practical Sewing Cover Stitch Edges with elastic Stitch length: 3-4 mm Differential: 0.7-N - Turn the raw edge to the width of the elastic and topstitch from the right side. Guide the fold along the right section of the foot or use one of the lines on the stitch plate as a guide. -
Page 30: Top Stitching Seams / Ribbing /Yokes
Practical Sewing Cover Stitch Top stitching seams / ribbing /yokes Stitch length :3-4 mm Differential: 0.7-N - Fold or press seam to one side. - Edge stitch (or at distance desired) from the right. - Guide the edge of the fabric along the side sections of the foot. Cover stitch is perfect for topstitching and decorative finishes. -
Page 31: Practical Sewing Chainstitch
Practical Sewing Chainstitch Securing the seam end Secure the seam end by pulling the looper thread loop open (1). If the looper thread is subsequently pulled upwards, the needle thread (2) appears and can be pulled through to the wrong side and knotted. -
Page 32: Gathering With Chainstitch
Practical Sewing Chainstitch Gathering with chainstitch A single layer of lightweight fabric can be gathered with differential feed. Differential: 2 Stitch length: 4 mm Thread tensions: Basic Binding Stitch length: 3-4 mm Differential: N Cut bias binding or bias cut strips four times the width of the desired width, mark if wanted or press. -
Page 33: Trouble Shooting Guide
Trouble shooting guide Problem Cause Solution Page Fabric does not feed ・ Presser foot pressure is too low. ・ Adjust the presser foot pressure. evenly Thread breaks ・ The thread tension is too tight for thread ・ Reduce the thread tension. being used. -
Page 34: Technical Data
Technical data Stitch choice Cover stitch: 3 needles, 1 looper: 5 mm (0.2”) 2 needles, 1 looper: 5 mm (0.2”) 2 needles, 1 looper: 2.5 mm (0.1”) Chainstitch: 1 needle, 1 looper Needle system 130/705H Stitch width Cover stitch: 5 mm (0.2”) Stitch length 1-4 mm Differential feed... -
Page 35: Optional Accessories
Optional Accessories Hemmer Guide for Coverstitch Supplies 1 Cloth Guide (1) 1 Folded Edge Guide (2) 2 Fixation Screws (3) Additionally required Cover Stitch Compensation foot (= standard accessory with every CS ma- chine) Application The Hemmer Guide helps folding the hem and assures perfect placement of the upper hem edge during cover stitching. - Page 36 2-11-1, TSURUMAKI, TAMA-SHI, TOKYO, 206-8551, JAPAN PHONE : (81)42-357-2341 FAX : (81)42-357-2379 Copyright C 2018 JUKI CORPORATION All rights reserved throughout the world. 40214157-1 001118...