Advertisement
Quick Links
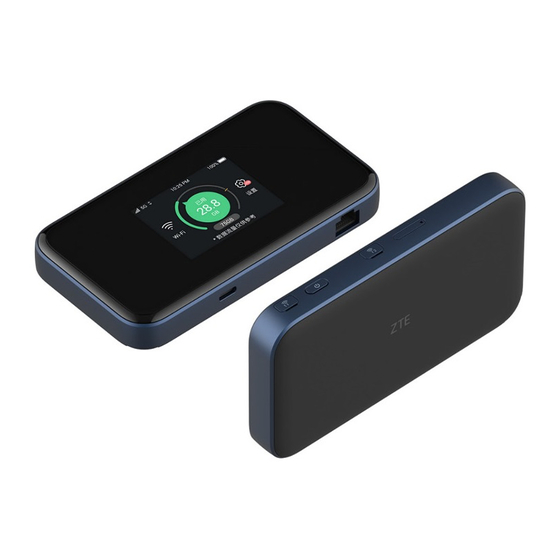
A004ZT
Quick Start
Thank you for purchasing "A004ZT".
● B efore using A004ZT, read "Quick Start" (this guide), " お願いとご注意 (Safety Precautions)"
(Japanese), and "User Guide" to ensure proper handling.
● C heck User Guide on SoftBank Website at
(https://www.softbank.jp/mobile/support/product/pocket-wifi -5g-a004zt/).
It can be accessed using a PC or a smartphone.
● W hen Wi-Fi router is under a corporate subscription, Wi-Fi router functionality can be regulated by
administrators. Depending on how functions are regulated, settings or operations as described
herein may not be available.
Precautions
・ Reproduction of the contents of this guide in part or in whole is prohibited.
・ The content of this guide is subject to change without notice.
・ E very eff ort has been made in preparation of this guide. Should you notice any unclear points,
omissions, etc., feel free to contact us (see "Customer Service").
Package Contents
The following items are included in the package. Please confi rm package
contents before use. Contact Customer Service for missing items.
■ A004ZT (Wi-Fi router)
■ Quick Start (Japanese)
■ Quick Start (this guide)
■ お願いとご注意 (Japanese)
• Keep accessories in a safe place.
• AC Charger is not supplied. Purchase an optional AC Charger. Always use AC
Charger specifi ed by SoftBank (for USB PD, USB Type-C™ quick charge AC
Charger [ZSDBAS] (SB-AC20-TCPD)).
Parts & Functions
(With Battery Cover Removed)
What A004ZT Can Do
Wi-Fi router connects various WLAN devices wirelessly to use the Internet.
Internet Connection
●5G/4G/LTE/3G
Connect Wi-Fi router
to the Internet via
5G/4G/LTE/3G.
●Wi-Fi
Connect Wi-Fi router to
the Internet via WLAN
router at office or
SoftBank Wi-Fi Spot.
• Wi-Fi router supports IEEE 802.11 a/b/g/n/ac/ax standards.
• IEEE 802.11 b/g/n WLAN devices and Bluetooth devices use the same 2.4
GHz band. If a WLAN device or Bluetooth device is used near Wi-Fi router, the
communication speed may slower due to reception interference.
• Communication speed may decrease depending on number of WLAN devices
connected.
Power On/Off
■ Power On
a
Long press
(1.5 seconds or more)
If a warning screen appears, confi rm the message and tap "OK".
Home Screen appears.
・ W i-Fi router searches for network to connect to the Internet automatically after
powered on.
・ T ap
to unlock Lock Screen and Home Screen appears.
■ Power Off
a
Long press
(1.5 seconds or more)
b
"Power Off " → "Yes"
Wi-Fi Name (SSID) and Password (Security Key)
Confi rm Wi-Fi name (SSID) and password (Security Key: WPA Key or WEP Key)
from Home Screen.
a
In Home Screen, tap "Wi-Fi"
b
Flick upward
Wi-Fi name (SSID) and password (Security Key)
appear.
• Alternatively, see SSID Sticker to check default
Wi-Fi name (SSID) and password (Security Key).
• By default, Multi SSID function (SSID B) is set
to OFF.
■ B attery Pack
■ U SB Cable TypeA/C
(ZEBBR1)
(ZEDBG1)
■ SIM Pin (Sample)
■ SSID Sticker
Display
External Device Port
Connect USB Cable.
LAN Cable Port
Connect LAN Cable.
(POWER) Key
Turn Display on/off .
Long press (1.5 seconds or more) to power
on/off .
USIM Card Slot
Reset Button
Long press (1.5 seconds or more) with a
pointed object to reset settings to defaults.
・ R eset can also be performed from WEB UI.
For details, see User Guide.
* T wo external antenna ports are located on
both sides of POWER Key, but they cannot be
used with this Wi-Fi router.
WLAN Connection
Customer Service
For application or service information, call SoftBank Technical Support Center.
■SoftBank Customer Support
From a SoftBank handset, dial toll free at 157
From a landline/IP phone, dial toll free at 0800-919-0157
Business hours : Call 10:00 am - 7:00 pm / Chat 9:00 am - 8:00 pm
■SoftBank Technical Support Center
From a SoftBank handset, dial toll free at
From a landline/IP phone, dial toll free at 0088-21-5525
Business hours : Weekdays 9:00 am - 8:00 pm / Sat., Sun. and holidays 9:00 am - 5:00 pm
Installing USIM Card
IC card that is loaned to you from SoftBank is called USIM Card, and
information such as your phone number, etc. are saved on it. Install USIM Card
to use Wi-Fi router. For handling, see following SoftBank Website (Japanese).
https://www.softbank.jp/mobile/support/protect/usim/
• Be sure to power off to perform the following steps.
a
Pull out USIM Card Tray
With Display side of Wi-Fi router facing
down, push SIM Pin (sample) into the
hole of USIM Card Tray. Press it slowly
in the direction of , and pull out USIM
Card Tray in the direction of .
• Do not touch or scratch IC chip when installing/removing USIM Card.
• Do not use SIM Pin (sample) other than installing/removing USIM Card.
• Handle SIM Pin (sample), USIM Card, and USIM Card Tray with care as they are
small parts.
Installing/Removing Battery Pack
• Always power off beforehand.
■ Installing Battery Pack
a
Remove Battery Cover
Hook the ○ part (notch) with your fi nger
and remove Battery Cover.
Be careful not to hurt your fi ngernail.
b
Insert Battery Pack
With the + - printed side facing up,
push Battery Pack in the direction of
aligning the Battery terminals with the
Wi-Fi router terminals, and push it down
fi rmly in the direction of .
c
Attach Battery Cover
Check the orientation of Wi-Fi router and Battery Cover and fi rmly press around the
edge of Battery Cover.
Hold and slide on the edge of Battery Cover to check there are no gaps.
●Connect PC
(USB connection
available)
●Connect
smartphones
etc.
Wi-Fi router groove
■ Removing Battery Pack
a
Remove Battery Cover and
remove Battery Pack
Put your fi nger on the ○ part (groove)
and slowly lift it up in the direction of
the arrow.
Charging Battery
Battery Pack is not fully charged at time of purchase. Charge Battery Pack
before use.
■ C onnect to PC Using USB
Cable Type A/C (ZEDBG1)
Insert USB Type-C plug of USB Cable
into External Device Port of Wi-Fi router
and USB plug to a USB port on PC.
• Use only compatible AC Charger (sold separately) or supplied USB Cable to
charge Battery.
• For compatible AC Charger, see SoftBank web page (https://www.softbank.jp/
mobile/products/).
• Also, see AC Charger (sold separately) user guide.
• Charging is stopped by battery protection function when charged for a long time.
In this case, recharge after a while.
5525
b
Set USIM Card
Set USIM Card into USIM Card Tray
with the IC chip facing down as in .
IC chip
c
Install USIM Card Tray
Insert gently all the way in the direction of .
Battery Cover
notch
■ C harging with AC Charger
(Sold Separately)
Insert AC Charger (sold separately)
USB Type-C plug into External Device
Port and power plug to AC outlet.
Notch
Advertisement

Related Manuals for Zte SoftBank Pocket WiFi 5G


Summary of Contents for Zte SoftBank Pocket WiFi 5G
- Page 1 Customer Service A004ZT For application or service information, call SoftBank Technical Support Center. Quick Start ■SoftBank Customer Support From a SoftBank handset, dial toll free at 157 Thank you for purchasing "A004ZT". From a landline/IP phone, dial toll free at 0800-919-0157 ● B efore using A004ZT, read "Quick Start" (this guide), " お願いとご注意 (Safety Precautions)" Business hours : Call 10:00 am - 7:00 pm / Chat 9:00 am - 8:00 pm (Japanese), and "User Guide" to ensure proper handling. ● C heck User Guide on SoftBank Website at ■SoftBank Technical Support Center (https://www.softbank.jp/mobile/support/product/pocket-wifi -5g-a004zt/). It can be accessed using a PC or a smartphone. From a SoftBank handset, dial toll free at 5525 ● W hen Wi-Fi router is under a corporate subscription, Wi-Fi router functionality can be regulated by From a landline/IP phone, dial toll free at 0088-21-5525 administrators. Depending on how functions are regulated, settings or operations as described Business hours : Weekdays 9:00 am - 8:00 pm / Sat., Sun. and holidays 9:00 am - 5:00 pm herein may not be available. Precautions ・ Reproduction of the contents of this guide in part or in whole is prohibited. ・ The content of this guide is subject to change without notice. ・ E very eff ort has been made in preparation of this guide. Should you notice any unclear points, omissions, etc., feel free to contact us (see "Customer Service").
- Page 2 Notifi cations Check and delete received notifi cations. Check that Keys to About Check detailed information of Wi-Fi router including Phone "Wi-Fi Spot" is enter four- Number and IMEI. set to "ON", digit login and tap "OFF" password → Activating WLAN Function for "SoftBank Tap "OK" Wi-Fi Spot" to Power on to connect to the Internet automatically and enable WLAN. Confi rm that is shown on Display of Wi-Fi router. turn it "ON" ■ Sleep Mode • When fi ve minutes elapse after no WLAN devices are connected, Wi-Fi router January 2021, First Edition goes into Sleep mode (default setting). SoftBank Corp. • In Sleep mode, WLAN is off . Visit SoftBank Shop for assistance • To release Sleep mode and turn on WLAN to reconnect WLAN devices, press Model: A 004ZT • Sleep mode is not activated during charging. Manufacturer: ZTE Corporation...