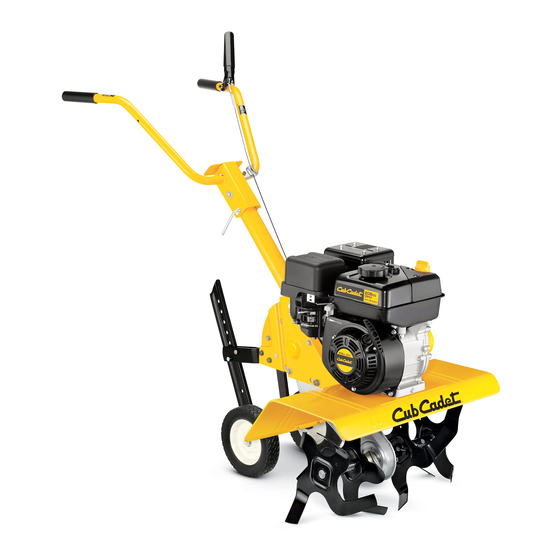
Cub Cadet FT24 Operator's Manual
Front tine tiller
Hide thumbs
Also See for FT24:
- Parts manual (93 pages) ,
- Operation manual (48 pages) ,
- Operator's manual (36 pages)
Advertisement
Available languages
Available languages
Quick Links
Safe Operation Practices • Set-Up • Operation • Maintenance • Service • Troubleshooting • Warranty
O
'
M
peratOr
s
anual
Front Tine Tiller — FT24
WARNING
READ AND FOLLOW ALL SAFETY RULES AND INSTRUCTIONS IN THIS MANUAL
BEFORE ATTEMPTING TO OPERATE THIS MACHINE.
FAILURE TO COMPLY WITH THESE INSTRUCTIONS MAY RESULT IN PERSONAL INJURY.
NOTE: This Operator's Manual covers several models. Features may vary by model. Not all features in this manual are applicable to all
models and the model depicted may differ from yours.
CUB CADET LLC, P.O. BOX 361131 CLEVELAND, OHIO 44136-0019
Form No. 769-17531
(August 14, 2018)
Advertisement

Related Manuals for Cub Cadet FT24


Summary of Contents for Cub Cadet FT24
- Page 1 NOTE: This Operator’s Manual covers several models. Features may vary by model. Not all features in this manual are applicable to all models and the model depicted may differ from yours. CUB CADET LLC, P.O. BOX 361131 CLEVELAND, OHIO 44136-0019 Form No. 769-17531...
-
Page 2: Table Of Contents
Visit us on the web at www.cubcadet.com ◊ Call a Customer Support Representative at (800) 965-4CUB ◊ Locate your nearest Cub Cadet Dealer at (877) 282-8684 ◊ Write to Cub Cadet LLC • P.O. Box 361131 • Cleveland, OH • 44136-0019... -
Page 3: Safe Operation Practices
Important Safe Operation Practices WARNING! This symbol points out important safety instructions which, if not followed, could endanger the personal safety and/or property of yourself and others. Read and follow all instructions in this manual before attempting to operate this machine. Failure to comply with these instructions may result in personal injury. - Page 4 Do not change the engine governor settings Notice Regarding Emissions If the machine should start making an or over-speed the engine. The governor unusual noise or vibration, stop the engine, controls the maximum safe operating speed disconnect the spark plug wire and ground Engines which are certified to comply with of engine.
-
Page 5: Assembly & Set-Up
Assembly & Set-Up Contents of Carton • Tiller (1) • Handlebar Assembly (1) • Depth Stake Assembly (1) • Tine Assemblies (4) • Wheel Assembly (1) • Bottle of Oil (1) • Operator’s Manual (1) • Engine Operator’s Manual (1) Assembly Use two clevis pins and two cotter pins from Remove the two screws from the bracket in... - Page 6 Adjustments Remove the handle adjustment crank from the Turn the cable collar section one or two turns handle. See Figure 3-6. to increase or decrease tension on the cable. See Figure 3-9. Wheels Retighten the hex nut against the cable collar. The tiller is shipped with the wheels adjusted so See Figure 3-9.
-
Page 7: Controls And Operation
Controls & Operation Clutch Lever Handle Handle Adjustment Crank Depth Stake Tines Figure 4-1 Engine Controls Yoke to Back WARNING! Be sure no one is standing in front of the tiller while the engine is Place the wheel yoke so that wheels are toward the See the separate Engine Operator’s Manual for running or being started. - Page 8 Tilling Procedure Depth Stake Other Uses The depth stake acts as a brake for the tiller and The tiller has many uses other than tilling and When tilling, leave approximately eight inches of controls the depth and speed at which the machine cultivating a garden.
-
Page 9: Service
Service Clean the exterior of the engine and the Using a 1⁄2” wrench, remove the hex screw WARNING! Disconnect the spark plug entire tiller thoroughly. Lubricate the tiller as securing the belt keeper to the engine. See wire and ground it against the engine described in the lubrication instructions. -
Page 10: Troubleshooting
Troubleshooting Problem Cause Remedy Tines do not engage 1. Foreign object lodged in tines 1. Dislodge foreign object 2. Tine clevis pin(s) missing 2. Replace tine clevis pin(s) 3. Pulley and idler not in correct adjustment 3. Take tiller to authorized service dealer 4. - Page 11 NOTA: Este manual de operación cubre distintos modelos. Las características del tractor pueden variar según los modelos. No todas las características en este manual se aplican a todos los modelos de tractor y la máquina que se ilustra aquí puede diferir de la suya. CUB CADET LLC, P.O. BOX 361131 CLEVELAND, OHIO 44136-0019 Formulario No. 769-17531...
- Page 12 Elija entre las opciones que se presentan a continuación: ◊ Visite nuestro sitio web en www.cubcadet.com ◊ Llame a un representante de Asistencia al Cliente al (800) 965-4CUB ◊ Escríbanos a Cub Cadet LLC • P.O. Box 361131 • Cleveland, OH • 44136-0019...
- Page 13 Medidas importantes de seguridad ¡ADVERTENCIA! La presencia de este símbolo indica que se trata de instrucciones importantes de seguridad que se deben respetar para evitar poner en peligro su seguridad personal y/o material y la de otras personas. Lea y siga todas las instrucciones de este manual antes de poner en funcionamiento esta máquina.
- Page 14 Aviso referido a emisiones No sobrecargue la capacidad de la máquina Antes de limpiar, reparar o inspeccionar la intentando labrar el suelo a un nivel máquina, detenga el motor y asegúrese de demasiado profundo o a una velocidad que los dientes y todas las partes móviles Los motores que están certificados y cumplen demasiado rápida.
- Page 15 Montaje y Configuración Contenido de la caja de cartón • Una cultivadora • Un conjunto de barra de control • Un conjunto de calibrador de profundidad • Cuatro conjuntos de dientes • Una Asamblea de ruedas • Una botella de aceite •...
- Page 16 Coloque el manija en su posición y asegure Ajustes Girar la sección de collar cable de una o dos con el hardware eliminado previamente. Vea vueltas para aumentar o disminuir la tensión la Figura 3-5. en el cable. Vea Figura 3-9. Ruedas Retire la manivela de ajuste de la manija de la Vuelva a apretar la tuerca de seguridad contra el...
- Page 17 Controles y Funcionamiento Palanca del embrague Manija Manija Ajuste Crank Estaca de profundidad Dientes Figura 4-1 Controles del motor Retén hacia atrás ¡ADVERTENCIA! Asegúrese de que nadie se encuentre delante de la Coloque el retén de las ruedas de manera que las Consulte el Manual de operación del motor, por cultivadora mientras el motor está...
- Page 18 Procedimiento para realizar la labranza Estaca de profundidad Otras aplicaciones La estaca de profundidad funciona como un freno de La cultivadora tiene muchas aplicaciones además de Durante la labranza, deje aproximadamente 8 la cultivadora y controla la profundidad y la velocidad la de labranza y cultivo de un jardín.
- Page 19 Servicio Fuera de temporada de almacenamiento ¡ADVERTENCIA! Desconecte el cable de Guardapolea loca la bujía y tierra contra el motor antes de Si la caña no se utiliza durante un período superior realizar cualquier reparación. a 30 días, los siguientes pasos deben tomarse para Mantenimiento preparar la caña para el almacenamiento.
- Page 20 Solución de problemas Problema Causa Remedio Los dientes no enganchan 1. Hay un objeto extraño entre los dientes 1. Desaloje el objeto extraño. 2. Falta la o las chavetas de horquilla de los dientes. 2. Cambie la o las chavetas de horquilla de los dientes. 3.