Table of Contents
Advertisement
Quick Links
Advertisement
Table of Contents

Related Manuals for Airlink101 AWLH3028V2


Summary of Contents for Airlink101 AWLH3028V2
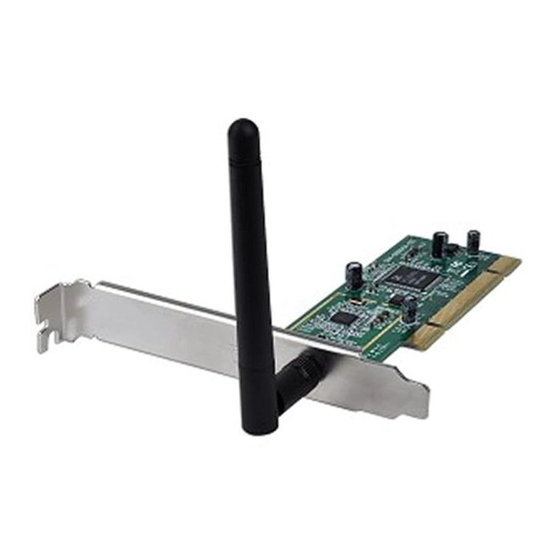
- Page 1 802.11g Wireless PCI Adapter Model # AWLH3028v2 User’s Manual Rev. 1.0...
-
Page 2: Table Of Contents
1. Introduction... 3 1.1 Package Contents ... 3 1.2 Features ... 3 2. Installation... 4 2.1 Install Driver & Utility... 4 3. Connect to Wireless Network ... 9 4. Configure Wireless LAN Monitor ... 14 4.1 General... 14 4.2 Profile Settings... 16 4.3 Available Network ... -
Page 3: Introduction
1. Introduction Thank you for purchasing the 802.11g Wireless PCI Adapter. This PCI Adapter is designed to comply with IEEE 802.11g Wireless LAN standard and is suitable for desktop computers with a 32-bit PCI slot. This Adapter supports WiFi Protected Access (WPA2-PSK and WPA-PSK) data encryption for higher security that protects your wireless network from eavesdropping. -
Page 4: Installation
2. Installation 2.1 Install Driver & Utility This section provides instructions on how to install the Wireless PCI Adapter. The driver is installed along with the utility. SWITCH THE COMPUTER OFF, remove the cover and insert the wireless Step 2.1 PCI adapter into an available PCI slot of your computer. - Page 5 Insert the CD into the CD drive. The Autorun screen will pop up. Step 2.5 Users: Select Install Driver (Windows 7) from the menu. Windows 7 Users: Select Install Utility and Driver (Windows Windows Vista/XP/2000 Vista/XP/2K) from the menu. Note: If the Autorun screen doesn’t appear automatically, go to Start, Run, and type D:\Utility\Setup.exe (where D is the letter of your CD drive) and click OK.
- Page 6 Click Install to start installing the driver/utility. Step 2.7...
- Page 7 Step 2.8 Windows 2000/XP Screen. (For Windows 2000, click Yes at the Digital Signature Not Found prompt). Please wait when Windows is installing the driver for Airlink101 802.11g Wireless Adapter and the utility, Airlink101 Wireless LAN Monitor. Click Finish to complete the installation. Step 2.9 Users: Click Continue Anyway at the Windows Logo...
- Page 8 Select Yes, I will restart my computer now. Click Finish to reboot the Step 2.10 computer. The driver and utility have been installed. Please continue to next chapter.
-
Page 9: Connect To Wireless Network
3. Connect to Wireless Network For Windows 7 Users: You will need to use the utility built in Windows 7 to manage this wireless PCI adapter. Currently, Airlink101 Wireless LAN Monitor does not support Windows 7. Click on the wireless icon in the system tray at the bottom right-hand corner of Step 3.1 your screen. - Page 10 For Windows Vista/XP/2000 Users: Open the Airlink101 802.11g Wireless LAN Monitor utility by double clicking on Step 3.1 the icon in the system tray at the bottom right-hand corner of your screen.
- Page 11 Click the Available Network tab of the Wireless LAN Monitor, select the Step 3.2 wireless network that you wish to connect to, and click Add to Profile. If the network that you are attempting to connect does not have encryption enabled, you will receive a warning about connecting to an unsecured network.
- Page 12 The connection should be now established. Under General tab, you can Step 3.4 check the status of wireless connectivity. Verify that IP Address, Subnet Mask and Gateway have valid numbers assigned to them (instead of all 0’s). The Status should be Associated, and there should be green bars next to Signal Strength and Link Quality.
- Page 13 Congratulations! You have now connected to the wireless network successfully.
-
Page 14: Configure Wireless Lan Monitor
4. Configure Wireless LAN Monitor This section describes the various functions of the 802.11g Wireless LAN Monitor that you can configure, including the settings of wireless encryption. 4.1 General The General tab provides you with the status of the current connection, including signal, network name (SSID) and IP Address. - Page 15 Radio Off: Check/uncheck this box to turn off/on the wireless function of the adapter. Disable Adapter: Check/uncheck this box to disable/enable the wireless adapter. For Windows XP users, you will see a checkbox “Windows Zero Config” which can be used to enable or disable the Windows XP’s built-in wireless utility, Windows Zero Configuration.
-
Page 16: Profile Settings
4.2 Profile Settings The Profile tab lists the current profiles and allows you to add/remove/edit profiles. The Available Profile(s) box lists all the profiles that you’ve created for your network. A profile is automatically created and added to this list when you connect to a new network. - Page 17 Enter the profile settings here, including Profile Name, SSID, Network Authentication, Data Encryption and Network Key. Click OK to save the changes. The section 4.7, Configuring Encryption will give you the information of how to set the different options of the wireless network encryption settings.
-
Page 18: Available Network
4.3 Available Network The Available network tab lists all of the networks that the adapter detects in your area. Clicking Refresh will refresh the list. To connect to a network, select a network from the list and click Add to Profile. -
Page 19: Status
4.4 Status The status section provides you with a list of information about the current status of the adapter. -
Page 20: Statistics
4.5 Statistics The Statistics section gives you information about transmit and receive packet count. -
Page 21: Wi-Fi Protected Setup (Easy Setup Button)
We are using the AWLH3028v2 and the AR570W Airlink101 Wireless 150 Router to illustrate the following setup instructions. Open the Airlink101 802.11g Wireless LAN Monitor. Click the Wi-Fi Protect Step 4.6.1... - Page 22 - For Push Button method, click Push Button Config (PBC) button, continue to Step 4.6.2 - For Pin Input Config method, click Pin Input Config (PIN) button, continue to Step 4.6.3a When you see this window pops up, Step 4.6.2 within the following 2 minutes, push the Easy Setup Button (i.e.
- Page 23 If you choose the Pin Code method, click Yes when prompted with the Step 4.6.3a question “Do you want to select a specific AP?”. Select the Access Point that you want to connect, and then click Select.
- Page 24 Write down the on a piece of paper. PIN Code (The following steps are different for each router. Please refer to the user’s manual of your router for detailed instructions.) Log on to the router AR570W’s web configuration page from the Step 4.6.3b browser (i.e.
- Page 25 After a few moments both the router configuration screen and the adapter configuration screen should show a message telling you that a connection is established. If you cannot connect successfully with WPS, you need to log in to your router’s Note: configuration and make sure the WPS feature is enabled.
-
Page 26: Configuring Encryption
4.7 Configuring Encryption This section describes the available encryption types and how to configure them. In most cases, encryption type will be automatically detected by the wireless adapter; all you need to do is to enter the Network key, as described in Section 3, Step 3.3. If you are creating a custom profile, you need to manually configure the encryption settings. - Page 27 4.7.1 Configuring WEP encryption Select WEP from the Data encryption box. Under Network Authentication, select either Shared key or Open System, depending on the router settings. If your WEP key is 5 or 13-digit, alphanumeric : • Check ASCII and enter your WEP key into the box next to Passphrase If you use Passphrase to setup the WEP encryption for your router : •...
- Page 28 4.7.2 Configuring WPA/WPA2-PSK Encryption (for home users) Select WPA-PSK/WPA2-PSK from the Network Authentication box. Under Data encryption select either AES or TKIP depending on the settings for your router. Enter the encryption key that the router is using into the Network Key, Confirm network key boxes.
- Page 29 4.7.3 Configuring WPA/WPA2 Encryption (for corporate networks) Select WPA 802.1x / WPA2 802.1x from the Network Authentication box and click The following window will pop up after few seconds.
- Page 30 You can choose a network authentication method: Protected EAP or Smart Card or other Certificate then click Settings to configure the advanced settings. 1) Choose Protected EAP then click on Settings to configure the advanced security settings.
- Page 31 Configure the advanced security settings for PEAP then click OK. Refer to your system administrator for information about what settings you should enter here.
- Page 32 2) Choose Smart Card or other Certificate then click on Settings to configure the advanced security settings. Refer to your system administrator for information about what settings you should enter here.
-
Page 33: Ad-Hoc And Peer-To-Peer Wireless Networks
4.8 Ad-hoc and Peer-to-Peer Wireless Networks Ad-hoc networking is used when you want to connect two or more computers together without going through a router. In ad-hoc mode, you lose a lot of the features that come with a router. The maximum connection speed drops to 11Mbps. - Page 34 You can also choose between no security or WEP security. If you choose WEP security, you can follow the instructions in the Configuring Encryption section of the manual. Click OK to save the profile. Select your new profile from the Available Profile(s) box, and double click to enable it. You need to configure all other computers that you are planning on connecting to your ad-hoc network with the same settings that you input on this screen.
-
Page 35: About
4.9 About The About window provides the information about the Airlink101 802.11g Wireless LAN Monitor Utility version and the current driver version. -
Page 36: Troubleshooting
5 Troubleshooting 1. If you cannot open the Wireless LAN Monitor utility, make sure that the PCI adapter is inserted firmly into the PCI slot. 2. If you cannot connect to the wireless router, you may want to double check the wireless security settings on the router. -
Page 37: Appendix A - Specifications
Appendix A – Specifications Frequency Band • 2.4GHz ISM bandwidth Standards • IEEE 802.11g • IEEE 802.11b Channel • 11 Channels Interface • 32-bit PCI Antenna type • 2dBi dipole antenna Security • 64 / 128-bit WEP encryption • WPA-PSK, WPA2-PSK •... -
Page 38: Technical Support
Technical Support E-mail: support@airlink101.com Toll Free: 1-888-746-3238 Web Site: www.airlink101.com *Theoretical maximum wireless signal rate based on IEEE standard 802.11g specifications. Actual data throughput will vary. Network conditions and environmental factors, including volume of network traffic, building materials and construction, mix of wireless products used, radio frequency interference (e.g., cordless telephones and microwaves) as well as network overhead lower actual data throughput rate.