Table of Contents
Advertisement
Quick Links
Download this manual
See also:
User Manual
Quick Installation Guide
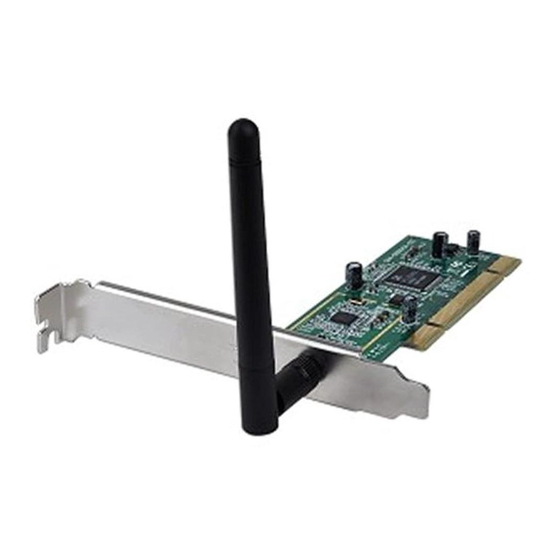
802.11g Wireless PCI Adapter
Section 1
Install the Wireless PCI Adapter
This Quick Installation Guide only provides the basic installation instructions.
For detailed instructions of other advanced features, please refer to the User's
Manual that can be found on the provided CD.
Step 1.1
SWITCH THE COMPUTER OFF, remove the cover and insert the
wireless PCI adapter into an available PCI slot of your computer.
Step 1.2
Fasten the antenna to the antenna connector on the wireless PCI
adapter. Replace the cover of your computer.
Step 1.3
Switch on the computer.
Step 1.4
Click Cancel when you see the Found New Hardware Wizard.
Windows XP/2000
Users:
Model # AWLH3028v2
Package Contents:
• 802.11g Wireless PCI
• Antenna
• Low Profile Bracket
• Driver & Utility CD
• Quick Installation Guide
Ver. 1.1
Adapter
Advertisement
Table of Contents

Related Manuals for Airlink101 AWLH3028V2


Summary of Contents for Airlink101 AWLH3028V2
-
Page 1: Quick Installation Guide
Quick Installation Guide 802.11g Wireless PCI Adapter Model # AWLH3028v2 Section 1 Install the Wireless PCI Adapter This Quick Installation Guide only provides the basic installation instructions. For detailed instructions of other advanced features, please refer to the User’s Manual that can be found on the provided CD. - Page 2 Windows 7/Vista Users: After turning on the computer, Windows will install its built in drivers for this card. A window will pop up telling you that the driver was installed successfully. Once you see this message, continue to Step 1.5. Step 1.5 Insert the CD into the CD drive.
- Page 3 Note: If the Autorun screen doesn’t appear automatically, go to Start, Run, and type D:\Utility\Setup.exe (where D is the letter of your CD drive) and click OK. Windows Vista Users: At this point, you may get a warning message like the one below.
- Page 4 Step 1.8 Windows 2000/XP Users: Click Continue Anyway at the Windows Logo Screen. (For Windows 2000, click Yes at the Digital Signature Not Found prompt). Please wait when Windows is installing the driver for Airlink101 802.11g Wireless Adapter and the utility, Airlink101 Wireless Monitor. Step 1.9 Click Finish to complete the installation.
- Page 5 Step 1.10 Select Yes, I will restart my computer now. Click Finish to reboot the computer. The driver and utility have been installed. Please continue to Section 2.
-
Page 6: Connect To Wireless Network
Section 2 Connect to Wireless Network For Windows 7 Users: You will need to use the utility built in Windows 7 to manage this wireless PCI adapter. Currently, Airlink101 Wireless Monitor does not support Windows 7. Step 2.1 Click on the wireless icon in the system tray at the bottom right-hand corner of your screen. - Page 7 For Windows Vista/XP/2000 Users: Step 2.1 Open the Airlink101 Wireless Monitor utility by double clicking on the icon in the system tray at the bottom right-hand corner of your screen.
- Page 8 Step 2.2 Click the Available Network tab of the Wireless Monitor, select the wireless network that you wish to connect to, and click Add to Profile. If the network that you are attempting to connect does not have encryption enabled, you will receive a warning about connecting to an unsecured network. Click OK to complete the connection.
- Page 9 Step 2.4 The connection should be now established. Under General tab, you can check the status of wireless connectivity. Verify that IP Address, Subnet Mask and Gateway have valid numbers assigned to them (instead of all 0’s). The Status should be Associated, and there should be green bars next to Signal Strength and Link Quality.
- Page 10 Congratulations! You have now connected to the wireless network successfully.
-
Page 11: Troubleshooting
Troubleshooting 1. If you cannot open the wireless monitor utility, make sure that the PCI adapter is inserted firmly into the PCI slot. 2. If you cannot connect to the wireless router, you may want to double check the wireless security settings on the router. The network key you entered in Step 2.3 must match with the settings on the wireless router.