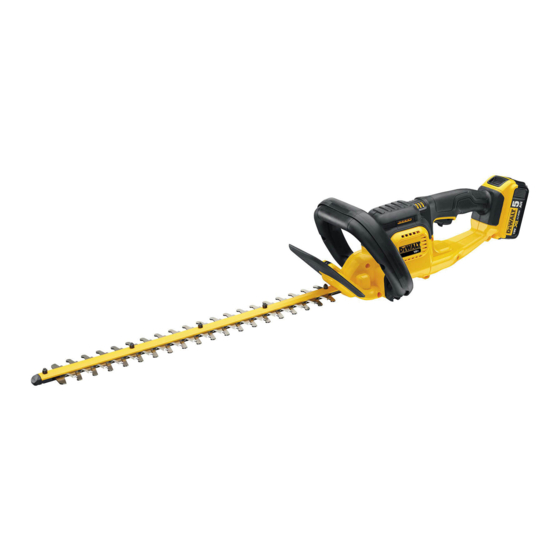
DeWalt DCM563 Service Training
Hide thumbs
Also See for DCM563:
- Owner's manual (17 pages) ,
- Original instruction (164 pages) ,
- Original instructions manual (164 pages)
Table of Contents
Advertisement
Quick Links
Advertisement
Table of Contents

Summary of Contents for DeWalt DCM563
- Page 1 DCM563 Hedge Trimmer...
- Page 2 WALT Hedge Trimmer DCM563 Impact Resistent & Durable Xenoy™ Run time: Battery Protection Housing 100 mins – 6.0Ah Cage For Durability 120 mins – 7.5Ah Wrap Around Padded Aux Handle - For Added Comfort Suring Longer Use Friction Clutch Delivers pro Protection Guard –...
- Page 3 Before repair Before repair and service Follow the safety instruction...
- Page 4 Safety Notes Before attempting any repairs, the following should be observed, Ensure that the correct tool is used and only use good quality hand tools. Ensure the work shop is clean and tidy. Always wear protective clothing, Overalls, safety gloves, safety glasses, safety hat/net etc.
- Page 5 KEY (LEGEND) of SYMBOLS ENGLISH GERMAN ITALIAN FRENCH SPANISH PORTUGUESE DUTCH CHECK ÜBERPRÜFEN CONTROLLARE CONTROLER COMPROBAR VERIFIQUE CONTROLEREN CORRECT RICHTIG CORRETTO CORRECT CORRECTO CORRECTO GOED TOURNEZ DANS GIRAR SENTIDO TURN COUNTER DREHEN GEGEN GIRARE IN SENSO LE SENS INVERSE GIRO IZQUIERDA ANTI-HORARIO DRAAI LINKSOM CLOCKWISE...
- Page 6 KEY (LEGEND) of SYMBOLS ENGLISH GERMAN ITALIAN FRENCH SPANISH PORTUGUESE DUTCH PH – KRUIS ⊕ CROSS HEAD TOURNEVIS DESTORNILLADO CHAVE SCHRAUBEN- CACCIAVITE PH SCHROEVENDRA SCREWDRIVER CRUCIFORME R DE ESTRELLA PHILIPS DREHER AIER (PH TYPE) TORX- TORX TORX HEAD CACCIAVITE TOURNEVIS DESTORNILLADO SCHRAUBEN- CHAVE TORX...
- Page 7 START DISSASEMBLY...
- Page 8 DISSASEMBLY...
- Page 9 DISSASEMBLY TX 20...
- Page 10 DISSASEMBLY TX 20 MM...
- Page 11 DISMANTLING THE HANDLE PH 2...
- Page 12 DISMANTLING THE HANDLE...
- Page 13 DISMANTLING THE HANDLE PH 2...
- Page 14 DISMANTLING THE HANDLE...
- Page 15 DISMANTLING THE HANDLE PH 0...
- Page 16 DISASSEMBLY OF THE PROTECTOR TX 20MM...
- Page 17 DISASSEMBLY OF BLADES 4 mm...
- Page 18 DISASSEMBLY OF BLADES...
- Page 19 DISASSEMBLY OF BLADES...
- Page 20 DISASSEMBLY OF BLADES...
- Page 21 DISASSEMBLY OF BLADES...
- Page 22 DISASSEMBLY OF BLADES...
- Page 23 DISASSEMBLY OF BLADES 4 MM...
- Page 24 DISASSEMBLY OF BLADES...
- Page 25 DISASSEMBLY OF BLADES TX 10...
- Page 26 DISASSEMBLY OF BLADES...
- Page 30 DISASSEMBLY OF GEAR AND ENGINE...
- Page 31 DISASSEMBLY OF GEAR AND ENGINE TX 20...
- Page 32 DISASSEMBLY OF GEAR AND ENGINE...
- Page 33 DISASSEMBLY OF GEAR AND ENGINE...
- Page 34 DISASSEMBLY OF GEAR AND ENGINE...
- Page 35 DISSASEMBLY...
- Page 36 DISASSEMBLY OF GEAR AND ENGINE...
- Page 37 DISSASEMBLY...
- Page 38 DISSASEMBLY...
- Page 39 DISASSEMBLY OF GEAR AND ENGINE...
- Page 40 DISSASEMBLY TX 20MM...
- Page 41 MOTOR AND ELECTRONIC DISMOUNTING...
- Page 42 DISSASEMBLY...
- Page 43 DISSASEMBLY TX 20 MM...
- Page 44 DISSASEMBLY...
- Page 45 DISASSEMBLY...
- Page 46 MOTOR ASSEMBLY...
- Page 47 MOTOR ASSEMBLY...
- Page 48 MOTOR ASSEMBLY...
- Page 50 ENGINE AND ELECTRONIC ASSEMBLY...
- Page 51 ENGINE AND ELECTRONIC ASSEMBLY...
- Page 52 MOUNTING THE MOTOR, ELECTRONIC AND SWITCH...
- Page 54 ASSEMBLY OF GEAR AND BLADES...
- Page 55 ASSEMBLY OF GEAR AND BLADES 4 MM...
- Page 56 ASSEMBLY OF GEAR COVER AND BLADES...
- Page 57 ASSEMBLY OF GEAR COVER AND BLADES 4 MM...
- Page 58 ASSEMBLY OF THE HANDLE...
- Page 59 FINAL TEST OF HEDGE TRIMMER TEST After repair Carry out Earth continuity, Earth leakage and Insulation test (flash test) where appropriate. Ensure all guards function correctly. Run product to check that it functions correctly, including all features. Before attempting any necessary adjustments, ensure that the unit is not connected to the power supply.


