TecMate Optimate 6 Instructions For Use Manual
Automatic charger
Hide thumbs
Also See for Optimate 6:
- Instructions for use manual (44 pages) ,
- Instructions for use manual (40 pages) ,
- Instructions for use manual (52 pages)
Table of Contents
Advertisement
Available languages
Available languages
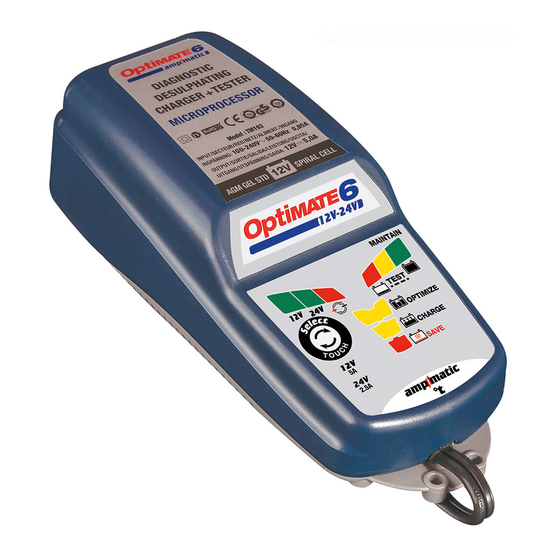
MODEL: TM193 / TM194
AC: 100 – 240VAC 50-60Hz
DC: 60W
Thermally adjusted
1 x 12V from 3 - 200Ah
+
-
1 x 24V from 3 - 120AH
STD / AGM-MF / GEL
(max. Ah rating based on 48 hour charge).
Automatic charger for 12V & 24V lead/acid batteries • Chargeur
automatique pour batteries 12V & 24V plomb-acide • Cargador automático
para baterías 12V & 24V plomo-ácido • Carregador automático para
baterias de 12V & 24V chumbo/ácido • Automatische Ladegerät für 12V
& 24V Blei-Säure Batterien • Automatische lader voor 12V & 24V loodzuur
accu's • Caricabatterie automatico per batterie 12V piombo-acido
• Automatisk diagnostisk laddare för 12V & 24V blybatterier
12V-24V
12V-24V
5A @ 12V / 2.5A @ 24V
INSTRUCTIONS FOR USE
IMPORTANT: Read completely
before charging
MODE D'EMPLOI
IMPORTANT: à lire avant
d'utiliser l'appareil
MODO DE EMPLEO
IMPORTANTE: a leer antes de
utilizar el aparato
INSTRUÇÕES DE UTILIZAÇÃO
IMPORTANTE: Ler antes de
utilizar.
ANWENDUNGSVORSCHRIFTEN
WICHTIG: Vollständig vor der
Benutzung lesen
GEBRUIKSAANWIJZING
BELANGRIJK: Lees volledig voor
gebruik
ISTRUZIONI PER L'USO
IMPORTANTE: da leggere prima
di utilizzare l'apparecchio
INSTRUKTIONER
VIKTIGT: läs följande fullständiga
instruktioner för användningen
innan du använder laddaren
Advertisement
Table of Contents

Related Manuals for TecMate Optimate 6


Summary of Contents for TecMate Optimate 6
- Page 1 12V-24V 12V-24V INSTRUCTIONS FOR USE IMPORTANT: Read completely MODEL: TM193 / TM194 before charging AC: 100 – 240VAC 50-60Hz DC: 60W 5A @ 12V / 2.5A @ 24V MODE D’EMPLOI Thermally adjusted IMPORTANT: à lire avant d’utiliser l’appareil MODO DE EMPLEO IMPORTANTE: a leer antes de utilizar el aparato INSTRUÇÕES DE UTILIZAÇÃO...
- Page 2 LEDs / SELECT TEST 2.5A °t TEST LEDs 100% 100%...
-
Page 3: Important Safety
INSTRUCTIONS FOR CANADA & USA THIS PORTION OF THE MANUAL CONTAINS IMPORTANT SAFETY INSTRUCTIONS FOR THE OPTIMATE 6 12V-24V BATTERY CHARGER. IT IS OF THE UTMOST IMPORTANCE THAT EACH TIME, BEFORE USING THE CHARGER, YOU READ AND EXACTLY FOLLOW THESE INSTRUCTIONS. SAVE THESE INSTRUCTIONS. - Page 4 12. PREPARING TO CHARGE a) If necessary to remove battery from vehicle to charge, always remove grounded terminal from battery first. Make sure all accessories in the vehicle are off, so as not to cause an arc. b) Be sure area around battery is well ventilated while battery is being charged. Gas can be forcefully blown away by using a piece of cardboard or other non-metallic material as a fan.
- Page 5 12V-24V 12V-24V AUTOMATIC DIAGNOSTIC CHARGER FOR 12V LEAD-ACID BATTERIES FROM 3Ah TO 240Ah or 24V LEAD-ACID BATTERIES UP TO 120Ah DO NOT USE FOR NiCd, NiMH, Li-Ion OR NON-RECHARGEABLE BATTERIES. IMPORTANT: READ THE FOLLOWING INSTRUCTIONS BEFORE USING THE CHARGER This appliance can be used by children aged from 8 years and above and persons with reduced physical,sensory or mental capabilities or lack of experience and knowledge if they have been given supervision or instruction concerning use of the appliance in a safe way and understand the hazards involved.
- Page 6 STEP 1 LED #1a / 1b: Confirms AC power supply to the charger and selected battery voltage. Voltage 1a 1b Changing voltage selection: Disconnect charger from battery. Place and hold finger Selection on Select-TOUCH sensor. The selected voltage LED brightens to confirm touch. (i.e. if ‘12V’...
- Page 7 STEP 5 LED #4 : YELLOW The CHARGE mode engages if the battery state of charge was 50% or higher (as tested in STEP 3) or once the battery has been sufficiently CHARGE recovered during STEP 4. The ampmatic™ charge current monitoring and control program automatically determines the most efficient rate of charge current for the connected battery, according to its state of charge, state of health, and electrical storage capacity.
-
Page 8: Limited Warranty
NOTE: Details at www.tecmate.com/warranty. copyright © 2015 TecMate International OptiMate 6 and the names of other battery care products mentioned in these instructions such as BatteryMate, TestMate and TestMate mini, are registered trademarks of TecMate International NV. WARRANTY in Canada, USA, Central America and South America: TecMate North America, Oakville, ON, Canada, as a wholy owned subsidiary of TecMate International, assumes the responsibility for product warranty in these regions. -
Page 9: Instructions Importantes Concernant La Sécurité
CONSERVER CES INSTRUCTIONS. CE MANUEL CONTIENT DES INSTRUCTIONS IMPORTANTES CONCERNANT LA SÉCURITÉ ET LE FONCTIONNEMENT DU CHARGEUR OPTIMATE 6 12V-24V. CHARGEUR AUTOMATIQUE POUR BATTERIES 12V & 24V PLOMB-ACIDE NE CONVIENT PAS POUR LES BATTERIES NiCd, NiMH, Li-Ion OU NON RECHARGEABLES. - Page 10 (v) SI LA BORNE NÉGATIVE EST MISE À LA MASSE, RACCORDER LA PINCE POSITIVE (ROUGE) DU CHARGEUR À LA BORNE POSITIVE (POS, P, +) NON MISE À LA MASSE DE LA BATTERIE. RACCORDER LA PINCE NÉGATIVE (NOIRE) AU CHÂSSIS DU VÉHICULE OU AU MOTEUR, LOIN DE LA BATTERIE. NE PAS RACCORDER LA PINCE AU CARBURATEUR, AUX CANALISATIONS D’ESSENCE NI AUX PIÈCES DE LA CARROSSERIE EN TÔLE.
- Page 11 12V-24V 12V-24V CHARGEUR AUTOMATIQUE AVEC DIAGNOSTIC POUR BATTERIES PLOMB-ACIDE 12 V DE 3 Ah à 240 Ah OU POUR BATTERIES PLOMB-ACIDE 24 V JUSQU’À 120 Ah IMPORTANT : LIRE ENTIÈREMENT LES INSTRUCTIONS SUIVANTES AVANT D’UTILISER LE CHARGEUR Cet appareil n’est pas destiné à être utilisé par des personnes (y compris des enfants) possédant des capacités physiques, sensorielles ou mentales réduites, ou manquant d'expérience et de connaissance, sauf si elles bénéficient d’une surveillance ou ont reçu des instructions concernant l’utilisation de l’appareil d’une personne responsable de leur sécurité.
- Page 12 ÉTAPE 1 LED nº 1a/1b : confirme l’alimentation secteur vers le chargeur et la tension sélectionnée de la batterie (1a = 12 V, 1b = 24 V). Tension 1a 1b Modification de la tension sélectionnée : déconnectez le chargeur de la batterie. sélectionnée Appuyez sur le capteur de sélection et maintenez-le enfoncé. La LED de la tension sélectionnée s’allume pour confirmer l’action (par exemple, si une tension de « 12 V »...
- Page 13 ÉTAPE 5 LED #4 : JAUNE Le mode de CHARGE s’enclenche si la batterie est d’au moins 50 % (selon les résultats du test de l’ÉTAPE 3), ou si elle est suffisamment restaurée CHARGE au cours de l’ÉTAPE 4. Le mode de commande et de surveillance du courant de charge ampmatic™ determine automatiquement le taux de charge le plus efficace pour la batterie connectée, en fonction de l’état de charge, de l’état de santé...
-
Page 14: Garantie Limitée
TecMate International SA, B-3300 Tienen, Belgique, consent la présente garantie au premier client utilisateur de ce produit, sans possibilité de transfert. TecMate (International) garantit ce chargeur pendant trois ans à compter de la date d’achat au détail contre les défauts de composants ou d’assemblage. Le cas échéant, le chargeur sera réparé ou remplacé à la discrétion du fabricant. - Page 15 12V-24V 12V-24V CARGADOR CON DIAGNÓSTICO AUTOMÁTICO PARA BATERÍAS PLOMO-ÁCIDO DE 12 V (DE 3 Ah A 240 Ah) O PARA BATERÍAS PLOMO-ÁCIDO DE 24 V (HASTA 120 Ah) NO UTILIZAR CON BATERÍAS DE NiCd, NiMH, Li-Ion O BATERÍAS NO RECARGABLES. IMPORTANTE: LEA COMPLETAMENTE LAS SIGUIENTES INSTRUCCIONES ANTES DE UTILIZAR EL CARGADOR Este aparato no puede ser utilizado por que lo utilicen personas (incluidos niños) con capacidades físicas, sensoriales o mentales disminuidas, o bien con falta de experiencia y conocimientos, a menos que una...
- Page 16 PASO 1 LED n.º 1a/1b: confirma que el cargador recibe suministro de CA y la tensión de la batería seleccionada. Selección 1a 1b Cambio de la tensión seleccionada: desconecte el cargador de la batería. Mantenga de la tensión pulsado el sensor Select-TOUCH. Se iluminará el LED correspondiente a la tensión seleccionada para confirmar que se está...
- Page 17 PASO 5 LED #4 : AMARILLO El modo CARGA se activa si el estado de carga de la batería es 50 % o superior (prueba en el PASO 3), o una vez que la batería se haya CARGA recuperado lo suficiente durante el PASO 4, El programa de control y supervisión de corriente de carga ampmatic™...
-
Page 18: Garantía Limitada
NOTA: Véase www.tecmate.com/warranty ó contacte warranty@tecmate.com copyright © 2015 TecMate International OptiMate 6 y los nombres de los otros aparatos mencionados en este texto como BatteryMate, TestMate y TestMate mini, son marcas registradas de TecMate International SA. Se puede encontrar más información sobre los productos de TecMate en www.tecmate.com. - Page 19 12V-24V 12V-24V CARREGADOR AUTOMÁTICO DE DIAGNÓSTICO PARA BATERIAS DE CHUMBO-ÁCIDO DE 12V DE 3Ah A 240Ah OU BATERIAS DE CHUMBO-ÁCIDO DE 24V ATÉ 120Ah NÃO UTILIZE O APARELHO PARA BATERIAS NiCd, NiMH, Li-Ion NEM PARA BATERIAS NÃO RECARREGÁVEIS. NOTAS E AVISOS DE SEGURANÇA: CASO AINDA NÃO O TENHA FEITO, LEIA AS PÁGINAS ANTERIORES COM A INDICAÇÃO "INSTRUÇÕES DE SEGURANÇA IMPORTANTES"...
- Page 20 ETAPA 1 LED #1a / 1b: Confirma o fornecimento de energia CA ao carregador e a tensão da bateria selecionada. Seleção da 1a 1b Alteração da tensão de carga: Desligue o carregador da bateria. Carregue e tensão mantenha o botão de seleção. O LED da tensão selecionada acende-se para confirmar.
- Page 21 ETAPA 5 LED #4 : AMARELO O modo de CARGA é ativado se o estado de carga da bateria for de 50% ou superior (de acordo com o teste na ETAPA 3) ou quando a bateria tiver sido recuperada até um CARGA nível adequado durante a ETAPA 4.
-
Page 22: Garantia Limitada
NOTA: Veja www.tecmate.com/warranty o contatem warranty@tecmate.com copyright © 2015 TecMate International OptiMate 6 e os nomes dos outros aparelhos mencionados neste texto como BatteryMate, TestMate e TestMate mini, são marcas registadas de TecMate International SA. Pode-se encontrar mais informação sobre os produtos de TecMate em www.tecmate.com. - Page 23 12V-24V 12V-24V AUTOMATISCHES DIAGNOSE-LADEGERÄT FÜR 12V-BLEIAKKUS VON 3Ah BIS 240Ah oder 24V-BLEIAKKUS BIS 120Ah NICHT VERWENDEN FÜR NiCd-, NiMH-, Li-Ion- ODER NICHT WIEDERAUFLADBARE BATTERIEN. SICHERHEITSWARNUNG UND -HINWEISE: SPÄTESTENS JETZT DIE „WICHTIGEN SICHERHEITSHINWEISE“ AUF DEN VORAUSGEHENDEN SEITEN LESEN, EHE DAS LADEGERÄT IN BETRIEB GENOMMEN WIRD.
- Page 24 Temperatur erhöht und bei höherer Temperatur verringert. Einstellung: -0,004V/Zelle/°C über oder unter 20°C (68°F). EINLEITEN DES LADEVORGANGS : Wenn die Spannungsauswahl in SCHRITT 1 der erwarteten Batteriespannung entspricht und keine Anschlussfehler vorhanden sind, wie in SCHRITT 2 beschrieben, beginnt der automatische Betrieb ab SCHRITT 3. SCHRITT 1 LED #1a / 1b: Zeigt die Wechselstromversorgung des Ladegeräts und die gewählte Batteriespannung.
- Page 25 SCHRITT 5 LED #4 : GELB Der Modus LADEN wird aktiviert, wenn der Ladezustand der Batterie 50% oder höher war (wie in SCHRITT 3 getestet), oder sobald die Batterie in SCHRITT 4 LADEN ausreichend wiederhergestellt wurde. Die ampmatic™ Ladestromüberwachung und -Steuerung wählt automatisch den effizientesten Ladestrom für die angeschlossene Batterie entsprechend Ladezustand, Batteriezustand und Speicherkapazität.
-
Page 26: Begrenzte Garantie
BEACHTUNG: Siehe www.tecmate.com/warranty oder kontaktieren Sie warranty@tecmate.com copyright © 2015 TecMate International OptiMate 6 und die Namen anderer Produkte wie BatteryMate, TestMate und TestMate mini, die in diesen Anweisungen erwähnt werden, sind geschützte Warenzeichen von TecMate International NV. Mehr Informationen über TecMate Produkten können bei www.tecmate.com gefunden werden. - Page 27 12V-24V 12V-24V LADER MET AUTOMATISCHE DIAGNOSE VOOR 12 V-LOODZUURACCU’S VAN 3 Ah TOT 240 Ah OF 24 V-LOODZUURACCU’S TOT 120 Ah NIET GEBRUIKEN VOOR NiCd-, NiMH-, Li-ion- OF NIET-OPLAADBARE ACCU’S. VEILIGHEIDSWAARSCHUWING EN OPMERKINGEN: ALS U DE 'BELANGRIJKE VEILIGHEIDSINSTRUCTIES' OP DE VORIGE PAGINA'S NOG NIET HEBT GELEZEN, LEES ZE DAN EERST VOOR U DE LADER GEBRUIKT.
- Page 28 HET LADEN STARTEN : Indien de in STAP 1 geselecteerde spanning overeenkomt met de verwachte batterijspanning en er zich geen van de in STAP 2 beschreven verbindingsproblemen voordoen, start de werking volledig automatisch vanaf STAP 3. STAP 1 Led #1a / 1b: Bevestigt de AC-voeding naar de lader en geselecteerde accuspanning.
- Page 29 STAP 5 LED #4 : GEEL De LAADmodus wordt geactiveerd als de accu meer dan 50% of meer ontladen is (zoals getest bij STAP 3) of zodra CHARGE de accu voldoende hersteld is tijdens STAP 4. Het programma ampmatic™ voor de monitoring en controle van de laadstroom bepaalt automatisch de efficiëntste laadstroom voor de aangesloten accu op basis van de laadtoestand, de conditie van de accu en het opslagvermogen.
-
Page 30: Beperkte Garantie
NOTITIE: Zie www.tecmate.com/warranty of contacteer warranty@tecmate.com. copyright © 2015 TecMate International OptiMate 6 en de namen van andere producten zoals BatteryMate, TestMate en TestMate mini, die in deze instructies worden vermeld, zijn gedeponeerd handelsmerken van TecMate International NV. Meer informatie over TecMate producten kan op www.tecmate.com worden gevonden. - Page 31 12V-24V 12V-24V CARICABATTERIE AUTOMATICO CON DIAGNOSTICO PER BATTERIE PIOMBO-ACIDO 12 V & 24V. CARICABATTERIE AUTOMATICO CON DIAGNOSTICA PER BATTERIE PIOMBO-ACIDO 12 V DA 3 Ah A 240 Ah oppure BATTERIE PIOMBO-ACIDO DA 24 V FINO A 120 Ah AVVERTENZA DI SICUREZZA E NOTE: SE NON LO SI È...
- Page 32 FASE 1 LED 1a/1b: conferma che il caricabatterie è collegato all’alimentazione CA e indica quale tensione della batteria è selezionata (1a = 12 V, 1b = 24 V). Selezione 1a 1b Modifica della tensione selezionata: scollegare il caricabatterie dalla batteria. Tenere della premuto il dito sul sensore di selezione-TOCCO.
- Page 33 FASE 5 LED #4 : GIALLO La modalità di CARICA si attiva se la batteria è stata scaricata più del 50% (come rilevato dal test alla FASE 3) o se è stata sufficientemente CARICA recuperata durante la FASE 4. Il programma di monitoraggio e controllo della corrente di carica ampmatic™ stabilisce automaticamente il livello più...
-
Page 34: Garanzia Limitata
NOTA: Vede www.tecmate.com/warranty o contattate warranty@tecmate.com copyright © 2015 TecMate International OptiMate 6 ed i nomi degli altri apparecchi citati in questo testo come BatteryMate, TestMate e TestMate mini, sono marchi registratii di TecMate International SA. Si può trovare più informazione sui prodotti di TecMate da... - Page 35 12V-24V 12V-24V AUTOMATISK DIAGNOSTIKLADDARE FÖR 12 V BLY-SYRABATTERIER FRÅN 3Ah TILL 240Ah eller 24 V BLY-SYRABATTERIER UPP TILL 120Ah FÅR INTE ANVÄNDAS FÖR NiCd-, NiMH- eller Li-Ion-batterier ELLER FÖR ICKE UPPLADDNINGSBARA BATTERIER. SÄKERHETSVARNING OCH SÄKERHETSINFORMATION: OM DU INTE REDAN HAR LÄST IGENOM FÖREGÅENDE SIDOR, MÄRKTA MED ”VIKTIGA SÄKERHETSANVISNINGAR”, MÅSTE DU GÖRA DET INNAN DU ANVÄNDER LADDAREN.
- Page 36 STEG 1 Lysdiod 1a/1b: Bekräftar att laddaren försörjs med växelström och visar vald batterispänning (1a = 12 V, 1b = 24 V). Val av 1a 1b Ändra spänning: Koppla bort laddaren från batteriet. Håll fingret mot knappen Select. spänning Lysdioden för vald spänning tänds (vid tryck på 12 V tänds alltså lysdioden för 12 V). Efter tre sekunder ändras vald spänning, och lysdioderna SAVE (nr 3), CHARGE (nr 4) och TEST (nr 6, 7 och 8) blinkar två...
- Page 37 STEG 5 Lysdiod #4 : GUL Läget CHARGE (Laddning) aktiveras om batteriets laddningsstatus är 50 % eller högre (enligt testet i STEG 3) eller så snart batteriet har återställts tillräckligt LADDNING under STEG 4. Vilken laddingshastighet som är mest effektiv för det anslutna batteriet fastställs automatiskt av ampmatic™-programmet för övervakning och styrning av laddningsström, utifrån batteriets laddningsstatus, skick och elektriska laddningskapacitet.
- Page 38 NOTERA: Se www.tecmate.com/warranty eller kontakta warranty@tecmate.com copyright © 2015 TecMate International OptiMate 6 och namnger av andra produkter som nämns i dessa anvisningar liksom BatteryMate, TestMate och TestMatemini, är registreringsvarumärken av TecMate International NV. Mer information på TecMate produkter kan finnas på www.tecmate.com.
- Page 39 MOUNTING NOTICE NOTICE DE MONTAGE NOTA PARA EL MONTAJE NOTA DA MONTAGEM WANDMONTIERUNG MUURBEVESTIGING 4,5mm L +20mm NOTA DEL MONTAGGIO VÄGGMONTERING 2m / 7ft max. EXTEND OPTIONS: O-3 (1.8m / 6ft) O-13 / O-23 (4.6m / 15ft)
- Page 40 Discover our full range of accessories at optimate1.com Découvrez notre gamme complète optimate1.com d’accessoires sur Descubra nuestra gama completa de optimate1.com accesorios en Descubra toda a nossa gama de acessórios optimate1.com Entdecken Sie unser komplettes optimate1.com Zubehörsortiment auf Ontdek ons volledig gamma toebehoren op optimate1.com Scoprite la nostra gamma completa di optimate1.com...