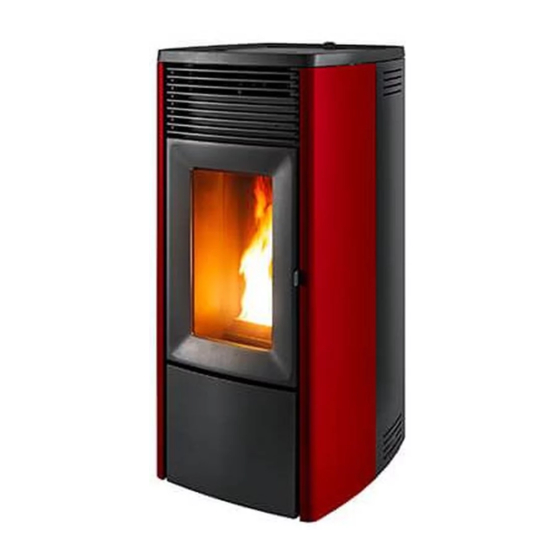
MCZ EGO AIR 8 M2 Installation Manual
Sealed pellet stove
Hide thumbs
Also See for EGO AIR 8 M2:
- Installation manual (40 pages) ,
- Installation manual (72 pages) ,
- Installation manual (60 pages)

Related Manuals for MCZ EGO AIR 8 M2


Summary of Contents for MCZ EGO AIR 8 M2
- Page 1 INSTALLATION GUIDE SEALED PELLET STOVE EGO AIR 8 M2 EGO COMFORT AIR 10 M2 PART 2 - OPERATION AND CLEANING Translation of original instructions...
-
Page 2: Table Of Contents
TABLE OF CONTENTS TABLE OF CONTENTS ....................II 13-FIRST START-UP .....................3 14-GRAPHIC PANEL .....................4 15-DISPLAYS ......................6 16-OPERATING MODES ....................9 17-SELECTING THE OPERATING MODES ...............13 18-MANUAL MODE ....................14 19-AUTO MODE ......................15 20-COMFORT MODE ....................16 21-OVERNIGHT MODE ....................17 22-TURBO MODE .......................18 23 - FANS ........................19 24-SILENT MODE .......................21 25-START&STOP .......................22 26-TIMER .........................25... -
Page 3: 13-First Start-Up
13-FIRST START-UP WARNINGS BEFORE IGNITION GENERAL WARNINGS Remove all parts that may burn from the brazier and the glass (manual, various adhesive labels or any polystyrene). Check that the brazier is positioned correctly and rests properly on the base. The first ignition may not be successful as the feed screw is empty and does not always manage to load the brazier with the required amount of pellets in time to light the flame. -
Page 4: 14-Graphic Panel
14-GRAPHIC PANEL MAESTRO GRAPHIC PANEL The “foldaway” panel is located at the back of the product. Grasp the panel at the sides with your hand and lift it. The panel will block in the raised position. The display is graphic only while the controls are “soft touch” Attention! It is advisable to put the panel in the “HIDDEN”... - Page 5 14-GRAPHIC PANEL KEY FUNCTIONS CONTROL AND MENU SCROLLING KEYS FAN CONTROL MENU NAVIGATION IN THE DIFFERENT OPERATING ON/OFF AND CONFIRMATION OF MENU MODES (PROGRAMMES) CHOICES START&STOP ENABLING/DISABLING GRAPHIC DISPLAY CHRONO/SLEEP ENABLING/DISABLING Technical Dept. - All rights reserved - Reproduction prohibited...
-
Page 6: 15-Displays
15-DISPLAYS DISPLAY AT FIRST PRODUCT IGNITION The display shows an additional sequence to that described in the following paragraph only when the product is first powered up. This additional sequence makes it possible to adjust/confirm the current date and time (to make the adjustment later, see the dedicated user menu paragraph). - Page 7 15-DISPLAYS Display with the product off 1. WI-FI active and connected, the icon is only present if the product is connected to a router or a network. 2. Bluetooth active and/or connected. The icon is present if the Bluetooth has been activated and turns blue if it is connected to a paired device.
- Page 8 15-DISPLAYS Display with the product on 1. COMFORT mode 2. Operating mode crown 3. WI-FI active and connected 4. Bluetooth active and connected 5. AUTO mode 6. OVERNIGHT mode 7. Room temperature recorded by the local probe or remote control (OPTIONAL) 8.
-
Page 9: 16-Operating Modes
16-OPERATING MODES MAESTRO technology allows the heater to express its utmost potential with even an easier and more intuitive use. A real integrated micro-computer communicates with your smartphone and further improves the performance of the equipment that continues to work perfectly even in non-ideal conditions. - Page 10 16-OPERATING MODES DISPLAY STANDBY The panel automatically goes into STAND-BY mode after a 2” time-out (the time can be changed from the panel menu). The stand-by mode still indicates changes in the operating mode of the equipment (e.g.: pellet reserve, shutdown or cooling) and the room temperature changes with a 60 second interval.
- Page 11 16-OPERATING MODES FEED SCREW ACTIVATION (FIRST IGNITION OR AFTER HOPPER EMPTYING) Prior to first product ignition, it is necessary to load the fuel and preload the pellets inside the feed screw for loading the fuel in the brazier. To do this, simply press and hold the key for 10 seconds and the “feed screw loading”...
- Page 12 16-OPERATING MODES IGNITION Display upon ignition • Press and hold the key for at least 2”, the product switches to on and the key flashes until the ignition phase has been completed. On the other hand, it remains steadily lit and white during operation. •...
-
Page 13: 17-Selecting The Operating Modes
17-SELECTING THE OPERATING MODES SELECTING THE OPERATING MODES Navigation in the different operating modes takes place using the key. Every time the key is pressed, the next icon on the mode crown lights up in clockwise direction. The icon and the dashes turn red, showing the change of mode. The change of mode takes place after 3”... -
Page 14: 18-Manual Mode
18-MANUAL MODE MANUAL MODE In manual mode it is possible to set the power of the flame from 1 to 5 at your discretion to adjust the amount of heat. In this mode there is no temperature control and the equipment works constantly at the set power(s) Press the key to select the icon... -
Page 15: 19-Auto Mode
19-AUTO MODE AUTO MODE In AUTO mode, you can set the intended temperature in the room and the equipment runs at maximum power until the chosen temperature is reached. Once the temperature is reached, the equipment reduces its power to a minimum to hold the temperature. If even the minimum operating speed causes a further increase in the room temperature, it is advisable to consider the combined operation with the START&STOP function (see the specific chapter) Press the... -
Page 16: 20-Comfort Mode
20-COMFORT MODE COMFORT MODE In COMFORT mode, you can set the intended temperature in the room and the equipment runs at medium power until the chosen temperature is reached. Once the temperature is reached, the equipment reduces its power to a minimum to hold the temperature. If even the minimum operating speed causes a further increase in the room temperature, it is advisable to consider the combined operation with the START&STOP function (see the specific chapter) Press the... -
Page 17: 21-Overnight Mode
21-OVERNIGHT MODE OVERNIGHT MODE In OVERNIGHT mode, you can set the intended temperature in the room and the equipment runs at low power until the chosen temperature is reached. Once the temperature is reached, the equipment reduces its power to a minimum to hold the temperature. If even the minimum operating speed causes a further increase in the room temperature, it is advisable to consider the combined operation with the START&STOP function (see the specific chapter) Press the... -
Page 18: 22-Turbo Mode
22-TURBO MODE TURBO MODE In TURBO mode, the equipment works for the limited time of 20 minutes at its maximum power and ventilation without the possibility of changing its setting. Press the key to select the icon. icon and the three adjacent dashes light up in red and a confirmation request appears when selecting the mode. -
Page 19: 23 - Fans
23 - FANS FAN BASE ADJUSTMENT You can use the key to adjust the equipment fan/s. The first time you press it allows you to enter the edit screen of the first fan. keys change the fan speed. Pressing the key repeatedly allows you to choose which fan to modify, from a minimum of 1 to 4 fans, according to the composition/construction of the product. - Page 20 23 - FANS The available values start from NO AIR (fan off)/LOW AIR (fan at minimum possible operating speed) up to power 5 (MAXIMUM). The AUTO mode is added to these choices, which allows self-adjustment of the fan based on the flame power. This mode is very practical and recommended because this way, the product always generates its maximum heat with minimal noise thanks to parameters that are tested by the manufacturer.
-
Page 21: 24-Silent Mode
24-SILENT MODE ENABLING THE SILENT MODE There is an advanced feature to be able to set the product to maximum silence by following an automatic procedure that first allows all the residual heat to be evacuated and then set all the fans to minimum power. Press and hold the key for 5”. -
Page 22: 25-Start&Stop
25-START&STOP START&STOP The START&STOP function switches off the product when it reaches the required room temperature and if the set temperature hysteresis is also respected. Pressing the button activates the START&STOP function directly and the small house near the temperature turns into the icon to indicate its activation. - Page 23 25-START&STOP INTERVENTION DELAY AND ADJUSTMENTS OF THE START&STOP TEMPERATURE HYSTERESIS When the room temperature is reached, there is a waiting time for intervention to prevent the equipment from suddenly turning on/off as the room temperature drops/rises, for example, when a door or an external window is opened. This waiting time therefore allows you to be sure that the room temperature has actually dropped for a certain time inside the room (for example 5 minutes).
- Page 24 25-START&STOP ACTIVATING START&STOP WITH THE EQUIPMENT OFF If the equipment is OFF the START&STOP needs to be activated, the following occurs when the key is pressed: • The display changes from OFF to STAND BY, • the house icon becomes and the key turns steady green •...
-
Page 25: 26-Timer
26-TIMER ACTIVATING THE CHRONO FUNCTION Pressing the key once (or an odd number of times) will activate the CHRONO function directly. The first time the button is pressed, the following appears: CHRONO OFF Use the keys to select CHRONO ON Wait 3”... -
Page 26: 27-Sleep
27-SLEEP ACTIVATING THE SLEEP FUNCTION Unlike the CHRONO, the SLEEP function sets an unplanned switch-off of the product besides the CHRONO programming Pressing the key twice (or an even number of times) activates the SLEEP function. The SLEEP function cannot be selected with the stove OFF The following appears: SLEEP OFF Use the... -
Page 27: 28 - Wi-Fi/Wps/Bluetooth
28 - WI-FI/WPS/BLUETOOTH ENABLING/DISABLING BLUETOOTH BLUETOOTH is independent from the WI-FI and is enabled by pressing simultaneously and continuously for 5 seconds Pairing is enabled during activation and when you return to the home screen, the icon appears and flashes waiting for connection with an already registered device. The Bluetooth connection is not deactivated but is always waiting for a connection (with devices that are already registered), so that if a paired device is within range at different times of the day, it automatically connects to the product (just like a mobile phone when entering the car). - Page 28 28 - WI-FI/WPS/BLUETOOTH ENABLING/DISABLING WI-FI and WPS By default, the product has Bluetooth network enabled and Wi-Fi active but not connected: this means that Wi-Fi is not visible until the product is connected to a Wi-Fi/home network. WI-FI MENU: Open the specific menu on the panel by simultaneously pressing the keys.
- Page 29 28 - WI-FI/WPS/BLUETOOTH The APP will search for available devices close by. It is possible that not only the Bluetooth network of the stove is found, but also that of other appliances; the stove is uniquely identified by the name MCZ_EP_123456, where the last 6 numbers are the last 6 digits of the stove’s serial number which can be found on the appliance’s label or in the instruction leaflet.
-
Page 30: 29-Shutdown
29-SHUTDOWN SHUTDOWN (in various states) Just like switch-on, press and hold for 2” and the display will switch to OFF/stand-by mode. OFF display. • Room temperature • Current time • • icon is only present if the product is connected to a router; otherwise it is off and the icon is present if Bluetooth has been enabled. -
Page 31: 30-Extra Displays
30-EXTRA DISPLAYS FEED SCREW AUTOMATIC RELEASE If the ON-OFF key turns yellow during operation, it means that the feed screw is performing a rotation cycle in the reverse direction to release some pellets in it. The cycle is automatic and there is no need for user intervention. YELLOW ICON FORCED COOLING A compulsory 30-minute cooling cycle takes place when the product works continuously for many... - Page 32 30-EXTRA DISPLAYS MANAGING OTHER NOTIFICATION ICONS The following are other notification icons that must appear on the panel: The pellet reserve icon appears if the specific sensor (optional) is installed. The symbol appears inside the crown when the pellet level drops below the sensor: grey during operation and red in OFF or STAND BY for START&STOP The icon does not appear during shutdown and cooling If the panel is in STANDBY, the reserve icon is displayed alternately...
- Page 33 30-EXTRA DISPLAYS COOLING ICON Display in COOLING status after shutdown. FORCED COOLING ICON FORCED COOLING STAND BY display. Exceeding the maximum hours of operation at maximum power (e.g.: 6 hours). CHRONO and SLEEP Example of the CHRONO/SLEEP icon display when OFF and of the CHRONO with STAND BY display and product ON.
-
Page 34: 31-User Menu
31-USER MENU USER MENU Pressing the button continuously for 5” grants access to a user menu scrolled with the buttons. The exit TIME OUT from this screen is 2 minutes, unless you forcibly exit with The selection box indicates the item you are selecting and moves with Press to select the menu item To exit and NOT confirm the choices... - Page 35 31-USER MENU CONTROLS DISPLAY CONTROLS INFO Read-only to exit (+beep) INFO The TIME OUT of this screen is 2 minutes LIVE 2142 2100 ACTIVE 183° 47,5° 9999h A DATE Once you have entered the menu, the day turns red to indicate where the adjustment of the values begins.
- Page 36 31-USER MENU TONE • to change the values • Available values – SILENT / NORMAL / HIGH • to confirm and return to the previous page (+beep) • to exit without confirming (+beep) NORMAL is the factory setting ADAPTIVE MODE • to change the values • The available values -ON and OFF • to confirm and return to the previous page (+beep) •...
- Page 37 31-USER MENU STANDBY DISPLAY • to change the values • The available values from 0 to 600”. The next step after 600” is OFF, which means that the display NEVER goes into standby. • to confirm and return to the previous page (+beep) • to exit without confirming (+beep) CLEAN GRATE (only MATIC and HYDRO) • to change the values •...
- Page 38 31-USER MENU EXTERNAL THERMOSTAT If an external thermostat is connected, it is no longer possible to indicate the room temperature recorded by the local probe and adjust the intended temperature from the panel. The display will therefore be shown in AUTO/COMFORT/OVERNIGHT mode: ON indicates that the thermostat contact is CLOSED and there is OFF indicates that the thermostat contact is OPEN and there is NO a power demand.
-
Page 39: 32-Pellet Level Sensor
32-PELLET LEVEL SENSOR ASSEMBLING PELLET LEVEL SENSOR (optional) The pellet sensor is a low fuel indicator that warns the user that the pellets are finishing. With the hopper empty, lift the pellet loading cover and manually remove the cap “J” fitted inside, then insert the pellet level sensor “K”... -
Page 40: 33-External Thermostat
33-EXTERNAL THERMOSTAT EXTERNAL THERMOSTAT CONNECTION (OPTIONAL) To connect the external thermostat, disconnect the room probe from the terminal in position 11 of the circuit board and connect the wiring of the external thermometer. -
Page 41: 34-Safety Devices
34-SAFETY DEVICES SAFETY DEVICES The product is fitted with the following safety devices. SMOKE TEMPERATURE PROBE This detects the temperature of the smoke, thereby enabling starting or stopping the product when the smoke temperature drops below the preset value. PELLET HOPPER TEMPERATURE PROBE If the temperature exceeds the preset safety value, it immediately stops the product, which must cool down before the stove is restarted. -
Page 42: 35-Alarms
35-ALARMS ALARMS In the event of an alarm, the crown turns red for “attention”. symbol and the alarm code appear. button turns red and flashes very fast All other keys are disabled. PLEASE NOTE Press the button for at least 3” to reset the alarm. - Page 43 35-ALARMS ALARM SIGNALLING If an operating anomaly occurs the stove starts switching off due to the alarm. The following table describes the possible alarms indicated by the stove, associated to the respective code that appears on the emergency panel and helpful tips to solve the problem. MESSAGE ON DISPLAY TYPE OF PROBLEM SOLUTION...
- Page 44 35-ALARMS Faulty gear motor driving sensor (PWM) Contact an authorised service centre. GEAR MOTOR SENSOR FAULT Electronic control unit overheating The structure is too hot because the product has been used for too long at the maximum power or there is poor BOARD TEMPERATURE ventilation.
- Page 45 If these causes are excluded, check and if necessary clean the smoke duct and flue (it is recommended for this operation to be carried out by an MCZ qualified technician). The product can be switched on again only after having eliminated the cause permanently.
- Page 46 35-ALARMS If alarm A21 is triggered often, please note that: Stove door open Close the door Fuel loading hatch open Close the hatch. PRESSURE Lower the fuel level in the hopper. SWITCH Air pressure switch Draught difficulties or clogged brazier. Check whether the brazier is clogged by deposits and clean it, if necessary.
- Page 47 35-ALARMS Remembering that the draught recommended for the products to work properly is 10 Pa at maximum capacity and 5 Pa at minimum (according to the technical data sheet found in the user and maintenance manual), adjustments may be required in worse draught conditions (also due to the position of the flue in areas that are particularly subject to adverse weather such as prevailing winds, snow, northern exposure, etc.) so as to always guarantee the required negative pressure inside the hopper.
- Page 48 35-ALARMS NEGATIVE PRESSURE INSIDE THE HOPPER WITH FACTORY-SET PARAMETERS AND A DRAUGHT OF 5 Pa (MINIMUM RECOMMENDED) POWER VALUES 13.7/14.2 Pa 15.1/15.6 Pa 17.1/17.5 Pa 19.1/19.5 Pa 22.0/22.2 Pa Draught 6 kW 95°C 110°C 125°C 141°C 165°C Smoke temperature 13.8/14.3 Pa 15.6/16.1 Pa 17.8/18.0 Pa 21.7/22.2 Pa...
-
Page 49: 36-Recommendations For Safe Use
36-RECOMMENDATIONS FOR SAFE USE ONLY CORRECT INSTALLATION AND APPROPRIATE MAINTENANCE AND CLEANING OF THE APPLIANCE CAN GUARANTEE CORRECT OPERATION AND SAFE USE OF THE PRODUCT. We would like to inform you that we are aware of cases of malfunctioning of domestic pellet-fuelled heating products, mainly due to incorrect installation and use, as well as inadequate maintenance. -
Page 50: 37-Cleaning
37-CLEANING EXAMPLE OF A CLEAN BRAZIER EXAMPLE OF A DIRTY BRAZIER Only by properly servicing and cleaning the product is it possible to ensure its safety and correct operation. ATTENTION! All the cleaning operations of all parts must be performed with the product completely cold and unplugged. Disconnect the product from the 230V power supply before performing any maintenance operation The product requires little maintenance if used with certified good quality pellets. - Page 51 37-CLEANING REMEMBER THAT ONLY A CORRECTLY POSITIONED AND CLEAN BRAZIER CAN GUARANTEE SAFE IGNITION AND OPTIMAL OPERATION OF YOUR PELLET PRODUCT. IN CASE OF FAILED IGNITION AND AFTER ANY OTHER BLOCK STATE OF THE PRODUCT, IT IS ESSENTIAL TO EMPTY THE BRAZIER BEFORE EVERY RESTART For the brazier to be cleaned properly, remove it from its housing completely and thoroughly clean all the holes and the grate on the bottom.
- Page 52 In the event of breakage it must be replaced. ATTENTION! Never let the stove work without the air filter fitted. MCZ cannot be held liable for any damage caused to the internal components if this requirement is not complied with.
- Page 53 37-CLEANING PERIODIC CLEANING PERFORMED BY A QUALIFIED TECHNICIAN CLEANING THE HEAT EXCHANGER AND THE LOWER COMPARTMENT Half-way through the winter season, but especially at the end, the compartment through which the exhaust smoke passes will need to be cleaned. This cleaning process is mandatory in order to facilitate the general removal of all combustion residue, before it becomes very difficult to remove it due to moisture compacting it over time.
- Page 54 37-CLEANING CLEANING THE EXCHANGER CLEANING THE UPPER COMPARTMENT Clean the upper exchanger when the stove is cold and without the cladding in question. After removing the cap to clean the lower compartment “n” (see previous paragraph), use a stiff rod or a bottle brush to scrape the walls of the firebox (see arrow) to make the ash fall into the lower compartment.
- Page 55 37-CLEANING Use a stiff rod or a bottle brush to scrape the walls of the firebox (see arrow - respectively to the right and to the left of the firebox) to make the ash fall into the lower compartment. Use a vacuum cleaner nozzle to vacuum up any remaining ash and dust on the exchanger (see arrow). Then thoroughly clean the lower exchanger, replace any gaskets if needed, and reassemble.
- Page 56 37-CLEANING CLEANING THE SMOKE EXPULSION SYSTEM AND GENERAL CHECKS Clean the smoke outlet system, especially around the Tee fittings, elbows and any horizontal sections of the smoke duct. For information on periodically cleaning the flue, contact a skilled chimney sweep. Check the seal of the ceramic fibre gaskets on the door of the stove.
- Page 57 37-CLEANING SHUTDOWN (end of season) At the end of each season, before switching the product off, it is recommended to remove all the pellets from the hopper with a vacuum cleaner with a long pipe. We recommend removing the unused pellets from the hopper because they can retain moisture. Disconnect any combustion air ducting that can lead to moisture inside the combustion chamber but, above all, ask the specialised technician to refresh the paint inside the combustion chamber with the special silicone spray paints (available at any store or Technical Assistance Centre) during the necessary annual end of season scheduled maintenance operations.
-
Page 58: 38-Troubleshooting
38-TROUBLESHOOTING ATTENTION! All repairs must only be carried out by a specialised technician, with the product switched off and unplugged. ANOMALY POTENTIAL CAUSES SOLUTIONS The pellets are not fed into the The pellet hopper is empty. Fill the hopper with pellets. combustion chamber. - Page 59 38-TROUBLESHOOTING ANOMALY POTENTIAL CAUSES SOLUTIONS The product works for a few minutes Start-up phase is not completed. Repeat the ignition stage. and then switches off. Temporary power cut. Repeat ignition. Clogged smoke duct. Clean the smoke duct. Faulty or broken temperature probes. Check and replace the probes.
- Page 60 38-TROUBLESHOOTING ANOMALY POTENTIAL CAUSES SOLUTIONS The air fan does not switch on. The product has not reached the Wait. temperature. The product always runs at maximum The room thermostat is in maximum Set the temperature again. power when in automatic mode. position.
-
Page 61: 39-Circuit Board
39-CIRCUIT BOARD LIVE ELECTRICAL CABLES DISCONNECT THE POWER SUPPLY CABLE 230V BEFORE CARRYING OUT ANY OPERATIONS ON THE ELECTRICAL BOARDS 1. AIR PRESSURE SWITCH 9. MAESTRO CONTROL PANEL 2. KLIXON 10. SMOKE TEMPERATURE PROBE 3. AIR FAN 3 (IF ANY) 11. - Page 64 MCZ GROUP S.p.A. Via La Croce n°8 33074 Vigonovo di Fontanafredda (PN) – ITALY Telephone: 0434/599599 a.s. Fax: 0434/599598 Website: www.mcz.it e-mail: mcz@mcz.it 8902103900 REV.0 30/09/2021...