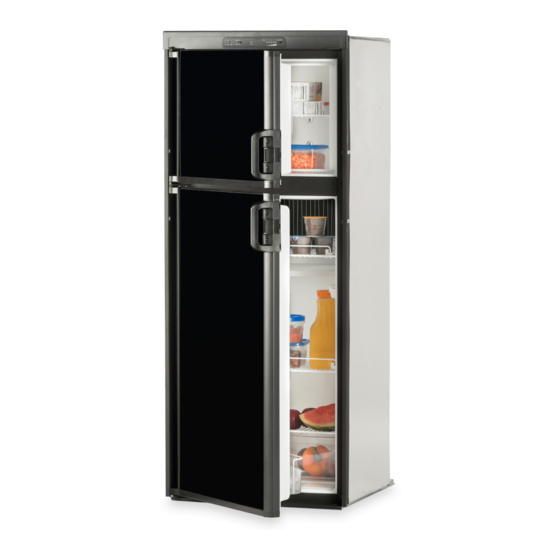
Dometic DM2652 Service Manual
Hide thumbs
Also See for DM2652:
- User manual ,
- Operating instructions manual (22 pages) ,
- Service instructions manual (7 pages)
Table of Contents
Advertisement
Quick Links
DM2652, DM2662, DM2663, DM2672, DM2682, DM2683, DM2852, DM2862,
DM2872, DM2882, DMR702 (first gen), DMR702-C, DMR702-D, DMR702-E, RM1350,
RM2351, RM2354, RM2451, RM2454, RM2551, RM2554, RM3762, RM3962
Americana and New Generation
EN
Refrigerators
Service Manual . . . . . . . . . . . . . . . . . . . . . . . .2
WARNING
Cancer and Reproductive Harm
www.P65Warnings.ca.gov
REFRIGERATION
REFRIGERATORS
WARNING: If the information in this manual is not followed
exactly, a fire or explosion may result, causing property
damage, personal injury, or death.
– Do not store or use gasoline or other flammable vapors
and liquids in the vicinity of this or any other appliance.
– WHAT TO DO IF YOU SMELL GAS
• Do not try to light any appliance.
• Do not touch any electrical switch.
• Do not use any phone in your recreational vehicle.
• Clear the recreational vehicle of all occupants.
• Turn off the gas supply tank valve(s) or main gas supply.
• Immediately call your gas supplier for instructions.
If you cannot reach your gas supplier, call the fire
department.
– Have the gas system checked and leakage source
corrected by a qualified installer, service agency,
manufacturer or dealer, or the gas supplier.
Form No. 3317426.000 01/21 | ©2021 Dometic Corporation
Advertisement
Chapters
Table of Contents

Related Manuals for Dometic DM2652


Summary of Contents for Dometic DM2652
- Page 1 REFRIGERATION REFRIGERATORS DM2652, DM2662, DM2663, DM2672, DM2682, DM2683, DM2852, DM2862, DM2872, DM2882, DMR702 (first gen), DMR702-C, DMR702-D, DMR702-E, RM1350, RM2351, RM2354, RM2451, RM2454, RM2551, RM2554, RM3762, RM3962 Americana and New Generation WARNING: If the information in this manual is not followed...
-
Page 2: Table Of Contents
Testing the Cooling Unit in Bypass Mode . . 31 Service Center & Dealer Locations Visit: www.dometic.com Replacing the Cooling Unit ....31 Testing the Communication Wire Harness for Read these instructions carefully. -
Page 3: Explanation Of Symbols And Safety
Americana and New Generation Refrigerators Explanation of Symbols and Safety Instructions 8.37 Testing the Thermo Fuse for Continuity CAUTION (Americana Models Only) ....46 Indicates a hazardous situation that, if not avoided, 8.38 Replacing the Thermo Fuse (Americana could result in minor or moderate injury. -
Page 4: General Safety Messages
Exposure to high concentrations of ammonia refrigerant could cause pulmonary edema (fluid in • Use only Dometic replacement parts and the lungs); chemical burns to the eyes, lungs, and components that are specifically approved for use skin;... -
Page 5: Intended Use
Americana and New Generation Refrigerators Intended Use 2 Intended Use For applicable exploded parts views or service kit information, visit www.dometic.com/en-us/us/for- This service manual is intended for use by OEM service business. center and dealer technicians. It is not intended for use... - Page 6 Troubleshooting Americana and New Generation Refrigerators Operational Issue Potential Reason Page The refrigerator operates in electric mode but The mode or a switch is set incorrectly. not in gas mode. The gas pressure is too low or absent. The knob on the gas valve has been turned to the off or closed position.
- Page 7 Americana and New Generation Refrigerators Troubleshooting Operational Issue Potential Reason Page The ice maker is over-filling or under-filling The ice maker water supply needs adjustment. during operation. The fresh food compartment freezes. The thermistor is not operating within the proper temperature range. There is a short or a failed circuit in the lower control module.
- Page 8 Troubleshooting Americana and New Generation Refrigerators Operational Issue Potential Reason Page New Generation models only The DC voltage is too low. • E0 is displayed. The lower control module cannot handle the AC ripple level. • Three thermostat range setting lights are There is a short or a failed circuit in the lower control module.
-
Page 9: General Information
Door Flapper (RM1350 model only) models. Door Hinge Doors 4.1 Tools and Materials Electrode Dometic recommends that the following tools and Flue Baffle materials be used while servicing the refrigerators: Gas Valve Heating Element Recommended Tools Ice Maker... - Page 10 Door Type Model Type Placeholder Cubic Feet Cubic Feet Placeholder Model Type Model Model Brand Brand D = Dometic R = Refrigerator Brand Brand R = Refrigerator Model M = Model Model M = Model 3 = New Generation Model Type...
- Page 11 Brand/Model Model Brand/Model RM = Refrigerator Model Brand Model Type 1350 = Elite Series Brand D = Dometic SL = Slim (24 in.) Model M = Model IM = Ice Maker Depth/Features Cubic Feet 7 = 7 ft WID =Water/Ice Dispenser in the Door M = Manual Door Lock (26 ...
-
Page 12: Component Locations
General Information Americana and New Generation Refrigerators 4.3 Component Locations This section provides the general component locations for each refrigerator model. Actual model component locations may vary. 1 Americana Model Component Locations Ice Maker Thermistor Heating Element Orifice Communication Wire Harness Interior Light Flue Baffle Gas Valve... - Page 13 Americana and New Generation Refrigerators General Information 2 New Generation Model Component Locations Door Flapper Thermistor Water Valve Flue Baffle Doors Interior Light Thermal Fuse Burner Assembly Ice Maker Ventilator Fan/Switch Gas Valve Electrode Communication Wire Harness Cooling Unit Orifice Upper Control Module Lower Control Module Thermofuse...
-
Page 14: Terminology
General Information Americana and New Generation Refrigerators 4.4 Terminology Term Definition A refrigerator designed to work on either 2-Way gas or 120 VAC A refrigerator designed to work on either 3-Way gas, 120 VAC, or 12 VDC The section of the heat exchanger used Condenser to cool and condense the incoming refrigerant vapor into a liquid... -
Page 15: Wiring Diagrams
M Thermistor 7 Blue 12VDC N Solenoid Valve 8 Gray O Retainer 9 White P Protective Earth DM2672, DM2682, DM2872, DM2882, DM2652, DM2662, DM2852, DM2862 (one fan) with and without ice maker Circuit Board Power P1–1 P1–2 P1–3 P2–1 P2–2... -
Page 16: Diagnostic Procedures
Diagnostic Procedures Americana and New Generation Refrigerators 6 Diagnostic Procedures Remember to check the basics, including contributing issues, before replacing any parts. Refer to “Installation This section has information to help you identify various Issues” on page 27 for more details. operational issues by diagnosing individual component parts. -
Page 17: Cooling Unit
Americana and New Generation Refrigerators Diagnostic Procedures Component Diagnostic Question Action Based On Status Page Cooling Unit Is there a strong smell of ammonia? Replace the cooling unit. Is a loud gurgling noise coming from the cooling unit? Is the refrigerator or freezer not cold Bypass the cooling unit and test it for blockage. -
Page 18: Doors
Diagnostic Procedures Americana and New Generation Refrigerators Component Diagnostic Question Action Based On Status Page Doors Is the refrigerator or freezer not cold Inspect the door for warping or other damage that would prevent it from enough in any operating mode? closing properly. -
Page 19: Flue Baffle
Americana and New Generation Refrigerators Diagnostic Procedures Component Diagnostic Question Action Based On Status Page Flue Baffle Does the refrigerator operate in gas Confirm that the flue baffle is properly hooked and positioned in the burner mode but does not cool properly? tube. -
Page 20: Ice Maker
Diagnostic Procedures Americana and New Generation Refrigerators Component Diagnostic Question Action Based On Status Page Ice Maker Does the ice maker not produce ice? Confirm that the 120 VAC supplied to the ice maker is within tolerance (± 10%). Use a substance thermometer to confirm that the temperature in the freezer, next to the ice maker, is 12°F (-11°C) or colder. -
Page 21: Lower Control Module
Americana and New Generation Refrigerators Diagnostic Procedures Component Diagnostic Question Action Based On Status Page Lower Control Module Is the refrigerator not operating and the Confirm that the voltage supplied to the lower control module at J4 is between interior light not on? (Americana models 10.5–13.5 VDC. -
Page 22: Orifice
Diagnostic Procedures Americana and New Generation Refrigerators Component Diagnostic Question Action Based On Status Page Is E4 displayed? (New Generation Confirm that the voltage supplied to the models only) lower control module at terminal 6 is between 10.5–18 VDC. Is the right temperature setting light 2. -
Page 23: Thermistor
Americana and New Generation Refrigerators Diagnostic Procedures Component Diagnostic Question Action Based On Status Page Thermistor Is the refrigerator not operating but the Confirm that the resistance of the thermistor is within specification. interior light turns on? 2. If the resistance is out of specification, Is the refrigerator or freezer not cold replace the thermistor. -
Page 24: Upper Control Module
Diagnostic Procedures Americana and New Generation Refrigerators Component Diagnostic Question Action Based On Status Page Upper Control Module Is the refrigerator not operating but the Confirm the mode or switch is set correctly. interior light is on? Does the refrigerator operate in electric mode but not in gas mode? Does the refrigerator operate in gas mode but not in electric mode? -
Page 25: Error-Based Diagnostics
Americana and New Generation Refrigerators Diagnostic Procedures 6.1 Error-Based Diagnostics Refer to the following tables to diagnose system errors for the Americana and New Generation models covered in this service manual. 6.1.1 Americana Americana models have a check indicator lamp on the control panel that illuminates to indicate operational errors. - Page 26 Diagnostic Procedures Americana and New Generation Refrigerators Fault Description Possible Cause Recommended Action Page E0 is displayed. The DC voltage is too low. Perform a diagnostic on the power supply. Three thermostat range setting The lower control module cannot lights are flashing. (First generation handle the AC ripple level.
-
Page 27: Installation Issues
Americana and New Generation Refrigerators Installation Issues Fault Description Possible Cause Recommended Action Page E3 is displayed. The thermal fuse is tripped. Perform a diagnostic on the thermal fuse. The thermofuse is defective. Perform a diagnostic on the thermofuse. Two thermostat range setting Improper installation caused an Perform a diagnostic on the air space and lights are flashing. -
Page 28: Power Issues
Installation Issues Americana and New Generation Refrigerators 7.2 Gas Pressure Issues Potential Operational Issue Issue Check that the gas pressure is between The check indicator lamp is on. (Americana Altitude 10.5–11.5 in. W.C., ideally as close to 11 W.C. (at models only) the refrigerator) as possible. -
Page 29: Ambient Temperature Issues
Americana and New Generation Refrigerators Service Procedures 7.6 Altitude Issues • Air space: after installing the refrigerator within the cabinetry, there should be less than 0.5 in. (13 mm) of The gas system on the refrigerators are not designed open air space on the sides and top of the refrigerator to operate at extremely high altitude. -
Page 30: Removing The Refrigerator From An Enclosure
Service Procedures Americana and New Generation Refrigerators 8.1 Removing the Refrigerator from 8.2 Performing a Gas Leak Test an Enclosure WARNING: FIRE AND/OR EXPLOSION HAZARD. Do not use matches, candles, or other sources of open flame when checking for gas leaks. Failure to obey this warning could result in death or serious injury. -
Page 31: Resistance
Americana and New Generation Refrigerators Service Procedures 8.5 Testing the Cooling Unit in 4. Disconnect the LP gas supply line from the gas valve and cap the gas line. Bypass Mode 5. Remove the nut and screws securing the gas valve to The temperature outside the refrigerator must be the burner housing. -
Page 32: Testing The Communication Wire Harness For Continuity
Service Procedures Americana and New Generation Refrigerators 6. Disconnect all wiring from the lower control module, 11. Perform these steps in reverse with the new cooling gas valve, thermo fuse, and ventilator fan/switch (if unit to complete the replacement. installed). 8.7 Testing the Communication Wire 7. -
Page 33: Testing A Lower Control Module Fuse For Continuity
Americana and New Generation Refrigerators Service Procedures 3. Gain access to the back of the upper control module Consult the operating manual for the multi-meter and disconnect the communication wire harness. for specific device function. 4. Pull the defective communication wire harness out of 8.10 Replacing the Lower Control the refrigerator. -
Page 34: Replacing The Door
Service Procedures Americana and New Generation Refrigerators 8.11 Replacing the Door 8.12 Testing the Door Gasket 12 Testing the Door Gasket Door Paper 1. Open the refrigerator door and place a piece of 11 Removing the Door paper, such as a dollar bill, near the door hinge and Door Hinge Door between the gasket and the liner of the refrigerator. -
Page 35: Repairing The Door Gasket
Americana and New Generation Refrigerators Service Procedures 8.13 Repairing the Door Gasket 8.14 Adjusting the Door Flapper (RM1350 Model Only) 13 Repairing the Door Gasket 14 Adjusting the Flapper Guides Door Door Gasket Upper Flapper Guide Lower Flapper Guide 1. Warm the gasket with a heat gun. Perform the following actions as needed to ensure that the door flapper operates smoothly and closes without To avoid melting or damaging the liner, take care to... -
Page 36: Replacing The Door Hinge
Service Procedures Americana and New Generation Refrigerators 8.15 Replacing the Door Hinge 8.16 Adjusting the Position of the Electrode 16 Adjusting the Electrode Gap Gap: 3/16 in. (4.8 mm) 1. Disconnect the unit from all power sources (120 VAC and 12 VDC). 15 Removing the Door Hinge 2. -
Page 37: Replacing The Electrode
Americana and New Generation Refrigerators Service Procedures 8.17 Replacing the Electrode 8.18 Replacing the Flue Baffle 17 Removing the Electrode 18 Removing the Flue Baffle Electrode Burner Assembly Flue Baffle Burner Tube On newer units, the electrode and high voltage 1. -
Page 38: Testing The Gas Valve For Resistance
Service Procedures Americana and New Generation Refrigerators 8.19 Testing the Gas Valve for 8.20 Replacing the Gas Valve Resistance 19 Testing the Gas Valve Solenoid Blades Gas Valve Solenoid 1. Perform the steps in “Replacing the Gas Valve” on page 38 to remove the gas valve. 20 Accessing the Gas Valve Gas Valve 2. -
Page 39: Testing The Heating Element For Resistance
Americana and New Generation Refrigerators Service Procedures 8.21 Testing the Heating Element for 8.22 Replacing the Heating Element Resistance 21 Testing the Heating Element Connectors Heating Element Connectors 22 Removing the Heating Element from the Flue Stack 1. Perform the steps in “Replacing the Heating Element” on page 39 to remove the heating element. -
Page 40: Bypassing The Ice Maker
Service Procedures Americana and New Generation Refrigerators 8.23 Bypassing the Ice Maker 8.24 Replacing the Ice Maker 23 Removing the Ice Maker Cover Cover Plastic Gear Remove the plastic cover on the front of the ice maker. 1. Turn the larger of the two plastic gears a half turn clockwise to force the ice maker to cycle. -
Page 41: Testing The Interior Light Switch For Continuity
Americana and New Generation Refrigerators Service Procedures 8.25 Testing the Interior Light Switch 8.26 Replacing the Interior Light for Continuity 25 Testing the Interior Light Blades Blades Light Switch 1. Perform the steps in “Replacing the Interior Light” on page 41 to remove the light switch. 2. -
Page 42: Replacing The Orifice
Service Procedures Americana and New Generation Refrigerators 8.27 Replacing the Orifice 8.28 Replacing the Re-igniter 28 Removing the Re-igniter 27 Removing the Orifice from the Gas Valve Re-igniter Gas Valve Orifice On some models, the re-igniter is integrated into 1. Disconnect the unit from all power sources (120 VAC the lower control module and the entire module and 12 VDC). -
Page 43: Testing The Relay For Continuity
Americana and New Generation Refrigerators Service Procedures 8.29 Testing the Relay for Continuity 8.30 Replacing the Relay (RM1350 (RM1350 Model Only) Model Only) 30 Removing the Relay from the Refrigerator 29 Testing the Relay Relay Screw Terminals 1. Disconnect the unit from all power sources (120 VAC 1. -
Page 44: Testing The Thermal Fuse For Continuity
Service Procedures Americana and New Generation Refrigerators 8.31 Testing the Thermal Fuse for 8.32 Replacing the Thermal Fuse Continuity 31 Testing the Thermal Fuse Connector and Wire End Connector Wire End 1. Perform the steps in “Replacing the Thermal Fuse” on page 44 to remove the thermal fuse. -
Page 45: Testing The Thermistor For Resistance
Americana and New Generation Refrigerators Service Procedures 8.33 Testing the Thermistor for 3. Repeat the continuity test on the second pin of the thermistor wire. Resistance Consult the operating manual for the multi-meter for specific device function. 8.35 Replacing the Thermistor 33 Testing the Thermistor Leads Leads Thermistor... -
Page 46: Replacing The Thermocouple
Service Procedures Americana and New Generation Refrigerators 8.36 Replacing the Thermocouple 8.37 Testing the Thermo Fuse for Continuity (Americana Models Only) 35 Removing the Thermocouple from the Burner Housing Thermocouple Burner Housing 1. Disconnect the unit from all power sources (120 VAC 36 Testing the Thermo Fuse Blades and 12 VDC). -
Page 47: Replacing The Thermo Fuse
Americana and New Generation Refrigerators Service Procedures 8.38 Replacing the Thermo Fuse 8.39 Testing the Thermofuse for (Americana Models Only) Continuity (New Generation Models Only) 37 Removing the Thermo Fuse 38 Testing the Thermofuse Blades Thermo Fuse Flue Stack Thermofuse Blades 1. -
Page 48: Replacing The Thermofuse
Service Procedures Americana and New Generation Refrigerators 8.40 Replacing the Thermofuse 1. Disconnect the unit from all power sources (120 VAC and 12 VDC). (New Generation Models Only) 2. Remove the upper control module from the upper housing. 3. Disconnect the communication wire harness. 4. -
Page 49: Replacing The Ventilator Fan Switch
Americana and New Generation Refrigerators Service Procedures 8.43 Replacing the Ventilator Fan 8.44 Testing the Water Valve for Switch Resistance 43 Testing the Water Valve Blades Blades Water Valve 42 Removing the Ventilator Fan Switch 1. Perform the steps in “Replacing the Water Valve” on page 50 to remove the water valve. -
Page 50: Replacing The Water Valve
10 Replacement Parts For the most current parts information, visit www. dometic.com. 44 Disconnecting the Water Valve Water Lines Screws Mounting Bracket Water Valve 1. - Page 51 Americana and New Generation Refrigerators...
- Page 52 Mobile living made easy. dometic.com YOUR LOCAL YOUR LOCAL YOUR LOCAL DEALER SUPPORT SALES OFFICE dometic.com/dealer dometic.com/contact dometic.com/sales-offices...