
Related Manuals for Vizio SB36514-G6


Summary of Contents for Vizio SB36514-G6
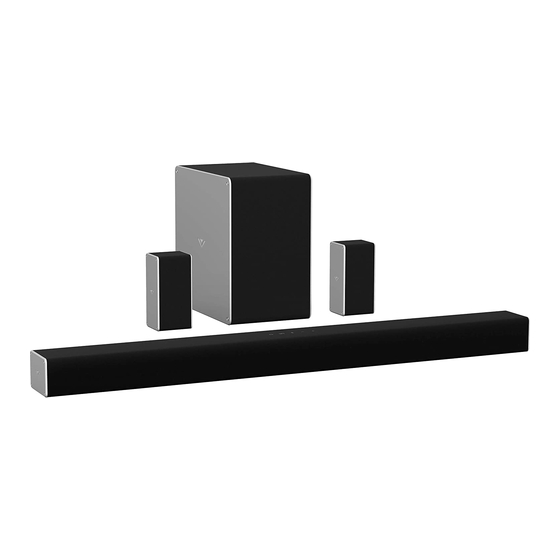
- Page 1 USER MANUAL Model: SB36514-G6 VIZIO 36" 5.1.4 Channel Sound Bar Home Theater Sound System Please read this guide before using the product.
- Page 2 IMPORTANT SAFETY INSTRUCTIONS Your Unit is designed and manufactured to operate within defined design limits, and misuse may result in electric shock or fire. To prevent your Unit from being damaged, the following rules should be observed for its installation, use, and maintenance. Please read the following safety instructions before operating your Unit.
- Page 3 • When connected to a power outlet, power is always flowing into your Unit. To totally disconnect power, unplug the power cord. • Do not overload power strips and extension cords. Overloading can result in fire or electric shock. • The wall socket should be located near your Unit and be easily accessible •...
-
Page 4: Table Of Contents
TABLE OF CONTENTS Package Contents ............................5 Controls & Connections ..........................6 First-Time Setup...............................10 Proper Placement ............................16 Using the Remote ............................17 Using your tablet or smartphone as a remote .....................18 LED Indicators ..............................19 Using Button Combinations ...........................24 Programming the Sound Bar .........................25 Bluetooth Audio Pairing ..........................26 Using Bluetooth mode ............................27 Advanced Setup ...............................28... -
Page 5: Package Contents
PACKAGE CONTENTS VIZIO 2 x Satellite Remote Control Sound Bar Wireless Subwoofer Speakers with 2x AAA Batteries Stereo RCA to 3.5mm to 3.5mm Digital Optical 3.5mm Audio Cable Audio Cable HDMI Cable Cable 2 x Satellite Speaker 4 x Cable Ties... -
Page 6: Controls & Connections
CONTROLS & CONNECTIONS Back of Sound Bar OPTICAL Power Port Digital Optical Audio In 3.5mm IN Analog Audio In (Stereo 3.5mm) English - 6... - Page 7 USB* HDMI IN USB In HDMI In HDMI OUT Ethernet HDMI Out (ARC) Ethernet In * Supports .WAV and .MP3 file format playback only. English - 7...
- Page 8 Top of Sound Bar Power Press to turn sound bar on or off. Input Press to change the audio source. Volume Increase or decrease the loudness of the audio. Bluetooth Input Hold to pair. (See ‘Bluetooth Audio Pairing’ for more information.) English - 8...
- Page 9 Back of Subwoofer Back of Satellite Speaker Pairing Button LED Indicator Power Port Power Button Satellite Speaker Port (Connects to subwoofer) Satellite Speaker Ports Connects to Left(blue cable)/Right (gray cable) Satellite Speakers English - 9...
-
Page 10: First-Time Setup
FIRST-TIME SETUP Back of Sound Bar CHOOSE ONE CABLE* 3.5MM TO DIGITAL OPTICAL and connect it to your tv RCA CABLE CABLE † Ensure your TV powered on GOOD BETTER † When using the digital input, if there is no audio: * Not all TVs/Displays have the audio outputs shown (A) try setting the TV/Display output to PCM or above. - Page 11 Do not use HDMI IN for First-Time Setup. HDMI ARC CABLE See Advanced Setup if you would like to connect HDMI devices (such as Blu-ray players, cable BEST boxes, and game consoles) to your Sound Bar. Connect the sound bar to your TV/Display* using HDMI cables send Video (Out) and receive one of the connection types to the left.
- Page 12 Back of Sound Bar Connect the power cable to the sound bar AC IN as shown. Plug the power cable into an electrical outlet. The sound bar will automatically begin searching for an active input.* The LED indicators on the front of the sound bar will begin cycling in pairs through inputs until an audio source is detected.** Tip: Pressing the INPUT button will...
- Page 13 Connect the satellite speakers to the To properly connect the subwoofer and satellite speakers, ensure the notches on the cables and subwoofer using the included satellite ports line up and that the cable is fully inserted. speaker audio cables. Subwoofer Satellite Speaker Satellite Speaker (Left)
- Page 14 Connect a power cable to the subwoofer. Plug the power cable into a power outlet. The subwoofer will automatically power on and link to the sound bar when plugged in. The LED will glow solid to confirm. English - 14...
- Page 15 For example, if you connected your TV to AUX, set the sound bar to AUX. When needed, VIZIO recommends replacing the batteries that came with this remote with two, new Duracell ‘AAA’ alkaline batteries. English - 15...
-
Page 16: Proper Placement
PROPER PLACEMENT For the best surround sound experience, position the sound bar, subwoofer, and satellite speakers as shown. The sound bar should be close to ear level. You will get the best sound effect if your ceiling is flat and 7.5 ft to 12 ft high. Sound bar is centered below the TV. -
Page 17: Using The Remote
USING THE REMOTE Display Displays Sound Bar Settings Power Press to turn on or off Menu Press to access the menu Input settings *Press to change the input Enter/Play/Pause source Press to select an option Press to play or pause Previous Press to return to previous track Next... -
Page 18: Using Your Tablet Or Smartphone As A Remote
USING YOUR TABLET OR SMARTPHONE AS A REMOTE Download the VIZIO SmartCast Mobile™ app and turn your smartphone or tablet into a remote to control your sound bar system. • Visit www.vizio.com/smartcastapp on your device to download. • Install the app and follow the on screen instructions to setup your device. -
Page 19: Led Indicators
Press the Enter button on the remote. The sound bar will be discoverable for (When searching for device) Pairing 15 minutes. You can now search for the sound bar (VIZIO SB36514*) using Flash from Bottom to Top your Bluetooth Device. The sound bar will power down if no device is found. - Page 20 Function LED Behavior Description Press the Next/Previous button to increase/decrease the level of the height Height Levels Two center LEDs speakers. Use this adjustment to accommodate various ceiling heights and indicate height level 0. Height seating distances. Press the Next/Previous button to increase/decrease the surround sound Surround Levels Two center LEDs level.
- Page 21 Function LED Behavior Description Surround On/Off Press the Next/Previous button to enable/disable surround sound. When Surround On disabled (Off), the satellite speakers and satellite height channels will be Surnd disabled. Surround Off Press the Next/Previous button to toggle between 3 preset height channels. When On is selected, the height speakers are turned on.
- Page 22 TV Remote On TV Remote Press the Next/Previous button to enable/disable VIZIO TV Remotes. When enabled (On), you can use a VIZIO TV remote control to turn on the sound bar VZtv Rmt On TV Remote Off (using the TV Volume Up button) and control volume.
- Page 23 (Amber) indicator LED will light up for 5 seconds before fading away. detected. When the sound When Wi-Fi is successfully set up via the VIZIO SmartCast app or through an bar successfully Wi-Fi Indicator LED ethernet connection, the blue indicator LED will light up to confirm a successful connection.
-
Page 24: Using Button Combinations
3 times Angle Note: This will erase all settings and preferences that you have set. Enable/disable the use of a VIZIO TV remote control to power on and adjust the volume of the Enable VIZIO VIZIO TV sound bar. -
Page 25: Programming The Sound Bar
PROGRAMMING THE SOUND BAR You can program your sound bar to accept TV remote IR commands. Press the Menu button on the remote, then use the Up/Down buttons to navigate to Prg Remote. Use the Next/Previous buttons to toggle through Learn Vol -, Learn Vol +, and Learn Mute. -
Page 26: Bluetooth Audio Pairing
Once the device is paired, the LED Indicators will stop flashing.) You can now search for the sound bar (VIZIO SB36514*) using Top of Sound Bar your Bluetooth device. For more information, refer to the user manual that came with the other device. -
Page 27: Using Bluetooth Mode
USING BLUETOOTH MODE Your sound bar supports music streaming from smart phones, tablets, and computers with Bluetooth capability. Device compatibility will vary. Refer to your device’s documentation for more information. • Once you have paired your source device to the sound bar, as long as you stay within range of the sound bar, your device should remain paired. -
Page 28: Advanced Setup
ADVANCED SETUP Back of Sound Bar Note: Always use HDMI 2.0 certified cables. DIGITAL OPTICAL 3.5MM TO HDMI CABLE CABLE RCA CABLE USB Thumb Drive* Tablet/MP3 Player/Laptop Network Media Player Game Console Supports .WAV and .MP3 file format playback only. English - 28... -
Page 29: Advanced Setup - Hdmi Arc
ADVANCED SETUP - HDMI ARC Connect HDMI OUT (ARC) to the HDMI (ARC) port on your TV HDMI cables transmit both audio and video. To view video from these devices, turn the sound bar on, then set the sound bar input Note: Always use HDMI 2.0 HDMI CABLE to HDMI In. -
Page 30: Connecting With Hdmi Arc
CEC menu. The following steps are for use with a VIZIO TV, steps may differ by TV manufacturer. See your TV’s user manual for more information. CEC Function naming may differ by TV manufacturer. See your TV’s user manual for more information. - Page 31 Back of TV* Connect HDMI OUT (ARC) to the HDMI (ARC) port on your TV * HDMI ARC port location may differ by TV manufacturer. See your TV’s user manual for more information. English - 31...
-
Page 32: Connecting A Subwoofer
CONNECTING A SUBWOOFER The subwoofer has already been paired with the sound What does pairing mean? bar by VIZIO. However, the subwoofer may need to be Pairing means to wirelessly connect. re-linked to the sound bar if there is no sound coming from the subwoofer. -
Page 33: Wall-Mounting The Sound Bar
WALL-MOUNTING THE SOUND BAR Wall-Mount Screw Holes Back of Sound Bar Insert the two wall-mount screws into the wall-mount screw holes, and then tighten them with a Phillips screwdriver. Place the included wall mounting template against the wall under your TV. Mark the two bracket holes using a pencil. - Page 34 Be sure your screws are attached to wood studs, drywall anchors (for drywall), or concrete anchors (for brick/concrete walls). Screws for attaching the brackets to the wall are not included. Choose the screw type and length appropriate to your home’s construction. If in doubt, consult a professional installer. *Bracket Screw Not Included with sound bar Suggested Screw Size: 3.5 diameter.
-
Page 35: Wall-Mounting The Satellite Speakers
WALL-MOUNTING THE SATELLITE SPEAKERS To wall-mount the satellite speakers: *Bracket Screw Not Included with sound bar Attach the wall mount screw to the back of the Suggested Screw Size: satellite speaker. 3.5" diameter. 1.63" minimum length Secure the wall mount bracket to the wall. Bracket screw is not included. - Page 36 Why register? Customized Support Get assistance quickly with your information on hand. News and Offers Take advantage of the latest news and special offers from VIZIO. Safety and Satisfaction Stay up-to-date with important product updates and notifications. English - 36...
- Page 37 Award-Winning Customer Care At Your Convenience. NEED HELP? Go to: support.vizio.com Find help with: New product setup • • Connecting your devices • Technical problems • Product updates and more Live chat support available You can also contact our support team at:...
-
Page 38: Help & Troubleshooting
HELP & TROUBLESHOOTING Press the POWER button on the remote control or on the top of your sound bar. • There is no power. • Ensure the power cord is securely connected. • Plug a different device into the electrical outlet to verify that the outlet is working correctly. •... -
Page 39: Frequently Asked Questions
FREQUENTLY ASKED QUESTIONS • You can verify content via the VIZIO SmartCast Mobile app. Download the VIZO SmartCast Mobile app and sync your sound bar. Go to Settings >System Information to see what type of audio is being played. Visit vizio.com/smartcastapp for more on the SmartCast Mobile app. -
Page 40: Limited Warranty
VIZIO’s Responsibilities If VIZIO determines that a product is covered by this warranty, VIZIO will (at its option) repair or replace it, or refund the purchase price to you. There will be no charge for parts or labor during the warranty period. Replacement parts may be new or recertified at VIZIO’s option and sole discretion. Replacement parts and VIZIO’s labor are warranted for the remaining portion of the original warranty or for ninety (90) days from warranty service, whichever is longer. - Page 41 What to Do If You Are Not Satisfied With Service If you feel VIZIO has not met its obligations under this warranty, you may attempt to resolve the issue informally with VIZIO. If you are unable to resolve the issue informally and wish to file a formal claim against VIZIO, and if you are a resident of the United States, you must submit your claim to binding arbitration according to the procedures described below, unless an exception applies.
- Page 42 General No employee or agent of VIZIO may modify this warranty. If any term of this warranty, other than the class action waiver, is found to be unenforceable, that term will be severed from this warranty and all other terms will remain in effect. If the class action waiver is found to be unenforceable, then the entire section titled “Binding Arbitration Agreement;...
-
Page 43: Specifications
Specifications Forward Firing - Two 1.65” x 2.56” Full Range Driver for Each Channel (1 for left, 1 for right, 1 for center) Sound Bar: Upward Firing - Two 1.65” x 2.56” Full Range Driver for Each Channel (1 for left, 1 for right) Forward Firing - Two 2.12"... -
Page 44: Legal & Compliance
LEGAL & COMPLIANCE FCC Class B Radio Interference Statement NOTE: This equipment has been tested and found to comply with the limits for a Class B digital device, pursuant to Part 15 of the FCC Rules. These limits are designed to provide reasonable protection against harmful interference in a residential installation. - Page 45 All software is provided subject to software license agreements and you agree that you will be bound by such license agreements in addition to other applicable terms of use. By using the VIZIO products, you agree to the VIZIO Terms of Service and Privacy Policy, as well as Google’s Terms of Service and Privacy Policy. The VIZIO Terms of Use and Privacy Policy may be updated from time to time and are available to view at http://www.vizio.com/ terms and http://www.vizio.com/privacy, respectively.
- Page 46 POWER SAVINGS WILL BE ACHIEVED. CHANGING THE FACTORY DEFAULT SETTINGS OR ENABLING OTHER FEATURES WILL INCREASE POWER CONSUMPTION THAT COULD EXCEED THE LIMITS NECESSARY TO QUALIFY FOR ENERGY STAR RATING. WE WANT TO HELP YOU SAVE ENERGY. © 2019 VIZIO INC. ALL RIGHTS RESERVED. 190213SL English - 46...