Table of Contents
Advertisement
Quick Links
Advertisement
Table of Contents

Related Manuals for VTech DigiArt Creative Easel


Summary of Contents for VTech DigiArt Creative Easel
- Page 1 Parent’s Guide 91-003216-021...
-
Page 3: Included In This Package
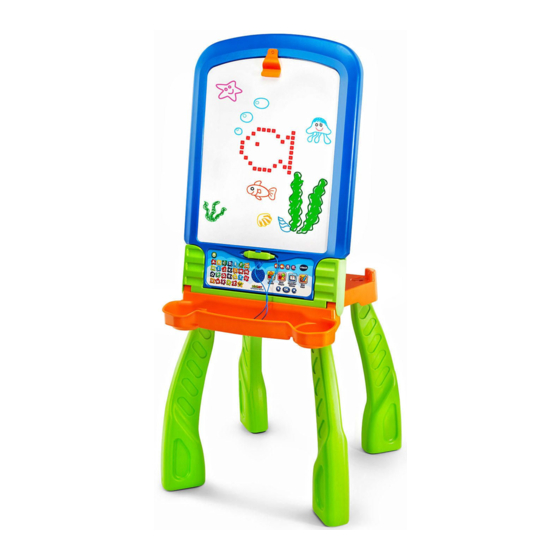
Thank you for purchasing the VTech ® DigiArt Creative Easel. The DigiArt Creative Easel transforms into a whiteboard, blackboard or drawing table. Using the magic pen, children can follow the flashing lights to draw more than 150 letters, numbers, objects and shapes. - Page 4 Creative Easel 20 21 22 VOLUME DOWN BUTTON PAPER CLIP WHITEBOARD VOLUME UP BUTTON LED SCREEN AREA MUSIC ON/OFF BUTTON MAGIC PEN HOLDER BRIGHTNESS BUTTON MAGIC PEN DRAW OBJECTS BUTTON SUPPLIES TRAY DRAW SHAPES BUTTON BLACKBOARD GUESS THE PICTURE BUTTON BATTERY COMPARTMENT FREE DRAW BUTTON ON/OFF BUTTON...
- Page 5 PARTS OF THE DIGIART CREATIVE EASEL Easel Hooks Table Hooks Bars Blackboard/Whiteboard (A) Latch Buttons Hook (one on each side) Buckles Buckle Handles Supplies Tray (B) Legs (C)
- Page 6 ASSEMBLY INSTRUCTIONS Adult assembly required. For your child’s safety, do not let your child play with the toy until it is fully assembled. WHITEBOARD EASEL FORM Step 1: To attach the Supplies Tray (B) to the Blackboard/Whiteboard (A). • Remove the two black plastic covers protecting the two bars on (A1). •...
- Page 7 Step 2: Lift the wider part of A2 of the Blackboard/Whiteboard (A). Then unsnap the narrow area of part A2 and move it towards the Supplies Tray (B). Insert the narrow part of A2 into the slot on the back of the Supplies Tray (B).
- Page 8 Step 5: Turn the DigiArt Creative Easel upright and assembly is complete. Note: To disassemble the easel for better storage, just reverse the above steps. To remove the legs from the easel, pull them out one by one in the opposite direction of installing.
- Page 9 TRANSFORM FROM WHITEBOARD TO BLACKBOARD Step 1: Make sure the Magic Pen is placed in the Magic Pen Holder. Step 2: Detach the Blackboard/Whiteboard (A) from the stand by pulling up, turning it over to the blackboard side and putting it into the stand again. To change the blackboard back into a whiteboard, reverse the order of the steps above.
- Page 10 TRANSFORM FROM EASEL TO DRAWING TABLE Step 1: Make sure the unit is turned OFF and in Whiteboard mode before transforming. Loosen the Buckles on both sides by pressing the Latch Button and at the same time pulling the Buckle Handles outward. Step 2: Hold the Blackboard/Whiteboard (A) with one hand and with the other hand, move the back legs slowly backward until the Blackboard/...
- Page 11 Step 3: Snap A2 into place and attach both Buckles to the Table Hooks and tighten the Buckles by pushing them inward. The Drawing Table is now ready to use and the LED Screen Area will rotate automatically. TRANSFORM FROM DRAWING TABLE TO EASEL Step 1: Make sure the unit is turned OFF before transforming.
-
Page 12: Getting Started
Step 2: Unsnap A2, lift the Blackboard/Whiteboard (A) with one hand and move the back legs forward with the other hand. Insert A2 into the slot on the back of the Supplies Tray (B). Step 3: Attach the Buckles of the Supplies Tray (B) to both Easel Hooks of A2, then push the Buckle Handles inward to tighten them. -
Page 13: Battery Notice
BATTERY NOTICE • Use new alkaline batteries or fully charged NI-MH (Nickel Metal- hydride) rechargeable batteries for best performance. • Use only batteries of the same or equivalent type as recommended. • Do not mix different types of batteries: alkaline, standard (carbon- zinc) or rechargeable, or new and used batteries. -
Page 14: Low Battery
Please replace the batteries with a full set of new batteries before further use. AUTOMATIC SHUT OFF To preserve battery life, the DigiArt Creative Easel will automatically turn off after 3 minutes without operation. In Free Draw Mode, the automatic shut off time is 5 minutes. - Page 15 MAGIC PEN AND LED SCREEN AREA The LED Screen Area is located in the centre of the Whiteboard. The screen will rotate automatically when transformed between the Whiteboard and Drawing Table. Be careful not to pull hard on the Magic Pen wire. When the Magic Pen is not in use, securely place it back in the Magic Pen Holder.
-
Page 16: Screen Brightness
DRAW OBJECTS Press the Draw Objects Button to show the object-selection menu. Press the Left or Right Arrow Buttons to choose an object and press the OK Button to confirm. Follow the voice instructions and use the Magic Pen to trace the flashing lights to learn how to draw the object. -
Page 17: Care And Maintenance
CAUTION: • Do not lay down, stand or jump on the table. • This item should only be used on level ground. DO NOT use on an uneven surface. • This item was made to be used indoors. • DO NOT use sprays or cleaners on the boards as they may cause damage. - Page 18 1. Make sure the LED screen is not covered The magic pen by paper, whiteboard marker (not included) cannot draw on drawings or other dirt. Otherwise, the some dots. sensitivity of the MAGIC PEN will be affected and may not work properly. If the problem persists, please contact our Consumer Services Department and a service representative will be happy to help you.
-
Page 19: Consumer Services
CONSUMER SERVICES Creating and developing VTech products is accompanied by a responsibility that we at VTech take very seriously. We make ® every effort to ensure the accuracy of the information, which forms the value of our products. However, errors sometimes can occur. - Page 20 Visit our website for more information about our products, downloads, resources and more. www.vtech.co.uk www.vtech.com.au TM & © 2019 VTech Holdings Limited. All rights reserved. Printed in China. 91-003216-021...