Table of Contents
Advertisement
Advertisement
Table of Contents

Related Manuals for VTech DigiArt


Summary of Contents for VTech DigiArt
- Page 1 User’s Manual © 2016 VTech All rights reserved Printed in China 91-003216-006...
- Page 2 , music cla and even rece ! With Preschool Learning™, learning is fun om day one! At VTech®, we know that a child has the ability to do great things. at’s why all our electronic learning products are uniquely designed to develop a child’s mind and allow them to learn to the best their...
-
Page 3: Included In This Package
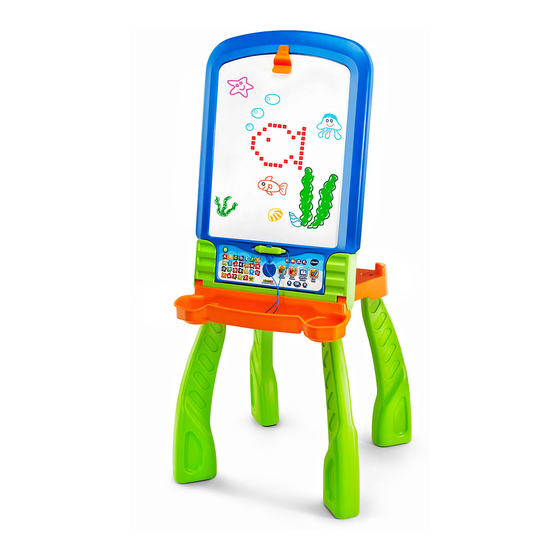
INTRODUCTION Thank you for purchasing the VTech DigiArt Creative Easel ® The DigiArt Creative Easel transforms into a dry-erase board, chalkboard or drawing table. Using the magic pen, children can follow the blinking lights to draw more than 150 letters, numbers, objects and shapes. - Page 4 20 21 22 VOLUME DOWN BUTTON PAPER CLIP DRY-ERASE BOARD VOLUME UP BUTTON LED SCREEN AREA MUSIC ON/OFF BUTTON MAGIC PEN HOLDER BRIGHTNESS BUTTON MAGIC PEN DRAW OBJECTS BUTTON SUPPLIES TRAY DRAW SHAPES BUTTON CHALKBOARD GUESS THE PICTURE BUTTON BATTERY COMPARTMENT 19 FREE DRAW BUTTON ON/OFF BUTTON 20 LEFT ARROW BUTTON LETTER BUTTONS 21 OK BUTTON NUMBER BUTTON 22 RIGHT ARROW BUTTON...
-
Page 5: Assembly Instructions
ASSEmBLY INSTRUCTIONS Adult assembly required. For your child’s safety, do not let your child play with the toy until it is fully assembled. DRY-ERASE EASEL fORm Step 1: To attach the SUPPLIES TRAY (B) to the CHALKBOARD/DRY-ERASE BOARD (A), use the hooks on the SUPPLIES TRAY (B) to connect it to part A1 of the CHALKBOARD/DRY-ERASE BOARD (A). - Page 6 Step 3: Tighten the center screw by pushing it in and turning it clockwise to fix it in position. Step 4: Insert two LEGS into part A2 of the CHALKBOARD/DRY-ERASE BOARD (A) and two LEGS into the bottom of the SUPPLIES TRAY (B). The LEGS will lock into place.
- Page 7 TRANSfORm fROm DRY-ERASE BOARD TO CHALKBOARD Step 1: Make sure the MAGIC PEN is placed in the MAGIC PEN HOLDER. Step 2: Detach the CHALKBOARD/DRY-ERASE BOARD (A) from the stand by pulling up, turning it over to the chalkboard side and putting it into the stand again.
- Page 8 TRANSFORM FROM EASEL TO DRAWING TABLE Step 1: Make sure the unit is turned OFF and in DRY-ERASE BOARD mode before transforming. Loosen the center screw by pushing in and turning it counterclockwise. Step 2: Hold the CHALKBOARD/DRY-ERASE BOARD (A) with one hand and with the other hand, move the back legs slowly backwards until the CHALKBOARD/DRY-ERASE BOARD (A) lies horizontally on the four LEGS.
- Page 9 Step 3: Snap A2 into place and tighten the center screw by pushing it in and turning it clockwise to fix it in position. Then tighten the left and right screws on the SUPPLIES TRAY (B) by turning them clockwise. The DRAWING TABLE is now ready to use and the LED SCREEN AREA will rotate automatically.
-
Page 10: Getting Started
Step 2: Unsnap A2, lift the CHALKBOARD/DRY-ERASE BOARD (A) with one hand and move the back legs forward with the other hand. Insert A2 into the slot on the back of the SUPPLIES TRAY (B), lining up the hole of A2 with the center screw of the SUPPLIES TRAY (B). -
Page 11: Battery Notice
Please replace the batteries with a full set of new batteries before further use. AUTOMATIC SHUT-OFF To preserve battery life, the DigiArt Creative Easel will automatically turn off after 3 minutes without operation. In Free Draw Mode, the auto- off time is 5 minutes. - Page 12 • Do not use sharp or pointed objects on the writing surface. Scratching the board will cause permanent damage. • Use non-toxic dry-erase markers only. Do not use washable or permanent marker, crayons, pens, pencils or other drawing tools to draw on the board surface. CHALKBOARD • Use the chalk to draw on the chalkboard. • Wipe with a slightly damp cloth to erase the drawing. Note: • Do not use sharp or pointed objects on the writing surface. Scratching the board will cause permanent damage.
- Page 13 ACTIvITIES WRITE LETTERS Press any LETTER BUTTON to learn how to write that letter. Follow the voice instructions and use the MAGIC PEN to trace the blinking lights to learn how to write the letter. WRITE NUMBERS Press the NUMBER BUTTON to see the number-selection menu. Press the LEFT or RIGHT ARROW BUTTONS to choose a number and press the OK BUTTON . Follow the voice instructions...
-
Page 14: Screen Brightness
• Press the RIGHT ARROW BUTTON to play the next song. • Press the OK BUTTON or FREE DRAW BUTTON to clear the screen. PAPER CLIP Insert a piece of paper into the PAPER CLIP and start drawing. If you would like to listen to the music while drawing, turn on the unit and press the FREE DRAW BUTTON. -
Page 15: Troubleshooting
IMPORTANT NOTE: Creating and developing VTech products is accompanied by a ® responsibility that we at VTech take very seriously. We make ® every effort to ensure the accuracy of the information, which forms the value of our products. However, errors sometimes can occur. - Page 16 NOTE: This equipment has been tested and found to comply with the limits for a Class B digital device, pursuant to Part 15 of the FCC Rules. These limits are designed to provide reasonable protection against harmful interference in a residential installation. This equipment generates, uses and can radiate radio frequency energy and, if not installed and used in accordance with the instructions, may cause harmful interference to radio communications.
-
Page 17: Product Warranty
Return of the product under Warranty must adhere to the following rules: If VTech believes that there may be a defect in the materials or workmanship of the product and can confirm the purchase date and location of the product, we will at our discretion replace the product with a new unit or product of comparable value.