
Related Manuals for Remington Style B5 Series


Summary of Contents for Remington Style B5 Series
- Page 1 B5 STYLE SERIES BEARD TRIMMER USE & CARE MANUAL PLEASE READ PRIOR TO USE To register your product go to www.remingtonproducts.com.au www.remington.co.nz 3 YEAR WARRANTY MB6000AU...
-
Page 2: Important Safety Instructions
• Use this appliance only for its intended use as described in this manual. • Do not use attachments not recommended by Remington. • Never drop or insert any object into any opening of this appliance. • Keep the cord away from heated surfaces. - Page 3 • This appliance should be charged by approved safety isolating adaptors PA0510A with the output 5V DC, 1A. Remington strongly recommends that an approved Safety Switch (Residual current device) be installed to protect all bathroom power outlets. Ask an electrical contractor for advice.
-
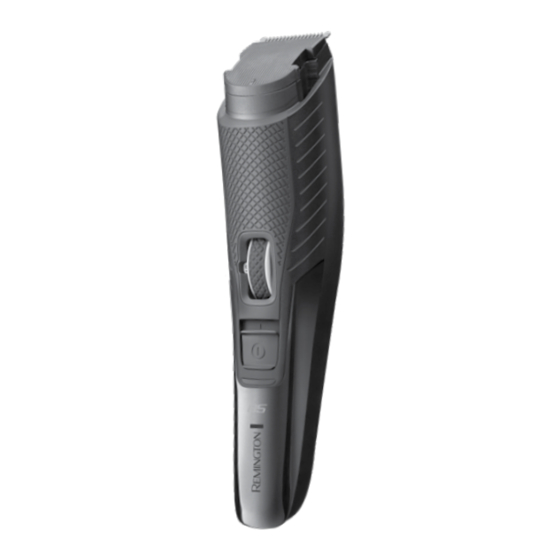
Page 4: Key Parts
MB6000AU B5 STYLE SERIES BEARD TRIMMER Use & Care Instruction Manual Thank you for purchasing your Remington B5 Style Series Beard Trimmer. ® Inside this manual you will find instructions on using and caring for your groomer. KEY PARTS 1. On/off switch 6. -
Page 5: Charging Indicator
ABOUT YOUR GROOMER MB6000AU SPECIFICATIONS Power System Cord/Cordless (Rechargeable) Full Charge Time 2 Hours Run Time 60 Minutes Indicators Charging Indicator Light & Low Battery Light Voltage Type Single 100240V only Quick Charge 5 Minutes CHARGING • It is recommended to fully charge your product before using for the first time. - Page 6 ATTACHING THE GROOMING ATTACHMENTS • Hold the trimmer in one hand with your thumb securely on the zoom wheel to keep it from turning. Ensure the length position indicator is at 0.4. • Slide the comb down the grooves until it clicks into place. •...
- Page 7 GROOMING TIPS Here are a few tips for trimming the various parts of your facial hair (guide only). To Thin and Taper the Beard/Moustache Fit the adjustable comb. Use the zoom wheel to set the comb to the desired length setting. The setting will appear on the length position indicator.
- Page 8 To Define the Beard/Moustache Line Hold the trimmer with the trimmer blade facing you. Start with the edge of beard/moustache line and gently lower the trimmer blade onto your skin. Use motions towards the edge of the beard/moustache line to trim to desired locations in facial area and away from beard in neck area.
-
Page 9: Cleaning And Maintenance
CLEANING AND MAINTENANCE • To ensure long lasting performance of the trimmer, clean the blades and unit regularly. • Do not use harsh or abrasive cleaners on the unit or blades. • This product has washable blades. Ensure the blades are detached from the trimmer before washing the blades. - Page 10 This product is not suitable for use in the bath or shower. This appliance conforms to radio interference requirements. Any product purchased and used commercially carries a limited 90 day warranty.
-
Page 11: Warranty Against Defects
Spectrum Brands Australia Pty Ltd and Spectrum Brands New Zealand Limited WARRANTY AGAINST DEFECTS In this warranty: Australian Consumer Law means the Australian consumer law set out in Schedule 2 to the Competition and Consumer Act 2010; CGA means the New Zealand Consumer Guarantees Act 1993; Goods means the product or equipment which was accompanied by this warranty and purchased in Australia or New Zealand, as the case may be;... - Page 12 Customer service in New Zealand: 0800 736 776 Email: info@remington.co.nz Website: www.remington.co.nz REMINGTON SERVICE HOTLINE Australia 1800 623 118 (toll free) New Zealand 0800 736 776 (toll free) ® Registered Trade Mark of Spectrum Brands Inc., or one of its subsidiaries Made in China to the Specifications of Spectrum Brands, Inc.