
Related Manuals for Lincoln Electric OUTBACK 200 CE


Summary of Contents for Lincoln Electric OUTBACK 200 CE
- Page 1 IM3135 08/2020 REV00 ® OUTBACK 200 CE OPERATOR’S MANUAL ENGLISH Lincoln Electric Bester Sp. z o.o. ul. Jana III Sobieskiego 19A, 58-260 Bielawa, Poland www.lincolnelectric.eu...
- Page 2 Measured sound power level: LWA 97 dB Name and address of the person Piotr Kusiak authorised to compile the technical Quality Manager file: Lincoln Electric Bester Sp z.o.o ul. Jana III Sobieskiego 19a POLAND 58-260 Bielawa pkusiak@lincolnelectric.eu ______________________________ Claudio Ambrosi Product Manager Lincoln Electric EMEAR Loc.Casalmenini...
-
Page 3: Table Of Contents
12/05 THANK YOU! For choosing the QUALITY of the Lincoln Electric products. Please check packaging and equipment for damage. Claims for material damaged in shipment must be notified immediately to the dealer. For ease of use, please enter your product identification data in the table below. Model Name, Code & Serial Number can be found on the machine rating plate. -
Page 4: Technical Specifications
Technical Specifications ® OUTBACK 200 (CE) (K14294-1) INPUT – PETROL ENGINE Horse Operatin Displacement Cu. power Make/Model Description g Speed In. (ltrs.) Bore x Starting system Capacities @3.000 (RPM) Stroke Inch (mm) Fuel: 6,1 liters Gasoline K14294-1 11,1HP 3.000 Manual recoil Oil: 1,1 liters 4‐stroke ... -
Page 5: Electromagnetic Compatibility (Emc)
Electromagnetic Compatibility (EMC) Conformance Products displaying the CE mark are in conformity with European Community Council Directive of 15 Dec 2004 on the approximation of the laws of the Member States relating to electromagnetic compatibility, Directive 2014/30/EU. It was manufactured in conformity with a national standard that implements a harmonized standard: EN 60974-10 Electromagnetic Compatibility (EMC) Product Standard for Arc Welding Equipment. - Page 6 welding equipment should not be modified in any way except for those changes and adjustments covered in the manufacturer’s instructions. In particular, the spark gaps of arc striking and stabilizing devices should be adjusted and maintained according to the manufacturer’s recommendations. Welding Cables The welding cables should be kept as short as possible and should be positioned close together, running at or close to floor level.
-
Page 7: Safety
Failure to follow the instructions in this manual could cause serious personal injury, loss of life, or equipment damage. Read and understand the following explanations of the warning symbols. Lincoln Electric is not responsible for damages caused by improper installation, improper care or abnormal operation. -
Page 8: Installation And Operator Instructions
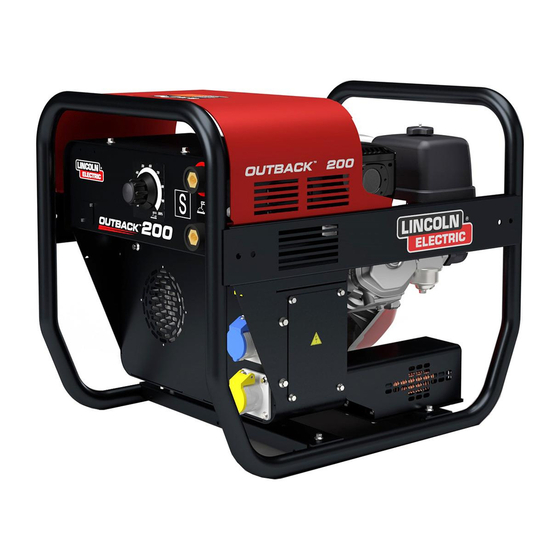
Read this entire section before installation or operation of the machine. General Description The OUTBACK 200 CE is a petrol engine powered DC stick welding power source and 230 / 110 volt AC power generator. The engine drives a generator that supplies single phase power for the DC welding circuit, single phase power for the AC auxiliary outlets. - Page 9 When receiving the goods make sure that the product has not suffered damage during the transport, that there has not been rough handling or taking away of parts contained inside the packing or in the set. In case you find damages, rough handling or absence of parts (envelopes, manuals, etc.), we advise you to inform immediately our Technical Service.
- Page 10 The OUTBACK 200 CE is shipped with the engine Further guidance is given in IEC/TS 620812. crankcase filled. Check the oil level before starting the engine.
- Page 11 35mmq Turn the fuel cock to ON Cable Installation FUEL Install the welding cables to your OUTBACK 200 CE as follows: The engine must be OFF to install welding cables. Connect the electrode holder and work cables to the weld output terminals. The terminals are identified on the case front.
- Page 12 Lightly pull the start-up knob until meeting resistance, then pull decisively. ATTENTION: Allow the start-up knob to re-enter slowly, avoiding having it knock against the motor and thereby damaging the start-up system. Once the engine is started, with the starter off, let it turn for a few minutes before drawing the Use as a generator load...
- Page 13 electrical plant with which the machine is going to work. WARNING: bound the neutral to frame BEFORE the GFI WORKING PRICIPLE Working condition according to the position of voltage switch Y5 A) 110V Position In this position output voltage is present only at the 110V socket WARNING LABEL B) 230V Position...
- Page 14 COMPONENT & CONTROL LOCATIONS environmental regulations, and to maximize the service life of your equipment, it is very important to take a few moments before you operate the engine to check its condition. Be sure to take care of any problem you find, or have your servicing dealer correct it, before you operate the engine Failure to properly maintain this engine, or failing...
- Page 15 Exhaust contains poisonous carbon monoxide gas that can build up to dangerous levels in closed areas. Breathing carbon monoxide can cause unconsciousness or death. Review the instructions provided with the equipment powered by this engine for any safety precautions that Some engine applications use a remote-mounted throttle should be observed with engine startup, shutdown or control rather than the engine-mounted throttle lever...
- Page 16 ELECTRIC STARTER (applicable types): Turn the engine switch to the OFF position Turn the key to the START position, and hold it there until the engine starts. If the engine fails to start within 5 seconds, release the key, and wait at least 10 seconds before operating the starter again Using the electric starter for more than 5 seconds at a time will overheat the starter motor and can damage it.
- Page 17 procedures using basic hand tools. Other service tasks MAINTENANCE SCHEDULED that are more difficult, or require special tools, are best handled by professionals and are normally performed by a Honda technician or other qualified mechanic. The maintenance schedule applies to normal operating conditions.
- Page 18 REFUELING up spilled fuel before starting the engine Recommended Fuel Unleaded gasoline U.S. Pump octane rating 86 or higher Except U.S. Research octane rating 91 or higher Pump octane rating 86 or higher This engine is certified to operate on unleaded gasoline with a pump octane rating of 86 or higher (a research octane rating of 91 or higher).
- Page 19 REDUCTION CASE OIL (applicable types) Reccomended oil Use the same oil that is recommended for the engine Running the engine with a low oil level can cause engine damage. This type of damage is not covered by the Oil Level Check Distributor’s Limited Warranty Check the reduction case oil level with the engine The Oil Alert system (applicable types) will automatically...
- Page 20 Screw in the oil filler cap/dipstick and tighten CYCLONE DUAL-FILTER ELEMENT securely AIR CLEANER A dirty air cleaner will restrict air flow to the carburetor, reducing engine performance. If you operate the engine in very dusty areas, clean the air filter more often than specified in the MAINTENANCE SCHEDULE Operating the engine without an air filter, or with a damaged air filter, will allow dirt to enter the engine,...
- Page 21 Install the air cleaner cover, and tighten the nut securely Low profile Types Oil-bath type Unsnap the air cleaner cover clips, remove the Remove the wing nut, and remove the air air cleaner cover, and remove the air filter cleaner cap and cover element Remove the air filter element from the cover.
- Page 22 Reinstall the filter, new O-ring, and the sediment cup. Tighten the sediment cup securely Move the fuel valve lever to the ON position and check for leaks SPARK PLUGS Spark plugs: BPR6ES (NGK) W20EPR-U (DENSO) This spark plug has the correct heat range for normal engine operating temperatures If the engine has been running, let it cool before servicing the spark plug...
- Page 23 Spark Arrester Cleaning & Inspection Troubleshooting 1- Use a brush to remove carbon deposits from Engine will not start the spark arrester screen. Be careful not to Possible Cause Correction damage the screen. Replace the spark arrester Battery discharged. Recharge battery. if it has breaks or holes Move the throttle lever to its minimum position Fuse burnt out.
- Page 24 Electric for advice or information about their use of our products. We respond to our customers based on the best information in our possession at that time. Lincoln Electric is not in a position to warrant or guarantee such advice, and assumes no liability, with respect to such information or advice.
-
Page 25: Weee
WEEE Do not dispose of electrical equipment together with normal waste! In observance of European Directive 2012/19/EC on Waste Electrical and Electronic Equipment (WEEE) and its implementation in accordance with national law, electrical equipment that has reached the end of its life must be collected separately and returned to an environmentally compatible recycling facility. -
Page 26: Electrical Schematic
Electrical Schematic... -
Page 30: Suggested Accessories
Suggested Accessories KIT HANDLES OUTBACK 200. K14295-1 K14296-1 KIT WHEELS OUTBACK 200.: W000260684 KIT 25C50 – kit with ground cable and cable electrode hoder W000011139 KIT 35C50 – kit with ground cable and cable electrode hoder...