Devolo MicroLink 56k Fun LAN User Manual
Devolo microlink 56k fun lan modem: user guide
Hide thumbs
Also See for MicroLink 56k Fun LAN:
- User manual (21 pages) ,
- Specifications (4 pages) ,
- Technical specifications (2 pages)
Table of Contents
Advertisement
Quick Links
Advertisement
Table of Contents

Related Manuals for Devolo MicroLink 56k Fun LAN


Summary of Contents for Devolo MicroLink 56k Fun LAN
- Page 1 MicroLink 56k Fun LAN...
- Page 2 The reproduction and distribution of the documentation and software supplied with this product and the use of its contents is subject to written authorization from devolo AG. We reserve the right to make any alterations that arise as the result of technical development.
- Page 3 Preface Thank you for placing your trust in this devolo product. With the MicroLink 56k Fun LAN, you will be able to access the Internet and take advantage of a variety of other data communications applications by using the software package provided.
-
Page 4: Table Of Contents
Contents 1 Introduction ... 5 What does the MicroLink 56k Fun LAN have to offer? ... 5 Firewall and virus scanner... 6 2 Connection and Startup... 7 System requirements... 7 Connection and display elements ... 7 Connecting the modem to a single PC ... 9 2.3.1... -
Page 5: Introduction
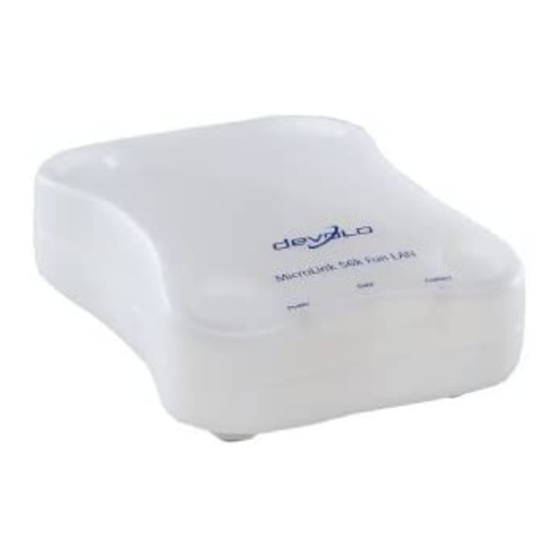
The LED control lamps of your MicroLink 56k Fun LAN display the device sta- tus and provide status regarding the function of the data transmission. The MicroLink 56k Fun LAN has three LEDs on the front panel and two on the rear panel. -
Page 6: Firewall And Virus Scanner
Introduction Firewall and virus scanner Included with the MicroLink 56k Fun LAN is Norman Internet Control soft- ware. Norman Internet Control is a firewall and antivirus program that checks your computer for destructive software. This kind of software is also referred to as malware (short for “malicious software”). -
Page 7: Connection And Startup
Connection and Startup This chapter introduces you to the hardware of the MicroLink 56k Fun LAN and shows you how to connect the modem and establish a connection to the Internet as quickly as possible. Thanks to the Ethernet interface of the MicroLink 56k Fun LAN, you can... - Page 8 The rear panel has four jacks and two LED control lamps: I/O: On/off switch; use this to switch the MicroLink 56k Fun LAN on and off. AC 9V~: Plug the provided power adapter into the MicroLink 56k Fun LAN using this jack. devolo MicroLink 56k Fun LAN...
-
Page 9: Connecting The Modem To A Single Pc
ETH: Ethernet connection (RJ45); this jack is used to connect the MicroLink 56k Fun LAN to your computer or router with the network cable provided. LED (bottom left): this is lit when the MicroLink 56k Fun LAN is con- nected to the computer or router. -
Page 10: Installing And Configuring The Internet Access Software
Continue with the installation or configuration of your Internet access software under your operating system. All you need now to start using the MicroLink 56k Fun LAN is Internet access software so that you can establish an Internet connection. This software con- trols data traffic between your PC and the Internet. - Page 11 For example, you can enter the name of the provider. 'Account Name': The user name assigned by your provider. 'Password': The password associated with your user name. 'PPPoE Service Name': “atdt” plus the telephone number of your Internet provider, e.g. “atdt18001234567”. Connection and Startup devolo MicroLink 56k Fun LAN...
- Page 12 In the top right corner of the screen, there is now a new icon for the inte- Starting and stop- ping the Internet grated Ethernet network card connection devolo MicroLink 56k Fun LAN . Start the Internet connection by clicking...
- Page 13 'no' here. We recom- mend this setting particularly when using dynamic IPs. 'ISP's primary DNS Server': Enter the address of the Internet pro- vider's DNS server here. Connection and Startup devolo MicroLink 56k Fun LAN...
- Page 14 In an editor, open the '/etc/ppp/peers/dsl-provider' file. Add the option “- S 'atdt<PROVIDERPHONENUMBER>' ” to the end of the “pppoe -I eth0 ...” line. Add the following entries to the end of the file: “default-asyncmap nopcomp devolo MicroLink 56k Fun LAN...
-
Page 15: Connecting To An Ethernet Network
Connecting to an Ethernet network You can use the MicroLink 56k Fun LAN not only to connect one PC to the Internet, but also an entire network if needed. -
Page 16: Connecting The Microlink 56K Fun Lan To A Router
Connect your MicroLink 56k Fun LAN to the matching connection jack of the telephone line using the telephone cable provided. Connect the MicroLink 56k Fun LAN to the power supply using the power adapter provided. Switch on the router first, followed by the devolo MicroLink 56k Fun LAN and then switch on the other computers on the network. - Page 17 Internet provider in Great Britain (provider phone number: 012345): AT&F+GCI=B4;ATDT012345 Internet provider via a private branch exchange (PBX): AT&F+GCI=B4;ATX3DT0,012345 In this example, the PBX system requires you to dial “0” to reach an out- side line. Connection and Startup Country code devolo MicroLink 56k Fun LAN...
-
Page 18: Appendix
Appendix Appendix Technical data Users with specific technical interests should refer to this table for detailed information on the MicroLink 56k Fun LAN. Phys. transfer rates Protocol Data compression Error correction Dialing method External call BPS adjust Computer interface Power supply... -
Page 19: Declaration Of Conformity
Protection requirements with respect to EMC §3 (1) 2, (Article 3 (1) b)) EN 55024: 1998 +A1 : 2001 EN 55022: 1998 +A1: 2000 (Class A) Netzabschluß eines öffentlichen TK-Netzes Termination point of a public telecom. network Heiko Harbers July 2004 Vorstandsvorsitzender Appendix devolo MicroLink 56k Fun LAN... -
Page 20: Care And Maintenance Of The Device
Clean the unit by wiping dirt from the case using an eyeglasses cleaning cloth or other soft cloth. Never use water, paint thinner, benzene, alcohol or other strong cleaning agents when cleaning the MicroLink 56k Fun LAN, as these could damage the case. -
Page 21: Warranty Conditions
Warranty period The warranty period for this devolo product is three years. This period begins at the day of deliv- ery from the devolo dealer. Warranty services rendered by devolo do not result in an extension of the warranty period nor do they initiate a new warranty period. - Page 22 Claims for compensation of lost profits, indirect or consequential detriments, are excluded. devolo is not liable for lost data or retrieval of lost data in cases of slight and ordinary neg- ligence.