Advertisement
Quick Links
N
!
OTICE
Each safety device must be maintained and checked per the recommended schedule. Refer to Section 6 in
the O&M Manual for more information.
S
F
AFETY
EATURES
It is the responsibility of the customer to ensure external safety provisions, such as but not limited to:
guards, safety labels, safety controls, interlocks, lockout devices are in place and operable.
S
L
AFETY
ABELS
The following words are used in this manual to denote the degree of seriousness of the individual hazards.
Indicates an imminently hazardous situation which, if not avoided, will result in death or serious injury. This signal
Indicates a potentially hazardous situation which, if not avoided, could result in death or serious injury.
Indicates a potentially hazardous situation which, if not avoided, may result in minor or moderate injury. It may also
N
/N
- N
OTICE
OTE
OTICE
Is the preferred signal word to address practices not related to personal injury. The safety alert symbol is
not used with this signal word.
Instructions
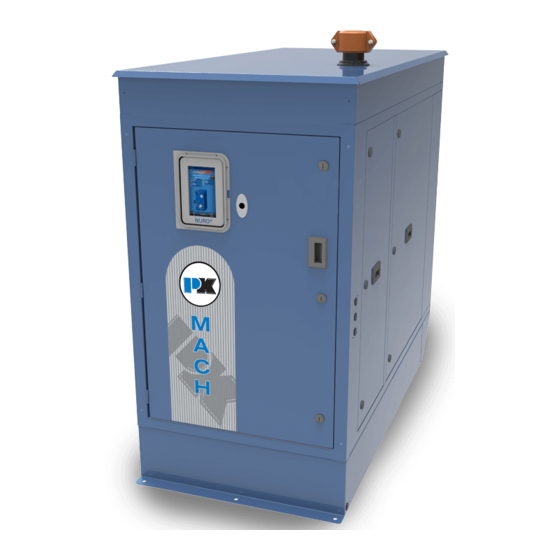
NURO Conversion Instructions
MACH C1500-C2000H
word is to be limited to the most extreme situations.
be used to alert against unsafe practices.
1005101738
ENVI to NURO
Date: 12/19/2017
Revision A
Advertisement

Related Manuals for Patterson-Kelley HARSCO MACH C1500


Summary of Contents for Patterson-Kelley HARSCO MACH C1500
- Page 1 Instructions 1005101738 ENVI to NURO Date: 12/19/2017 NURO Conversion Instructions Revision A MACH C1500-C2000H OTICE Each safety device must be maintained and checked per the recommended schedule. Refer to Section 6 in the O&M Manual for more information. AFETY EATURES It is the responsibility of the customer to ensure external safety provisions, such as but not limited to: guards, safety labels, safety controls, interlocks, lockout devices are in place and operable.
- Page 2 Instructions 1005101738 ENVI to NURO Date: 12/19/2017 NURO Conversion Instructions Revision A MACH C1500-C2000H If the information in these instructions are not followed, fire or explosion may result causing property damage, personal injury, or loss of life. It is essential to read, understand, and follow the recommendations of these instructions before installing, operating or servicing this equipment.
- Page 3 Instructions 1005101738 ENVI to NURO Date: 12/19/2017 NURO Conversion Instructions Revision A MACH C1500-C2000H TOOLS Required • Phillips Head Screwdriver • Drill and Drill Bit Set • Adjustable Wrench • Set of Nut Drivers SAE • Torx set SAE • Multimeter •...
- Page 4 Instructions 1005101738 ENVI to NURO Date: 12/19/2017 NURO Conversion Instructions Revision A MACH C1500-C2000H Remove 7/16” nuts Figure 1 5. Using a 1/8” drill bit, drill out rivets that fasten high and low voltage terminal blocks. 6. Remove 7/16” nuts from 4 inside corners of front frame assembly as shown in Figure 2.
- Page 5 Instructions 1005101738 ENVI to NURO Date: 12/19/2017 NURO Conversion Instructions Revision A MACH C1500-C2000H Remove 7/16” nuts Figure 2 7. Remove 3 T30 Torx screws from front frame as shown in Figure 3. Remove front frame.
- Page 6 Instructions 1005101738 ENVI to NURO Date: 12/19/2017 NURO Conversion Instructions Revision A MACH C1500-C2000H 8. With a T30 Torx bit, loosen 3 screws that hold control panel in place shown in Figure 3. Loosen T30 Torx screws to control panel Remove T30 Torx screws to front frame Figure 3...
- Page 7 Instructions 1005101738 ENVI to NURO Date: 12/19/2017 NURO Conversion Instructions Revision A MACH C1500-C2000H 8. Disconnect all wires from internal safety devices and sensors. Take note to wire colors for sensors as new panel will use same colors for sensor wires. 9.
- Page 8 Instructions 1005101738 ENVI to NURO Date: 12/19/2017 NURO Conversion Instructions Revision A MACH C1500-C2000H 11. Install heat exchanger sensor on front section of exchanger. Sensor only needs to be finger tight. DO NOT OVERTIGHTEN SENSOR. Heat exchanger sensor Figure 6...
- Page 9 Instructions 1005101738 ENVI to NURO Date: 12/19/2017 NURO Conversion Instructions Revision A MACH C1500-C2000H 12. Install new control panel in place of old one and tighten down T30 Torx bit screws. 13. Install both electrical boxes facing front of boiler using supplied T20 self-tapping Torx screws.
- Page 10 Instructions 1005101738 ENVI to NURO Date: 12/19/2017 NURO Conversion Instructions Revision A MACH C1500-C2000H 15. Run igniter wire and ground to ignition electrode. Install gas valve plug with retaining screw. High and low gas pressure switches will have matching electric connectors that will need to be plugged in.
- Page 11 Instructions 1005101738 ENVI to NURO Date: 12/19/2017 NURO Conversion Instructions Revision A MACH C1500-C2000H 17. Install front frame assembly with (4) 7/16” nuts in each corner from inside of cabinet. Install 7/16” nut Figure 9 18. Install (3) T30 Torx screws along bottom of front frame assembly. 19.
- Page 12 Instructions 1005101738 ENVI to NURO Date: 12/19/2017 NURO Conversion Instructions Revision A MACH C1500-C2000H 21. Insert green electric plug D1 and D2 into NURO control and attach all ground wires to front door ground lug. Figure 11 22. Install field wiring to new terminal boxes per wiring terminal block labels. 23.
- Page 13 Instructions 1005101738 ENVI to NURO Date: 12/19/2017 NURO Conversion Instructions Revision A MACH C1500-C2000H Gas Valve and Wires Figure 12 Heat Exchanger Sensor and Wires Figure 13...
- Page 14 Instructions 1005101738 ENVI to NURO Date: 12/19/2017 NURO Conversion Instructions Revision A MACH C1500-C2000H Blower Plugs Figure 14 Low Water Cut Off Figure 15...
- Page 15 Instructions 1005101738 ENVI to NURO Date: 12/19/2017 NURO Conversion Instructions Revision A MACH C1500-C2000H High Limit Probe Figure 16 Ignitor Ground Wires Figure 17 24. Re-energize power to unit. DO NOT ENERGIZE GAS. Call tech support for help pairing controls to boiler (570-421-7500 and press 2 for technical support). 25.
- Page 16 Instructions 1005101738 ENVI to NURO Date: 12/19/2017 NURO Conversion Instructions Revision A MACH C1500-C2000H Runout Procedure Start Interlock 1, Start Interlock 2, and Air Damper terminals are 120 VAC. Power must be off when removing, installing jumpers, or wires to these terminals. Remove the factory jumpers / field wiring from enable/disable, start interlock 1, start interlock 2, damper end switch terminals.
- Page 17 Instructions 1005101738 ENVI to NURO Date: 12/19/2017 NURO Conversion Instructions Revision A MACH C1500-C2000H When the main gas shutoff/control valve opens to attempt ignition, the high gas pressure switch will trip, causing the NURO touchscreen to display 10011: “High Gas Limit”. Even after re-opening the downstream gas cock inside the boiler, 10011: “High Gas Limit”...
- Page 18 Instructions 1005101738 ENVI to NURO Date: 12/19/2017 NURO Conversion Instructions Revision A MACH C1500-C2000H...
- Page 19 Instructions 1005101738 ENVI to NURO Date: 12/19/2017 NURO Conversion Instructions Revision A MACH C1500-C2000H...
- Page 20 Instructions 1005101738 ENVI to NURO Date: 12/19/2017 NURO Conversion Instructions Revision A MACH C1500-C2000H...