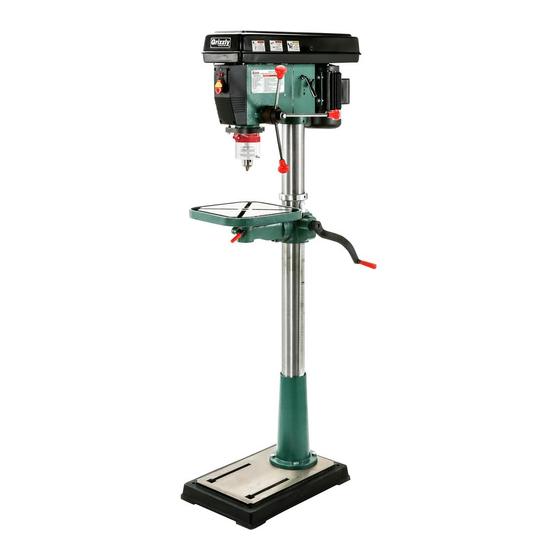
Grizzly G7947 Owner's Manual
12-speed drill presses
Hide thumbs
Also See for G7947:
- Instruction manual (56 pages) ,
- Parts manual (4 pages) ,
- Manual (10 pages)
Table of Contents
Advertisement
Quick Links
MODEL G7947 G7948
12-SPEED DRILL PRESSES
OWNER'S MANUAL
(For models manufactured since 01/21)
G7947
G7948
184841
COPYRIGHT © AUGUST, 2005 BY GRIZZLY INDUSTRIAL, INC. REVISED JANUARY, 2021 (JL)
WARNING: NO PORTION OF THIS MANUAL MAY BE REPRODUCED IN ANY SHAPE
OR FORM WITHOUT THE WRITTEN APPROVAL OF GRIZZLY INDUSTRIAL, INC.
#TR7410 PRINTED IN CHINA
V3.01.21
Advertisement
Table of Contents

Related Manuals for Grizzly G7947


Summary of Contents for Grizzly G7947
- Page 1 G7947 G7948 184841 COPYRIGHT © AUGUST, 2005 BY GRIZZLY INDUSTRIAL, INC. REVISED JANUARY, 2021 (JL) WARNING: NO PORTION OF THIS MANUAL MAY BE REPRODUCED IN ANY SHAPE OR FORM WITHOUT THE WRITTEN APPROVAL OF GRIZZLY INDUSTRIAL, INC. #TR7410 PRINTED IN CHINA...
- Page 2 This manual provides critical safety instructions on the proper setup, operation, maintenance, and service of this machine/tool. Save this document, refer to it often, and use it to instruct other operators. Failure to read, understand and follow the instructions in this manual may result in fire or serious personal injury—including amputation, electrocution, or death.
-
Page 3: Table Of Contents
G7947/G7948 Wiring Diagram ....45 Needed for Setup ......... 15 SECTION 9: PARTS ........46 Unpacking ............ 15 G7947 Stand & Table Breakdown ....46 Inventory ............16 G7947 Headstock ........47 Cleanup ............17 G7948 Stand & Table Breakdown ....50 Site Considerations ........ -
Page 4: Introduction
Machine Description and it helps us determine if updated documenta- tion is available for your machine. The G7947 and G7948 function and operate the same but have the following differences: G7947 •... -
Page 5: Identification
C. Belt Tension Lever Depth Stop D. Belt Tension Lock Chuck Guard E. Table Height Crank K. Scale Table Lock Lever Column Lock Lever To reduce your risk of serious injury, read this entire manual BEFORE using machine. Model G7947/G7948 (Mfd. Since 01/21) -
Page 6: Controls & Components
" and uses a JT-3 key. work light, and supports the motor and belt housing. O. Scale: Displays current table-tilt angle. D. Belt Tension Lever: Adjusts motor location P. Column Lock Lever: Locks table height. to increase/decrease belt tension. Model G7947/G7948 (Mfd. Since 01/21) -
Page 7: G7947 Machine Data Sheet
MACHINE DATA SHEET Customer Service #: (570) 546-9663 · To Order Call: (800) 523-4777 · Fax #: (800) 438-5901 MODEL G7947 17" FLOOR DRILL PRESS Product Dimensions: Weight................................245 lbs. Width (side-to-side) x Depth (front-to-back) x Height................21 x 30 x 70 in. - Page 8 Serial Number Location ........................ID Label on Head ISO 9001 Factory ..............................Yes Certified by a Nationally Recognized Testing Laboratory (NRTL) ................. Yes Model G7947/G7948 (Mfd. Since 01/21) The information contained herein is deemed accurate as of 2/4/2021 and represents our most recent product specifications. Model G7947 PAGE 2 OF 3 Due to our ongoing improvement efforts, this information may not accurately describe items previously purchased.
-
Page 9: G7948 Machine Data Sheet
The information contained herein is deemed accurate as of 2/4/2021 and represents our most recent product specifications. Model G7948 PAGE 1 OF 3 Due to our ongoing improvement efforts, this information may not accurately describe items previously purchased. Model G7947/G7948 (Mfd. Since 01/21) - Page 10 Light Socket Type........................120V, Std Bulb Maximum Bulb Wattage..........................60 W The information contained herein is deemed accurate as of 2/4/2021 and represents our most recent product specifications. Model G7947/G7948 (Mfd. Since 01/21) Model G7948 PAGE 2 OF 3 Due to our ongoing improvement efforts, this information may not accurately describe items previously purchased.
-
Page 11: Section 1: Safety
Never operate under the influence of drugs or injury or blindness from flying particles. Everyday alcohol, when tired, or when distracted. eyeglasses are NOT approved safety glasses. Model G7947/G7948 (Mfd. Since 01/21) - Page 12 Make sure they are properly installed, you experience difficulties performing the intend- undamaged, and working correctly BEFORE ed operation, stop using the machine! Contact our operating machine. Technical Support at (570) 546-9663. -10- Model G7947/G7948 (Mfd. Since 01/21)
-
Page 13: Additional Safety For Drill Presses
If normal safety pre- respect. Failure to do so could result in cautions are overlooked or ignored, seri- serious personal injury, damage to equip- ous personal injury may occur. ment, or poor work results. -11- Model G7947/G7948 (Mfd. Since 01/21) -
Page 14: Section 2: Power Supply
Nominal Voltage ........240V meets the specified circuit requirements. Cycle ............60 Hz Phase ........... Single-Phase Power Supply Circuit ......15 Amps Plug/Receptacle ......NEMA 6-15 -12- Model G7947/G7948 (Mfd. Since 01/21) - Page 15 The plug must only be inserted into a matching receptacle (see following figure) that is properly installed and grounded in accordance with all local codes and ordinances. -13- Model G7947/G7948 (Mfd. Since 01/21)
-
Page 16: Converting Voltage To 240V
Install 6-15 plug on the power cord per plug manufacturer's instructions. Note: If plug manufacturer's instructions are not available, NEMA standard 6-15 plug wir- ing is provided on Page 46. -14- Model G7947/G7948 (Mfd. Since 01/21) -
Page 17: Section 3: Setup
IMPORTANT: Save all packaging materials until you are completely satisfied with the machine and have resolved any issues between Grizzly or the shipping agent. You MUST have the original pack- aging to file a freight claim. It is also extremely helpful if you need to return your machine later. -
Page 18: Inventory
C. Drift Key ............1 O. Handle ............1 D. Arbor ............1 Table ............1 E. Chuck Key ..........1 Q. Column ............1 Chuck ............1 G7948 G7947 G7947 G7948 Figure 7. G7947/G7948 box inventory. -16- Model G7947/G7948 (Mfd. Since 01/21) -
Page 19: Cleanup
Figure 8. T23692 Orange Power Degreaser. Repeat Steps 2–3 as necessary until clean, then coat all unpainted surfaces with a quality metal protectant to prevent rust. -17- Model G7947/G7948 (Mfd. Since 01/21) -
Page 20: Site Considerations
Only install in an Shadows, glare, or strobe effects that may distract access restricted location. or impede the operator must be eliminated. G7947 G7948 30" ⁄ " 21" Figure 9. Working clearances. -18- Model G7947/G7948 (Mfd. Since 01/21) -
Page 21: Anchoring To Floor
Failure Drilled Hole to use a base plate greatly increases pos- sibility of tipping and personal injury. Figure 10. Popular method for anchoring machinery to a concrete floor. -19- Model G7947/G7948 (Mfd. Since 01/21) - Page 22 Figure 12. Base Plate Mounting Figure 13. Drill press bolted to mobile base, Holes using lag bolts and flat washers. Metal Plate Mobile Base Figure 12. Mounting base plate to mobile base. -20- Model G7947/G7948 (Mfd. Since 01/21)
-
Page 23: Assembly
Column Ring Marking Location Rack Figure 14. Column secured to base. Figure 16. Marking top of rack to show which end is up. Remove column ring by loosening set screw, and remove rack. -21- Model G7947/G7948 (Mfd. Since 01/21) - Page 24 Install crank lever over pinion shaft, and tighten set screw in crank handle against flat 15. Slide column all the way into bottom of head- part of pinion shaft. stock (approximately 4"-6"). Thread handle into crank lever. -22- Model G7947/G7948 (Mfd. Since 01/21)
- Page 25 Figure 21. Aligning headstock with base. 19. Tighten (2) headstock set screws to column, as shown in Figure 22. Figure 20. Tilting drill press upright. Figure 22. Securing headstock to column. -23- Model G7947/G7948 (Mfd. Since 01/21)
- Page 26 Figure 26 (120V operation only). Spindle Belt Cover Knob Figure 24. Downfeed handles and belt cover knob installed. 23. Insert table shaft into table support assembly. Light Bulb Access Here Figure 26. Light bulb access location. -24- Model G7947/G7948 (Mfd. Since 01/21)
-
Page 27: Joining Drill Chuck & Arbor
Retract chuck jaws completely into chuck. Insert small end of arbor into chuck. Hold assembly by the arbor and tap chuck onto a block of wood with medium force, as illustrated below. -25- Model G7947/G7948 (Mfd. Since 01/21) -
Page 28: Test Run
Clear all setup tools away from machine. Connect machine to power supply. Turn machine ON, verify motor operation, and then turn machine OFF. The motor should run smoothly and without unusual problems or noises. -26- Model G7947/G7948 (Mfd. Since 01/21) -
Page 29: Section 4: Operations
V-belt configuration chart located inside ects. Regardless of the content in this sec- belt cover. tion, Grizzly Industrial will not be held liable for accidents caused by lack of training. Connects machine to power, and turns machine ON. -
Page 30: Calculating Spindle Speed For Drilling
Aluminum Mild Steel Carbide Insert Type One-Piece Type 1800 Tenon/Plug Cutters Soft Wood Hard Wood Plastic Brass Aluminum Mild Steel 3/8" – 1/2" 1200 1000 5/8" – 1" Figure 29. Drill bit speed chart. -28- Model G7947/G7948 (Mfd. Since 01/21) -
Page 31: Changing Speeds
V-belts to the desired V-grooves on the motor, idler, and spindle pulleys. The Model G7947 & G7948 is capable of 12 dif- ferent spindle speed RPMs. Spindle speed is For Example: As indicated in the speed... -
Page 32: Drilling
SOFT MATERIAL: The softer the material, the faster the spindle may turn. (Plastics can melt at too high of a spindle speed!) The Model G7947/G7948 is designed for drilling LUBRICANT: Use some form of lubricant on holes in wood or metal. The basic operation all materials except wood. -
Page 33: Installing/Removing Drill Bits
Installing/Removing Setting Depth Stop Drill Bits The Model G7947/G7948 has a depth stop that allows you to drill repeated non-through holes to Any drill bit you install in the chuck must be tight the same depth every time. enough that it will not come loose during opera- tion. -
Page 34: Positioning Table
Figure 34. Table adjustment controls. Loosen the lock bolt and tilt the table to the desired angle (make sure table rotation lock knob is locked, so the table won't fall out). Tighten the lock bolt. -32- Model G7947/G7948 (Mfd. Since 01/21) -
Page 35: Removing Arbor
Both Slots Aligned Figure 35. Inner and outer drift-key slots aligned. Insert the drift key into the drift-key slot, and allow the quill to rise, trapping the drift key. -33- Model G7947/G7948 (Mfd. Since 01/21) -
Page 36: Section 5: Accessories
To reduce this risk, only install accessories recommended for this machine by Grizzly. NOTICE Refer to our website or latest catalog for additional recommended accessories. - Page 37 ⁄ " x 48"; replaces all "A" sized V-belts. Requires two Power Twist® V-belts to replace the stock V-belts on your Model G7947/G7948. Well worth it! Figure 41. Half-mask respirator with disposable cartridge filters. Figure 43. T21992 Power Twist V-Belt installed.
- Page 38 ⁄ " overall with 7 ⁄ " lifetime! Chisels measure 11 long handles. T20446 H4979 Figure 45. Hearing protection. Figure 47. Model D3782 Lathe Chisel Set, 3-Pc. www.grizzly.com 1-800-523-4777 order online at or call -36- Model G7947/G7948 (Mfd. Since 01/21)
- Page 39 ⁄ " shank. (For the smaller bits in three easy steps. Just set the drill G7947 & G7948 requires G9716 Quill Collar to bit in the collet, grind the taper relief angle, then work.) grind the web thinning angle to reduce the center point width.
-
Page 40: Section 6: Maintenance
Inspect regularly for tension and wear. Check pulleys to ensure that they are properly aligned. See Changing Speeds on Page 29 for more information about removing/installing belts if you need help replacing the belts. -38- Model G7947/G7948 (Mfd. Since 01/21) -
Page 41: Section 7: Service
5. Motor mount loose/broken. 5. Tighten/replace. 6. Motor or spindle bearings at fault. 6. Test by rotating shaft; rotational grinding/loose shaft requires bearing replacement. 7. Chuck unbalanced or cutter dull. 7. Replace chuck; replace/resharpen cutter. -39- Model G7947/G7948 (Mfd. Since 01/21) - Page 42 1. Poorly adjusted return spring. return to highest 2. Worn return spring. 2. Replace return spring. position. 1. Calibrate depth stop (Page 41). Depth stop pro- 1. Depth stop not calibrated. ducing inaccurate results. -40- Model G7947/G7948 (Mfd. Since 01/21)
-
Page 43: Calibrating Depth Stop
4. Test the depth stop by measuring how far the spindle actually moves with respect to where you set the depth stop. Jam Nut and Cover Nut Spring Lock Cover Figure 53. Feed shaft return spring assembly. -41- Model G7947/G7948 (Mfd. Since 01/21) - Page 44 A high-tension coiled spring is underneath the cover. Put on heavy leather gloves Hold the cover nut and tighten the jam nut to protect yours hands from possible against the cover nut. lacerations when removing the cover. -42- Model G7947/G7948 (Mfd. Since 01/21)
-
Page 45: Section 8: Wiring
Technical Support at (570) 546-9663. The photos and diagrams included in this section are best viewed in color. You can view these pages in color at www.grizzly.com. -43- Model G7947/G7948 (Mfd. Since 01/21) -
Page 46: Electrical Components
Electrical Components Light Switch Power Switch Figure 55. Power and light switch assembly. Figure 57. Motor wiring inside junction box. Figure 56. Light socket with dust plug removed (for 120V operation only). -44- Model G7947/G7948 (Mfd. Since 01/21) -
Page 47: G7947/G7948 Wiring Diagram
G7947/G7948 Wiring Diagram MOTOR Prewired (120V) Ground Ground MOTOR Rewired (240V) Ground Rewired to 240V Ground 120 VAC 240 VAC 5-20 Plug 6-15 Plug (Installed) (As Recommended) -45- Model G7947/G7948 (Mfd. Since 01/21) -
Page 48: Section 9: Parts
G7947 Stand & Table Breakdown We do our best to stock replacement parts when possible, but we cannot guarantee that all parts shown are available for purchase. Call (800) 523-4777 or visit www.grizzly.com/parts to check for availability. BUY PARTS ONLINE AT GRIZZLY.COM! -46- Model G7947/G7948 (Mfd. -
Page 49: G7947 Headstock
76V2 58-5 58-4 58-2 77V2 58-1 58-3 58-6 52 53 100V3 27V2 184841 100B 100C 26V2 126-3 126-1 126-5 126-2 126-4 BUY PARTS ONLINE AT GRIZZLY.COM! -47- Model G7947/G7948 (Mfd. Since 01/21) Scan QR code to visit our Parts Store. - Page 50 SWITCH PLATE P7947090A DRILL CHUCK ARBOR MT3 X JT3 P7947047D TAP SCREW M4 X 12 P7947091 DRILL CHUCK JT3 X 3/64–5/8" BUY PARTS ONLINE AT GRIZZLY.COM! -48- Model G7947/G7948 (Mfd. Since 01/21) Scan QR code to visit our Parts Store.
- Page 51 Safety labels help reduce the risk of serious injury caused by machine hazards. If any label comes off or becomes unreadable, the owner of this machine MUST replace it in the original location before resuming operations. For replacements, contact (800) 523-4777 or www.grizzly.com. BUY PARTS ONLINE AT GRIZZLY.COM! -49- Model G7947/G7948 (Mfd.
-
Page 52: G7948 Stand & Table Breakdown
G7948 Stand & Table Breakdown BUY PARTS ONLINE AT GRIZZLY.COM! -50- Model G7947/G7948 (Mfd. Since 01/21) Scan QR code to visit our Parts Store. -
Page 53: G7948 Headstock Breakdown
76V2 58-5 58-4 58-2 77V2 58-1 58-3 58-6 52 53 100V3 27V2 184841 100B 100C 26V2 126-3 126-1 126-5 126-2 126-4 BUY PARTS ONLINE AT GRIZZLY.COM! -51- Model G7947/G7948 (Mfd. Since 01/21) Scan QR code to visit our Parts Store. - Page 54 GRIZZLY SAFETY PADDLE SWITCH P7948089 SPINDLE P7948047C SWITCH PLATE P7948090A ARBOR MT4/JT3 P7948047D TAP SCREW M4 X 12 P7948091 DRILL CHUCK JT3 X 3/64–5/8" BUY PARTS ONLINE AT GRIZZLY.COM! -52- Model G7947/G7948 (Mfd. Since 01/21) Scan QR code to visit our Parts Store.
- Page 55 HEX NUT M12-1.5 P7948136 THRUST BEARING 51107 P7948118 PHLP HD SCR M5-.8 X 10 P7948137 HEX WRENCH 5MM P7948119 FLAT WASHER 5MM BUY PARTS ONLINE AT GRIZZLY.COM! -53- Model G7947/G7948 (Mfd. Since 01/21) Scan QR code to visit our Parts Store.
-
Page 56: G7947/48 Labels & Cosmetics
Safety labels help reduce the risk of serious injury caused by machine hazards. If any label comes off or becomes unreadable, the owner of this machine MUST replace it in the original location before resuming operations. For replacements, contact (800) 523-4777 or www.grizzly.com. BUY PARTS ONLINE AT GRIZZLY.COM! -54- Model G7947/G7948 (Mfd. -
Page 59: Warranty And Returns
WARRANTY & RETURNS Grizzly Industrial, Inc. warrants every product it sells for a period of 1 year to the original purchaser from the date of purchase. This warranty does not apply to defects due directly or indirectly to misuse, abuse, negligence, accidents, repairs or alterations or lack of maintenance.