Table of Contents
Advertisement
Quick Links
E2018 Lennox Industries Inc.
Dallas, Texas, USA
THIS MANUAL MUST BE LEFT WITH THE
HOMEOWNER FOR FUTURE REFERENCE
General
This XP25 outdoor heat pump is designed for use with
HFC-410A refrigerant only.
These instructions are intended as a general guide and do
not supersede local codes in any way. Consult authorities
having jurisdiction before installation.
IMPORTANT: BEFORE APPLYING ANY POWER (MAIN, SOLAR
OR LOW VOLTAGE) TO THE OUTDOOR UNIT, THE FIELD MUST
®
CONFIRM ICOMFORT Wi-Fi
OR HIGHER SOFTWARE. (REFERENCE ICOMFORT WI-FI
)
THERMOSTAT MANUAL
THIS UNIT IS A INTEGRAL COMPONENT OF A SYSTEM THAT
WILL REQUIRE AN ICOMFORT WI-FI
ICOMFORT™-ENABLED AIR HANDLER OR FURNACE.
iComfort™-enabled
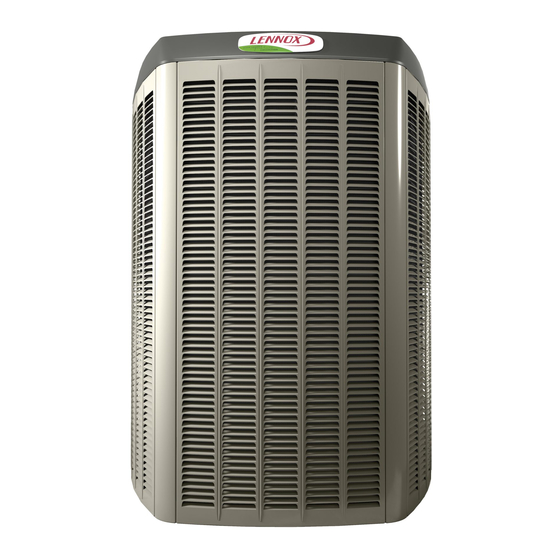
XP25
STEP 1 -- SETTING THE UNIT -- Clearances
CLEARANCE ON ALL SIDES — INCHES (MILLIMETERS)
6 (152)
12 (305)
36 (914)
MINIMUM CLEARANCE BETWEEN TWO UNITS
THERMOSTAT HAS VERSION 2.1
®
THERMOSTAT AND
®
iComfort WI-FI
air handler or
furnace
NOTES:
S Clearance to access panel must be 30
CONTROL
PANEL ACCESS
S Clearance to one of the other three
LOCATION
30 (762)
S Clearance to one of the remaining two
Note: Dimensions are not to scale.
24
(610)
INSTALLATION
INSTRUCTIONS
Dave Lennox Signature
Collection XP25 System
HEAT PUMPS
507005-01
7/2018
®
OUTDOOR UNIT
Improper installation, adjustment, alteration, service or
maintenance can cause property damage, personal inju
ry or loss of life.
Installation and service must be performed by a licensed
HVAC professional installer (or equivalent) or service
agency.
inches (762mm).
sides must be 36 inches (914mm).
sides may be 12 inches (305mm) and
the final side may be 6 inches
(152mm).
CONNECTIONS
FIGURE 1
Page 1
PACKING LIST
GROMMETS (2) BUSHING (1)
WARRANTY
CARD
WARNING
MINIMUM CLEARANCE
ABOVE UNIT
48 (1219)
ACCESS PANEL
LINE SET
REAR VIEW OF UNIT
®
RAST 6-PIN
CONNECTOR (1)
Advertisement
Table of Contents

Related Manuals for Lennox Dave Lennox Signature XP25


Summary of Contents for Lennox Dave Lennox Signature XP25
- Page 1 INSTALLATION INSTRUCTIONS E2018 Lennox Industries Inc. Dallas, Texas, USA Dave Lennox Signature ® THIS MANUAL MUST BE LEFT WITH THE Collection XP25 System HOMEOWNER FOR FUTURE REFERENCE General HEAT PUMPS 507005-01 This XP25 outdoor heat pump is designed for use with 7/2018 HFC-410A refrigerant only.
- Page 2 DETAIL A DETAIL B INSTALL UNIT AWAY FROM WINDOWS INSTALL UNIT LEVEL OR, IF ON A SLOPE, MAINTAIN SLOPE TOLERANCE OF 2 DEGREES (OR 2 INCHES PER 5 FEET [50 MM PER 1.5 M]) AWAY FROM BUILDING STRUCTURE. BUILDING STRUCTURE MOUNTING SLAB TWO 90°...
-
Page 3: Step 2 -- Refrigerant Piping
NOTICE ! WARNING Roof Damage! To prevent personal injury, as well as damage to panels, This system contains both refrigerant and oil. Some unit or structure, observe the following: rubber roofing material may absorb oil, causing the While installing or servicing this unit, carefully stow all rubber to degrade. - Page 4 NOT REPLACE COMPRESSOR. empty all existing traps. Polyol ester (POE) oils are used in Lennox units charged with HFC-410A refrigerant. Re sidual mineral oil can act as an insulator, preventing proper heat transfer. It can also clog the expansion de...
- Page 5 Table 1. Standard Refrigerant Line Set — Up to 50 Linear Feet Inches (mm) Valve Size Connections Recommended Line Sets Unit Size Liquid Line Suction Line L15 Line Set Model Line Set Length Catalog Number L15-65-30 30 feet (9.1 m) 89J60 -024 L15-65-40...
- Page 6 STEP 2 – REFRIGERANT PIPING – Removing Existing Indoor Metering Device and Flushing TYPICAL EXISTING FIXED ORIFICE TYPICAL EXISTING EXPANSION VALVE REMOVAL REMOVAL PROCEDURE PROCEDURE (UNCASED COIL SHOWN) (UNCASED COIL SHOWN) STUB END TWO-PIECE PATCH PLATE LIQUID LINE CHECK DISTRIBUTOR TUBES (UNCASED COIL ONLY) ORIFICE EXPANSION...
- Page 7 STEP 2 -- REFRIGERANT PIPING -- Brazing Procedures CAP AND CORE REMOVAL PIPING PANEL REMOVAL / PREPARING LINE SET Remove service cap and core from both the suction Remove piping panel to access service valves. Cut / vapor and liquid line service ports. ends of the refrigerant lines square (free from nicks or dents) and debur the ends.
- Page 8 CAUTION WARNING Brazing alloys and flux contain materials which are Danger of fire. Bleeding the refrigerant hazardous to your health. charge from only the high side may result Avoid breathing vapors or fumes from brazing in pressurization of the low side shell and operations.
-
Page 9: Step 3 -- Installing Indoor Expansion Valve
STEP 3 -- INSTALLING INDOOR EXPANSION VALVE This outdoor unit is designed for use in systems that include an check/expansion valve metering device. See the XP25 Product Specifications bulletin for approved check/expansion valve kit match-ups and application information. The check/expansion valve can be installed internal or external to the indoor coil. In applications where an uncased coil is being installed in a field-provided plenum, install the check/expansion valve in a manner that will provide access for future field service of the check expansion valve. -
Page 10: Step 4 -- Leak Test And Evacuation
STEP 4 -- LEAK TEST AND EVACUATION HIGH MANIFOLD GAUGE SET OUTDOOR UNIT TO VAPOR SERVICE VALVE NOTE - Position canister to deliver liquid refrigerant. NITROGEN HFC-410A CONNECT GAUGE SET A. Connect the high pressure hose of an HFC-410A manifold gauge set to the vapor valve service port. NOTE —... - Page 11 STEP 4 -- LEAK TEST AND EVACUATION (Continued) EVACUATION HIGH CONNECT GAUGE SET NOTE — Remove cores from service valves (if not already done). Connect low side of manifold gauge set with 1/4 SAE in-line tee to vapor line service valve Connect high side of manifold gauge set to OUTDOOR MANIFOLD...
-
Page 12: Install Thermostat
STEP 5 -- ELECTRICAL -- Circuit Sizing and Wire Routing In the U.S.A., wiring must conform with current local codes CAUTION and the current National Electric Code (NEC). In Canada, wiring must conform with current local codes and the current Canadian Electrical Code (CEC). - Page 13 STEP 3 -- ELECTRICAL (Continued) -- Outdoor Control Jumper and Terminals 7-SEGMENT DISPLAY PUSH BUTTON PUMP DOWN - WHEN UNIT IS IN PUMP DOWN MODE, Pd WILL BE DISPLAYED ON 7-SEGMENT. TO ACTIVATE PUMP DOWN MODE, THE CONTROL MUST BE IN THE IDLE STATE, AND THE PUMP DOWN JUMPER PLACED ACROSS THE TWO PUMP DOWN PINS.
-
Page 14: Outdoor Control
ROUTE CONTROL WIRES ELECTRICAL (CONTROL WIRING) AND LINE SET INLETS USE Maximum length of wiring (18 gauge) for all connections on TYPICAL CONTROL BOX BUSHING AND GROMMETS the RSBus is 1500 feet (457 meters). Wires should be color- PROVIDED IN BAG º... - Page 15 Lennox dealer for assistance. Alarms 1. Ask your Lennox dealer to show you where your indoor unit's filter is located. It will be either at the indoor unit Alarm information is provided on on the outdoor unit ®...
- Page 16 Heat Pump Operation the unit will return to normal operation at the Your new Lennox heat pump has several characteristics conclusion of the defrost cycle. that you should be aware of: Preservice Check...