Parkside PDS 120 B2 Operating And Safety Instructions Manual
Scroll saw
Hide thumbs
Also See for PDS 120 B2:
Table of Contents
Advertisement
Available languages
Available languages
Quick Links
DEKUPIERSÄGE PDS 120 B2
SCROLL SAW PDS 120 B2
SCIE À CHANTOURNER PDS 120 B2
DE
AT
CH
DEKUPIERSÄGE
Bedienungs- und Sicherheitshinweise
Originalbetriebsanleitung
FR
BE
SCIE À CHANTOURNER
Consignes d'utilisation et de sécurité
Traduction des instructions d'origine
CZ
VYŘEZÁVACÍ PILA
Pokyny pro obsluhu a bezpečnostní pokyny
Překlad originálního provozního návodu
SK
VYREZÁVACIA PÍLA
Pokyny pre obsluhu a bezpečnostné pokyny
Preklad originálneho návodu na obsluhu
IAN 322849_1901
GB
IE
SCROLL SAW
Operating and Safety Instructions
Translation of Original Operating Manual
NL
BE
DECOUPEERZAAG
Bedienings- en veiligheidsinstructies
Vertaling van de originele handleiding
PL
PIŁA WYRZYNARKA
Wskazówki dotyczące obsługi i bezpieczeństwa
Tłumaczenie oryginalnej instrukcji obsługi
8
Advertisement
Chapters
Table of Contents

Related Manuals for Parkside PDS 120 B2


Summary of Contents for Parkside PDS 120 B2
- Page 1 DEKUPIERSÄGE PDS 120 B2 SCROLL SAW PDS 120 B2 SCIE À CHANTOURNER PDS 120 B2 DEKUPIERSÄGE SCROLL SAW Bedienungs- und Sicherheitshinweise Operating and Safety Instructions Originalbetriebsanleitung Translation of Original Operating Manual SCIE À CHANTOURNER DECOUPEERZAAG Consignes d‘utilisation et de sécurité...
- Page 2 Klappen Sie vor dem Lesen die Seite mit den Abbildungen aus und machen Sie sich anschließend mit allen Funktionen des Gerätes vertraut. Before reading, unfold the page containing the illustrations and familiarise yourself with all functions of the device. Avant de lire le mode d‘emploi, ouvrez la page contenant les illustrations et familiarisez-vous ensuite avec toutes les fonctions de l‘appareil. Vouw vóór het lezen de pagina met de afbeeldingen open en maak u vertrouwd met alle functies van het apparaat.
-
Page 6: Table Of Contents
Inhalt: Seite: Erklärung der Symbole auf dem Gerät................................2 Einleitung ..........................................3 Gerätebeschreibung (Abb. 1-16) ..................................3 Lieferumfang ........................................3 Bestimmungsgemäße Verwendung ..................................3 Sicherheitshinweise ......................................4 Technische Daten ........................................ 6 Vor Inbetriebnahme......................................7 Aufbau ..........................................7 Bedienung ..........................................9 Elektrischer Anschluss......................................10 Transport ..........................................10 Reinigung, Wartung und Ersatzteilbestellung ..............................10 Lagerung ..........................................11 Entsorgung und Wiederverwertung .................................11 Störungsabhilfe .........................................12... -
Page 7: Erklärung Der Symbole Auf Dem Gerät
1. Erklärung der Symbole auf dem Gerät Warnung! Zur Verringerung des Verletzungsrisikos Bedienungsanleitung lesen! Tragen Sie eine Schutzbrille. Während der Arbeit entstehende Funken oder aus dem Gerät heraustretende Splitter, Späne und Stäube können Sichtverlust bewirken. Tragen Sie einen Gehörschutz. Die Einwirkung von Lärm kann Gehörverlust bewirken. Tragen Sie eine Staubschutzmaske. -
Page 8: Einleitung
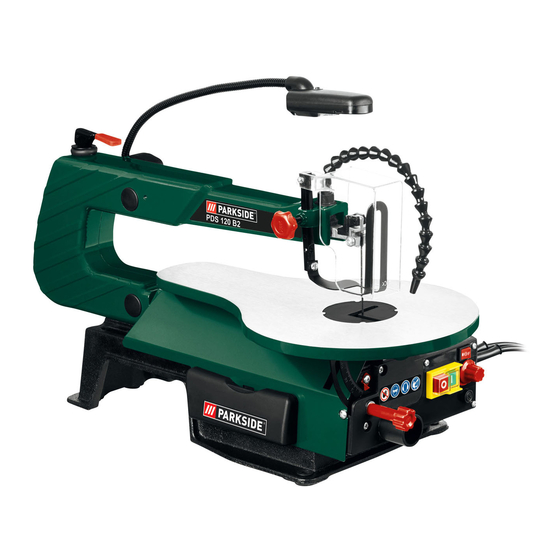
2. Einleitung 3. Gerätebeschreibung (Abb. 1-16) Hersteller: Abblasvorrichtung scheppach Halterung (Abblasvorrichtung) Fabrikation von Holzbearbeitungsmaschinen GmbH Rändelschraube Günzburger Straße 69 Halter (Sägeblattschutz) D-89335 Ichenhausen Sägeblattschutz Sägetisch Verehrter Kunde, Fußpedal Wir wünschen Ihnen viel Freude und Erfolg beim Arbeiten mit Abdeckung links Ihrem neuen Gerät. -
Page 9: Sicherheitshinweise
Das Gerät darf nur nach seiner Bestimmung verwendet wer- Lesen Sie alle diese Hinweise, bevor Sie dieses Elektrowerk- den. Jede weitere darüber hinausgehende Verwendung ist zeug benutzen, und bewahren Sie die Sicherheitshinweise gut nicht bestimmungsgemäß. Für daraus hervorgerufene Schäden auf. oder Verletzungen aller Art haftet der Benutzer/Bediener und nicht der Hersteller. - Page 10 10. Schließen Sie die Staubabsaug-Einrichtung an – Beschädigte Schalter müssen bei einer Kundendienst- – Falls Anschlüsse zur Staubabsaugung und Auffangein- werkstatt ersetzt werden. richtung vorhanden sind, überzeugen Sie sich, dass Benutzen Sie keine Elektrowerkzeuge, bei denen sich – diese angeschlossen und richtig benutzt werden. der Schalter nicht ein- und ausschalten lässt.
-
Page 11: Technische Daten
• Drücken Sie das Werkstück immer fest gegen die Arbeits- • Säge erst nach Freimachen des Arbeitstisches von Material- platte. resten und Werkzeugen einschalten. Lassen Sie nur das zu • Entfernen Sie nie lose Splitter, Späne oder eingeklemmte bearbeitenden Werkstück und etwaige Arbeitshilfen (Keile) Holzteile bei laufendem Sägeblatt. -
Page 12: Vor Inbetriebnahme
Die angegebenen Werte sind Emissionswerte und müssen da- • Schließen Sie die Maschine nur an eine ordnungsgemäß mit nicht zugleich auch sichere Arbeitsplatzwerte darstellen. installierte Schutzkontakt- Steckdose an, die mit mindestens Obwohl es eine Korrelation zwischen Emissions- und Immissi- 10 A abgesichert ist. onspegeln gibt, kann daraus nicht zuverlässig abgeleitet wer- den, ob zusätzliche Vorsichtsmaßnahmen notwendig sind oder 8.3 Montage der Dekupiersäge auf einer Werk-... - Page 13 9.3.3 Entnahme des Sägeblattes mit Stiften Montieren Sie den Niederhalter (24). Stecken Sie die Schraube (25) an den Halter (4) und fixieren Sie diese. Zur Entnahme des Sägeblattes (22) nehmen Sie die Setzen Sie das Sägeblatt (22) wieder ein, wie unter 9.3 Tischeinlage (26) nach oben ab.
-
Page 14: Bedienung
10.4 Hubzahlregler (Abb. 2) 9.5 Feineinstellung der Winkelskala (Abb. 12) ACHTUNG Mit dem Hubzahlregler (18) können Sie die Hubzahl entspre- Überprüfen Sie die Einstellung der Winkelskala, bevor Sie mit chend des zu schneidenden Materials einstellen. Für weiches dem Gerät arbeiten. Material empfehlen wir hohe Hubzahlen, für hartes Material niedrige Hubzahlen. -
Page 15: Elektrischer Anschluss
12. Transport 10.7 Durchführen von Gehrungsschnitten (Abb. 14) WARNUNG Seien Sie beim Durchführen von Gehrungsschnitten besonders • Transportieren Sie das Elektrowerkzeug, indem Sie es an vorsichtig. Durch die Neigung des Sägetisches wird ein Abrut- den dafür vorgesehenen Aussparungen am Gestell und der schen begünstigt. -
Page 16: Lagerung
13.2.3 Netzkabel Altgeräte dürfen nicht in den Hausmüll! Wenn das Netzkabel ausgerissen, angeschnitten oder in ande- Dieses Symbol weist darauf hin, dass dieses Produkt ge- rer Form beschädigt ist, sollte es augenblicklich ersetzt werden. mäß Richtlinie über Elektro- und Elektronik-Altgeräte (2012/19/EU) und nationalen Gesetzen nicht über 13.2.4 Feinsicherung tauschen (Abb. -
Page 17: Störungsabhilfe
16. Störungsabhilfe WARNUNG Schalten Sie die Säge immer aus und ziehen Sie den Netzstecker vor allen Wartungs- und Reinigungsarbeiten. Störung Mögliche Ursache Abhilfe Sägeblattes ohne Stifte Sägeblattklemmschraube (28/29) zu leicht Sägeblattklemmschraube (28/29) fest anziehen löst sich nach Abschalten angezogen des Motors Motor läuft nicht an Ausfall Netzsicherung Netzsicherung prüfen... -
Page 18: Garantieurkunde
17. Garantieurkunde Sehr geehrte Kundin, sehr geehrter Kunde, unsere Produkte unterliegen einer strengen Qualitätskontrolle. Sollte dieses Gerät dennoch einmal nicht einwandfrei funktionieren, bedau- ern wir dies sehr und bitten Sie, sich an unseren Servicedienst unter der auf dieser Garantiekarte angegebenen Adresse zu wenden. Gern stehen wir Ihnen auch telefonisch über die unten angegebene Servicerufnummer zur Verfügung. - Page 19 Table of contents: Page: Explanation of the symbols on the equipment ...............................15 Introduction ........................................16 Device description (fig. 1-15) ...................................16 Supplied package ......................................16 Intended use ........................................16 Safety information ......................................17 Technical data ........................................19 Before starting the machine ....................................19 Assembly ..........................................20 Operation ..........................................21 Electrical connection ......................................22 Transport ..........................................22 Cleaning, maintenance, storage and ordering of spare parts ........................23...
-
Page 20: Explanation Of The Symbols On The Equipment
1. Explanation of the symbols on the equipment Warning! Read the operating instructions to reduce the risk of injury! Wear safety goggles. Sparks generated during work or splinters, chips and dust emitted by the equipment can cause loss of sight. Wear ear-muffs. -
Page 21: Introduction
2. Introduction 3. Device description (fig. 1-15) MANUFACTURER: Blow-off device scheppach Mounting (Blow-off device) Fabrikation von Holzbearbeitungsmaschinen GmbH Knurled screw Günzburger Straße 69 Holder (Saw blade guard) D-89335 Ichenhausen Saw blade guard Saw table Dear Customer, Foot pedal we hope your new tool brings you much enjoyment and suc- Cover, left cess. -
Page 22: Safety Information
The equipment may only be used for the tasks it is designed to 2. Only have your device repaired by qualified handle. Any other use is deemed to be a case of misuse. The specialists and only with original spare parts. This user/operator and not the manufacturer will be liable for any ensures that safety of the device is maintained. - Page 23 – Check the connection cable of the electric tool regu- • Follow all these safety instructions before and while working larly and have it replaced by a recognised specialist with the saw. when damaged. • Do not use this saw to cut fire wood. Check theextension cable regularly and replace it if •...
-
Page 24: Technical Data
• Workpieces that are smaller than the saw blade guard can **Operating mode S6 30%: cause injuries to the hands or fingers. Use suitable aids! Continuous operation with idling (cycle time 10 minutes). To • Avoid cramped hand positions when guiding in the work- ensure that the motor does not become excessively hot, it may piece and avoid positions in which slipping could lead to only be operated for 30% of the cycle at the specified rating... -
Page 25: Assembly
8.2 General notes 9.1 Installing the depressor (fig. 6, 7) • All covers and safety devices have to be properly fitted be- NOTE: fore the equipment is switched on. Before assembling the depressor (24), the saw blade pre-in- • It must be possible for the blade to run freely. stalled at the factory (22) must be removed (see 9.3). -
Page 26: Operation
Tighten the saw blade (22) with the clamping lever To set the saw table, use a 90° bracket (31, not in the (11), by pressing it down again. Check the tension of scope of delivery). Place this against the saw table and the saw blade (22). -
Page 27: Electrical Connection
11. Electrical connection 10.5 Operating modes (fig. 1, 2) The scroll saw is able to be operated manually or via the foot pedal. The electrical motor installed is connected and ready for operation. The connection complies with the applicable VDE and DIN provisions. The customer‘s mains connection as well as the extension cable used must also comply with these regulations. -
Page 28: Cleaning, Maintenance, Storage And Ordering Of Spare Parts
13. Cleaning, maintenance, storage and 13.3 Service information ordering of spare parts Please note that the following parts of this product are sub- ject to normal or natural wear and that the following parts are WARNING therefore also required for use as consumables. Wear parts*: Carbon brushes, saw blade, table inlay Always switch the machine off and remove the mains plug prior to all maintenance and cleaning work. -
Page 29: Troubleshooting
16. Troubleshooting WARNING Always switch the machine off and remove the mains plug prior to all maintenance and cleaning work. Fault Possible cause Remedy Saw blade without pins Saw blade clamping screw (28/29) not tightened Tighten the saw blade clamping screw (28/29) loosens after switching off enough the engine... -
Page 30: Warranty Certificate
17. Warranty certificate Dear Customer, All of our products undergo strict quality checks to ensure that they reach you in perfect condition. In the unlikely event that your device develops a fault, please contact our service department at the address shown on this guarantee card. Of course, if you would prefer to call us then we are also happy to offer our assistance under the service number printed below. - Page 31 Table des matières: Page: Légende des symboles figurant sur l’appareil ..............................27 Introduction ........................................28 Description de la machine (Fig. 1-16) ................................28 Limite de fourniture ......................................28 Ensemble de livraison .......................................28 Consignes de sécurité .......................................29 Caractéristiques techniques ....................................31 Avant la mise en service ....................................32 Montage ..........................................32 Commande ........................................34 Raccordement électrique ....................................35...
-
Page 32: Légende Des Symboles Figurant Sur L'appareil
1. Légende des symboles figurant sur l’appareil Avertissement - Lisez ce mode d’emploi pour diminuer le risque de blessures! Portez des lunettes de protection. Les étincelles générées pendant travail ou les éclats, copeaux et la poussière sortant de l’appareil peuvent entraîner une perte de la vue. Portez une protection de l’ouïe. -
Page 33: Introduction
2. Introduction 3. Description de la machine (Fig. 1-16) FABRICANT : Soufflette scheppach Support (Soufflette) Fabrikation von Holzbearbeitungsmaschinen GmbH Vis moletée Günzburger Straße 69 Support (Capot de protection de lame de scie) D-89335 Ichenhausen Capot de protection de lame de scie Table Chers clients, Pédale... -
Page 34: Consignes De Sécurité
L’appareil doit uniquement être utilisé conformément à son af- Veuillez lire ces consignes avant d’utiliser cet outil électrique et fectation ! Chaque utilisation allant au-delà de cette affectation conservez-les soigneusement. est considérée comme non conforme. Pour les dommages en résultant ou les blessures de tout genre, le fabricant décline Entretien et maintenance toute responsabilité... - Page 35 10. Raccordez le dispositif d’aspiration – N’utilisez pas un outil électrique qui ne peut être mis en – Au cas où des raccords pour les dispositifs d’aspiration marche ou arrêté. et de collection sont disponibles, vérifiez qu’ils sont 21. ATTENTION! bien branchés et correctement utilisés.
-
Page 36: Caractéristiques Techniques
• Pour remédier aux incidents lorsque l’outil est bloqué, mettez • Maintenez toujours les doigts à bonne distance de la lame la machine hors circuit. - Débranchez la prise du secteur - de scie. retirez ce qui bloque. « Attention ! Risque de blessure par •... -
Page 37: Avant La Mise En Service
8.3 Montage de la scie à chantourner sur un établi Les facteurs pouvant influencer le niveau d’immission présent sur le moment au poste de travail comprennent la durée des ef- Pour le montage, vous avez besoin de: fets, la sorte de salle de travail, les autres sources de bruit, etc. par ex. - Page 38 Le serre-flan (24) doit toujours être adapté à la hauteur de la Extrayez la lame des supports de lame supérieur et infé- pièce à usiner. La pièce à usiner ne doit cependant pas être rieur (27/30). serrée, elle doit se déplacer librement. Le serre-flan (24) permet de garantir que la pièce à...
-
Page 39: Commande
9.6 Aspiration des copeaux (Fig. 13) ATTENTION : N’utilisez l’appareil qu’avec l’aspiration. Raccordez une installation d’aspiration des copeaux adaptée (non fournie) au raccord d’aspiration (15) (voir Fig. 13 Illustra- tion à titre d’exemple). ATTENTION : Contrôlez et nettoyez régulièrement les canaux d’aspiration. -
Page 40: Raccordement Électrique
11. Raccordement électrique 13. Nettoyage, maintenance, stockage et commande de pièces de rechange Le moteur électrique installé est prêt à fonctionner une fois raccordé. Le raccordement correspond AVERTISSEMENT aux dispositions de la VDE et DIN en vigueur. Arrêtez toujours la scie et débranchez la fiche secteur avant tous les travaux de maintenance et de nettoyage. -
Page 41: Stockage
13.3 Informations concernant le service après- Ne jetez pas les anciens appareils avec les déchets vente ménagers! Il faut tenir compte du fait que pour ce produit les pièces sui- Ce symbole indique que conformément à la directive vantes sont soumises à une usure liée à l‘utilisation et sont donc relative aux déchets d’équipements électriques et élec- des consommables non couverts par la garantie. -
Page 42: Aide Au Dépannage
16. Aide au dépannage AVERTISSEMENT Arrêtez toujours la scie et débranchez la fiche secteur avant tous les travaux de maintenance et de nettoyage. Problème Cause possible Solution La lame de scie sans tiges Vis de serrage de lame de scie (28/29) pas Serrez la vis de serrage de lame de scie (28/29) se détache après l’arrêt suffisamment serrée... -
Page 43: Acte De Garantie
17. Acte de garantie Chère Cliente, Cher Client, Nos produits sont soumis à un contrôle de qualité très strict. Si cet appareil devait toutefois ne pas fonctionner impeccablement, nous en serions désolés. Dans un tel cas, nous vous prions de bien vouloir prendre contact avec notre service après-vente à l‘adresse indiquée sur le bulletin de garantie ou vous adresser au marché... - Page 44 Inhoudsopgave: Pagina: Verklaring van de symbolen op het toestel ..............................40 Inleiding ..........................................41 Beschrijving van het toestel (afb. 1-16) ................................41 Omvang van de levering ....................................41 Doelmatig gebruik ......................................41 Veiligheidsinstructies ......................................42 Technische gegevens ......................................44 Vóór inbedrijfstelling ......................................45 Opzet ..........................................45 Bediening ...........................................47 Elektrische aansluiting .......................................48 Transport ..........................................48 Reiniging, onderhoud en bestellen van wisselstukken ............................48 Opbergen ..........................................49...
-
Page 45: Verklaring Van De Symbolen Op Het Toestel
1. Verklaring van de symbolen op het toestel Waarschuwing – Handleiding lezen om het letselrisico te verminderen” Draag een veiligheidsbril. Vonken die tijdens het werk ontstaan of splinters, spanen en stof die uit het toestel ontsnappen kunnen leiden tot zichtverlies. Draag een gehoorbeschermer. -
Page 46: Inleiding
2. Inleiding 3. Beschrijving van het toestel (afb. 1-16) Fabrikant: Afblaasinrichting scheppach Houder (Afblaasinrichting) Fabrikation von Holzbearbeitungsmaschinen GmbH Kartelschroef Günzburger Straße 69 Houder (Zaagbladafdekking) D-89335 Ichenhausen Zaagbladafdekking Zaagtafel Geachte klant, Voetpedaal Wij wensen u veel plezier en succes bij het werken met uw Afdekking links nieuwe apparaat. -
Page 47: Veiligheidsinstructies
Het toestel mag slechts voor werkzaamheden worden gebruikt Lees alle voorschriften alvorens deze machine te gebruiken en waarvoor het bedoeld is. Elk verder gaand gebruik is niet doel- bewaar de veiligheidsvoorschriften. matig. Voor daaruit voortvloeiende schade of letsel van welke aard dan ook is de gebruiker/bediener, niet de fabrikant, aan- Onderhoud en service sprakelijk. - Page 48 11. Onttrek de kabel niet aan zijn eigenlijke be- 21. LET OP! stemming – Bij gebruik van andere inzetstukken en andere acces- Draag het gereedschap niet aan de kabel en gebruik soires bestaat gevaar voor persoonlijk letsel. – de kabel niet om de stekker uit het stopcontact te trek- 22.
-
Page 49: Technische Gegevens
• Schakel de machine uit om storingen aan het geblokkeerde • Hou de vingers op een veilige afstand van het zaagblad. inzetgereedschap te verhelpen. Verwijder de netstekker uit • Leid het werkstuk veilig en vast en laat het op geen enkel los. het stopcontact. -
Page 50: Vóór Inbedrijfstelling
8.3 Monteer de decoupeerzaag op een werkbank De waarden vermeld in de tabel zijn emissiewaarden en ko- men niet meteen noodzakelijk overeen met de geluidswaarden gemeten op de werkvloer. Hoewel er een correlatie bestaat Voor de montage hebt u nodig: tussen emissie- en immissiepeilen kan er niet zeker uit worden opgemaakt of al dan niet bijkomende voorzorgsmaatregelen Inhoud van de levering:... - Page 51 Let op dat de neerhouder (24) het zaagblad (22) niet Haal eerst de spanning er af door de spanhendel (11) aanraakt. omhoog te klappen. Verminder de spanning verder door rechtsom te draaien. De neerhouder (24) moet altijd overeenkomstig de werkstuk- Druk de draagarm (12) iets omlaag (zie afb.
-
Page 52: Bediening
Voer een testsnede uit. Controleer de hoek op het werk- stuk met een winkelhaak. Stel eventueel de aanwijzer (33) af. 9.6 Spanenafzuiging (afb. 13) LET OP: Gebruik het apparaat alleen met afzuiging. Sluit een geschikte spanenafzuiginstallatie (niet bij de levering inbegrepen) op de afzuigmof (15) aan (zie afb. -
Page 53: Elektrische Aansluiting
van wisselstukken 11. Elektrische aansluiting De geïnstalleerde elektromotor is bedrijfsklaar WAARSCHUWING aangesloten. De aansluiting voldoet aan de rele- Schakel de zaag altijd uit en trek de stekker uit het stopcontact vante VDE- en DIN-voorschriften. voor alle onderhouds- en reinigingswerkzaamheden. De netaansluiting van de klant en het gebruikte 13.1 Reiniging verlengsnoer moeten eveneens aan deze voor- Hou de veiligheidsinrichtingen, de ventilatiespleten en het mo-... -
Page 54: Opbergen
U moet er rekening mee houden dat bij dit product de volgen- de delen onderhevig zijn aan een slijtage door gebruik of een natuurlijke slijtage, resp. dat de volgende delen nodig zijn als verbruiksmaterialen. De verpakking is gemaakt van milieuvriendelijke Slijtstukken*: Koolborstels, zaagblad, tafelinzetstukken materialen die u bij lokale recyclingcentra kunt in- leveren. -
Page 55: Garantiebewijs
17. Garantiebewijs Geachte klant, onze producten zijn aan een strenge kwaliteitscontrole onderhevig. Mocht dit apparaat echter ooit niet naar behoren functioneren, spijt het ons ten zeerste en vragen u zich tot onze servicedienst onder het adres vermeld op dit garantiebewijs te wenden. Wij staan ook graag telefo- nisch tot uw dienst via het hieronder vermelde servicetelefoonnummer. - Page 56 Spis treści: Strona: Wyjaśnienie symboli na urządzeniu ................................52 Wprowadzenie .........................................53 Opis urządzenia (rys. 1-16) .....................................53 Zakres dostawy ........................................53 Użycie zgodne z przeznaczeniem ..................................53 Bezpieczeństwa ........................................54 Dane techniczne........................................56 Przed uruchomieniem ......................................57 Budowa ..........................................57 Obsługa ..........................................59 Przyłącze elektryczne .......................................60 Transport ..........................................60 Czyszczenie, konserwacja i zamawianie części zamiennych ........................60 Przechowywanie .......................................61 Utylizacja i recykling ......................................61 Pomoc dotycząca usterek ....................................62...
-
Page 57: Wyjaśnienie Symboli Na Urządzeniu
1. Wyjaśnienie symboli na urządzeniu Ostrzeżenie! W celu zmniejszenia ryzyka obrażeń należy przeczytać instrukcję obsługi. Stosować okulary ochronne. Powstające w trakcie pracy iskry lub wyrzucane przez urzą- dzenie odłamki, wióry i pyły mogą się przyczynić do utraty widoczności. Nosić nauszniki ochronne. Hałas może powodować utratę słuchu. Nosić... -
Page 58: Wprowadzenie
2. Wprowadzenie 3. Opis urządzenia (rys. 1-16) Producent: Dmuchawa scheppach Uchwyt (dmuchawa) Fabrikation von Holzbearbeitungsmaschinen GmbH Śruba radełkowa Günzburger Straße 69 Uchwyt (osłona tarczy tnącej) D-89335 Ichenhausen Osłona tarczy tnącej Stół pilarki Szanowny kliencie, Pedał nożny Życzymy wiele radości i sukcesów w trakcie pracy z nowo na- Osłona po lewej stronie bytym urządzeniem. -
Page 59: Bezpieczeństwa
Urządzenia używać tylko zgodnie z jego przeznaczeniem. Przed przystąpieniem do używania niniejszego narzędzia Każde użycie wykraczające poza wyżej podane jest uważane elektrycznego należy przeczytać wszystkie wskazówki i odpo- za niezgodne z przeznaczeniem. Za wynikające stąd szkody wiednio przechowywać je w bezpiecznym miejscu. producent nie odpowiada;... - Page 60 Stosować odpowiednie wyposażenie ochronne – Uszkodzone urządzenia ochronne i części należy – Stosować okulary ochronne. zgodnie z ich przeznaczeniem oddać do naprawy Podczas prac z dużą emisją pyłu stosować maskę chro- lub wymiany do warsztatu specjalistycznego, o ile nie – niącą...
-
Page 61: Dane Techniczne
• Nie ciąć przedmiotów obrabianych, które są za małe, by • Nigdy nie opuszczać stanowiska pracy bez wcześniejszego można je było bezpiecznie utrzymać w ręce. wyłączenia piły. Odczekać, aż piła całkowicie się zatrzyma. • Nie obciążać maszyny tak mocno, że spowoduje to jej za- •... -
Page 62: Przed Uruchomieniem
Poziom ciśnienia akustycznego L ......66,9 dB(A) • Przed uruchomieniem przycisku włączania/wyłączania tar- Odchylenie K ............... 3 dB(A) cza musi być prawidłowo zamontowana. Części ruchome Poziom mocy akustycznej L ......... 79,9 dB(A) muszą poruszać się lekko. Odchylenie K .............. 3 dB(A) •... - Page 63 Wyjąć tarczę tnącą (22) w sposób opisany w punkcie Naprężyć tarczę tnącą (22) dźwignią zaciskową (11), 9.3. ponownie naciskając ją w dół. Sprawdzić napięcie tar- Zdjąć dolny uchwyt (24) z osłony tarczy tnącej (5) po- czy tnącej (22). Jeśli napięcie jest zbyt niskie, można je przez całkowite poluzowanie śruby (25) (patrz rys.
-
Page 64: Obsługa
10.3 Praca z lampą roboczą (rys. 4) Tarcza tnąca powinna, przy prawidłowym napięciu, wydawać wyraźny dźwięk, gdy jest „wyrywana”, jak w przypadku jed- Włączyć maszynę w sposób opisany w punkcie 10.2. nej strony. Lampę roboczą (20) można teraz włączać i wyłączać za pomocą... -
Page 65: Przyłącze Elektryczne
Po wykonaniu cięć wewnętrznych należy usunąć tarczę W przypadku pytań proszę o podanie następujących danych: tnącą (22) z uchwytów tarczy (zgodnie z opisem w pkt • Rodzaj prądu silnika 9.3). • Dane z tabliczki identyfikacyjnej maszyny Wyjąć przedmiot obrabiany ze stołu. 12. -
Page 66: Przechowywanie
Zużytego sprzętu nie wolno wyrzucać wraz z odpadami 13.2.3 Kabel zasilający Jeżeli kabel zasilający jest zerwany, przecięty lub w inny spo- domowymi! sób uszkodzony, należy go natychmiast wymienić. Symbol ten oznacza, że zgodnie z dyrektywą w spra- wie zużytego sprzętu elektrycznego i elektronicznego 13.2.4 Wymiana bezpiecznika czułego (rys. -
Page 67: Pomoc Dotycząca Usterek
16. Pomoc dotycząca usterek OSTRZEŻENIE Przed rozpoczęciem prac konserwacyjnych lub czyszczących należy zawsze wyłączyć piłę i odłączyć wtyczkę sieciową. Usterka Możliwa przyczyna Pomoc Brzeszczot piły bez Śruba zaciskowa tarczy tnącej(28/29) zbyt lekko Dokręcić śruba zaciskowa tarczy tnącej (28/29) kołków luzuje się, gdy dokręcona. -
Page 68: Gwarancja
17. Gwarancja Drodzy Klienci, Wszystkie nasze produkty przechodzą przez rygorystyczną kontrolę jakości, aby zapewnić, że dotrą do Państwa w idealnym stanie. W mało prawdopodobnej sytuacji wystąpienia usterki w Państwa urządzeniu, proszę skontaktować się z naszym działem serwisu pod adresem podanym w niniejszej karcie gwarancyjnej. Oczywiście, jeśli wolelibyście Państwo do nas zadzwonić, jesteśmy również gotowi zaoferować pomoc pod numerem telefonu serwisu wydrukowanym poniżej. - Page 69 Obsah: Strana: Vysvětlení symbolů na přístroji ..................................65 Úvod ..........................................66 Popis přístroje (obr. 1-16) ....................................66 Rozsah dodávky ........................................66 Použití podle účelu určení ....................................66 Bezpečnostní pokyny ......................................67 Technická data ........................................69 Před uvedením do provozu ....................................70 Montáž ..........................................70 Obsluha ..........................................71 Elektrická přípojka ......................................72 Přeprava..........................................72 Čištění, údržba, uložení...
-
Page 70: Vysvětlení Symbolů Na Přístroji
Vysvětlení symbolů na přístroji Varování! Ke snížení rizika zranění si přečíst návod k obsluze! Noste ochranné brýle. Jiskry vznikající při práci nebo odštěpky dřeva, třísky a prachy vystu- pující z přístroje mohou způsobit ztrátu viditelnosti. Noste ochranu sluchu. Působení hluku může způsobit ztrátu sluchu. Noste ochrannou masku proti prachu. -
Page 71: Úvod
2. Úvod 3. Popis přístroje (obr. 1-16) VÝROBCE: Zařízení na odfukování pilin scheppach Držák (Zařízení na odfukování pilin) Fabrikation von Holzbearbeitungsmaschinen GmbH Rýhovaný šroub Günzburger Straße 69 Držák (Ochrana pilového listu) D-89335 Ichenhausen Ochrana pilového listu Stůl pily VÁŽENÝ ZÁKAZNÍKU, Nožní... -
Page 72: Bezpečnostní Pokyny
Přístroj smí být používán pouze podle svého účelu určení. Ka- Obsluha a údržba ždé další, toto překračující použití, neodpovídá použití podle účelu určení. Za z toho vyplývající škody nebo zranění všeho 1. Pravidelné čištění, údržba a mazání. Před každým druhu ručí uživatel/obsluhující osoba a ne výrobce. seřizováním, údržbou nebo opravou vytáhněte síťovou zástrčku. - Page 73 12. Zajistěte opracovávaný kus VAROVÁNÍ – Používejte upínací zařízení nebo svěrák, aby opracová- Tento elektrický nástroj vytváří během provozu elektromagnetic- vaný kus pevně držel. Tak je držen spolehlivěji než rukou. ké pole. Toto pole může za určitých podmínek ovlivňovat aktiv- 13.
-
Page 74: Technická Data
7. Technická data • Musí být dodržovány bezpečnostní, pracovní a údržbářské pokyny výrobce a také rozměry uvedené v Technických da- tech. Síťové napětí ..........220-240 V ~ /50 Hz • Je třeba dbát příslušných bezpečnostních předpisů a jiných, Příkon ............80 Watt (S1*) všeobecně... -
Page 75: Před Uvedením Do Provozu
Vhodné pilové listy Přišroubujte vyřezávací pilu na dílenský stůl šroubem se Je možné použití všech běžných pilových listů s minimální dél- šestihrannou hlavou (G) skrz montážní body (obr. 3 pol. kou 127 mm s i bez kolíku. 19) v následujícím pořadí (obr. 5): A vyřezávací... -
Page 76: Obsluha
Tlačte rameno (12) lehce dolů (viz obr. 9). Pokud je napnutí listu příliš malé nebo velké, postupujte násle- Poté nejprve uvolněte horní svěrací šroub kotouče pily dujícím způsobem: (28) a dále spodní svěrací šroub pomocí (29) inbuso- • Vyklopte upínací páku (11) nahoru. vého klíče (23). -
Page 77: Elektrická Přípojka
10.7 Provádění pokosových řezů (obr. 14) 10.3 Provoz pracovní svítilny (obr. 4) Zapněte stroj způsobem popsaným v bodu 10.2. VAROVÁNÍ Pracovní svítilnu (20) lze nyní zapínat a vypínat vypína- Při provádění pokosových řezů buďte velmi opatrní. Nakloně- čem (21). ním stolu pily existuje větší pravděpodobnost sklouznutí. Hrozí nebezpečí... -
Page 78: Čištění, Údržba, Uložení A Objednání Náhradních Dílů
13.3 Servisní informace • Dbejte na to, aby během přepravy byla volně uložená část pilového listu zakrytá, například ochranným zařízením. Je třeba dbát na to, že u tohoto přístroje podléhají následující díly opotřebení přiměřenému použití nebo přirozenému opotře- 13. Čištění, údržba, uložení a objednání bení, resp. -
Page 79: Odstraňování Závad
16. Odstraňování závad VAROVÁNÍ Před veškerými úkony údržby a čištění vždy vypněte pilu a odpojte síťovou zástrčku. Závada Možná příčina Odstranění Pilový list bez kolíku se po Upevňovací šroub pilového listu (28/29) je Utáhněte upevňovací šroub pilového listu (28/29) vypnutí motoru uvolní nedotažený... -
Page 80: Záruční List
17. Záruční list Važena zakaznice, važeny zakazniku, naše výrobky podléhají přísné kontrole kvality. Pokud i přesto tento přístroj bezvadně nefunguje, velice toho litujeme a prosíme Vás, abyste se obrátili na náš zákaznický servis, jehož adresa je uvedena na tomto záručním listu. Rádi Vám budeme k dispozici také telefonicky na níže uvedeném servisním čísle. - Page 81 Obsah: Strana: Vysvetlenie symbolov na prístroji..................................77 Úvod ..........................................78 Popis prístroja (obr. 1-16) ....................................78 Obsah dodávky ........................................78 Správny spôsob použitia ....................................78 Bezpečnostné pokyny .......................................79 Technické údaje .........................................81 Pred uvedením do prevádzky ...................................82 Zloženie ..........................................82 Obsluha ..........................................83 Elektrická prípojka ......................................84 Preprava..........................................85 Čistenie, údržba, skladovanie a objednanie náhradných dielov ........................85 Skladovanie ........................................85 Likvidácia a recyklácia......................................85 Odstraňovanie porúch ......................................86...
-
Page 82: Vysvetlenie Symbolov Na Prístroji
1. Vysvetlenie symbolov na prístroji VÝSTRAHA - Aby ste znížili riziko poranenia, prečítajte si návod na obsluhu Noste ochranné okuliare. Iskry vznikajúce pri práci alebo úlomky, triesky a prach vystupu- júci z prístroja by mohli viesť k trvalému poškodeniu zraku. Používajte ochranu sluchu. -
Page 83: Úvod
2. Úvod 3. Popis prístroja (obr. 1-16) Výrobca: Vyfukovacie zariadenie scheppach Držiak (Vyfukovacie zariadenie) Fabrikation von Holzbearbeitungsmaschinen GmbH Skrutka s ryhovanou hlavou Günzburger Straße 69 Držiak (Ochrana pílového kotúča) D-89335 Ichenhausen Ochrana pílového kotúča Stôl píly Vážený zákazník, Nožný pedál Želáme Vám veľa zábavy a úspechov pri práci s Vaším novým Ľavý... -
Page 84: Bezpečnostné Pokyny
6. Bezpečnostné pokyny Prístroj smie byť použitý len na ten účel, na ktorý bol určený. Akékoľvek iné odlišné použitie sa považuje za nespĺňajúce účel použitia. Za škody alebo zranenia akéhokoľvek druhu 6.1 Všeobecné bezpečnostné predpisy pre elek- spôsobené nesprávnym používaním ručí používateľ / obsluhu- trické... - Page 85 – Pri dlhých vlasoch noste sieťku na vlasy. – Poškodené ochranné zariadenia a diely sa musia v súlade Používajte ochranný výstroj s predpismi nechať opraviť alebo vymeniť v autorizovanej Noste ochranné okuliare. dielni, pokiaľ nie je v návode na obsluhu uvedené inak. –...
-
Page 86: Technické Údaje
• Nikdy neodstraňujte uvoľnené triesky, hobliny alebo zasek- • Obrábaný predmet veďte vždy bezpečne a pevne a nene- nuté časti dreva pri bežiacom pílovom liste. chávajte ho ani na chvíľu povolený. • Pri odstraňovaní porúch v prípade zablokovaného obrába- • Neopúšťajte pracovné miesto bez toho, aby ste pílu najprv cieho nástroja je potrebné... -
Page 87: Pred Uvedením Do Prevádzky
Faktory, ktoré môžu ovplyvňovať momentálnu imisnú hladinu Nie je v rozsahu dodávky: nachádzajúcu sa na pracovisku, sú medzi inými doba trvania • ploché tesnenie Ø 7 mm (4x) vplyvov, druh pracovnej miestnosti, iné zdroje hlukov atď., napr. • gumená podložka: 410 x 255 x 13 mm počet strojov a iných spríbuznených procesov. -
Page 88: Obsluha
9.2 Montáž vyfukovacieho zariadenia (obr. 8) Skontrolujte polohu kolíkov pílového kotúča v držiakoch Zabezpečte, aby bola ochrana pílového kotúča (5) sklo- pílového kotúča (27/30). pená nadol. Napnite list (22) s napínacou pákou (11), pričom ho Naskrutkujte vyfukovacie zariadenie (1) v smere hodino- znovu zatlačíte nadol. -
Page 89: Elektrická Prípojka
• Drevo sa na pílový kotúč musí viesť pomaly, pretože zuby POZOR pílového listu sú malé. Pri prepnutí z ovládania nožným pedálom na manuálne ovlá- • Každá osoba, ktorá chce s pílou pracovať, potrebuje istý čas danie sa stroj automaticky rozbehne. Počet zdvihov zodpove- na zaučenie. -
Page 90: Preprava
13.2 Údržba Elektrické prípojné vedenia pravidelne kontrolujte ohľadne po- škodení. Dávajte pozor na to, aby pri kon - trole prípojného vedenia nebolo toto pripojené k elektrickej sieti. 13.2.1 Ložisko (obr. 1/pol. 10) Elektrické prípojné vedenia musia zodpovedať príslušným usta- Namažte ložiskové body (10) vratných kladiek najneskôr po noveniam VDE a DIN. -
Page 91: Odstraňovanie Porúch
Obal je z ekologického materiálu, ktorý môžete zlikvidovať v miestnych recyklačných centrách. O možnostiach likvidácie opotrebovaného prístroja sa informujte na vašej samospráve alebo štátnej správe. Staré zariadenia nevyhadzujte do domového odpadu! Tento symbol upozorňuje na to, že tento výrobok sa musí zlikvidovať podľa smernice o odpade z elektrických a elektronických zariade- ní... -
Page 92: Záručný List
17. Záručný list Vážená zákazníčka, vážený zákazník, naše výrobky podliehajú prísnej kontrole kvality. V prípade, že nebude prístroj napriek tomu bezchybne fungovať, je nám to veľmi ľúto a prosíme Vás, aby ste sa obrátili na našu servisnú službu na adrese uvedenej na tomto záručnom liste. Radi Vám budeme k dispozícii taktiež telefonicky na uvedenom servisnom telefónnom čísle. -
Page 93: Konformitätserklärung
Marke / Brand: Parkside Art.-Bezeichnung / Article name: DEKUPIERSÄGE PDS - 120 B2 SCROLL SAW PDS - 120 B2 SCIE À CHANTOURNER - PDS 120 B2 Art.-Nr. / Art. no.: 3901405974; 3901405976-3901405980; 39014059915-39014059916 Ident.-Nr. / Ident. no.: 01001 - 20417... - Page 96 C142442 ™ C142442 ® SCHEPPACH FABRIKATION VON HOLZBEARBEITUNGSMASCHINEN GMBH Günzburger Str. 69 D-89335 Ichenhausen C142442 ® C142442 C142442 C142442 ® ® ® Stand der Informationen · Last Information Update · Version des informations · Stand van de informatie · Stav informací Update: 07 / 2019 ·...