Advertisement
Quick Links
Advertisement

Related Manuals for Echelon SPINCO PODIUM


Summary of Contents for Echelon SPINCO PODIUM
- Page 1 P O D I U M I N S T R U C T I O N M A N U A L...
- Page 2 Hello, I am Lou Lentine, President and CEO of Echelon Fitness, and I'd like to personally welcome you to the joint Welcome to our PODIUM family! SPINCO x Echelon experience. From our nationwide SPINCO studios to the comfort of your home, it is our mission to empower and inspire YOU, Our two brands have joined forces to bring you unparalled, connected home cycling workouts with the our loyal community.
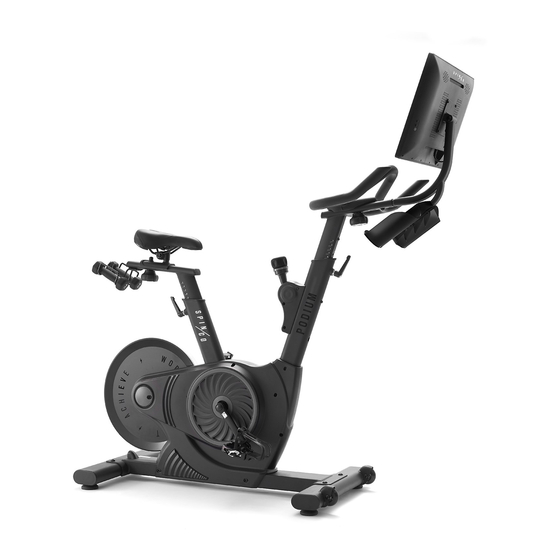
- Page 3 INTRODUCING SPINCO PODIUM WORK. SWEAT. ACHIEVE. PODIUM is engineered for optimum, smooth functionality and total immersion. Power by Echelon’s award winning guarantee of craftsmanship. • 21.5" HD TOUCHSCREEN WITH 180° ROTATION • MULTI-ADJUSTABLE AERO HANDLEBARS • TWO HANDLEBAR MOUNTED BOTTLE HOLDERS •...
- Page 4 INCLUDES INCLUDES Handlebar height Handlebar height adjustment lever adjustment lever Handlebar post f rame Handlebar post frame Resistance knob/brake lever Resistance knob/brake lever Crank arms Crank arms Seat post Seat post Seat height adjustment lever Seat height adjustment lever Seat slide adjustment knob Seat slide adjustment knob 21.5"...
-
Page 5: Account Creation
ACCOUNT CREATION If this product was purchased on the spincopodium.com website, you will receive an activation email. Please follow the steps within the email to activate your account. - Page 6 Loosen bolts in order. Remove bolts in order. Remove cardboard and then repeat Remove cardboard and then repeat Remove cardboard and then repeat Remove cardboard and then repeat Remove cardboard and then repeat Loosen bolts in order. Loosen bolts in order. Loosen bolts in order.
- Page 7 Use a pair of scissors or wire cutters Use the included hex key to remove Place the front foot with wheels Use a pair of scissors or wire cutters Use a pair of scissors or wire cutters Use a pair of scissors or wire cutters Use a pair of scissors or wire cutters Use the included hex key to remove Use the included hex key to remove...
- Page 8 Insert foot bolts into rear foot. Tighten down foot bolts with Attach dumbbell holder onto seat Insert foot bolts into rear foot. Insert foot bolts into rear foot. Insert foot bolts into rear foot. Tighten down foot bolts with Tighten down foot bolts with Tighten down foot bolts with Attach dumbbell holder onto seat Attach dumbbell holder onto seat...
- Page 9 Connect the one wires from frame Unscrew handlebar height Insert handlebar post screw into Connect the one wires from frame Connect the one wires from frame Connect the one wires from frame Unscrew handlebar height Unscrew handlebar height Unscrew handlebar height Insert handlebar post screw into Insert handlebar post screw into Insert handlebar post screw into...
- Page 10 ‘Storage’, and then either ‘Clear Data’ or ‘Clear Cache,’ depending which button is either ‘Clear Data’ or ‘Clear Cache,’ depending which button is highlighted. Restart the Echelon highlighted. Restart the Echelon Fit™ App and attempt connection again. If you have any highlighted.
- Page 11 NOTE: WE RECOMMEND HAVING HELP WITH TABLET INSTALLATION. NOTE: WE RECOMMEND HAVING HELP WITH TABLET INSTALLATION. NOTE: WE RECOMMEND HAVING HELP WITH TABLET INSTALLATION. NOTE: WE RECOMMEND HAVING HELP WITH TABLET INSTALLATION. NOTE: WE RECOMMEND HAVING HELP WITH TABLET INSTALLATION. NOTE: WE RECOMMEND HAVING HELP WITH TABLET INSTALLATION.
- Page 12 Feed included zip-tie through wire Pull zip-tie to tighten and secure Cut excess length off of zip-tie. Feed included zip-tie through wire Pull zip-tie to tighten and secure Cut excess length off of zip-tie. clip and behind cord, as shown cord in place.
- Page 13 Remove nut from right pedal by Screw right pedal onto right crank Screw right pedal onto right crank Finger tighten nut clockwise back Finger tighten nut clockwise back Remove nut from right pedal by Remove nut from right pedal by Remove nut from right pedal by Remove nut from right pedal by Screw right pedal onto right crank...
- Page 14 Finger tighten nut counterclockwise Hold pedal with double sided Plug power adapter into port Hold pedal with double sided Hold pedal with double sided Hold pedal with double sided Hold pedal with double sided Plug power adapter into port Plug power adapter into port Plug power adapter into port Plug power adapter into port Finger tighten nut counterclockwise...
- Page 15 Turn seat slide adjustment lever Move seat along track to desired Turn seat height adjustment lever Turn seat slide adjustment lever Turn seat slide adjustment lever Turn seat slide adjustment lever Move seat along track to desired Move seat along track to desired Move seat along track to desired Turn seat height adjustment lever Turn seat height adjustment lever...
-
Page 16: Handlebar Height
FITTING THE BIKE TO YOU SEAT HEIGHT Stand beside the bike with your hip next to the saddle and face towards the handlebars. Adjust the saddle up or down to align the seat with your hip bone height. Next, hop on into the saddle and clip your shoes into the pedals. To do this, slide your foot forward until you feel the connection between the bottom of your cleat and the pedal attachment, and then press your foot straight down into the pedal. - Page 17 THE SWEAT UPGRADE EVERYTHING YOU NEED TO TAKE THE STUDIO HOME If you purchased The Sweat Upgrade, you will have received a deluxe box of exclusive accessories including a pair of premium spin shoes, a PODIUM bike mat, a set of custom 3lb dumbbells, and a SPINCO sweat towel &...
- Page 18 ATTACHING YOUR CLEATS Put your shoes on and find the ball of your foot. The cycling cleat should be aligned just under the ball of the foot for maximum comfort, performance and natural movement in the ankles to create a fluid pedal stroke and help prevent injury.
- Page 19 THE SPINCO CLASS EXPERIENCE IT’S A FEELING, NOT A PLACE Whether you are an avid SPINCO rider or new to our community, we firmly believe that everybody is welcome, and we’re looking forward to riding with you. More than just a ride, and bigger than the bike, our SPINCO workouts are made to inspire and uplift.
- Page 20 FEDERAL COMMUNICATIONS COMMISSION (FCC) STATEMENT 15.21 YOU ARE CAUTIONED THAT CHANGES OR MODIFICATIONS NOT EXPRESSLY APPROVED BY THE PART RESPONSIBLE FOR COMPLIANCE COULD VOID THE USER’S AUTHORITY TO OPERATE THE EQUIPMENT. 15.105(B) THIS EQUIPMENT HAS BEEN TESTED AND FOUND TO COMPLY WITH THE LIMITS FOR A CLASS B DIGITAL DEVICE, PURSUANT TO PART 15 OF THE FCC RULES.
- Page 21 INNOVATION, SCIENCE AND ECONOMIC DEVELOPMENT CANADA (ISED) INNOVATION, SCIENCE ET DÉVELOPPEMENT ÉCONOMIQUE CANADA (ISED) THIS CLASS B DIGITAL APPARATUS COMPLIES WITH CANADIAN ICES-003 CET APPAREIL NUMÉRIQUE DE CLASSE B EST CONFORME À LA NORME NMB-003. CANADIAN NOTICE THIS DEVICE COMPLIES WITH ISED LICENSE-EXEMPT RSS STANDARD(S). OPERATION IS SUBJECT TO THE FOLLOWING TWO CONDITIONS: (1) THIS DEVICE MAY NOT CAUSE INTERFERENCE, AND (2) THIS DEVICE MUST ACCEPT ANY INTERFERENCE, INCLUDING INTERFERENCE THAT MAY CAUSE UNDESIRED...
- Page 22 THE MINIMUM DIMENSIONS ARE: 0.5 M (19.7 IN.) ON AT LEAST ONE SIDE, AND 0.5 M (19.7 IN.) EITHER BEHIND OR IN FRONT OF THE EXERCISE BIKE. WHILE CLEANING YOUR SPINCO PODIUM BIKE, PLEASE USE A SOFT RAG WITH MILD DETERGENT OR WATER TO WIPE DOWN THE MACHINE. DO NOT USE CORROSIVE CHEMICAL LIQUIDS WHICH MAY DAMAGE THE COVER.
- Page 23 1. An appliance should never be left unattended when plugged in. Unplug from outlet when not in use, and before putting on or taking off parts. 2. Do not operate under blanket or pillow. Excessive heating can occur and cause fire, electric shock, or injury to persons.
- Page 24 • NEVER allow children to play on or around the bike. This helps protect them from injury from moving parts. • ALWAYS set the bike up properly for your specific body type. The SPINCO PODIUM offers up/down and fore/ aft adjustments that are clearly marked to ensure a quick and easy customization for each workout.
- Page 25 • ALWAYS ensure that you have a water bottle filled with at least 12 oz. of water and a towel close by to absorb sweat from your body and the handlebars. • NEVER use the SPINCO PODIUM in a standing position at high revolutions per minute (RPM) (see OPERATION section, Fig. 2).
- Page 26 • ALWAYS ensure that the SPINCO PODIUM is wiped down after each use to keep it sanitary. • Cleaning and user maintenance shall not be made by children without supervision. If any problems arise affecting the performance of the SPINCO PODIUM, contact the manufacturer immediately.