Table of Contents
Advertisement
Advertisement
Table of Contents

Related Manuals for Echelon CONNECT EX5S


Summary of Contents for Echelon CONNECT EX5S
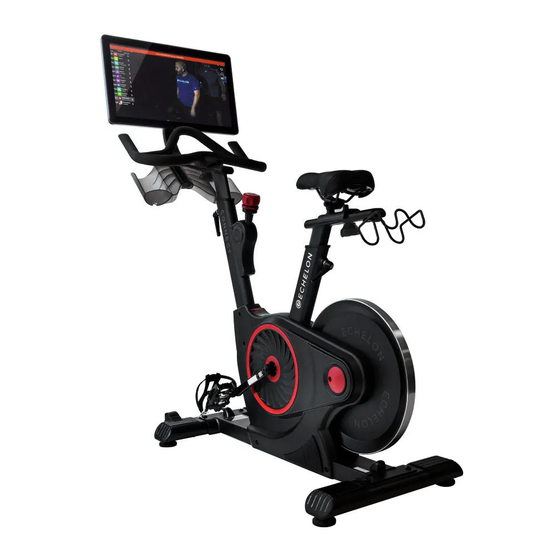
- Page 1 C O N N E C T S M A R T B I K E I N S T R U C T I O N M A N U A L E X 5 s...
- Page 3 Hello, I am Lou Lentine, President of Echelon, and I would like to welcome you to the Echelon community. You’ve made a great decision for yourself and your family. The Echelon Experience is an innovative combination of fitness products integrated with our state-of-the-art Echelon Fit App.
- Page 4 QUICK START GUIDE DOWNLOAD LATEST VERSION OF THE APP Ensure latest version of the Echelon Fit™ App is installed from the Google Play Store or the App Store. CHANGE LOCATION SERVICES TO ‘HIGH ACCURACY’ (IF IOS USER, SKIP THIS STEP) Navigate to your apps from the home screen by tapping the Apps icon (or the ^ icon at the bottom of the screen on older versions), and tap the Settings app.
- Page 5 (on older versions, select ‘MORE’) and then select ‘Show system’ or ‘Show system apps’. Select ‘Bluetooth Share’, then ‘Storage’, and then either ‘Clear Data’ or ‘Clear Cache,’ depending which button is highlighted. Restart the Echelon Fit™ App and attempt connection again. If you have any issues after completing this process, please contact appsupport@echelonfit.com Apple and the Apple logo are trademarks of Apple Inc.
- Page 6 PARTS INCLUDES Handlebar height 14. Screen mount adjustment lever 15. Seat Handlebar post f rame 16. Pedals Resistance knob/brake lever Dumbbell holder Crank arms 18. Power adapter Seat post 19. Double-sided wrench Seat height adjustment lever 20. Wrench Seat slide adjustment lever 21.
- Page 7 REMOVAL OF FRAME Loosen bolts in order. Remove bolts in order. Remove cardboard and then repeat Remove bolts in order with included on other side. tools as shown. Remove bolts on both sides with Hold cardboard piece and remove included tools as shown. f rame f rom bike.
- Page 8 ASSEMBLY Use a pair of scissors or wire cutters Use the included hex key to remove to cut zip ties around wheel chocks. the metal f ront support bracket. Using one of the wrenches, knock out the f ront then the back chock. Place the f ront foot with wheels Insert foot bolts into f ront foot.
- Page 9 ASSEMBLY Insert foot bolts into rear foot. Tighten down foot bolts with included hex key. Attach dumbbell holder onto seat Place seat onto seat post and secure post with screws and screwdriver with included wrench. end of hex key. Pull the two wires out of f rame and two wires f rom base of handlebar post. DO NOT UNTIE TWIST TIES AT TOP OF HANDLEBAR POST.
- Page 10 ASSEMBLY Connect the two wires f rom f rame Unscrew handlebar height and handlebar post together, then adjustment lever, but do not feed excess wire down into f rame. remove. Pull lever out and fully insert handlebar post into f rame. Release lever and post is secure.
- Page 11 ASSEMBLY Slide water bottle holder onto post and secure with two screws. TABLET INSTALLATION Remove the four preinstalled screws Flip mount around to face away f rom and set to the side. Connect bike. Flip tablet over and hold tablet up to mount and hand screw all four screws into tablet.
- Page 12 ASSEMBLY Remove nut f rom right pedal by Screw right pedal onto right turning counterclockwise. crank arm clockwise. Use double sided wrench to ensure pedal is f irmly seated against crank arm. Finger tighten nut clockwise back Hold pedal with double sided onto pedal bolt.
- Page 13 Plug power adapter into port The assembly of your Echelon® located on the rear foot bracket, Connect bike is now complete! then plug into wall outlet.
-
Page 14: Seat Adjustment
SEAT ADJUSTMENT Turn seat slide adjustment lever Move seat along track to desired counterclockwise to loosen. location. Turn seat slide adjustment lever clockwise to tighten and secure in place. Turn seat height adjustment lever Pull and hold the seat height counterclockwise until you are able adjustment lever and raise the seat to pull the lever halfway out. -
Page 15: Handlebar Adjustment
HANDLEBAR ADJUSTMENT Turn handlebar adjustment lever Pull and hold the handlebar counterclockwise until you are able adjustment lever and raise or to pull the lever halfway out. lower the handlebars to desired position. Ensure lever engages one of the adjustment holes. Turn handlebar adjustment lever clockwise until secure. - Page 16 OPERATION There are two different positions (shown below) you will see during classes on the Echelon Fit™ app. Fig. 1 demonstrates a relaxed upper body while in seated position. Fig. 2 demonstrates proper hand placement and weight distribution while in an upright position.
- Page 17 OPERATION To adjust the resistance while using the Echelon Connect, turn the ® resistance adjustment knob to the left or right, as shown in Fig. 3. To stop the bike press down on the resistance adjustment knob, as shown in Fig. 4.
- Page 18 SPECS Input: 100-240V~ 50/60Hz Max 1.7A Output: 12V QDID: 60912 FCC ID: SH6MDBT40 CAN ICES-3 (B)/NMB-3(B) HVIN: 1.0 IC: 8017A-MDBT40 DIMENSIONS: 54" L X 20" W X 60" H FEDERAL COMMUNICATIONS COMMISSION (FCC) STATEMENT 15.21 YOU ARE CAUTIONED THAT CHANGES OR MODIFICATIONS NOT EXPRESSLY APPROVED BY THE PART RESPONSIBLE FOR COMPLIANCE COULD VOID THE USER’S AUTHORITY TO OPERATE THE EQUIPMENT.
- Page 19 ISED INNOVATION, SCIENCE AND ECONOMIC DEVELOPMENT CANADA (ISED) INNOVATION, SCIENCE ET DÉVELOPPEMENT ÉCONOMIQUE CANADA (ISED) THIS CLASS B DIGITAL APPARATUS COMPLIES WITH CANADIAN ICES-003 CET APPAREIL NUMÉRIQUE DE CLASSE B EST CONFORME À LA NORME NMB- 003. CANADIAN NOTICE THIS DEVICE COMPLIES WITH ISED LICENSE-EXEMPT RSS STANDARD(S). OPERATION IS SUBJECT TO THE FOLLOWING TWO CONDITIONS: (1) THIS DEVICE MAY NOT CAUSE INTERFERENCE, AND...
-
Page 20: Important Safety Instructions
LEAST ONE SIDE, AND 0.5 M (19.7 IN.) EITHER BEHIND OR IN FRONT OF THE EXERCISE BIKE. WHILE CLEANING YOUR ECHELON® CONNECT BIKE, PLEASE USE A SOFT RAG WITH MILD DETERGENT OR WATER TO WIPE DOWN THE MACHINE. DO NOT USE CORROSIVE CHEMICAL LIQUIDS WHICH MAY DAMAGE THE COVER. - Page 21 This will ensure that you engage in the proper strength or fitness program for your age and physical condition. Before using the Echelon® Connect, answer these questions: · Have you been sick recently? · Have you had prolonged dizziness recently? ·...
- Page 22 WARNINGS • ALWAYS use the Echelon® Connect on solid, level ground and in a well lit and ventilated area. • ALWAYS check that the seat and handlebars are securely fastened before use. • NEVER allow children to play on or around the bike. This helps protect them from injury from moving parts.
- Page 23 Using such attachments may cause injury or damage to the bike and will affect the warranty of the bike. • ALWAYS ensure that the Echelon® Connect is wiped down after each use to keep it sanitary. • Cleaning and user maintenance shall not be made by children without supervision.
- Page 24 PLEASE NOTE: App and software updates may change user functionality. Please refer to on-screen instructions, as they will be the most up to date. www.echelonf it.com 072419 ECHEX-5S...