Table of Contents
Advertisement
Available languages
Available languages
Quick Links
Advertisement
Table of Contents

Related Manuals for Zte Grand Memo II


Summary of Contents for Zte Grand Memo II
- Page 3 ZTE Grand™ Memo II Quick Start Guide...
- Page 4 We offer self-service for our smart terminal device users. Please visit the ZTE official website (at www. ztedevice.com) for more information on self-service and supported product models. Information on the website takes precedence.
- Page 5 Trademarks ZTE and the ZTE logos are trademarks of ZTE Corporation. Google and Android are trademarks of Google, Inc. ® The Bluetooth trademark and logos are owned by the Bluetooth SIG, Inc. and any use of such trademarks by ZTE Corporation is under license.
-
Page 6: Getting To Know Your Phone
Getting to Know Your Phone Proximity & Indicator Light Sensor Light Front microSDHC Earpiece Camera Card Tray micro-SIM Card Tray Touch Power Key Screen Headset Jack Back Camera Flash Volume Key Speaker Microphone Charging/ micro-USB Jack... -
Page 7: Setting Up Your Phone
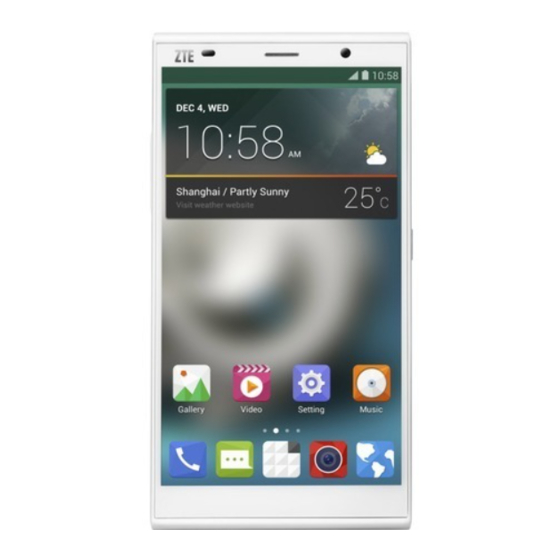
Status and notification bar Google search Wallpaper Shortcut Primary shortcuts On-screen Keys (Home) • Touch to return to the home screen from any application or screen. • Drag to Google to open Google Search or to go through the Internet. (Back) Touch to go to the previous screen. -
Page 8: Installing The Micro-Sim Card
Installing the micro-SIM Card Turn off your phone before installing or removing the micro-SIM card. 1. Insert the tray eject tool or the end of a small paper clip into the hole beside the micro-SIM card tray (next to the Power Key). Pull out the micro-SIM card tray and place the micro-SIM card (contacts facing down) on the tray as shown. -
Page 9: Installing The Microsdhc™ Card (Not Included)
WARNING! To avoid damage to the phone, do not use any other kind of SIM card or any non-standard micro- SIM card cut from a SIM card. Your service provider will supply your SIM card. Installing the microSDHC™ Card (Not Included) The microSDHC card can be installed and removed while the phone is turned on. -
Page 10: Charging The Battery
2. Pull out the microSDHC card tray and place the microSDHC card (contacts facing down) on the tray as shown. Then carefully install the tray back. NOTE: Some applications may require a microSDHC card to work normally or may store certain data on it. - Page 11 2. Connect the charger to a standard AC wall outlet. 3. Disconnect the charger when the battery is fully charged. WARNING! Use only ZTE-approved chargers and cables. The use of unapproved accessories could damage your phone. CAUTION: Do not change the built-in rechargeable battery in...
-
Page 12: Touch Screen And Navigation
Touch Screen and Navigation Your phone features a capacitive touch screen, so you can gently touch, quickly swipe, or pinch with two fingers to navigate. • Lightly touch the buttons, icons, or applications on the screen with your fingertip. • Touch and hold your finger on an item to see available options. -
Page 13: Customizing Home Screens
Customizing Home Screens Add shortcuts, widgets, and folders or change wallpapers and home screen transition effects to make the phone your own. Do one of the following, depending on the change you want to make. • To add a widget, shortcut, or application shortcut, touch and hold an empty place on the home screen,... -
Page 14: Calling And Voicemail
• To c h a n g e h o m e s c r e e n o r l o c k s c r e e n wallpaper, touch and hold an empty place on the home screen, touch Wallpaper and then select form Wallpaper for home screen or Wallpaper for lock screen. -
Page 15: Checking Voicemail
Checking Voicemail 1. From the home screen, touch 2. Touch to open the dialer. 3. Touch and hold the 1 Key. 4. Follow the voice prompts to listen to your voice messages. Text and Multimedia Messaging Send messages to other mobile phones and to email addresses to communicate privately and quickly. -
Page 16: Setting Up Email Accounts
To send an MMS, touch and touch an attachment type. 5. Touch to send your message. Please don’t text and drive. Setting Up Email Accounts Setting Up Gmail 1. Touch in the home screen and select Gmail. NOTE: If another Gmail account is already set up, touch the Menu Key >... -
Page 17: Setting Up An Exchange Activesync
® Setting Up an Exchange ActiveSync Account 1. Touch in the home screen and select Email. NOTE: If another email account is already set up, touch the Menu Key > Settings > ADD ACCOUNT. 2. Enter the email address and password. 3. - Page 18 ® Google Play Store Apps There are tens of thousands of games and ® applications in the Google Play Store for you to download and install in a few easy steps. Before you begin, ensure that you are signed into your Google Account.
-
Page 19: Camera And Video
The app is successfully installed when the icon appears in the status bar. To access the app from the home screen, touch NOTE: You need a Google Wallet™ account to purchase paid apps. Camera and Video Take pictures and record videos right from your phone with the camera and... - Page 20 4. When you’re finished, t o u c h t h e t h u m b n a i l image in the upper right corner of the screen to view your picture. 5. Touch Share. You can p o s t t h e p i c t u r e o n ®...
-
Page 21: Changing Language
Changing Language You can change the language of your phone’s buttons and menus. 1. From the home screen, touch > > Language & input > Language. 2. Touch the language you want to use. Product Safety Information Don’t make or receive handheld calls while driving. - Page 22 Avoid contact with anything magnetic. Avoid extreme temperatures. Keep away from pacemakers and other electronic medical devices. Avoid contact with liquid. Keep your phone dry. Turn off when asked to in hospitals and medical facilities. Don’t take your phone apart. Turn off when told to in aircrafts and airports.
-
Page 23: Radio Frequency (Rf) Energy
Radio Frequency (RF) Energy This device meets the government’s requirements for exposure to radio waves. This device is designed and manufactured not to exceed the emission limits for exposure to radio frequency (RF) energy set by the Federal C o m m u n i c a t i o n s C o m m i s s i o n o f t h e U . S . Government: The exposure standard for wireless mobile devices employs a unit of measurement known as the... - Page 24 The highest SAR value for the device as reported to the FCC when tested for use at the ear is 0.16 W/kg and when worn on the body, as described in this user guide, is 1.17 W/kg (Body-worn measurements differ among device models, depending upon available enhancements and FCC requirements.) While there may be differences between the SAR...
- Page 25 For body worn operation, this device has been tested and meets the FCC RF exposure guidelines for use with an accessory that contains no metal and the positions the handset a minimum of 1.0 cm from the body. Use of other enhancements may not ensure compliance with FCC RF exposure g u i d e l i n e s .
- Page 26 ZTE Grand™ Memo II Guía rápida...
- Page 27 Aviso ZTE Corporation se reserva el derecho a hacer m o d i f i c a c i o n e s a e r r o r e s d e i m p r e s i ó n o a actualizar las especificaciones de esta guía sin...
- Page 28 Marcas comerciales ZTE y los logotipos de ZTE son marcas comerciales de ZTE Corporation. Google y Android son marcas comerciales de Google, Inc. ® La marca comercial Bluetooth y sus logotipos son propiedad de Bluetooth SIG, Inc. y cualquier uso de dichas marcas comerciales por parte de ZTE Corporation se realiza bajo licencia.
- Page 29 Conoce tu teléfono Sensor de proximidad y Bandeja de indicadora de luz la tarjeta Cámara Auricular microSDHC delantera Bandeja de la tarjeta micro-SIM Pantalla Tecla de táctil encendido Conector para auriculares Atrás Cámara Flash Tecla de volumen Altavoz Micrófono Cargador/conector para micro-USB...
- Page 30 Barra de estado y de notificaciones Búsqueda en Google Fondo de pantalla Acceso directo Accesos directos principales Teclas en pantalla (Inicio) • Toca la tecla para volver a la pantalla de inicio desde cualquier aplicación o pantalla. • Arrastra a Google para abrir Búsqueda de Google o para navegar por Internet.
- Page 31 Instalación de la tarjeta micro-SIM Apaga tu teléfono antes de instalar o quitar la tarjeta micro-SIM. 1. Inserta la herramienta de expulsión de la bandeja o la punta de un pequeño sujetapapeles en el orificio junto a la bandeja para tarjetas micro-SIM (al lado de la tecla de encendido).
- Page 32 ¡ADVERTENCIA! Para evitar que tu teléfono se dañe, no utilices ningún otro tipo de tarjeta SIM ni ningún otro tipo de tarjeta micro-SIM de una tarjeta SIM que no sea el estándar. Tu proveedor te proporcionará la tarjeta SIM. Instalación de la tarjeta microSDHC™ (no se incluye) La tarjeta microSDHC se puede instalar y extraer mientras tu teléfono está...
- Page 33 NOTA: Algunas aplicaciones podrían necesitar una tarjeta microSDHC para funcionar con normalidad o para almacenar determinados datos. Por lo tanto, se recomienda que mantengas instalada una tarjeta microSDHC y que no la extraigas o cambies de manera aleatoria. Carga de la batería La batería de tu teléfono debería tener la carga suficiente para encender el teléfono, encontrar una señal y realizar algunas llamadas.
- Page 34 3. Desconecta el cargador cuando la batería esté completamente cargada. ¡ADVERTENCIA! Utiliza solo cargadores y cables aprobados por ZTE. El uso de accesorios no aprobados podría dañar tu teléfono. PRECAUCIÓN: No cambies la batería recargable incorporada de tu teléfono tú mismo.
- Page 35 Pantalla táctil y navegación Tu t e l é f o n o c u e n t a c o n u n a p a n t a l l a t á c t i l capacitiva, de modo que puedes tocar suavemente, deslizar rápidamente o pellizcar con dos dedos para navegar.
- Page 36 • Toca y arrastra la barra hacia abajo para ver más detalles. Arrastra la barra hacia arriba o toca para cerrarla. • : Encuentra todas tus aplicaciones. Personalización de las pantallas de inicio A g r e g a a c c e s o s d i r e c t o s , widgets y carpetas o cambia fondos de pantalla y los efectos de transición de pantalla para...
- Page 37 • Para ordenar los accesos directos en carpetas, toca un ícono de acceso directo y mantenlo presionado en la pantalla de inicio y arrástralo • Para mover un widget, acceso directo o una carpeta de la pantalla de inicio, tócalo y mantenlo presionado, luego arrástralo a la nueva ubicación.
-
Page 38: Llamadas Y Correo De Voz
Llamadas y correo de voz Llama a tus amigos y familiares, y revisa tus correos de voz en tan solo unos simples pasos. Hacer una llamada 1. En la pantalla de inicio, toca 2. Toca para abrir el marcador. 3. Marca el número que deseas llamar y toca para hacer la llamada. -
Page 39: Mensajería De Texto Y Multimedia
Mensajería de texto y multimedia Envía mensajes a otros teléfonos móviles y a direcciones de correo electrónico para comunicarte de manera rápida y privada. 1. En la pantalla de inicio, toca 2. Toca 3. Ingresa el número del destinatario o comienza a escribir el nombre de contacto. - Page 40 Configuración de cuentas de correo electrónico Configuración de Gmail 1. Toca en la pantalla de inicio y selecciona Gmail. NOTA: Si ya tienes otra cuenta de Gmail configurada, toca la Tecla Menú > Configuración > AGREGAR CUENTA. 2. Toca Existente para iniciar sesión en tu cuenta de Google existente.
- Page 41 Configuración de una cuenta de ® Exchange ActiveSync 1. Toca en la pantalla de inicio y selecciona Correo electrónico. NOTA: Si ya tienes otra cuenta de correo electrónico configurada, toca la Tecla Menú > Configuración > AGREGAR CUENTA. 2. Ingresa la dirección de correo electrónico y la contraseña.
- Page 42 ® Aplicaciones de Google Play Store Existen decenas de miles de juegos y aplicaciones ® en Google Play Store que puedes descargar e instalar siguiendo algunos pasos fáciles. Antes de empezar, asegúrate de haber iniciado sesión en tu cuenta de Google. 1.
- Page 43 PRECAUCIÓN: Una vez instaladas, algunas aplicaciones pueden acceder a muchas funciones o a una cantidad importante de tus datos personales. Play Store te mostrará a qué puede acceder la aplicación. Toca Aceptar y descargar (aplicaciones gratuitas) o Aceptar y comprar (aplicaciones pagadas) para continuar, o toca la tecla Atrás para cancelar.
-
Page 44: Cámara Y Video
Cámara y video Toma fotografías y graba videos directamente en el teléfono con la cámara y videocámara, y luego compártelos con amigos y familiares. 1. De la pantalla de inicio, toca > y gira el teléfono en posición horizontal. 2. Para cambiar la configuración de la cámara, como flash y modo de escena, debes tocar los botones del lado izquierdo del visor. - Page 45 5. Toca Compartir. Puedes p u b l i c a r t u i m a g e n e n ® ® Tw i t t e r , F a c e b o o k ® Amazon Kindle 6.
-
Page 46: Cambio De Idioma
Cambio de idioma Puedes cambiar el idioma de los botones y menús de tu teléfono. 1. De la pantalla de inicio, toca > > Teclado e idioma > Idioma. 2. Toca el idioma que deseas utilizar. Información de seguridad sobre el producto No hagas o recibas llamadas sosteniendo el teléfono con la... - Page 47 Para evitar causar daño a tu audición, no escuches a niveles de volumen altos durante periodos prolongados. Evita el contacto con cualquier medio magnético. Evita la exposición a temperaturas extremas. Mantenlo alejado de marcapasos y otros dispositivos médicos electrónicos. Evita el contacto con líquidos. Mantén tu teléfono seco.
- Page 48 Energía de radiofrecuencia (RF) E s t e d i s p o s i t i v o c u m p l e c o n l o s r e q u i s i t o s gubernamentales sobre la exposición a ondas de radio.
- Page 49 para alcanzar la red. En general, mientras más cerca estés de una antena de estación base inalámbrica, menor será la salida de energía. El valor de la SAR más alto para el dispositivo, según se informó a la FCC cuando se realizó la prueba en el oído, es de 0.16 W/kg, y al llevarlo sobre el cuerpo, tal como se describe en esta guía del usuario, es de 1.17 W/kg (las medidas al...
- Page 50 En cuanto al funcionamiento al llevarlo sobre el cuerpo, se realizaron pruebas a este dispositivo y cumple con las pautas de exposición de RF de la FCC para su uso con un accesorio que no tenga metal, y la distancia de un auricular con respecto al cuerpo debe ser de 1,0 cm como mínimo.