Table of Contents
Advertisement
Quick Links
Advertisement
Table of Contents

Related Manuals for Martin Audio TORUS


Summary of Contents for Martin Audio TORUS
- Page 1 V1.0 TORUS Constant Curvature Array User Guide...
-
Page 2: Table Of Contents
Acoustic Design Landscape Deployment Portrait Deployment Changing Horn Dispersion Accessories T12POLERIG T12GRID SBAR T12HRIG T12TRIG T12PB T12GSRIG Recommended Subwoofer SXCF118 Amplification iKON Amplifiers DISPLAY 3.0 Overview VU-NET 2.2 Overview Connections Overview TORUS USER GUIDE V1.0 Copyright © 2021 Martin Audio Ltd. - Page 3 Remove the socket cap fasteners from the horn to remove the compression driver. Remove the socket cap fasteners from the backplate to replace the diaphragm. Specifications T1215 and T1230 Technical Drawings T1215 T1230 Warranty Warranty Statement TORUS USER GUIDE V1.0 Copyright © 2021 Martin Audio Ltd.
-
Page 4: Torus
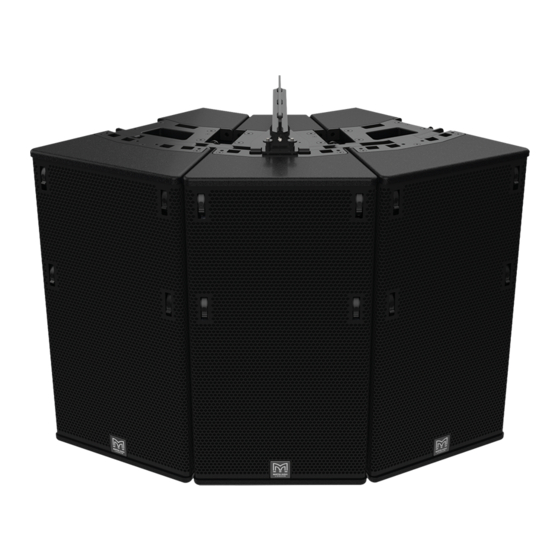
For applications that typically require a throw between 15-30m, a full-blown line array is not always practical, optimal or affordable. Conversely, a point source solution may not be sufficient in coverage and SPL. TORUS is a constant curvature array, designed to fill that gap perfectly, combining optimised coverage, SPL and cost efficiency. -
Page 5: Important Safety Instructions
• Only use attachments / accessories specified by Martin Audio • Use only with wheelboard and rigging hardware specified by Martin Audio. When moving using supplied wheelboards, caution should be used to avoid injury from the cabinet tipping over •... -
Page 6: System Overview
System Overview TORUS TORUS arrays are created using the two models in the series; the T1215 and T1230. Both feature a single 12” (300mm) Neodymium magnet low frequency drivers which are phase plug loaded for increased mid-band sensitivity. The high frequency element comprises three 1.4” (35mm) Neodymium Polymer Dome compression drivers loaded with a manually adjustable Dynamic Horn Flare offering horizontal dispersion options of 60°, 90°... -
Page 7: Acoustic Design
The horn is adjusted from the front of the cabinet. This is done without the need to remove the grille. Landscape Deployment TORUS combined in landscape creates a vertical array. In this mode the combined fixed angle of the cabinets becomes the vertical dispersion, and the flexible dispersion can be adjusted in the horizontal. -
Page 8: Portrait Deployment
TORUS USER GUIDE Portrait Deployment TORUS combined in portrait creates a horizontal array. In this mode the combined fixed angle of the cabinets becomes the horizontal dispersion, and the flexible dispersion can be adjusted in the vertical. Changing Horn Dispersion To adjust the angle, rotate the thumbwheels at the top and bottom of the grille. -
Page 9: Accessories
T12GRID T12HRIG The T12GRID is used to vertically array TORUS for up to 6 cabinets. The T12HRIG is used to horizontally array TORUS for up to 6 Cabinets may be flown from the T12GRID inverted allowing stereo cabinets. -
Page 10: T12Trig
T12PB The T12PB allows up to 6 x TORUS to be flown in vertical arrays without any array angle limit. It can also be used as a pullback/array stabilizing accessory when used with a T12GRID. TORUS USER GUIDE V1.0... -
Page 11: Recommended Subwoofer
Whilst a TORUS array can be complimended with any of the SX Series subwoofers, the SXCF118 is an idea choice for vertical TORUS arrays where a flown subwoofer is required in a combined array. By using the T12TRIG, TORUS can be flown directly under an array of SXCF118 subwoofers. -
Page 12: Amplification
For the best possible performance T1215 and T1230 are powered and controlled using iKON amplifiers. Presets are dynamically created using Martin Audio’s DISPLAY 3 prediction software. Once optimised the parameters can be exported from DISPLAY 3 and uploaded to the iKON amplifiers via VU-NET control software. -
Page 13: Display 3.0
DISPLAY 3.0 Overview DISPLAY 3 is modelling software that predicts coverage and SPL for Martin Audio loudspeakers in a 3D environment. Optimised Array, Constant curvature, point source and subwoofer solutions can be reviewed, and system designs validated. Within the application, venue creation is achieved via an import from Sketchup or by extruding a 2D slice from Display 2 software. - Page 14 The auto-assign button in the coverage tool automates this process. Loudspeakers are inserted from the loudspeaker library or imported from a Display 2 file. TORUS constant curvature systems for example can be deployed horizontally or vertically, with cabinet type, quantity and horn angle defined from the loudspeaker inspector menu.
- Page 15 Display 3 is part of a developing roadmap of software releases whereby tools and features are incrementally released over time. Display 3 can be downloaded from the Martin Audio website; https://martin-audio.com/support/software TORUS USER GUIDE V1.0...
-
Page 16: Vu-Net 2.2
EQ routing and delay via a networked infrastructure. Devices can be added manually using the Palette on the left, but this has limited use. In practical applications, the Discover Devices button is used. TORUS USER GUIDE V1.0 Copyright © 2021 Martin Audio Ltd. - Page 17 The application searches the network for all Vu-Net enabled devices and will add them to the project upon discovery. Presets are added to the amplifiers using the preset manager. Right click an amplifier to access the preset manager. TORUS USER GUIDE V1.0 Copyright © 2021 Martin Audio Ltd.
- Page 18 TORUS USER GUIDE When loading a TORUS T12 preset, first select the deployment type, followed by the number of speakers and amplifier channels used to drive the array. The preset info box displays a coloured graphic of the T12 array showing how it should be wired. For vertical systems, the array is wired from top to bottom and for horizontal systems, it is wired from the centre out.
- Page 19 For horizontal arrays, only one DSP channel is required. TORUS cabinets have an LED for identification, this can be toggled from within the amplifier’s control panel. The output channel is muted to prevent audio from passing to the circuit when the LED is active.
- Page 20 PEQs and the Lo-Shelf are ganged across all used DSP channels in the array, whereas the FIR Hi-shelf is independent for each DSP channel. The high-pass filter is available on the Output EQ section for use with a subwoofer. Vu-Net can be downloaded from the Martin Audio website; https://martin-audio.com/support/software TORUS USER GUIDE V1.0 Copyright © 2021 Martin Audio Ltd.
-
Page 21: Connections
1+/-, the remaining three cabinets are switched to pins 2+/-. The first three cabinets are now powered by channel 1 on the amplifier, the other three from channel 2. As all TORUS cabinets have an impedance of 8... -
Page 22: Overview
TORUS USER GUIDE Rigging Overview TORUS consists of a single-point rigging system located on either side of the cabinet, all hardware is captive and can be stored conveniently for transportation. Link Link Link Pin The fixed angled enclosure can be arrayed vertically and horizontally and deployed in various configurations with additional hardware. -
Page 23: Inclinometer Assembly
Inclinometer Assembly Martin Audio supplies an optional remote angle monitoring system which can used to check the tilt angle of the array. It consists of a sensor (mounted within the flying frame) and a remote display unit. Interconnection is via a standard XLR mic cable. - Page 24 The sensor can be fitted to both sides of T12GRID and various orientations allowing to be used for every array configuration Note that a single inclinometer reader can be used with multiple sensors. It is not necessary to have the same number of displays as sensors. TORUS USER GUIDE V1.0 Copyright © 2021 Martin Audio Ltd.
-
Page 25: Flying The Array
TORUS USER GUIDE Flying the Array When flying TORUS vertically the HF horn can be positioned on the left or the right to create symmetrical system design. Linking down – HF horn to the left Linking up – HF horn to the right HF Left Remove rigging pin and rotate the link through 180 degrees. - Page 26 TORUS USER GUIDE Position the T12GRID on top of the TORUS cabinet, rotate the links and insert the rigging pins. Make sure the cabinet is secured on both sides before lifting. Lift the array to a height where the next cabinet can be positioned underneath. Either lift the cabinet into position or lower the T12GRID onto the cabinet below.
- Page 27 Note: The T12GRID rigging pin is not used for this configuration but needs to be remove (then replaced) to rotate the link. HF Right Rotate the T12GRID so the rigging pins are at the top. TORUS USER GUIDE V1.0 Copyright © 2021 Martin Audio Ltd.
- Page 28 TORUS USER GUIDE Remove rigging pin and rotate the link through 180 degrees. Position the T12GRID on top of the TORUS cabinet and rotate the links and insert the rigging pins to secure. Make sure the cabinet is secured on both sides.
- Page 29 T12GRID can be positioned towards the rear of the array to maximise the available down tilt for a single point hang. T12GRID can be positioned towards the front of the array to maximise the available up tilt for a single point hang. TORUS USER GUIDE V1.0 Copyright © 2021 Martin Audio Ltd.
-
Page 30: T12Hrig
TORUS USER GUIDE T12HRIG The T12HRIG is a rigging accessory used to suspend TORUS in a horizontal configuration. The T12HRIG can be mounted to a cabinet or between two cabinets, given the best options to suspend multiple cabinets. T12HRIG can be mounted on the top or bottom of the cabinet in portrait mode, this allows the HF horn to be positioned at the top or the bottom of the array. - Page 31 Attached the T12HRIG making sure all four pins (two back and two front) locate and lock into position. The T12HRIG is only secure when the two locking pins have been inserted and locked into place. Add more TORUS by aligning the skids to the adjacent cabinet. TORUS USER GUIDE V1.0...
- Page 32 Lift the array and remove the rigging pins on the bottom of the array. Rotate the links into position. Replace the pins to link the bottom of the cabinets together. TORUS USER GUIDE V1.0 Copyright © 2021 Martin Audio Ltd.
- Page 33 TORUS USER GUIDE Up to 6 cabinets can be suspended using one of two T12HRIG’s. Below shows the number of T12HIG for the array combination. TORUS USER GUIDE V1.0 Copyright © 2021 Martin Audio Ltd.
-
Page 34: T12Trig
TORUS USER GUIDE T12TRIG The T12TRIG is a conversion frame for TORUS to be flown beneath SXCF118. Using one or two motors position a WPSGRIDt above the SCXF118 and lower it onto the enclosure. Remove the pins from the from SXCF118 to release the links. Rotate the SXCF118 links and line them up with the pin holes in the WPSGRIDt. - Page 35 Raise the sub array and place the T12TRIG underneath. Lower the array making sure the T12TRIG is aligned. Remove the rigging pins from all four corners of the T12TRIG Rotate the four links on the T12TRIG and align them with the SXCF118 rigging hardware. TORUS USER GUIDE V1.0 Copyright © 2021 Martin Audio Ltd.
- Page 36 Lift the array to a height where the cabinet can be positioned underneath. Either lift the cabinet into position or lower the array onto the cabinet below Remove rigging pin from the T12TRIG and rotate the TORUS link through 180 degrees. Replace the rigging pins to secure the cabinet to the T12TRIG.
- Page 37 Lift the array to a height where the cabinet can be positioned underneath. Either lift the cabinet into position or lower the array onto the cabinet below and secure both side using the TORUS rigging pins. TORUS USER GUIDE V1.0...
- Page 38 Lift the array to a height where the next cabinet can be positioned underneath. Either lift the cabinet into position or lower the array onto the cabinet below. Remove the rigging pins from the cabinet below, rotate the links on the cabinet above and insert the rigging pins to secure. TORUS USER GUIDE V1.0 Copyright © 2021 Martin Audio Ltd.
-
Page 39: T12Pb
Linking up – HF horn to the left HF Right Position the T12PB on top of the TORUS cabinet, rotate the links and insert the rigging pins to secure. Make sure the cabinet is secured on both sides. Lift the array to a height where the next cabinet can be positioned underneath. Either lift the cabinet into position or lower the T12PB onto the cabinet below. - Page 40 TORUS USER GUIDE Repeat the process until the desired amount of TORUS have been vertically arrayed. A maximum of 6 cabinets can be flown from the T12PB. A second T12PB can be linked to the bottom of the array and used to achieve angles that are not possible with a single T12PB. The configuration can also be used to secure the array to stop it moving.
- Page 41 TORUS USER GUIDE Note: The T12PB rigging pin is not used for this configuration but needs to be remove (then replaced) to rotate the link. TORUS USER GUIDE V1.0 Copyright © 2021 Martin Audio Ltd.
-
Page 42: T12Polerig
T12POLERIG The vertical angle for a pole mounted TORUS can be adjusted and secured with a tethered pin. The tilt angle will differ depending on which TORUS cabinet is used. Angles for both T1215 and T1230 are clearly displayed on the hardware. - Page 43 TORUS USER GUIDE When mounted on the pole tighten the thumb wheel to secure the POLERIG to the speaker stand or distance pole and remove the index pin. TORUS USER GUIDE V1.0 Copyright © 2021 Martin Audio Ltd.
-
Page 44: Sbar
SBAR The SBAR is a simple accessory allowing a single TORUS cabinet to be flown using 1 of 10 angles. The SBAR can be mounted front or back for up and down-tilt. Please refer to DISPLAY 3 for rigging options. - Page 45 A half coupler adaptor can be used to suspend a single cabinet from the SBAR. Secure the half coupler to the adaptor and remove the pin. Secure the adaptor to the SBAR and replace the pin. Secure the cabinet to the truss. TORUS USER GUIDE V1.0 Copyright © 2021 Martin Audio Ltd.
-
Page 46: Essential Maintenance
Remove the socket cap fasteners from the LF phase bung in a star pattern. There are 8 around the circumference of the driver and 2 on the side next to the HF horn. (6mm hex tool). TORUS USER GUIDE V1.0 Copyright © 2021 Martin Audio Ltd. - Page 47 TORUS USER GUIDE Remove the phase bung and disconnect the spade terminals for the LED if necessary. Remove the LF driver and disconnect the spade terminals. TORUS USER GUIDE V1.0 Copyright © 2021 Martin Audio Ltd.
-
Page 48: Replacing The High Frequecy Diaphragms
Remove the 6 rubber bungs from the horn flare Remove the 6 posi drive screws from the horn flare. Remove the horn assembly from the cabinet and place driver side up on a flat service. TORUS USER GUIDE V1.0 Copyright © 2021 Martin Audio Ltd. -
Page 49: Remove The Socket Cap Fasteners From The Horn To Remove The Compression Driver
TORUS USER GUIDE Remove the socket cap fasteners from the horn to remove the compression driver. Remove the socket cap fasteners from the backplate to replace the diaphragm. TORUS USER GUIDE V1.0 Copyright © 2021 Martin Audio Ltd. -
Page 50: Specifications
31kg (68.34 lbs) 26kg (57.32 lbs) *Martin Audio continues to specify a crest factor of 2 with 6dB between peak and continuous which best mirrors real-world performance. Simply add a further 6dB for comparison with manufacturers quoting a crest factor of 4 ie. 12dB between continuous and peak. -
Page 51: Technical Drawings
TORUS USER GUIDE Technical Drawings T1215 TORUS USER GUIDE V1.0 Copyright © 2021 Martin Audio Ltd. -
Page 52: T1230
TORUS USER GUIDE T1230 TORUS USER GUIDE V1.0 Copyright © 2021 Martin Audio Ltd. -
Page 53: Warranty
During the warranty period Martin Audio will, at its discretion, either repair or replace products which prove to be defective provided that the product is returned in its original packaging, shipping prepaid, to an authorised Martin Audio service agent or distributor. - Page 54 All information is Copyright © 2021 Martin Audio Ltd. Martin Audio, the Martin Audio logo and Hybrid are registered trademarks of Martin Audio Ltd. in the United Kingdom, United States and other countries; all other Martin Audio trademarks are the property of Martin Audio Ltd.