Table of Contents
Advertisement
Quick Links
Advertisement
Table of Contents

Related Manuals for JLL VELOX 2


Summary of Contents for JLL VELOX 2
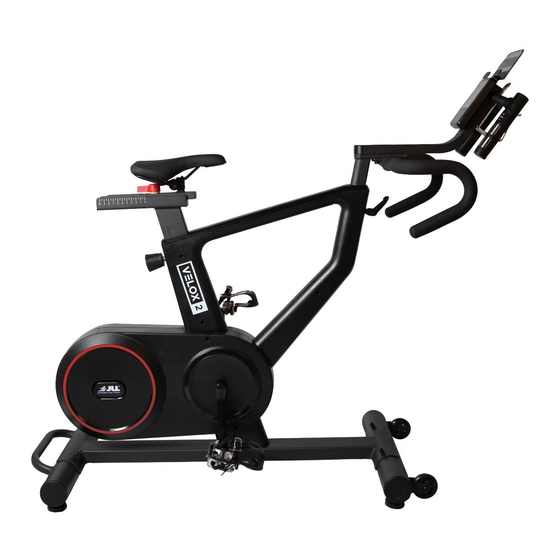
- Page 1 INSTRUCTION MANUAL Please read this book thoroughly before operating the bike.
-
Page 2: Table Of Contents
9 Diagram p. 9 Content listing p. 10 Box contents p. 10 Tools pack p. 10 Velox 2 PRO assembly p. 12 Monitor configuration p. 15 Testing the bike operation p. 16 Transporting the bike p. 16 Levelling the bike p. -
Page 3: Exploded Diagram
EXPLODED DIAGRAM 19 18... - Page 4 63 62...
-
Page 5: Parts List
PARTS LIST Description Qty NO. Description Display Right chain cover Right handle top cover Connection bar Cross pan head screw M5*35 Nylon nut Square end cap J50 Spring washer D6 Right handle bottom cover Middle shaft Left handle top cover Middle shaft spacer Display post Corrugated washer... -
Page 6: Safety Instructions
Safety Instructions End cap D28 Left chain cover Saddle Cross pan head self-drilling screw ST4.2*25*Φ8 Handlebar post Left handlebar post cover Square end cap Bottom cover iPad holder Cross pan head screw M5*10*Φ10 Round end cap Saddle post bottom right cover Flange nut M10*1.25*H7.5*S14 Limitation shaft... -
Page 7: User Safety Precautions
Safety Instructions Safety Instructions Please pay attention to the following instructions before operating this bike. USER SAFETY PRECAUTIONS PRIOR TO USE • Assemble the bike according to the instruction manual. • Consult your doctor before beginning any exercise program. • Read instructions. •... -
Page 8: Facility Safety Precautions
• DO NOT use the exercise bike outdoors. • Read the instruction manual completely before using the bike. • Ensure all users wear appropriate footwear on JLL equipment. ® • Set up and operate the bike on a level surface. DO NOT operate in small restricted areas or on plush carpet. -
Page 9: Assembly
Assembly PREPARING SITE To find the ideal location to set up this bike, ensure that: • Area is well illuminated and well ventilated. • Surface is level. • There is enough space to access the unit and emergency dismount. If it is possible, keep the following clearances: 0.5 m at each side and 2 m at the back. -
Page 10: Content Listing
CONTENT LISTING See diagram (pg.9) and content listing (below) for the exercise bike box contents. See Customer Service chapter for contact information if any parts are missing. BOX CONTENTS #7 Display Post 1PC #1 Display 1PC #10 Handlebar 1PC #15 Pedal 1pair #30 Rear Stabilizer Assembly 1PC #25 Front Stabilizer Assembly 1PC #37 Ipad holder 1PC (Optional) -
Page 11: Tools Pack
TOOLS PACK CONTENTS STEP2 STEP3 PART#107 2 PCS PART#11/12/14 2 PCS PART#3 2 PCS M8x20 M10 x 30 M5x35 Hex Wrench 1PC Crosshead spanner 1 PC #B S8 Hex Wrench 1PC #A S13-14-15 #C S5 inch 0 cm 1... -
Page 12: Velox 2 Pro Assembly
Inside the box you will find a Tools Pack (Hex Allen Key, Multi-tool, Washers and Bolts). See previous page. To assemble your JLL Velox 2 please follow these easy steps: STEP 1... - Page 13 STEP 3 Secure the display post to the handlebar post using two M8x20 screws. Next, attach the handlebars to the handlebar post using two M10x30 bolts, two spring and two flat washers. STEP 4 Connect the sensor wires from the display post to the monitor, feeding them through the iPad holder.
- Page 14 Safety Instructions STEP 6 Attach the saddle to the seat post, remembering to tighten the bolts on both sides. STEP 7 Next, attach the right and left pedals to the corresponding cranks. Each will be labelled ‘R’ or ‘L’. PLEASE NOTE: To avoid cross threading turn the right pedal clockwise and the left anti-clockwise.
-
Page 15: Monitor Configuration
Safety Instructions WARNING: HEAVY EQUIPMENT • It is recommended that at least two people lift, move and assemble the bike. • Use safe lifting methods. MONITOR CONFIGURATION LCD display Pulse Plates Front Gears Control Buttons Rear Gears... -
Page 16: Testing The Bike Operation
TESTING THE BIKE OPERATION Use the following instructions to test the resistance and correct operation of the bike. 1. Plug in your Velox 2 to your mains and switch on. You should hear a beep from the monitor. 2. Check that your pedals are securely on, flush to the crank and not angled. If the thread is worn from numerous attempts to attach the pedal, or placed angled, you are at risk of the pedal falling off. -
Page 17: Specifications
SPECIFICATIONS LCD Displays: Time, Speed, Average Speed, Distance, Calories, RPM, Display Pulse and Wattage. Transport Built-in wheels. Flywheel 9KG One Way Flywheel Resistance Electronic magnetic resistance controlled by front and rear gears. Crank 3 piece crank system on the pedals making it stronger and more reliable. Fully adjustable seat can be moved up and down or forwards and Seat backwards. -
Page 18: Operation
Operation Read all instructions, warnings and safety procedures located in the Safety chapter before using the bike. DATA READOUTS As you exercise, the bike keeps track of the following data: • Time: The total time you have been working out. Display time as hours : minutes . •... - Page 19 MANUAL MODE 1. Press enter to set targets such as time, distance, calories and even input age. Once you’ve set one of these press the start button to begin, the digits will then begin to count down. 2. During the workout you can change the resistance by using the gears. Right = Rear and Left = Front Left = Big Changes and Right = Fine Tuning on Hill Simulations 3.
- Page 20 Safety Instructions 4. Once completed the monitor will display your body fat %, BMR (basal metabolic rate) and BMI (body mass index) along with a body type figure at the top. BMI (Body Mass Index) Type Thin Normal Slightly Overweight Obese Overweight Male ≤...
- Page 21 Safety Instructions F1 = 1.0 Optimum 1.0 < F2 < 2.0 Good 2.0 < F3 < 2.9 Relatively good 3.0 < F4 < 3.9 Normal 4.0 < F5 < 5.9 Relatively poor F6 = 6.0 Poor HEART RATE BAND The heart rate band must be placed tightly around your chest with the sensor having skin contact consistently throughout any workout.
-
Page 22: Maintenance
Maintenance Maintenance must be performed on a regular basis. Performing maintenance actions can aid in providing safe and trouble-free operation of all JLL equipment. ® are not responsible for performing regular inspection and maintenance actions for ® your machine. JLL representatives are available to answer any questions that you may ®... -
Page 23: Exercise Bike Cleaning
Any rust will indicate there may be moisture in the air and as a result this could impact on the integrity and performance of your machine. WARNING 1. Use only JLL replacement parts. ® 2. Keep water and liquids away from electrical parts. - Page 24 WARNING: EQUIPMENT HAZARD To avoid serious injury or death: • Replace worn or damaged components immediately and do not use until repair is completed.
-
Page 25: Additional Information
• Always seek professional advice before changing your diet or starting any exercise program. • JLL Fitness Ltd is not liable for any injuries or damages that may occur when assembling or using this exercise bike. • By reading this you assume full responsibility for any injuries or changes to your physical well-being. - Page 26 WWW.JLLFITNESS.COM @JLLFitness Follow us on Facebook and Twitter © JLL Fitness Ltd . All Rights Reserved.