Table of Contents
Advertisement
Available languages
Available languages
Quick Links
Advertisement
Chapters
Table of Contents

Related Manuals for Electrolux MO325G


Summary of Contents for Electrolux MO325G
- Page 1 MO325G Microwave Oven User Manual Four à micro-ondes Notice d'utilisation Mikrowellenofen Benutzerinformation Forno a microonde Istruzioni per l’uso Horno de microondas Manual de instrucciones...
-
Page 2: Table Of Contents
12. INSTALLATION....................16 WE’RE THINKING OF YOU Thank you for purchasing an Electrolux appliance. You’ve chosen a product that brings with it decades of professional experience and innovation. Ingenious and stylish, it has been designed with you in mind. So whenever you use it, you can be safe in the knowledge that you’ll get great results every time. -
Page 3: Safety Information
ENGLISH SAFETY INFORMATION Before the installation and use of the appliance, carefully read the supplied instructions. The manufacturer is not responsible if an incorrect installation and use causes injuries and damages. Always keep the instructions with the appliance for future reference. 1.1 Children and vulnerable people safety WARNING! Risk of suffocation, injury or permanent... - Page 4 By clients in hotels, motels, bed and breakfast and – other residential type environments Internally the appliance becomes hot when in • operation. Do not touch the heating elements that are in the appliance. Always use oven gloves to remove or put in accessories or ovenware.
-
Page 5: Safety Instructions
ENGLISH The contents of feeding bottles and baby food jars • shall be stirred or shaken and the temperature checked before consumption, in order to avoid burns. Eggs in their shell and whole hard-boiled eggs should • not be heated in the appliance since they may explode, even after microwave heating has ended. - Page 6 2.2 Electrical Connection • Do not use the appliance as a work surface and do not use the cavity for WARNING! storage purposes. Risk of fire and electrical 2.4 Care and Cleaning shock. • All electrical connections should be WARNING! made by a qualified electrician.
-
Page 7: Product Description
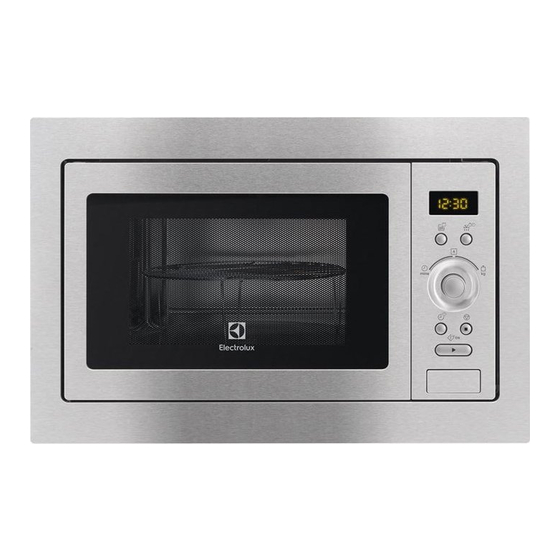
ENGLISH 3. PRODUCT DESCRIPTION 3.1 General overview Lamp Safety interlock system Display Control panel Door opener Waveguide cover Grill Turntable shaft 3.2 Control Panel Symbol Function Description Display Shows the settings and cur‐ — rent time. Defrosting button To defrost food by weight or time. -
Page 8: Before First Use
Symbol Function Description Setting knob To set the cooking time, weight or to activate the auto cooking programmes. Stop / Clear button To deactivate the appliance or delete the cooking set‐ tings. Clock / Kitchen To set the clock. -
Page 9: Daily Use
ENGLISH 5. DAILY USE with small holes, e. g. on handles or WARNING! unglazed bottoms. Moisture going into Refer to Safety chapters. the holes can cause the cookware to crack when it is heated. 5.1 General information about • The glass cooking tray is a work using the appliance space for heating food or liquids. - Page 10 Suitable cookware and materials Cookware / Material Microwave Grilling Defrosting Heating Cooking Ovenproof glass and porcelain (with no metal components, e. g. Pyrex, heat-proof glass) Non-ovenproof glass and porcelain Glass and glass ceramic made of ovenproof/frost-proof material (e. g.
- Page 11 ENGLISH • open the door. The microwave stops When the microwave automatically. Close the door and deactivates automatically, an press to continue to cook. Use acoustic signal sounds. this option to inspect food. • press 5.3 Power setting table Press the Power setting Approximate Percentage of Power Function...
-
Page 12: Automatic Programmes
5.6 Multistage cooking 7. Press to confirm and activate the microwave. If one stage is defrosting, set After each step an acoustic signal it as the first stage. sounds. You can cook food in maximum 2 stages. 5.7 Grilling and Combi Cooking Cook all frozen foods in 2 stages. -
Page 13: Using The Accessories
ENGLISH Menu Amount A - 6 1 cup (120 ml) Beverage 2 cups (240 ml) 3 cups (360 ml) A - 7 50 g (add 450 ml of water) Pasta 100 g (add 800 ml of water) A - 8 50 g Popcorn 100 g... -
Page 14: Additional Functions
8. ADDITIONAL FUNCTIONS 8.1 Child Safety Lock 1. Press twice. 2. Turn the Setting knob to set the time. The Child Safety Lock prevents an 3. Press to confirm. accidental operation of the microwave. The Timer still works when you open Press and hold for 3 second. -
Page 15: Care And Cleaning
ENGLISH Add 30 - 45 ml of cold water for every Turn the food over halfway through the 250 g of vegetables. set time and continue grilling. Cut the fresh vegetables into even size 9.6 Combi Cooking pieces before cooking. Cook all vegetables with a cover on the container. -
Page 16: Installation
Problem Possible cause Remedy The lamp does not The lamp is defective. The lamp has to be replace. operate. There is sparking in There are metal dishes or Remove the dish from the ap‐ the cavity. dishes with metal trim. - Page 17 ENGLISH is stand in the room temperature and 2. If the cabinet depth is over 300 mm, absorb the heat. put the template on the bottom of cabinet and check if it fits. If yes, 12.2 Electrical installation mark the spots for screws. Remove the template and fix the bracket with WARNING! the screws in the marked spot.
- Page 18 13. ENVIRONMENT CONCERNS Recycle the materials with the symbol marked with the symbol with the household waste. Return the product to . Put the packaging in applicable your local recycling facility or contact containers to recycle it. Help protect the your municipal office.
- Page 19 12. INSTALLATION....................35 NOUS PENSONS À VOUS Merci d'avoir choisi ce produit Electrolux. Avec ce produit, vous bénéficiez de dizaines d'années d'expérience professionnelle et d'innovation. Ingénieux et élégant, il a été conçu sur mesure pour vous. Grâce à cet appareil, vous savez que chaque utilisation vous apportera satisfaction.
-
Page 20: Consignes De Sécurité
CONSIGNES DE SÉCURITÉ Avant d'installer et d'utiliser cet appareil, lisez soigneusement les instructions fournies. Le fabricant ne peut être tenu pour responsable des dommages et blessures liés à une mauvaise installation ou utilisation. Conservez toujours cette notice avec votre appareil pour vous y référer ultérieurement. - Page 21 FRANÇAIS L'appareil et son cordon d'alimentation doivent être • conservés hors de portée des enfants âgés de moins de 8 ans. 1.2 Consignes générales de sécurité Cet appareil est conçu uniquement pour un usage • domestique et des utilisations telles que : bâtiments de ferme, cuisines réservées aux –...
- Page 22 N'utilisez que des ustensiles adaptés à une utilisation • dans un four à micro-ondes. Lorsque vous faites cuire des aliments dans des • récipients en plastique ou en papier, surveillez toujours l'appareil car ces matières peuvent s'enflammer. Cet appareil est uniquement destiné à chauffer des •...
-
Page 23: Instructions De Sécurité
FRANÇAIS N'utilisez pas de produits abrasifs ni de racloirs • pointus en métal pour nettoyer la porte en verre car ils peuvent rayer sa surface, ce qui peut briser le verre. Faites attention aux dimensions minimales du meuble • (le cas échéant). Reportez-vous au chapitre «... -
Page 24: Description De L'appareil
2.4 Entretien et nettoyage • Nettoyez l'appareil avec un chiffon doux humide. Utilisez uniquement des AVERTISSEMENT! produits de lavage neutres. N'utilisez Risque de blessure pas de produits abrasifs, de tampons corporelle, d'incendie ou de à récurer, de solvants ni d'objets dommage matériel à... - Page 25 FRANÇAIS 3.2 Bandeau de commande Symbole Fonction Description Affichage Affiche les réglages et l'heu‐ — Touche décongéla‐ Pour décongeler des aliments tion selon le poids ou la durée. Touche de fonc‐ Pour choisir la fonction. tions Manette de réglage Pour régler le temps de cuis‐ son, le poids des aliments, ou pour activer les programmes de cuisson automatique.
-
Page 26: Avant La Première Utilisation
3.3 Accessoires Plateau de cuisson en verre et support à roulettes. Grille Ensemble du plateau tournant Utilisez toujours l'ensemble du plateau tournant pour cuire des aliments dans le micro-ondes. Utilisez-la pour : • faire griller des aliments • cuisson combinée 4. - Page 27 FRANÇAIS • Ne cuisez pas trop les plats en réglant Décongélation des viandes, de la une puissance et une durée trop volaille et du poisson élevées. Les aliments peuvent se • Posez l'aliment surgelé sans dessécher, brûler ou prendre feu. emballage sur une petite assiette •...
- Page 28 Ustensile de cuisine/matériaux Micro-ondes Gril Dégivrer Résis‐ Faites tance cuire Verre et porcelaine n'allant pas au four Verre et vitrocéramique composés d'un matériau allant au four/résistant au gel (par exemple l'Arcoflam), grille Céramique , grès Plastique résistant à une chaleur de 200 °C...
- Page 29 FRANÇAIS • attendre qu'il s'éteigne option si vous souhaitez simplement automatiquement une fois la durée surveiller la cuisson des aliments. écoulée. • appuyer sur • ouvrir la porte. Le micro-ondes s'arrête automatiquement. Fermez la Lorsque le micro-ondes s'éteint automatiquement, un porte et appuyez sur pour signal sonore retentit.
-
Page 30: Programmes Automatiques
3. Appuyez sur pour confirmer. sélectionner la décongélation selon 4. Tournez la manette de réglage pour la durée. sélectionner la puissance 2. Tournez la manette de réglage pour 5. Appuyez sur pour confirmer. -
Page 31: Utilisation Des Accessoires
FRANÇAIS Menu Quantité A - 3 250 g Viande 350 g 450 g A - 4 250 g Poisson 350 g 450 g A - 5 200 g Légumes 300 g 400 g A - 6 1 tasse (120 ml) Boissons 2 tasses (240 ml) 3 tasses (360 ml) -
Page 32: Fonctions Supplémentaires
8. FONCTIONS SUPPLÉMENTAIRES 8.1 Sécurité enfants 1. Appuyez deux fois sur 2. Tournez la manette de réglage pour La fonction Sécurité enfants permet sélectionner la durée. d'éviter une utilisation involontaire du 3. Appuyez sur la touche pour micro-ondes. confirmer. -
Page 33: Entretien Et Nettoyage
FRANÇAIS Problème Solution Une fois la durée de cuisson écou‐ La prochaine fois, diminuez la puissance et al‐ lée, les aliments sont trop cuits sur longez le temps. Remuez les liquides à la moi‐ les bords mais ne sont pas prêts au tié... -
Page 34: Cas D'anomalie De Fonctionnement
2 ou 3 minutes. bouillir ce mélange à pleine puissance • Pour éliminer les odeurs, versez de micro-ondes pendant 5 minutes. 2 cuillères à café de jus de citron 11. -
Page 35: Installation
FRANÇAIS Nous vous recommandons de noter ces informations ici : Modèle (MOD.) ........Référence du produit (PNC) ........Numéro de série (S.N.) ........12. INSTALLATION 12.2 Installation électrique AVERTISSEMENT! Reportez-vous aux chapitres AVERTISSEMENT! concernant la sécurité. Le branchement électrique doit être confié à un 12.1 Informations générales électricien qualifié. - Page 36 3. Installez le micro-ondes. Si vous avez vissé le support, veillez à ce qu'il bloque l'arrière de l'appareil pour l'empêcher de reculer. Distances d'installation Dimensions 380 + 2 4. Ouvrez la porte et fixez le micro- 560 + 8 ondes au meuble à...
- Page 37 FRANÇAIS 13. EN MATIÈRE DE PROTECTION DE L'ENVIRONNEMENT Recyclez les matériaux portant le électroniques. Ne jetez pas les appareils portant le symbole avec les ordures symbole . Déposez les emballages ménagères. Emmenez un tel produit dans les conteneurs prévus à cet effet. dans votre centre local de recyclage ou Contribuez à...
- Page 38 11. FEHLERSUCHE..................... 53 12. MONTAGE......................54 WIR DENKEN AN SIE Vielen Dank, dass Sie sich für ein Gerät von Electrolux entschieden haben. Sie haben ein Produkt gewählt, hinter dem jahrzehntelange professionelle Erfahrung und Innovation stehen. Bei der Entwicklung dieses großartigen und eleganten Geräts haben wir an Sie gedacht.
-
Page 39: Sicherheitsinformationen
DEUTSCH SICHERHEITSINFORMATIONEN Lesen Sie vor der Montage und dem Gebrauch des Geräts zuerst die Gebrauchsanleitung. Der Hersteller übernimmt keine Verantwortung für Verletzungen und Beschädigungen durch unsachgemäße Montage. Bewahren Sie die Gebrauchsanleitung griffbereit auf. 1.1 Sicherheit von Kindern und schutzbedürftigen Personen WARNUNG! Erstickungs- und Verletzungsgefahr sowie Gefahr einer dauerhaften Behinderung. - Page 40 1.2 Allgemeine Sicherheit Dieses Gerät ist für die Verwendung im Haushalt und • ähnliche Zwecke vorgesehen, wie z. B.: Bauernhöfe, Personalküchenbereiche in – Geschäften, Büros und anderen Arbeitsumfeldern Für Gäste in Hotels, Motels, Pensionen und – anderen wohnungsähnlichen Räumlichkeiten Der Geräteinnenraum wird während des Betriebs...
- Page 41 DEUTSCH Wenn Sie Lebensmittel in Behältern aus Kunststoff • oder Papier erwärmen, beobachten Sie das Gerät aufmerksam, da die Möglichkeit einer Entflammung besteht. Das Gerät ist zum Erwärmen von Speisen und • Getränken vorgesehen. Das Trocknen von Kleidungsstücken und das Erwärmen von Wärmekissen, Hausschuhen, Schwämmen, feuchten Tüchern o.
-
Page 42: Sicherheitsanweisungen
Die Geräterückseite muss gegen die Wand gestellt • werden. Benutzen Sie keine scharfen Scheuermittel oder • Metallschwämmchen zum Reinigen der Glastür; sie könnten die Glasfläche verkratzen und zum Zersplittern der Scheibe führen. Achten Sie auf die Mindestabmessungen des •... -
Page 43: Gerätebeschreibung
DEUTSCH • Üben Sie keinen Druck auf die • Fett- oder Speisereste im Gerät geöffnete Gerätetür aus. können einen Brand verursachen. • Die Lüftungsöffnungen dürfen nicht • Reinigen Sie das Gerät mit einem abgedeckt werden. weichen, feuchten Tuch. Verwenden • Verwenden Sie das Gerät nicht als Sie ausschließlich Neutralreiniger Arbeitsfläche und den Garraum nicht Benutzen Sie keine Scheuermittel,... - Page 44 3.2 Bedienfeld Symbol Funktion Beschreibung Display Anzeige der Einstellungen — und der aktuellen Uhrzeit. Taste Auftauen Auftauen von Lebensmitteln nach Gewicht oder Zeit. Taste Funktion Auswahl der Funktion. Einstellknopf Einstellen der Gardauer, des Gewichts oder Einschalten der automatischen Garpro‐...
-
Page 45: Vor Der Ersten Inbetriebnahme
DEUTSCH 3.3 Zubehör Glasteller und Rollenführung Grillrost Drehteller-Set Verwenden Sie beim Zubereiten von Speisen in der Mikrowelle stets das Drehteller-Set. Verwendung: • Grillen • Kombi-Garen 4. VOR DER ERSTEN INBETRIEBNAHME Nach dem elektrischen Anschluss des WARNUNG! Geräts oder nach einem Stromausfall Siehe Kapitel zeigt das Display 0:00 an und es ertönt Sicherheitshinweise. - Page 46 • Übergaren Sie die Speisen nicht, Auftauen von Fleisch, Geflügel, Fisch indem Sie die Leistung zu hoch und • Gefrorene, ungeöffnete Lebensmittel die Zeit zu lang einstellen. Die auf einem kleinen, umgedrehten Lebensmittel können austrocknen, Teller so in einen Behälter legen, verbrennen oder an manchen Stellen dass die Auftauflüssigkeit vom...
- Page 47 DEUTSCH Kochgeschirr/Material Mikrowelle Grillen Auftauen Aufwär‐ Garen Nicht feuerfestes Glas und Porzel‐ Glas und Glaskeramik aus feuerfes‐ tem/frostbeständigem Material (z. B. Arcoflam), Grillrost Keramik , Steingut Hitzebeständiger Kunststoff bis 200 °C Pappe, Papier Frischhaltefolie Bratfolie mit mikrowellen-geeignetem Verschluss Bratgeschirr aus Metall, z. B. Emaille, Gusseisen Backformen, schwarz lackiert oder si‐...
- Page 48 • Warten Sie, bis die Mikrowelle nach Garfortschritt der Speise zu Ablauf der eingestellten Gardauer überprüfen. automatisch ausgeschaltet wird. • Drücken Sie • Öffnen Sie die Tür. Die Mikrowelle wird automatisch ausgeschaltet. Wenn die Mikrowelle Schließen Sie die Tür und drücken automatisch ausgeschaltet wird, ertönt ein akustisches...
-
Page 49: Automatikprogramme
DEUTSCH 3. Mit bestätigen. Lebensmittel, die weniger 4. Stellen Sie die gewünschte als 200 g wiegen, müssen Leistungsstufe mit dem Einstellknopf zum Auftauen am Rand des ein. Drehtellers platziert werden. 5. Mit bestätigen. 1. Drücken Sie einmal für das 6. Drehen Sie den Einstellknopf, um die Auftauen nach Gewicht oder zweimal Zeit einzustellen. -
Page 50: Verwendung Des Zubehörs
4. Drücken Sie , um Ihre Auswahl zu bestätigen und die Mikrowelle einzuschalten. Menü Menge A - 1 200 g Pizza 400 g A - 2 200 g Kartoffeln 400 g 600 g A - 3 250 g Fleisch... -
Page 51: Zusatzfunktionen
DEUTSCH 7.2 Einsetzen des Grillrostes Lebensmittel niemals direkt auf dem Glasteller garen. Legen Sie den Grillrost auf das Drehteller-Set. 1. Legen Sie die Rollenführung um die Drehspindel. 2. Stellen Sie den Glasteller auf die Rollenführung. 8. ZUSATZFUNKTIONEN 8.1 Kindersicherung 1. Drücken Sie zweimal. -
Page 52: Reinigung Und Pflege
Problem Abhilfe Die Speise wurde zu trocken. Kürzere Garzeit einstellen oder niedrigere Mik‐ rowellen-Leistung wählen. Die Speise ist nach Ablauf der Zeit Längere Garzeit einstellen oder höhere Leis‐ immer noch nicht aufgetaut, heiß tung wählen. Beachten Sie, dass für die Zube‐... -
Page 53: Fehlersuche
DEUTSCH Reinigungsmittel an, und reinigen Sie warmem Wasser und etwas damit die Vorderseite des Geräts. Spülmittel an. • Reinigen Sie die Metalloberflächen • Um hartnäckige Rückstände leichter mit einem handelsüblichen entfernen zu können, stellen Sie ein Reinigungsmittel. Glas Wasser in das Gerät, und lassen •... -
Page 54: Montage
Störung Mögliche Ursache Abhilfe Das Gerät funktio‐ Eine Störung ist aufgetreten. Falls dieser Vorfall wiederholt niert ohne ersichtli‐ auftritt, wenden Sie sich an chen Grund nicht den autorisierten Kunden‐ mehr. dienst. 11.2 Servicedaten Typenschild befindet sich auf dem Gerät. - Page 55 DEUTSCH Schablone und befestigen Sie den Der Hersteller haftet nicht für Winkel mit den Schrauben an der Schäden, die aufgrund der markierten Stelle. Nichtbeachtung der Sicherheitsvorkehrungen des Überspringen Sie diesen Kapitels Schritt, wenn die „Sicherheitshinweise“ entstehen. Schranktiefe 300 mm beträgt. Die Mikrowelle wird mit einem Netzkabel mit Netzstecker geliefert.
- Page 56 13. UMWELTTIPPS Recyceln Sie Materialien mit dem Entsorgen Sie Geräte mit diesem Symbol nicht mit dem Hausmüll. Bringen Sie Symbol . Entsorgen Sie die das Gerät zu Ihrer örtlichen Verpackung in den entsprechenden Sammelstelle oder wenden Sie sich an Recyclingbehältern.
- Page 57 11. RISOLUZIONE DEI PROBLEMI..............71 12. INSTALLAZIONE....................72 PENSATI PER VOI Grazie per aver acquistato un'apparecchiatura Electrolux. Avete scelto un prodotto che ha alle spalle decenni di esperienza professionale e innovazione. Ingegnoso ed elegante, è stato progettato pensando a voi. Quindi, in qualsiasi momento desiderate utilizzarlo, potete esser certi di ottenere sempre i migliori risultati.
-
Page 58: Informazioni Per La Sicurezza
INFORMAZIONI PER LA SICUREZZA Leggere attentamente le istruzioni fornite prima di installare e utilizzare l'apparecchiatura. Il produttore non è responsabile se un'installazione ed un uso non corretto dell'apparecchiatura provocano lesioni e danni. Tenere sempre le istruzioni a portata di mano come riferimento futuro. - Page 59 ITALIANO 1.2 Avvertenze di sicurezza generali L'apparecchiatura è destinata all'uso domestico e • applicazioni simili, tra cui: Case di campagna; cucine di negozi, uffici e altri – ambienti di lavoro; clienti di hotel, motel, bed and breakfast e altri – ambienti residenziali All'interno l'apparecchiatura si scalda mentre è...
- Page 60 Quando si riscaldano o cuociono alimenti in recipienti • di plastica, carta, controllare il forno per evitare il rischio di incendio. L'apparecchiatura è destinata alla cottura di alimenti e • bevande. L'asciugatura di alimenti e capi di vestiario e il riscaldamento di compresse riscaldanti, pantofole, spugne, panni umidi e simili può...
-
Page 61: Istruzioni Di Sicurezza
ITALIANO Fare attenzione alle dimensioni minime del mobile • (ove previsto). Fare riferimento al capitolo Installazione. L'apparecchiatura deve essere messa in funzione con • la porta decorata aperta (ove prevista). 2. ISTRUZIONI DI SICUREZZA 2.1 Installazione • Se l'apparecchiatura è collegata alla presa mediante una prolunga, ATTENZIONE! assicurarsi che il cavo sia collegato a... -
Page 62: Descrizione Del Prodotto
• Se si utilizza uno spray per il forno, superficie. seguire attentamente le istruzioni di • Non lasciare che si accumulino resti sicurezza sulla confezione. di cibo versato o residui di detergente 2.5 Smaltimento sulle superfici di sigillatura della porta. - Page 63 ITALIANO 3.2 Pannello dei comandi Simbolo Funzione Descrizione Display Mostra le impostazioni e l'ora — corrente. Tasto scongela‐ Per scongelare il cibo in base mento al peso o al tempo. Tasto Funzione Per scegliere la funzione. Manopola d'impo‐ Per impostare il tempo di cot‐ stazione tura, il peso o per attivare i programmi di cottura automa‐...
-
Page 64: Preparazione Al Primo Utilizzo
3.3 Accessori Vassoio di cottura in vetro e guida a rulli. Griglia per il grill Kit piatto girevole Utilizzare sempre il piatto girevole per preparare il cibo all'interno del forno a microonde. Da utilizzare per: • cottura a grill •... - Page 65 ITALIANO seccarsi, scoppiare o rapprendersi in capovolto posto sopra un contenitore alcuni punti. cosicché il liquido di scongelamento • Non usare l'apparecchiatura per possa scorrere via. cuocere uova nel loro guscio o • Girare il cibo a metà tempo di lumache, poiché...
- Page 66 Pentole/Materiale Microonde Grill Scongela‐ Riscal‐ Cottura mento damento Ceramica , terracotta Plastica termoresistente fino a 200°C Cartone, carta Pellicola per alimenti Sacchetti di cottura con chiusura adatta alle microonde Recipienti di cottura in metallo, ad es. smalto, ghisa Teglie laccate in nero o rivestite in si‐...
- Page 67 ITALIANO 5.3 Tabella impostazioni di potenza Premere il Impostazione di potenza Percentuale Approssimativa di Poten‐ tasto Fun‐ zione 1 volta P100 100 % 2 volte P 80 80 % 3 volte P 50 50 % 4 volte P 30 30 % 5 volte P 10 10 %...
-
Page 68: Programmi Automatici
Cucinare tutti i cibi congelati in 2 Dopo ogni passaggio viene emesso passaggi. un segnale acustico. 1. Premere e impostare la modalità 5.7 Grill e cottura combo di scongelamento. 2. Ruotare la manopola d'impostazione 1. Premere per impostare il tempo o il peso di 2. -
Page 69: Utilizzo Degli Accessori
ITALIANO Menù Quantità A - 6 1 tazza (120 ml) Bevande 2 tazze (240 ml) 3 tazze (360 ml) A - 7 50 g (aggiungere 450 ml d'acqua) Pasta 100 g (aggiungere 800 ml d'acqua) A - 8 50 g Popcorn 100 g A - 9... -
Page 70: Consigli E Suggerimenti Utili
8.2 Timer cucina Il Timer rimane ancora in funzione quando si apre la porta o si mette in È possibile impostare al massimo 95 pausa il microonde. Premere minuti. annullare. Una volta trascorso il tempo 1. Premere due volte impostato, viene emesso un segnale 2. -
Page 71: Pulizia E Cura
ITALIANO 9.5 Grill A metà del tempo di cottura, girare la pietanza e poi continuare. Cuocere al grill i cibi sottili mettendoli al Ciascuna modalità abbina le funzioni di centro della griglia. cottura al microonde e grill in momenti e Girare la pietanza a metà... -
Page 72: Installazione
Problema Causa possibile Soluzione L'apparecchiatura Il fusibile nella scatola dei fusi‐ Controllare il fusibile. Se il fu‐ non funziona. bili è scattato. sibile scatta più di una volta, contattare un tecnico qualifi‐ cato. L'apparecchiatura La porta non è chiusa corretta‐... - Page 73 ITALIANO installata e con messa a terra. AVVERTENZA! Nell'eventualità di un cortocircuito Non collegare elettrico, la messa a terra riduce il rischio l'apparecchiatura ad di folgorazione. adattatori o a prolunghe. Potrebbe verificarsi un 12.3 Installazione del sovraccarico e rischio di microonde incendio.
- Page 74 4. Aprire la porta e fissare il microonde al mobile mediante una vite. 3. Installare il microonde. Una volta fissata la staffa, assicurarsi che blocchi la parte posteriore dell'apparecchiatura. 13. CONSIDERAZIONI SULL'AMBIENTE apparecchiature che riportano il simbolo Riciclare i materiali con il simbolo insieme ai normali rifiuti domestici.
- Page 75 12. INSTALACIÓN....................90 PENSAMOS EN USTED Gracias por adquirir un aparato Electrolux. Ha escogido un producto que contiene décadas de experiencia e innovación profesionales. Ingenioso y elegante, se ha diseñado pensando en usted. Así pues, siempre que lo utilice, puede tener la seguridad de que conseguirá...
-
Page 76: Información Sobre Seguridad
INFORMACIÓN SOBRE SEGURIDAD Antes de instalar y utilizar el aparato, lea atentamente las instrucciones facilitadas. El fabricante no se hace responsable de los daños y lesiones causados por una instalación y uso incorrectos. Guarde siempre las instrucciones junto con el aparato para futuras consultas. - Page 77 ESPAÑOL 1.2 Seguridad general Este aparato está concebido para utilizarse en • aplicaciones domésticas y similares, tales como: Granjas; áreas de cocina para el personal en – tiendas, oficinas y otros entornos de trabajo; Por clientes en hoteles, moteles, pensiones y otros –...
- Page 78 Si se genera humo, apague o desenchufe el horno y • deje la puerta cerrada para sofocar las posibles llamas. Las bebidas que se calientan en el microondas •...
-
Page 79: Instrucciones De Seguridad
ESPAÑOL 2. INSTRUCCIONES DE SEGURIDAD 2.1 Instalación • No desconecte el aparato tirando del cable de conexión a la red. Tire ADVERTENCIA! siempre del enchufe. Solo un electricista 2.3 Uso cualificado puede instalar este aparato. ADVERTENCIA! • Retire todo el embalaje. Riesgo de lesiones, •... -
Page 80: Descripción Del Producto
2.5 Desecho • Desconecte el aparato de la red. • Corte el cable de conexión a la red y ADVERTENCIA! deséchelo. Existe riesgo de lesiones o asfixia. 3. DESCRIPCIÓN DEL PRODUCTO 3.1 Descripción general Bombilla Sistema de bloqueo de seguridad... -
Page 81: Antes Del Primer Uso
ESPAÑOL Símbolo Función Descripción Tecla Descongelar Para descongelar alimentos por peso o por tiempo. Tecla de función Para elegir la función. Mando de ajuste Para ajustar el tiempo de coc‐ ción, el peso o para activar los programas de cocción au‐ tomática. -
Page 82: Uso Diario
Cuando conecte el aparato al suministro 2. Gire el mando de ajuste para ajustar de red, o después de un corte del las horas. mismo, la pantalla muestra 0:00 y se 3. Pulse para confirmar. emite una señal acústica. - Page 83 ESPAÑOL el aparato. Deje que se descongelen • Debe seguir las instrucciones del a temperatura ambiente. fabricante impresas en el envase (p. • Puede utilizar una potencia superior ej., retirar la tapa de metal y pinchar del microondas para cocinar frutas y la película de plástico).
- Page 84 5.2 Activación y desactivación Para desactivar el microondas: del microondas. • esperar hasta que el microondas se desactive automáticamente cuando PRECAUCIÓN! termine el tiempo. No deje funcionar el • abrir la puerta. El microondas se para microondas sin alimentos en automáticamente.
-
Page 85: Programas Automáticos
ESPAÑOL Puede cocinar alimentos en 2 etapas La descongelación por peso como máximo. no se debe utilizar con Cocine todos los alimentos congelados alimentos que han estado en 2 fases. fuera del descongelador durante más de 20 minutos, 1. Pulse y ajuste el modo de ni con alimentos preparados descongelación. -
Page 86: Uso De Los Accesorios
4. Pulse para confirmar y activar el microondas. Menú Cantidad A - 1 200 g Pizza 400 g A - 2 200 g Patatas 400 g 600 g A - 3 250 g Carne 350 g 450 g A - 4... -
Page 87: Funciones Adicionales
ESPAÑOL 7.2 Colocación de la rejilla del No cocine nunca los grill alimentos directamente sobre la bandeja de cristal. Coloque la rejilla del grill sobre el plato giratorio. 1. Coloque la guía de rodillos alrededor del eje giratorio. 2. Coloque la bandeja de cristal sobre la guía 8. - Page 88 9.1 Consejos para el microondas Problema Solución No hay datos para la cantidad de Busque alimentos similares. Aumente o reduz‐ alimentos preparados. ca el tiempo de cocción según la regla siguien‐ te: Doble de cantidad = casi doble de tiem‐...
-
Page 89: Mantenimiento Y Limpieza
ESPAÑOL 10. MANTENIMIENTO Y LIMPIEZA suciedad más fácilmente e impedirá ADVERTENCIA! que se queme. Consulte los capítulos sobre • Elimine la suciedad resistente con seguridad. limpiadores especiales. • Limpie periódicamente todos los 10.1 Notas y consejos sobre la accesorios y déjelos secar. Utilice un limpieza paño suave humedecido en agua templada y jabón neutro. -
Page 90: Instalación
Problema Posible causa Solución El aparato deja de Hay un fallo de funcionamien‐ Si esta situación se repite, lla‐ funcionar sin motivo me al Centro de servicio técni‐ aparente. 11.2 Datos de servicio placa de características. La placa de características se encuentra en el... - Page 91 ESPAÑOL plantilla y sujete la abrazadera con El fabricante declina toda los tornillos en el punto marcado. responsabilidad si la instalación no se efectúa Omita este paso si el siguiendo las instrucciones fondo del armario tiene de seguridad del capítulo más de 300 mm.
- Page 92 13. ASPECTOS MEDIOAMBIENTALES electrónicos. No deseche los aparatos Recicle los materiales con el símbolo marcados con el símbolo junto con los Coloque el material de embalaje en los residuos domésticos. Lleve el producto a contenedores adecuados para su su centro de reciclaje local o póngase en reciclaje.
- Page 93 ESPAÑOL...
- Page 94 www.electrolux.com...
- Page 95 ESPAÑOL...
- Page 96 www.electrolux.com/shop...