Table of Contents
Advertisement
Advertisement
Table of Contents

Related Manuals for Epson EH-LS300W


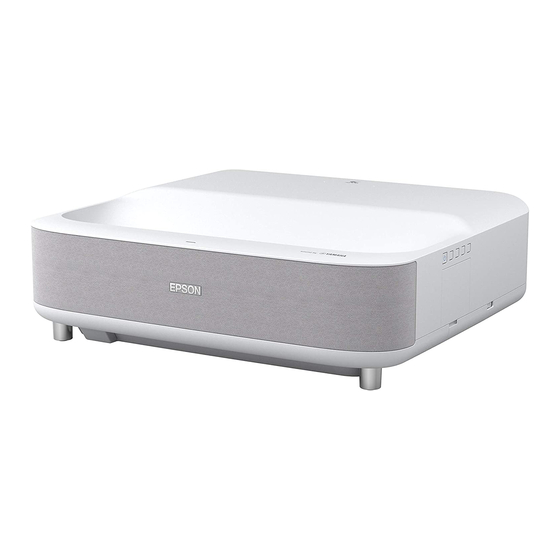
Summary of Contents for Epson EH-LS300W
- Page 1 User's Guide...
-
Page 2: Table Of Contents
Contents Notations Used in This Guide Focusing the Image Using the Focus Lever........26 Selecting an Image Source .............. 27 Introduction to Your Projector Image Aspect Ratio ................28 Changing the Image Aspect Ratio..................28 Available Image Aspect Ratios ....................29 Projector Parts and Functions ............ - Page 3 Contents Image Quality Settings - Picture Menu .......... 48 Solving Missing or Low Audio Problems................70 Solving Bluetooth Speaker Mode Problems ............... 70 Sound Quality Settings - Sound Menu........... 50 Solving Remote Control Operation Problems....... 72 Projector Feature Settings - Display Menu........52 Solving HDMI CEC Problems ............
-
Page 4: Notations Used In This Guide
Notations Used in This Guide Safety Symbols The projector and its manuals use graphical symbols and labels to indicate content that tells you how to use the projector safely. Read and carefully follow the instructions that are marked with these symbols and labels to avoid injury to persons or damage to property. This symbol indicates information that, if ignored, could possibly result in personal injury or even death. - Page 5 Searching by keyword Click Edit > Advanced Search. Enter the keyword (text) for information you want to find in the search window, and then click Search. Hits are displayed as a list. Click one of the displayed hits to jump to that page. Jumping directly from bookmarks Click a title to jump to that page.
- Page 6 • To specify pages that are not in series, divide the pages with commas. Example: 5, 10, 15...
-
Page 7: Introduction To Your Projector
Introduction to Your Projector See these sections to learn more about your projector. g g Related Links • "Projector Parts and Functions"... -
Page 8: Projector Parts And Functions
Projector Parts and Functions The following sections explain the projector parts and their functions. Name Function Status indicator Indicates the projector's status. g g Related Links • "Projector Parts - Front/Top" • "Projector Parts - Top/Side" g g Related Links •... -
Page 9: Projector Parts - Rear
Projector Parts and Functions g g Related Links Name Function • "Projector Indicator Status" p.64 Air exhaust vent Exhaust vent for air used to cool the projector • "Cleaning the Obstacle Sensor and Motion Sensor" p.57 internally. Caution Projector Parts - Rear While projecting, do not put your face or hands near the air exhaust vent, and do not place objects that may become warped or... -
Page 10: Projector Parts - Base
Projector Parts and Functions Name Function Name Function USB-A port Connects a commercially available USB device such as Rear foot Stabilizes the projector on a surface such as a desk. a webcam, external HDD, or keyboard. Air intake vent (air Takes in air to cool the projector internally. -
Page 11: Projector Parts - Projector Remote Control
Projector Parts and Functions Projector Parts - Projector Remote Control Name Function Indicator/Microphon Turns on when outputting signals from the remote control. Detects audio when you press the Mic button. YouTube button Starts the YouTube application. Bluetooth Speaker Switches to the Bluetooth Speaker Mode. Mode button Arrow buttons Selects menu items while displaying the projector's... - Page 12 Projector Parts and Functions Name Function Home button Displays the Android TV ™ home screen. Google Search button Searches with your voice. When you press this button, the remote control's microphone starts listening for voice commands. [Enter] button Enters the current selection and moves to the next level while displaying the projector's menu.
-
Page 13: Setting Up The Projector
Setting Up the Projector Follow the instructions in these sections to set up your projector. g g Related Links • "Projector Placement" p.14 • "Projector Connections" p.16 • "Installing Batteries in the Remote Control" p.18 • "Setting Up the Android TV™" p.20... -
Page 14: Projector Placement
Projector Placement Install the projector on a table in your living room or on a low shelf to project • If the image is tilted, rotate the front feet to adjust their height. images. • Leave plenty of space around and under the projector for ventilation, and Note the following points when selecting a projector location: do not place it on top of or next to anything that could block the vents. -
Page 15: Precautions On Installation
Projector Placement Precautions on Installation Warning Note the following precautions when installing the projector. Do not install the projector in a location subject to high levels of dust or humidity, or in a location subject to smoke or steam. Otherwise, it could cause a fire or electric shock to occur. -
Page 16: Projector Connections
Projector Connections See these sections to connect the projector to a variety of projection sources. Connect the other end to the projector's HDMI port. Attention Check the shape and orientation of the connectors on any cable you plan to connect. Do not force a connector into a port if it does not fit. The device or your projector could be damaged or could malfunction. -
Page 17: Connecting To An Arc Compatible Av System
Projector Connections Connecting to an ARC Compatible AV System If your AV system has an HDMI port, you can connect it to the projector using an HDMI cable (ARC compatible) to output audio to the AV system. Connect the HDMI cable to your video source's HDMI input port (ARC compatible). -
Page 18: Installing Batteries In The Remote Control
Installing Batteries in the Remote Control The remote control uses the two AAA batteries that came with the projector. Insert the batteries with the + and – ends facing as shown. Attention Make sure you read the Safety Instructions before handling the batteries. Remove the battery cover as shown. -
Page 19: Remote Control Operation
Installing Batteries in the Remote Control Replace the battery cover and press it down until it clicks into place. Avoid using the remote control in conditions with bright fluorescent lights or in direct sunlight, or the projector may not respond to commands. -
Page 20: Setting Up The Android Tv
Setting Up the Android TV™ When you turn on the projector for the first time, you need to setup the built- When the language selection screen is displayed, select the language in Android TV you want to use. ™ You can change each of the settings even after completing the initial setup. -
Page 21: Android Tv ™ Home Screen
Setting Up the Android TV™ Android TV ™ Home Screen When you turn on the projector or press the button on the remote control, the Android TV home screen is displayed. ™ You can easily access online content, applications, and projector settings from the home screen. -
Page 22: Using Basic Projector Features
Using Basic Projector Features Follow the instructions in these sections to use your projector's basic features. g g Related Links • "Turning On the Projector" p.23 • "Turning Off the Projector" p.24 • "Image Shape" p.25 • "Focusing the Image Using the Focus Lever" p.26 •... -
Page 23: Turning On The Projector
Turning On the Projector When you connect the video equipment to the projector, turn on the video Warning equipment you want to use after you turn on the projector. • Never look into the projector lens when the light source is on. This can damage Connect the power cord to the projector's power inlet and plug it into your eyes and is especially dangerous for children. -
Page 24: Turning Off The Projector
Turning Off the Projector Turn off the projector after use. • Turn off this product when it is not in use to prolong the life of the projector. Light source life varies depending on the environmental conditions and usage. Brightness decreases over time. Press the power button on the control panel or remote control. -
Page 25: Image Shape
Image Shape You can project an even, rectangular image by placing the projector directly Use the arrow buttons to select the point on the image you want to in front of the center of the screen and keeping it level. If you place the adjust, and then press [Enter]. -
Page 26: Focusing The Image Using The Focus Lever
Focusing the Image Using the Focus Lever You can correct the focus using the focus lever. Open the focus lever cover. Move the focus lever to adjust the focus. Close the focus lever cover. -
Page 27: Selecting An Image Source
Selecting an Image Source When multiple image sources are connected to the projector, such as a computer and DVD player, you can switch from one image source to the other. Make sure the connected image source you want to use is turned on. For video image sources, insert a DVD or other video media and press play. -
Page 28: Image Aspect Ratio
Image Aspect Ratio The projector can display images in different width-to-height ratios called Select the Picture and press the [Enter] button. aspect ratios. Normally, the input signal from your video source determines the image's aspect ratio. However, you can change the aspect ratio for certain images to fit your screen. -
Page 29: Available Image Aspect Ratios
Image Aspect Ratio Available Image Aspect Ratios You can select the following image aspect ratios, depending on the input signal from your image source. • Note that using the aspect ratio function of the projector to reduce, enlarge, or split the projected image for commercial purposes or for public viewing may infringe upon the rights of the copyright holder of that image based on copyright law. -
Page 30: Adjusting Image Quality (Color Mode)
Adjusting Image Quality (Color Mode) The projector offers different color modes to provide optimum brightness, Select the Picture menu and press the [Enter] button. contrast, and color for a variety of viewing environments and image types. You can select the mode designed to match your image and environment, or experiment with the available modes. -
Page 31: Available Color Modes
Adjusting Image Quality (Color Mode) Available Color Modes You can set the projector to use these color modes, depending on your environment and image types. Color mode Description Dynamic This is the brightest mode. Best for prioritizing brightness. Vivid Best for enjoying various content in a bright environment. -
Page 32: Turning On Automatic Luminance Adjustment
Turning On Automatic Luminance Adjustment You can turn on Dynamic Contrast to automatically optimize the image Select one of the following options and press [Enter]: luminance. This improves the image contrast based on the brightness of the • High Speed to adjust brightness as soon as the scene changes. content you project. -
Page 33: Adjusting Image Quality In Detail
Adjusting Image Quality in Detail You can fine-tune various aspects of how quality and colors are displayed in Select one of the following options: your projected images. • To adjust the overall color brightness of the color, adjust the Brightness setting. Turn on the projector and display an image. -
Page 34: Adjusting The Light Source Brightness
Adjusting the Light Source Brightness You can adjust the brightness of your projector's light source. Press to exit the menus. Turn on the projector and display an image. g g Related Links • "Image Quality Settings - Picture Menu" p.48 Press the button on the remote control. -
Page 35: Controlling The Volume With The Volume Buttons
Controlling the Volume with the Volume Buttons The volume buttons control the projector's internal speaker system. Turn on the projector and start a video. To lower or raise the volume, press the button on the control panel or remote control. A volume gauge appears on the screen. -
Page 36: Adjusting The Sound Settings (Sound Mode)
Adjusting the Sound Settings (Sound Mode) The projector offers various sound settings to fine-tune the sound quality for Select the Sound menu and press the [Enter] button. a variety of listening environments. You can select the mode designed to match your image, or experiment with the available modes. -
Page 37: Available Sound Modes
Adjusting the Sound Settings (Sound Mode) g g Related Links Setting Description • "Available Sound Modes" p.37 Virtual Surround Adjusts the strength of the surround effect. This setting • "Detailed Sound Settings" p.37 is saved for each Sound Mode. • "Sound Quality Settings - Sound Menu" p.50 Clear Voice Adjusts the voice so that it can be heard clearly. -
Page 38: Adjusting Projector Features
Adjusting Projector Features Follow the instructions in these sections to use your projector's adjustment features. g g Related Links • "Using the Projector as a Bluetooth Speaker" p.39 • "Shutting Off the Image Temporarily" p.41 • "HDMI CEC Features" p.42 •... -
Page 39: Using The Projector As A Bluetooth Speaker
Using the Projector as a Bluetooth Speaker You can use the projector's speaker to output audio from a video/audio device After exiting Bluetooth Speaker Mode, the following message is connected by Bluetooth. displayed. • There is a delay in the audio output from any Bluetooth audio device. •... - Page 40 Using the Projector as a Bluetooth Speaker • You may not be able to connect depending on the standard and type of device. • Even when connecting within the specified communication distance, connections can be lost due to the status of the signal. •...
-
Page 41: Shutting Off The Image Temporarily
Shutting Off the Image Temporarily When you want to enjoy the sound only from the projector, you can temporarily turn off the projected image. Press the button on the control panel or remote control. The light source turns off and the projected image is interrupted. To turn the image back on, press again. -
Page 42: Hdmi Cec Features
HDMI CEC Features When an audio/video source that meets the HDMI CEC standard is Select the Settings menu and press the [Enter] button. connected to the projector's HDMI port, you can use the projector's remote control to control certain features of the linked device. g g Related Links •... - Page 43 HDMI CEC Features g g Related Links • "Projector Feature Settings - Settings Menu" p.53...
-
Page 44: Updating Projector Firmware
Updating Projector Firmware You can get the latest version of the projector firmware over a network. When the latest projector firmware is available, a notification is automatically displayed on the screen. Follow the on-screen instructions to update the firmware. Press the button on the remote control. -
Page 45: Initializing The Projector
Initializing the Projector You can reset all of the projector settings to their default values. If you initialize the projector, all the information such as installed applications, Google account login information, and Projector Settings are deleted. Write down the settings you do not want to lose before performing initialization. -
Page 46: Adjusting The Menu Settings
Adjusting the Menu Settings Follow the instructions in these sections to access the projector menu system and change projector settings. g g Related Links • "Using the Projector Settings" p.47 • "Image Quality Settings - Picture Menu" p.48 • "Sound Quality Settings - Sound Menu" p.50 •... -
Page 47: Using The Projector Settings
Using the Projector Settings You can use the projector's menus to adjust the settings that control how your projector works. The projector displays the menus on the screen. Press the button on the remote control. You see the Projector Settings on the screen. Press the up or down arrow buttons to move through the menus listed on the screen. -
Page 48: Image Quality Settings - Picture Menu
Image Quality Settings - Picture Menu Settings on the Picture menu let you adjust the quality of your image for the Setting Options Description input source you are currently using. Contrast Adjusts the difference between light and dark areas of the image. Saturation Adjusts the intensity of the image colors. - Page 49 Image Quality Settings - Picture Menu • "Adjusting the Light Source Brightness" p.34...
-
Page 50: Sound Quality Settings - Sound Menu
Sound Quality Settings - Sound Menu Settings on the Sound menu provide optimum sound for a variety of image Setting Options Description types. You can select the mode designed to match your image, or experiment Virtual Surround High Adjusts the strength of the surround with the available modes. -
Page 51: Sound Quality Settings - Sound Menu
Sound Quality Settings - Sound Menu Setting Options Description Audio Output Varying levels Adjusts the audio latency. If the audio is Latency available fast, select a higher value. This item is only available for the following types of audio. • audio output from the projector's speaker •... -
Page 52: Projector Feature Settings - Display Menu
Projector Feature Settings - Display Menu Settings on the Display menu provide correction methods to properly project your image. Setting Options Description Corner Adjustment - Corrects image shape and alignment using an on-screen display. Motion Sensor Select On to automatically reduce the brightness of the light source for safety when someone comes close to the projector light while projecting. -
Page 53: Projector Feature Settings - Settings Menu
Projector Feature Settings - Settings Menu Options on the Settings menu let you customize various projector features. Setting Options Description HDMI CEC: Select On to control the connected audio/video device using the projector's remote control. When this is set to On, the projector automatically turns on when you turn on the connected device, or when you start playback on the connected device. -
Page 54: Maintaining The Projector
Maintaining the Projector Follow the instructions in these sections to maintain your projector. g g Related Links • "Projector Maintenance" p.55 • "Cleaning the Projection Window" p.56 • "Cleaning the Obstacle Sensor and Motion Sensor" p.57 • "Cleaning the Projector Case" p.58 •... -
Page 55: Projector Maintenance
The only parts you should replace are the air filter and remote control batteries. If any other part needs replacing, contact Epson or an authorized Epson servicer. Warning Before cleaning any part of the projector, turn it off and unplug the power cord. -
Page 56: Cleaning The Projection Window
Cleaning the Projection Window Clean the projection window periodically, or whenever you notice dust or smudges on the surface. To remove dust or smudges, gently wipe the projection window with lens-cleaning paper. Warning Do not use a lens cleaner that contains flammable gas. The high heat generated by the projector may cause a fire. -
Page 57: Cleaning The Obstacle Sensor And Motion Sensor
Cleaning the Obstacle Sensor and Motion Sensor Clean the projector's obstacle sensor and motion sensor periodically, or if you see a message telling you to remove any obstacles that are interfering with the projection area. To remove dust or smudges, gently wipe the lens with lens- cleaning paper. -
Page 58: Cleaning The Projector Case
Cleaning the Projector Case Before cleaning the projector case, turn off the projector and unplug the power cord. • To remove dust or dirt, use a soft, dry, lint-free cloth. • To remove stubborn dirt, use a soft cloth moistened with water and mild soap. -
Page 59: Air Filter And Vent Maintenance
0.04 to 0.2 mg/m3.) Attention If regular maintenance is not performed, your Epson projector will notify you when the temperature inside the projector has reached a high level. Do not wait until this warning appears to maintain your projector filter as prolonged exposure to high temperatures may reduce the life of your projector. -
Page 60: Replacing The Air Filter
Air Filter and Vent Maintenance Place the air filter with the four tabs facing down as shown. Slide the air filter cover latch and open the air filter cover. Attention Pull the air filter out of the projector. Do not force the air filter cover to close with the tabs on the air filter facing up. - Page 61 Air Filter and Vent Maintenance Place the new air filter with the four tabs facing down as shown. Attention Do not force the air filter cover to close with the tabs on the air filter facing up. Doing so could damage the projector. Close the air filter cover until it clicks into place.
-
Page 62: Solving Problems
Solving Problems Check the solutions in these sections if you have any problems using the projector. g g Related Links • "Projection Problems" p.63 • "Projector Indicator Status" p.64 • "Solving Projector Power-On or Power-Off Problems" p.66 • "Solving Image Problems" p.67 •... -
Page 63: Projection Problems
• The solutions in this manual can help you solve many problems. If none of these solutions help, contact Epson for technical support. After repairing the projector, Epson may return the projector to you in its initial status. Make sure you make a note of the account information of each online service before you contact your local dealer or the nearest Epson repair center. -
Page 64: Projector Indicator Status
If the indicators display a pattern not listed in the table below, turn the off to cool down for 5 minutes. projector off, unplug it, and contact Epson for help. • Make sure that the vents and air filter are not clogged with dust or obstructed by nearby objects. -
Page 65: Projector Indicator Status
Projector Indicator Status Indicator status Problem and solutions Laser warning. Turn the projector off, unplug it, and contact Epson for help. Flashing orange Laser has a problem. Turn the projector off, unplug it, and contact Epson for help. A fan or sensor has a problem. -
Page 66: Solving Projector Power-On Or Power-Off Problems
Related Links The power cord may be defective. Disconnect the cord and contact • "Projector Feature Settings - Settings Menu" p.53 Epson for help. g g Related Links • "Turning On the Projector" p.23 • "Installing Batteries in the Remote Control"... -
Page 67: Solving Image Problems
Solving Image Problems Check the solutions in these sections if you have any problems with projected • If you are projecting from a laptop computer, make sure it is set up images. to display on an external monitor. g g Related Links Check the following items: •... -
Page 68: Adjusting A Fuzzy Or Blurry Image
Solving Image Problems Adjusting a Fuzzy or Blurry Image Fixing Partial Image Problems If the projected image is fuzzy or blurry, try the following steps until the If only a partial computer image is displayed, try the following steps until the problem is solved. -
Page 69: Adjusting An Image With Incorrect Brightness Or Colors
Solving Image Problems Select a computer video resolution and refresh rate that are compatible with the projector. g g Related Links • "Image Quality Settings - Picture Menu" p.48 Adjusting an Image with Incorrect Brightness or Colors If the projected image is too dark or bright, or the colors are incorrect, try the following steps until the problem is solved. -
Page 70: Solving Sound Problems
Solving Sound Problems Check the solutions in these sections if you have any problems with projected • Set HDMI2 ARC to On in the Settings menu. sound. • Set Sound Output Device to ARC in the Sound menu. g g Related Links •... - Page 71 Solving Sound Problems Check the following items: • Check for obstacles between the Bluetooth audio device and the projector, and change their positions to improve communication. • Make sure the connected Bluetooth audio device is within the specified communication distance. •...
-
Page 72: Solving Remote Control Operation Problems
If the projector does not respond to remote control commands, try the following steps until the problem is solved. If you lose the remote control, you can order another one from Epson. Check that the remote control batteries are installed correctly and have power. -
Page 73: Solving Hdmi Cec Problems
Solving HDMI CEC Problems If you cannot operate the connected devices from the projector, try the following steps until the problem is solved. Make sure the cable meets the HDMI CEC standard. Make sure the connected device meets the HDMI CEC standard. See the documentation supplied with the device for more information. -
Page 74: Solving Wi-Fi Network Problems
Solving Wi-Fi Network Problems If you cannot connect to a Wi-Fi network, try the following solutions. Make sure your Wi-Fi router and modem are working properly. Rebooting these devices may solve the network connection problem. Check for obstacles between the Wi-Fi router and the projector, and change their positions to improve communication. -
Page 75: Solving Android Tv Problems
Solving Android TV™ Problems See the following page if you have any problems when watching the Android ™ https://support.google.com/androidtv/... -
Page 76: Appendix
Appendix Check these sections for the technical specifications and important notices about your projector. g g Related Links • "Optional Accessories and Replacement Parts" p.77 • "Screen Size and Projection Distance" p.78 • "Supported Monitor Display Resolutions" p.79 • "Projector Specifications" p.80 •... -
Page 77: Optional Accessories And Replacement Parts
Optional Accessories and Replacement Parts The following optional accessories and replacement parts are available. Please purchase these products as and when needed. The following list of optional accessories and replacement parts is current as of: August 2020. Details of accessories are subject to change without notice and availability may vary depending on the country of purchase. -
Page 78: Screen Size And Projection Distance
Screen Size and Projection Distance Check the table here to determine how far to place the projector from the 4:3 screen size screen based on the size of the projected image. 50" 102 × 76 35.0 12.8 89.0 55" 112 × 84 38.7 14.7 98.5... -
Page 79: Supported Monitor Display Resolutions
Supported Monitor Display Resolutions The table here lists the compatible refresh rate and resolution for each compatible video display format. HDMI Port Input Signals Signal Refresh rate (Hz) Resolution Color space (dots) 640 × 480 RGB* SDTV 59.94 720 × 480 4:2:2/4:4:4/RGB (480i/480p) SDTV... -
Page 80: Projector Specifications
Projector Specifications airborne particulate matter is less than 0.04 to 0.2mg/m3. The estimated time Product name EH-LS300W/EH-LS300B varies depending on the projector usage and operating conditions.) Dimensions 467 (W) × 133 (H) × 400 (D) mm (not including raised This product is also designed for IT power distribution system with phase-to- section) phase voltage 230V. -
Page 81: External Dimensions
External Dimensions Center of the projection window The unit in these illustrations is mm. -
Page 82: List Of Safety Symbols And Instructions
List of Safety Symbols and Instructions The following table lists the meaning of the safety symbols labeled on the No. Symbol mark Approved Description equipment. standards — The same as No. 8. No. Symbol mark Approved Description standards IEC60417 Battery, general IEC60417 "ON"... - Page 83 List of Safety Symbols and Instructions No. Symbol mark Approved Description No. Symbol mark Approved Description standards standards IEC60417 Class II equipment IEC60417 Caution (Sharp Corners) No. 5172 To identify equipment meeting the No. 6043 To indicate sharp corners that should safety requirements specified for Class not be touched.
-
Page 84: Laser Safety Information
Laser Safety Information This projector is a Class 1 laser product that complies with the IEC/EN60825- Inside 1:2014 international standard for lasers. Follow these safety instructions when using the projector. Warning • Do not open the projector's case. The projector contains a high-powered laser. •... - Page 85 Laser Safety Information Side As with any bright source, do not stare into the beam, RG2 IEC/EN 62471- 5:2015. For North/South America This projector is a Class 1 laser product that complies with the IEC/EN60825- 1:2014 international standard for lasers. Follow these safety instructions when using the projector.
-
Page 86: Glossary
Glossary This section briefly explains the difficult terms that are not explained in the Refresh Rate The light-emitting element of a display maintains the same text of this guide. For details, refer to other commercially available luminosity and color for an extremely short time. publications. -
Page 87: Notices
If this equipment does cause interference to radio and television reception, which can be determined by turning the equipment off and on, the We: Epson America, Inc. user is encouraged to try to correct the interference by one or more of the Located at: 3131 Katella Avenue, Los Alamitos, CA following measures. -
Page 88: Indication Of The Manufacturer And The Importer In Accordance With Requirements Of Eu Directive
® http://www.epson.eu/ Bluetooth SIG, Inc. and any use of such marks by Seiko Epson Corporation is under license. Other trademarks and trade names are those of their respective owners. Adobe and Adobe Reader are either registered trademarks or trademarks of Restriction of Use Adobe Systems Incorporated in the United States and/or other countries. -
Page 89: Copyright Attribution
Neither Seiko Epson Corporation nor its affiliates shall be liable to the purchaser of this product or third parties for damages, losses, costs, or expenses incurred by the purchaser or third parties as a result of: accident, misuse, or abuse of this product or unauthorized modifications, repairs, or alterations to this product, or (excluding the U.S.) failure to strictly comply...