Table of Contents
Advertisement
Quick Links
Advertisement
Table of Contents

Related Manuals for Samsung NQ50T9539BD


Summary of Contents for Samsung NQ50T9539BD
- Page 1 Questo manuale d’istruzione è fornito da trovaprezzi.it. Scopri tutte le offerte per Samsung NQ50T9539BD o cerca il tuo prodotto tra le migliori offerte di Forni Combi MWO Built-in Oven User manual NQ50T9539BD NQ8300T_NQ50T9539BD_EU_DG68-01190E-00_EN.indd 1 2020-01-30 8:57:04...
-
Page 2: Table Of Contents
Contents Cooking Smart Safety instructions Auto Cook Important safety instructions Auto Defrost Correct Disposal of This Product (Waste Electrical & Electronic Equipment) Speed Cook Installation Manual cooking Quick & Easy What’s included Installation instructions Maintenance Install in the cabinet Cleaning Before you start Replacement (repair) Care against an extended period of disuse... -
Page 3: Safety Instructions
Safety instructions • by clients in hotels, motels and other residential IMPORTANT SAFETY INSTRUCTIONS environments; READ CAREFULLY AND KEEP FOR FUTURE REFERENCE. • bed and breakfast type environments. WARNING: If the door or door seals are damaged, the oven Only use utensils that are suitable for use in microwave ovens. must not be operated until it has been repaired by a competent When heating food in plastic or paper containers, keep an eye person. - Page 4 Safety instructions Eggs in their shell and whole hard-boiled eggs should not be This appliance is not intended for use by persons (including heated in microwave ovens since they may explode, even after children) with reduced physical, sensory or mental capabilities, microwave heating has ended.
- Page 5 If the supply cord is damaged, it must be replaced by the WARNING: When the appliance is operated in the combination manufacturer, its service agent or similarly qualified persons in mode, children should only use the oven under adult order to avoid a hazard. supervision due to the temperatures generated.
- Page 6 Safety instructions WARNING: The appliance and its accessible parts become hot This appliance can be used by children aged from 8 years and during use. above and persons with reduced physical, sensory or mental capabilities or lack of experience and knowledge if they have Care should be taken to avoid touching heating elements.
- Page 7 While the oven is operating, do not turn it off by unplugging the power cord. Do not insert fingers or foreign substances. If foreign substances enter the oven, unplug the power cord and contact a local Samsung service centre. Do not apply excessive pressure or impact to the oven.
- Page 8 Safety instructions Microwave operation precautions Microwave oven precautions Only use microwave-safe utensils. Do not use metallic containers, gold or silver Failure to observe the following safety precautions may result in harmful exposure trimmed dinnerware, skewers, etc. to microwave energy. Remove wire twist ties. Electric arcing may occur. •...
-
Page 9: Correct Disposal Of This Product (Waste Electrical & Electronic Equipment)
Correct Disposal of This Product (Waste Electrical & Electronic Equipment) Samsung will charge a repair fee for replacing an accessory or repairing a cosmetic defect if the damage to the unit or accessory was caused by the customer. Items (Applicable in countries with separate collection systems) -
Page 10: Installation
The oven comes with different accessories that help you prepare different types of Make sure all parts and accessories are included in the product package. If you food. have a problem with the oven or accessories, contact a local Samsung customer centre or the retailer. Oven at a glance... -
Page 11: Installation Instructions
Install in the cabinet Kitchen cabinets in contact with the oven must be heatresistant up to 100 °C. General technical information Samsung will take no responsibility for damage of cabinets from the heat. Electrical Supply 230 V ~ 50 Hz... - Page 12 Installation Oven (mm) Built-in cabinet (mm) Min. 564-568 Min. 550 Min. 446 / Max. 450 Min. 50 200 cm2 200 cm2 Space for power outlet Oven (mm) (30 Ø Hole) Under-sink cabinet (mm) Min. 550 Min. 564 / Max. 568 Min.
- Page 13 Installing with a hob Fasten the oven using the two screws (4 x 25 mm) provoded. To install a hob on top of the oven, check the installation guide of the hob for the installation space requirement ( ). Make the electrical connection. Check that the appliance works.
-
Page 14: Before You Start
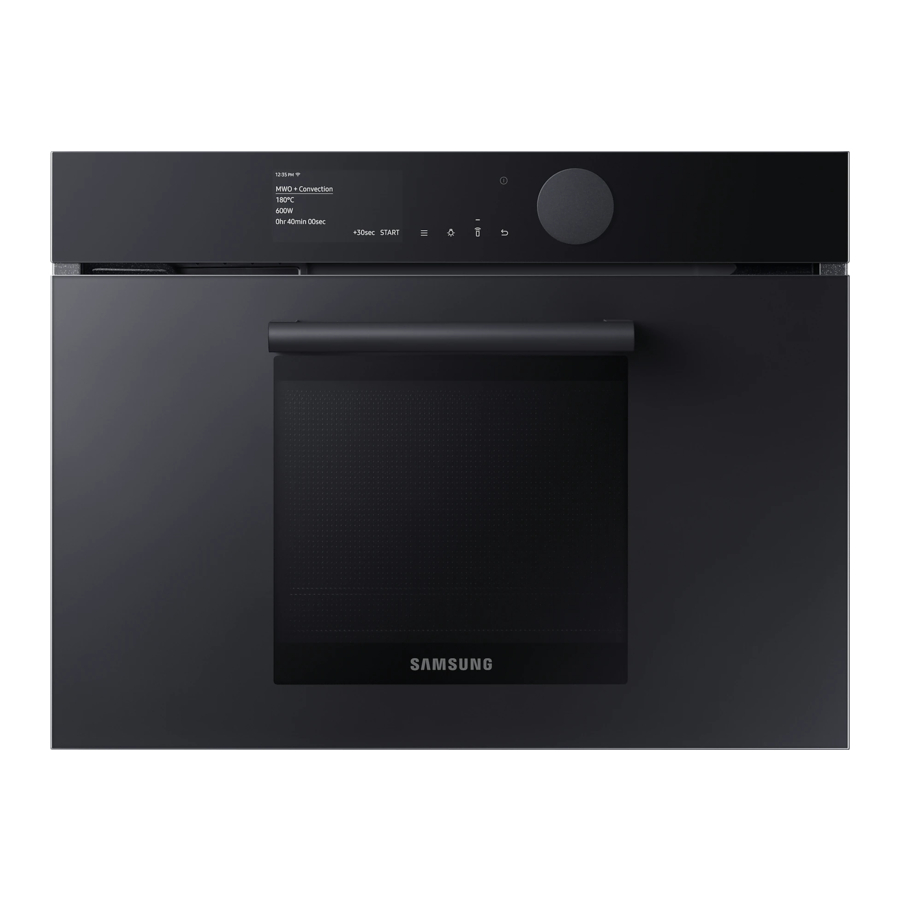
The oven’s control panel features a full touch display, dial knob and touch buttons When you turn on the oven for the first time, the Welcome screen appears with the Samsung logo. Follow the on-screen instructions to complete the initial to control the oven. Please read the following information to learn about the oven’s control panel. -
Page 15: Side Racks
Side racks Select the time zone. Swipe the screen up and down and then tap your time zone. Tap Next. • Insert the accessory to the correct Set the date. position inside of the oven. Tap the day, month, and year. •... -
Page 16: About Microwave Energy
Before you start About microwave energy Cookware for microwave Microwaves are high-frequency electromagnetic waves. The oven uses the prebuilt Cookware used for Microwave Mode must allow microwaves to pass through magnetron to generate microwaves which are used to cook or reheat food without and penetrate food. - Page 17 Material Microwave-safe Description Material Microwave-safe Description Polystyrene cups Overheating may Use thermoplastic or containers cause these to melt. containers only. Some Containers plastics may warp Fast-food Paper bags or These may catch fire. or discolour at high packaging newspaper temperatures. Recycled paper or These may cause Plastic...
-
Page 18: Operations
Operations Oven modes Tap Ready at to set the desired end 12:00 time. Fan Conventional On the main screen, tap Convection to • When you set the cooking time, 12:00 200°C select the desired cook mode. the oven displays the time the Convection 1hr 30min | Oven Off (For detailed information of each... - Page 19 Oven mode descriptions Mode Temperature range (°C) Default temperature (°C) 40-250 Mode Temperature range (°C) Default temperature (°C) The bottom heating element generates heat, which 40-250 Bottom Heat + Convection is evenly distributed by the convection fan. Use this The rear heating element generates heat, which is mode for pizza, bread, or cake.
-
Page 20: Microwave Modes
Operations Microwave modes Tap Cook Time to set the desired 12:00 cooking time. MWO + Grill On the main screen, tap Convection to • Maximum cooking time is 1 hour 12:00 200°C select the desired cook mode. and 30 minutes. Convection 300W (For detailed information of each... -
Page 21: Special Function
Special Function Microwave mode descriptions Temperature (°C) / Default temperature (°C) / On the main screen, tap Convection Mode 12:00 Power level (W) range Power level (W) and then Special Function. Convection - / 100–850 160°C The microwave energy enables food to be cooked Cook Time or reheated without changing either the form or the colour. - Page 22 Operations Special Function descriptions Tap Cook Time to set the desired 12:00 cooking time. Mode Temperature range (°C) Default temperature (°C) < Multi-level Cook • Maximum cooking time is 180°C 40–250 10 hours. Cook Time Multi-level Cook Use this for cooking with two multi-levels at the same time.
-
Page 23: Auto Cook
Auto Cook Auto Defrost The oven offers 31 Auto Cook programs. Take advantage of this feature to save The oven offers 5 Auto Defrost programs. Take advantage of this feature to your time or shorten your learning curve. The cooking time, power level and conveniently defrost items. -
Page 24: Speed Cook
Operations Speed Cook Favourites The oven offers Speed Cook programs. Take advantage of this feature to You can add up to 10 frequently used cook settings to the Favourites list to easily conveniently defrost items. The cooking time, power level and temperature will be apply them in the future. -
Page 25: Timer
Timer Renaming the favourite cook settings Touch the button on the control panel, and then tap Favourites. On the Favourites screen, tap Adding the new timer Tap Rename on the right side of the favourite cook setting you want to Touch the button on the control panel, and then tap Timer. -
Page 26: Cleaning
Operations Cleaning Deleting the timer Touch the button on the control panel, and then tap Timer. On the Timer screen, tap Steam Clean Tap Delete on the right side of the timer you want to delete. This is useful for cleaning light soiling with steam. Tap Done. -
Page 27: Settings
Settings Menu Submenu Description Touch the button on the control panel, and then tap Settings to change various Display Brightness You can change the brightness of the settings for your oven. display screen. Please refer to the following table for detailed descriptions. Screen saver You can turn the screen saver on or off. -
Page 28: Lock
Operations Lock Menu Submenu Description You can lock the control panel to prevent any unintended operation. Date & time Automatic date and You can turn on or turn off to update • To activate the Lock function, touch the button on the control panel, and time time from the Internet. -
Page 29: Cooking Smart
Cooking Smart Auto Cook Food Serving size (kg) Accessory Level Soup 0.2-0.3 Ceramic tray The following table presents 31 Auto programmes including reheating, cooking, 0.4-0.5 roasting and baking. It contains its quantities, standing times, and appropriate recommendations. These auto programmes contain special cook modes, which Pour into a deep ceramic plate or bowl and cover with have been developed for your convenience. - Page 30 Cooking Smart Food Serving size (kg) Accessory Level Food Serving size (kg) Accessory Level Frozen pizza 0.3-0.4 Oven rack 16. Dutch butter 0.5-0.7 Oven rack 0.4-0.5 Put fresh dough into a 22 cm round metal baking dish. Put Put frozen pizza on oven rack. on the rack.
- Page 31 Food Serving size (kg) Accessory Level Food Serving size (kg) Accessory Level 23. Fish fillet, 2 cm 0.3-0.6 Oven rack + 28. Fresh 0.3-0.4 Ceramic tray Baking tray vegetables 0.5-0.6 Marinate fish fillet (2 cm) and put side by side on oven Weigh the vegetables after washing, cleaning and cutting rack and baking tray.
-
Page 32: Auto Defrost
Cooking Smart Auto Defrost Serving size Standing time Food Accessory Level (kg) (min.) The following table presents the various Auto Defrost programmes, quantities, standing times and appropriate recommendations. These programmes use Fruit 0.1-0.8 Ceramic tray 5-10 microwave energy only. Remove all packaging material before defrosting. Place Distribute frozen fruit evenly on ceramic tray. -
Page 33: Manual Cooking
Manual cooking Food item Weight Accessory Shelf level Whole 1.0-1.1 kg Grill insert + Microwave cooking guide chicken 1.2-1.3 kg Ceramic tray • Do not use metal containers with Microwave mode. Always put food Brush chilled chicken with oil and spices. Put breast-side-down, containers on the cavity. - Page 34 Cooking Smart Fresh vegetables Cooking time Standing time Food Serving size (g) • Use a glass Pyrex container with a lid. (min.) (min.) • Add 30-45 ml of cold water for every 250 g. Mushrooms • Stir once during cooking, and once after cooking. •...
- Page 35 Rice and pasta Reheating Stir from time to time during and after cooking. • Do not reheat large-sized foods such as joints of meat, which easily overcook. Cook uncovered, and close the lid during settling. Then, drain water thoroughly. • It is safer to reheat foods at lower power levels.
- Page 36 Cooking Smart Baby foods & milk Serving size Defrosting Standing time Food time (min.) (min.) Cooking time Standing Food Serving size Power (W) (sec.) time (min.) Meat Minced meat 15-30 8-12 Baby Food 190 g 30-40 (Vegetable + Pork steaks Empty into ceramic deep plate.
- Page 37 Convection guide Top Heat + Convection Use temperatures and times in this table as guidelines for roasting. Convection We recommend to preheat the oven using Top Heat + Convection mode. Use temperatures and times in this table as guidelines for baking. Put meat on oven rack, follow shelf level advice in the table and use baking tray as We recommend to preheat the oven with Convection mode.
- Page 38 Cooking Smart Bottom Heat + Convection Grilling guide Use temperatures and times in this table as guidelines for baking. Large Grill We recommend to preheat the oven with Bottom Heat + Convection mode. Use temperatures and times in this table as guidelines for grilling. Set 220 °C grill temperature, preheat for 5 minutes.
- Page 39 Fan Grill Combination cooking guide Use temperatures and times in this table as guidelines for grilling. • Do not use metal containers with Microwave mode. Always put food Set 220 °C grill temperature, preheat for 5 minutes. containers on the cavity. •...
- Page 40 Cooking Smart Microwave + Convection Microwave + Roast Use power level with temperatures and times in this table as guidelines for Use power level with temperatures and times in this table as guidelines for cooking. Preheating is not needed. cooking. Preheating is not needed. Cooking Cooking Power level...
- Page 41 Fan Conventional guide Intensive Cook guide Use temperatures and times in this table as guidelines for baking. Use temperatures and times in this table as guidelines for roasting. We recommend to preheat the oven with Fan Conventional mode. We recommend to preheat the oven with Intensive (Top + Bottom + Convection) mode.
- Page 42 Cooking Smart Pro-Roasting Multi-level Cook (Special) This mode includes an automatic heating-up cycle over 200 °C. Use temperatures and times in this table as guidelines for baking. The top heater and the convection fan is operating during the process of searing We recommend to preheat the oven with Multi-level Cook mode.
-
Page 43: Quick & Easy
Quick & Easy Cooking jam Put 600 g fruits (for example mixed berries) in a suitable sized glass pyrex bowl with lid. Add 300 g preserving sugar and stir well. Cook covered for 10-12 minutes Melting butter using 850 W. Stir several times during cooking. Put directly into small jam glasses Put 50 g butter into a small deep glass dish. -
Page 44: Maintenance
Maintenance Cleaning Side racks (applicable models only) Lift up the front of the rack to release it Clean the oven regularly to prevent impurities from building up on or inside the from the holder. oven. Also pay special attention to the door and door sealing (applicable models only). -
Page 45: Replacement (Repair)
If you encounter a problem with hinges, sealing, and/or the door, contact a • suggestions. qualified technician or a local Samsung service centre for technical assistance. • If you want to replace the light bulb, contact a local Samsung service centre. Problem Cause Action Do not replace it yourself. - Page 46 Troubleshooting Problem Cause Action Problem Cause Action The oven does not work. Power is not supplied. Make sure power is There is no power to the Power is not supplied. Make sure power is supplied. oven. supplied. The door is open. Close the door and try There is a popping sound Cooking sealed food or...
- Page 47 Problem Cause Action Problem Cause Action The oven does not heat. The oven may not work, Put one cup of water The warm function does The oven may not work, Put one cup of water too much food is being in a microwave-safe not work.
- Page 48 Troubleshooting Problem Cause Action Problem Cause Action The interior light is dim The door has been left The interior light may There is water dripping. There may be water or Let the oven cool and or does not turn on. open for a long time.
- Page 49 Problem Cause Action Problem Cause Action Grill Oven Smoke comes out during During initial operation, This is not a malfunction, The oven does not heat. The door is open. Close the door and try operation. smoke may come from and if you run the oven again.
-
Page 50: Information Codes
Stop the oven and then try C-F2 again. Unplug the power cord for cooling enough time, and clean The touch key is malfunction. the button. (Dust, Water) C-d0 When appear same problem, contact a local Samsung service centre. 50 English NQ8300T_NQ50T9539BD_EU_DG68-01190E-00_EN.indd 50 2020-01-30 8:57:19... -
Page 51: Technical Specifications
Technical specifications Appendix SAMSUNG strives to improve its products at all times. Both the design Open Source Announcement specifications and these user instructions are thus subject to change without notice. The software included in this product contains open source software. You may... - Page 52 Please be advised that the Samsung warranty does NOT cover service calls to explain product operation, correct improper installation, or perform normal cleaning or maintenance. QUESTIONS OR COMMENTS? COUNTRY CALL OR VISIT US ONLINE AT AUSTRIA 0800 72 67 864 (0800-SAMSUNG) www.samsung.com/at/support...