
Related Manuals for Cuttermasters Tradesman Woodturner

Summary of Contents for Cuttermasters Tradesman Woodturner
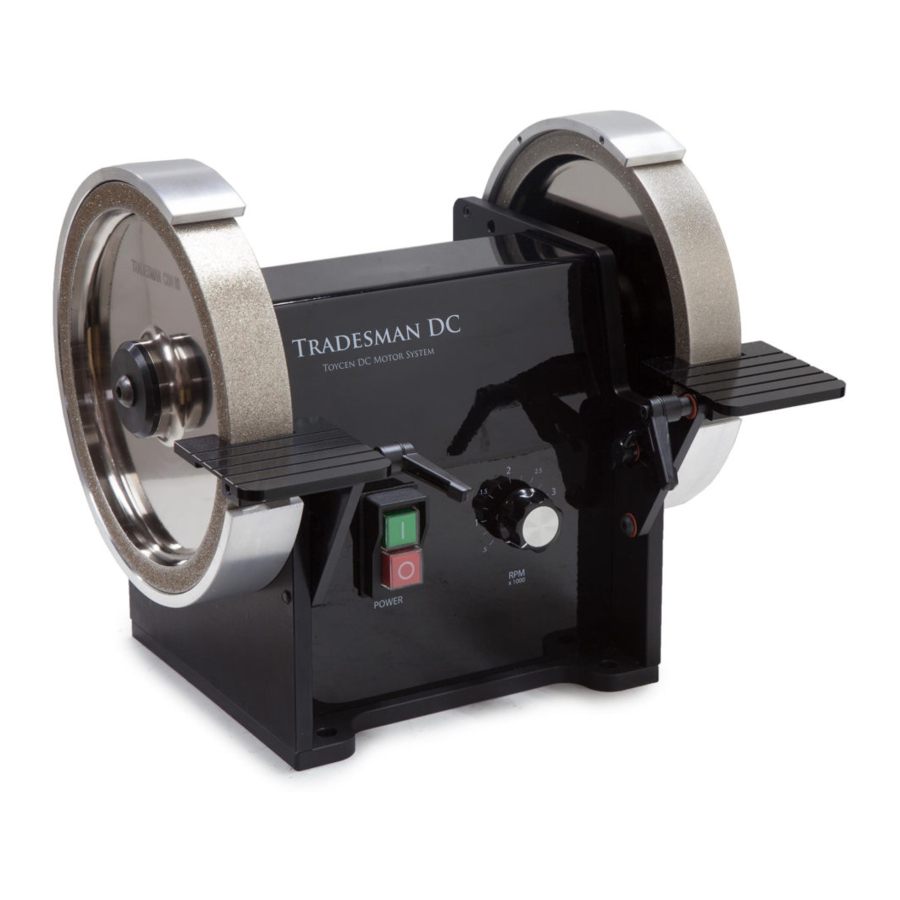
- Page 1 Tradesman DC Variable Speed Bench Grinder Operator’s Manual Tradesman Woodturner Tradesman Edge Tradesman Machinist Revised March 12 2021...
-
Page 2: Introduction, Forward And Contact Information
DC Variable Speed Bench Grinder. All Tradesman at the address below Grinders feature the same 400W DC Motor and control and plug in to regular household 110V AC Cuttermasters current (220V available). 2353 Ridgecrest Place Ottawa ON K1H7V4 We have a patent on low speed high feed grinding... -
Page 3: Table Of Contents
Tradesman DC Variable Speed Bench Grinder --- User’s Manual TABLE OF CONTENTS 1.0 Introduction, Forward and Contact Information ....2 Table of Contents ................. 3 Quick Start Guide and Main Componenets ......4 Important: Dust and Safety ..........5 Important: Drive Pin Installation ........6 Note: Fuses and Reverse ............. -
Page 4: Quick Start Guide And Main Componenets
Tradesman DC Variable Speed Bench Grinder --- User’s Manual Quick Start Guide Forward / Reverse AC receptacle and switch (if equiped, rear) spare fuse (rear) Wheel cap and screw and drive pins (if equiped with reverse) 1/4-28 Tool Rest Speed control Support Art Mounts On / Off switch ON/OFF... -
Page 5: Important: Dust And Safety
Tradesman DC Variable Speed Bench Grinder --- User’s Manual WARNING! This manual provides critical safety instructions on the proper setup, operation, maintenance and service of this machine. Failure to read, understand and follow the instructions given in this manual may result in serious personal injury, including amputation, electrocution or death. -
Page 6: Important: Drive Pin Installation
Tradesman DC Variable Speed Bench Grinder --- User’s Manual DRIVE PINS Drive Pins: On all Tradesman Grinders with Reverse capability (have a reverse switch on rear of machine - see following page) drive pins are employed to secure the wheels to the shaft. They pass through the cap and in to the shaft and stop the cap from accidentally unscrewing resulting in a wheel coming off during operation. -
Page 7: Note: Fuses And Reverse
Tradesman DC Variable Speed Bench Grinder --- User’s Manual FUSES and REVERSE Fuses: All Tradesman grinders are equiped with a fuse inside the AC re- ceptacle at the rear of the machine. If a power surge is experienced this fuse is designed to blow at 10A (10A Slow Blow). -
Page 8: General Grinding Safety
Tradesman DC Variable Speed Bench Grinder --- User’s Manual GENERAL GRINDING SAFETY For your own safety, read this instruction manual before operating this machine. 1. Always use ANSI approved safety glasses when operating machinery. Everyday eyeglasses only have impact resistant lenses - they are not safety glasses. 2. - Page 9 Tradesman DC Variable Speed Bench Grinder --- User’s Manual GENERAL ELECTRICAL SAFETY Before You Start - Electrical In the event of a malfunction or short circuit, grounding provides the path of least resistance for electri- cal current, and reduces the risk of electric shock for the operator. This tool is equipped with an electric cord that has an equipment grounding conductor and a grounding plug.
- Page 10 Tradesman DC Variable Speed Bench Grinder --- User’s Manual Before You Start - Electrical (continued) Use a separate electrical circuit for your tools. This circuit should not be less than a #12 gauge wire, and should be protected with a 15A time-lag fuse or breaker. Before connecting the motor to the power line, ensure the switch is in the OFF position and the electric current is rated the same as the current stamped on the motor's nameplate.
-
Page 11: Know Your Grinder: Tradesman Models
Weldon set screw flats, carbide corner prep. Tradesman Woodturner Tradesman Woodturner 8” Grinder for woodturners and woodworkers. Designed to run 8” and 6” wheels and is compatible with popular jigs like the Wolverine jig and the Tormek jigs. -
Page 12: Set Up
Tradesman DC Variable Speed Bench Grinder --- User’s Manual 2. GENERAL SET UP 2.1 Mounting the Grinder to the Workbench Before attempting to use this grinder, it should be properly mounted to a workbench or grinding stand. CAUTION Bench grinders vibrate. Grinder movement during high-speed rotation may cause Injury or damage to the workpiece or operator. -
Page 13: Mounting The Grinding Wheels And Hub
Tradesman DC Variable Speed Bench Grinder --- User’s Manual 3/8-24 Screw Drive Pin Hole Wheel Mounting Hardware Orientation Tool Grinder Hub This hub is used to adapt the 5/8” shaft of the Tradesman to a 1.25” tool grinder hub to mount our machin- ist and specialty wheels. -
Page 14: Drive Pin Installation
Tradesman DC Variable Speed Bench Grinder --- User’s Manual DRIVE PINS 2.3 Drive Pins On all Tradesman Grinders with Reverse capability (have a reverse switch on rear of machine - see following page) drive pins are employed to secure the wheels to the shaft. They pass through the cap and in to the shaft and stop the cap from accidentally unscrewing resulting in a wheel coming off during operation. -
Page 15: Tool Rests, T-Mrj, T-Mrf, T-Wf Vblock
Tradesman DC Variable Speed Bench Grinder --- User’s Manual 2.5 Tool Rest Adjustments and Installation Tool rest adjustment is achieved using thumb screw and or button head cap screw and included hex key. Before tightening the screws, adjust the gap between the grinding wheel and the work rest to a maximum of 1/8th”... -
Page 16: Tormek Brackets, Rests, Waterbath
Tradesman DC Variable Speed Bench Grinder --- User’s Manual 2.6 Tormek Tormek Bracket (T-TB, TE-TB for Edge) Remove the standard tool rest support arms to mount the Tormek Bracket which has its own longer support arms. You can use the same mounting screws as used on the standard rests. Note: For most Tormek jigs the wheel guards probably need to be repositioned so that the opening is at the top of the wheel. -
Page 17: Belt Sanding Attachments
Tradesman DC Variable Speed Bench Grinder --- User’s Manual 2.7 Belt Sanders Tradesman Belts Sanding Attachments are precision machined for the best belt sanding experience. These attachments are compatible with all models of Tradesman grinder and are designed to be easy to use in both di- rections. - Page 18 Tradesman DC Variable Speed Bench Grinder --- User’s Manual 2.7 Belt Sanders (Continued) Installing an Abrasive Belt Check to see if your belt has directional arrows and observe any manufacturer recomendations. Turn the grinder off. With one hand, grasp the tensioning handle, opposite the upper pulley and rotate it towards you. This will release tension on the belt for installation.
- Page 19 Tradesman DC Variable Speed Bench Grinder --- User’s Manual 2.7 Belt Sanders (Continued) TradesmanGrinder.com info@tradesmangrinder.com - Toll Free (800) 417 2171 Page 19...
- Page 20 Tradesman DC Variable Speed Bench Grinder --- User’s Manual 2.7 Belt Sanders (Continued) TradesmanGrinder.com info@tradesmangrinder.com - Toll Free (800) 417 2171 Page 20...
- Page 21 Tradesman DC Variable Speed Bench Grinder --- User’s Manual 2.8 Belt-Over-Wheel Belt Sander Assembly To install the Belt-Over-Wheel Attachment you will need: • four 1/4”-20 x 3/4” button head cap screws to mount the pivot plate (4” diameter round plate) to the grinder •...
-
Page 22: Machinist Attachments
Use the y-axis feed screw to feed in to the wheel for flats, cut off and neck reduction. Cuttermasters Chamfer Wheels are used for grinding Weldon set screw flats and can also be used for sharpening reamers. -
Page 23: Unibit Attachemnt, T-Unibit
Tradesman DC Variable Speed Bench Grinder --- User’s Manual 3.2 Unibit Attachment, T-Unibit The Tradesman Machinist can be configured to mount a fence ideal for sharpening unibits. It is used with the Tradesman Unibit Grinding Wheels. 1. Set depth of cut adjustment. Position three setscrews so that the unibit fence is at desired depth of cut. -
Page 24: Drills And Countersinks, T-Dcs
(remove tool rest support arms before installation). The recommended wheel for drills and countersinks is the Cuttermasters 6” CBN Face Wheel. Chuck capacity 3mm-21mm (1/8” - 7/8”) • Angle adjustment: 50° - (infinite on Jour- neyman) •... - Page 25 Tradesman DC Variable Speed Bench Grinder --- User’s Manual Countersink and Step Drill Attachment T-DCS (continued) Countersink Sharpnening Radial cam follower is removed for countersink grinding. It is a plunge process only, that is goverened by our slip-on cams. There is no swing. The swing adjustment screw is used for fine agular adjustment.
- Page 26 Tradesman DC Variable Speed Bench Grinder --- User’s Manual Countersink and Step Drill Attachment T-DCS (continued) 3-Flute Countersinks When viewing the correctly timed tool as shown in Figure x, each flute of a 3 flute countersink will bisect- ed by the top of the cam. (Figure 5). Not all countersinks are the same.
- Page 27 Tradesman DC Variable Speed Bench Grinder --- User’s Manual Countersink and Step Drill Attachment T-DCS (continued) Dry run the grinding cycle by rotating the chuck and observing the angle, entrance and exit point (with the motor off ) to see if you are getting the grind that you desire. Once you are satisfied with the cycle behavior turn on the grinder, remove the chuck and make sure it is tight and all settings are tight.
-
Page 28: 4. Maintenance And Troubleshooting
Tradesman DC Variable Speed Bench Grinder --- User’s Manual 4. Maintenance and Troubleshooting Maintenance WARNING! Turn the power switch to “OFF” and disconnect the plug from the outlet prior to adjusting or main- taining the grinder. DO NOT attempt to repair or maintain the electrical components of the motor. Take the grinder to a qualified service technician for this type of maintenance. -
Page 29: Terms Of Use And Disclaimer
Tradesman DC Variable Speed Bench Grinder --- User’s Manual 5. Terms of Use & Disclaimer – Toycen Industries, Toycen Corporation, and Affiliates (referred to below as “Toycen”) The recommendations and suggestions regarding product application and use that are offered on Toycen websites, in our product brochures, or information provided by any employee, broker or distributor of Toycen products, are a guide in the use of this product and are not a guarantee to their performance since Toycen has no control over the use that parties may apply the product. -
Page 30: Electrical Diagram (Non Reversing)
Tradesman DC Variable Speed Bench Grinder --- User’s Manual 6. Wiring Diagrams Tradesman Wiring Diagram Tradesman: Non Reversing Power In Start/Stop Ground Switch Neutral Line In Circuit Board Variable Speed Control P1 P2 P3 Motor Tradesman with Reversing Switch Wiring Diagram Tradesman: Reversing Power In Start/Stop... -
Page 31: Tradesman Specifications By Model
Shaft Concentricity .0002” (5μm) nominal Country of Origin Canada, HTS#8460.39.0020 Warranty Two Years Tradesman Woodturner, T8 Wheel Dimensions 8” diameter, 1.25” width (to guard), 5/8” arbor Voltage, Frequency, Power 110V, 220V available, 60Hz, 400W, 1/3HP Motor Type Brushed DC, Single Phase... - Page 32 Tradesman DC Variable Speed Bench Grinder --- User’s Manual Specifications (continued) Tradesman Edge 810 Wheel Dimensions 8-10” dia., 2” width (to guard), 5/8” or 7/8” arbor Voltage, Frequency, Power 110V, 220V available, 60Hz, 400W, 1/3HP Motor Type Brushed DC, Single Phase Switch On/Off Push Button with Safety, 110V or 120V Wheel Speed...
-
Page 33: Kb Circuit Board Operators Manual
Tradesman DC Variable Speed Bench Grinder --- User’s Manual Appendix KB Control Board Manual Appendix Figure 1 Appendix Figure 2 Appendix Figure 3 Appendix Figure 4 TradesmanGrinder.com info@tradesmangrinder.com - Toll Free (800) 417 2171 Page 33... - Page 34 Tradesman DC Variable Speed Bench Grinder --- User’s Manual Appendix Figure 5 Appendix Figure 6 Appendix Figure 7 Appendix Figure 8 TradesmanGrinder.com info@tradesmangrinder.com - Toll Free (800) 417 2171 Page 34...
- Page 35 Tradesman DC Variable Speed Bench Grinder --- User’s Manual Appendix Figure 9 Appendix Figure 10 Appendix Figure 11 Appendix Figure 12 TradesmanGrinder.com info@tradesmangrinder.com - Toll Free (800) 417 2171 Page 35...
- Page 36 Tradesman DC Variable Speed Bench Grinder --- User’s Manual Appendix Figure 13 Appendix Figure 14 Appendix Figure 15 TradesmanGrinder.com info@tradesmangrinder.com - Toll Free (800) 417 2171 Page 36...