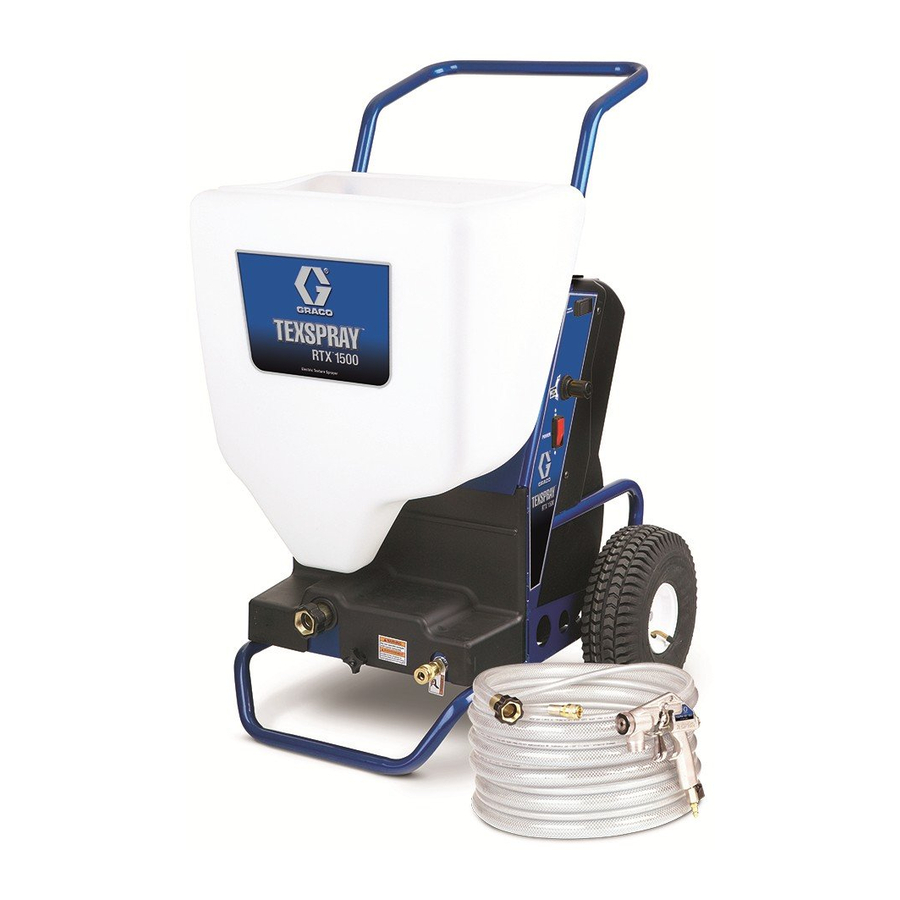
Graco RTX 1500 Operation
Electric texture sprayer
Hide thumbs
Also See for RTX 1500:
- Repair and parts manual (39 pages) ,
- Operation and parts (31 pages) ,
- Instructions manual (6 pages)
Table of Contents
Advertisement
Quick Links
Operation
RTX 1500 Electric Texture Sprayer
- For Water-Based Materials Only -
(Consult your Material Supplier for Warnings and Application Requirements)
Models:
Page 3
Maximum Working Air Pressure (Standard delivery): 45 psi (3.1 bar)
Maximum Working Fluid Pressure: 100 psi (6.9 bar)
Read all warnings and instructions.
CAUTION
Use RTX 1500 non-bleeder texture gun (model
248091) only. All other texture guns will damage
sprayer.
Graco Inc. P.O. Box 1441 Minneapolis, MN 55440-1441
Copyright 2004, Graco Inc. is registered to I.S. EN ISO 9001
310624A
ti4305a
Advertisement
Table of Contents

Related Manuals for Graco RTX 1500


Summary of Contents for Graco RTX 1500
- Page 1 Read all warnings and instructions. CAUTION Use RTX 1500 non-bleeder texture gun (model 248091) only. All other texture guns will damage sprayer. ti4305a Graco Inc. P.O. Box 1441 Minneapolis, MN 55440-1441 Copyright 2004, Graco Inc. is registered to I.S. EN ISO 9001...
- Page 2 Notes Notes...
-
Page 3: Related Manuals
Models Models Manual Country Languages Model Electric 287328* Requirements Operation 248201 120V, 60 Hz, 15 A N. America 310624 310694 310616 English 248536 110V, 60 Hz, 15A United Kingdom 310624 310694 310616 English 248370 / 248315 230V. 50 Hz,10 A Europe 310624 310616... - Page 4 Check equipment daily. Repair or replace worn or damaged parts immediately. • Do not alter or modify this equipment. • Use the equipment only for its intended purpose. Call your Graco distributor for information. • For professional use only. •...
- Page 5 WARNINGS WARNINGS Pressurized Equipment Hazard Compressed air can inject in skin. Air tubing rupture can cause injury if disconnected while under pressure. To reduce risk of injury: • Never exceed maximum working pressure of any attachment. • Do not direct airstream at body. •...
-
Page 6: Component Identification
Component Identification Component Identification ti4500a... - Page 7 Component Identification Component Identification English Français Dutch Main Power Switch Nozzle Storage Hopper Hopper Connect/Disconnect Graco RotoFlex™ HD Pump Material Outlet Air Outlet Fluid Flow Regulator and Pressure Gauge Gun Nozzle (5 sizes) Gun (see manual 310616)* Prime Switch Power Cord Pump Access Screw Hose - 25-ft.
-
Page 8: System Priming
System Priming System Priming English Français Dutch FUNCTION The RTX 1500 Electric Texture Sprayer is equipped with an automatic material pressure and flow device. When the operator releases the gun trigger, the pump pressure and flow, stops. When the operator squeezes the gun trigger, pump pressure and flow starts. - Page 9 System Priming Alternate Method - Using Prime Switch (P): (If air flow with material through gun is not desired) ti4364a ti4653a ti4655a ti4005a ti4656a 1 Turn sprayer main power (A) 2 Turn fluid flow regulator (K) up Close gun air valve (aa). 4 Depress and hold prime switch as necessary (P) to start and stop flow.
-
Page 10: Pressure Relief Procedure
Preparation Preparation Pressure Relief Procedure ti4292a ti4294a ti4296a ti4303a 1 Turn sprayer main power (A) 2 Unplug sprayer. Turn fluid flow regulator (K) all 4 Aim gun into hopper (C) or OFF. the way down. bucket and squeeze gun trig- ger until all air and material pressure is relieved. - Page 11 Preparation Grounding The sprayer must be grounded. Grounding reduces the risk of electrical shock by providing an escape wire for the electrical current. WARNING Read warnings, page 4. Electric Ground Requirements, Page 3 ti4296a ti4297a ti4295a • The sprayer cord includes a •...
- Page 12 Preparation Ground ti4295a Extension Cords Auxiliary Air CAUTION Compressor • Use only an extension cord • For best results use the hard- • Use Auxiliary Air Hookup Kit Attaching auxiliary air to sprayer without using the Auxiliary Air with an undamaged 3-prong wired, 25 ft power cord only.
- Page 13 Preparation ti4501a ti4502a Generators Hose Lengths CAUTION • 7500 W (7.5 KW) minimum • The system comes with a twin • The type of material you are Air hose fittings on sprayer can line hose set consisting of a spraying will determine the get hot! Allow sprayer to cool 1 in.
- Page 14 Preparation Setup IMPORTANT English Français Dutch • Do not allow material to dry inside pump, hoses, gun or spray system. WARNING Read warnings, page 4. ti4009a ti4011a ti4296a ti4298a 1 Connect one end of air hose to 2 Connect one end of material Install spray nozzle (L).
- Page 15 Preparation Removing and Installing Hopper ti4503a ti4504a Removing Hopper (C) Installing Hopper (C) 1 To remove hopper (C), loosen 2 Lift hopper (C) straight up, off 1 Position hopper drain over 2 Hand tighten fitting (D). fitting (D). Fittings are of unit.
-
Page 16: Wetting Hose
Preparation Wetting Hose WARNING Read warnings, page 4. WATER ti4654a ti4000a ti4505a Wet inside of hose before each 1 Pour one (1) gallon (3.8 liters) 2 Open gun air valve (aa). Follow 3 Turn sprayer ON (A). Aim gun use to flush out sediment and of clean water into hopper. - Page 17 Preparation ti4290a WASTE 4 Trigger gun into waste pail until hopper no longer contains water and all water is removed from hose and pump system.
-
Page 18: Mixing Material
Preparation Mixing Material WARNING Read warnings, page 4. ti3907a ti3906a NOTE: For optimal performance, • Use water-based materials 1 Mix material in a separate 2 Agitate to a smooth, lump-free only. thin material as described in container. consistency. steps 3-5. For best results do not use partial bags. - Page 19 Preparation 3 To achieve a consistent density NOTE: For an accurate test, be between batches, after texture sure gauge is completely dry and material is thoroughly mixed, clean every time it is used. gently set ball end of Material Thickness Gauge on surface of mixture.
- Page 20 Startup Startup WARNING Read warnings, page 4. Nozzle ti4000a ti4009a ti4302a CAUTION 1 Fill hopper (C) with prepared 2 Install nozzle. See Nozzle 3 Open gun air valve (aa). To avoid material packout in texture material. Selection Chart, page page 22. needle, do not allow material to flow out of gun when air valve (aa) is closed for a sustained amount...
- Page 21 Startup ti4303a ti4290a ti4657a ti4000a WASTE 4 Inspect 25 ft. material hose for 6 Trigger gun into a pail. When 7 For proper spray pattern and 8 Adjust fluid flow (K) and/or gun kinks which could restrict fluid texture material appears at pump and gun adjustments, air valve (aa) to achieve flow.
-
Page 22: Nozzle Selection
Spray Techniques Spray Techniques Nozzle Selection English Francois Application Nozzle Application Nozzle Air Volume Air Volume 3-4 mm high 3-4 mm Simulated Acoustic 4 mm medium to high 4 mm 6 mm 6 mm 8-10 mm 8-10 mm Orange Peel 3-4 mm medium to high 3-4 mm... -
Page 23: System Adjustment
Spray Techniques System Adjustment WARNING Read warnings, page 4. ti4303a ti3999a ti4004a ti4000a ti4303a ti3999a Fluid flow is controlled with the 1 Open air valve (aa). 2 Test spray pattern on card- 3 Adjust air valve (aa) and/or fluid flow regulator knob (K) and board. - Page 24 Spray Techniques OPEN CLOSED ti4304a ti4655a Material Flow Air Flow Adjustment Adjustment 4 To select correct nozzle for Check material consistency Material flow should be adjusted • To decrease air flow, move air your applications, consider often. Material may thicken as it on the sprayer using the Fluid valve (aa) toward the closed size of aggregate in material...
- Page 25 Spray Techniques ti4006a Preventing Material For Continuous Surge at Gun Trigger Spraying • Allow system to release pres- • Engage trigger lock (dd) to sure before triggering gun. hold trigger open and reduce • When you stop spraying, fatigue. always depress trigger fully to allow system to build pressure.
-
Page 26: Shut Down And Clean-Up
Shutdown and Cleanup Shutdown and Cleanup CAUTION English Français Dutch • Before removing material hose relieve pressure following pro- cedure on page 10 and remove material from hose. • To keep sprayer in good operat- ing condition, always clean it thoroughly and prepare it prop- erly for storage. - Page 27 Shutdown and Cleanup WARNING Read warnings, page 4. ti4009a ti4301a ti4290a ti4000a WASTE When you have finished spraying: 1 Drain remaining material into 2 Fill hopper with clean water. 3 Remove nozzle (L) from gun 4 Open gun air valve (aa), forc- bucket until most of texture and allow water to flow through ing air through nozzle to clear...
- Page 28 Shutdown and Cleanup ti4740a ti4741a ti4739a ti4012a 5 Disconnect air line and mate- 6 Disconnect material hose 7 Insert sponge ball in material 8 Reconnect material hose to rial hose from gun. from sprayer. hose. sprayer.
- Page 29 Shutdown and Cleanup ti4653a water ti4301a ti4010a ti4652a 9 Pour a couple gallons of 11 Turn sprayer main power (A) 14 Finish cleaning all compo- To improve working condition for clean water to hopper. nents. A soft brush may be future use, after cleaning apply used to help loosen any dried a few drops of light oil to:...
-
Page 30: Maintenance
Maintenance Maintenance English Français Component Task Frequency Component Task Frequency Hoses Check for wear Daily and/or damage Drain system of all After each use water Air and Material Hose Add a few drops of After each days use Connections light oil RotoFlex HD Pump Flush Daily... -
Page 31: Technical Data
Technical Data Technical Data Maximum working fluid pressure 100 psi (6.9 bar) Maximum working air pressure 45 psi (3.1 bar) Material pressure operating range 0-100 psi (0 to 6.9 bar) Motor/Compressor specifications Oilless compressor Air delivery 6.5 CFM @ 40 psi (184.1 lpm @ 2.758 bar) Capacitor start 120V, 60 Hz 15.0 amp AC Power cord... - Page 32 Notes Notes...
-
Page 33: Warranty
With the exception of any special, extended, or limited warranty published by Graco, Graco will, for a period of twelve months from the date of sale, repair or replace any part of the equipment determined by Graco to be defective. - Page 34 Warranty TO PLACE AN ORDER, contact your Graco distributor, or call 1-800-690-2894 to identify the nearest distributor. All written and visual data contained in this document reflects the latest product information available at the time of publication. Graco reserves the right to make changes at any time without notice.