Advertisement
Quick Links
Rimage
Professional 2450 Setup and
®
Installa�on Guide
Before You Begin:
This document describes how to set up your Rimage Professional 2450 system to
run with Rimage Software Suite version 9.4. and higher. The 2450 is part of the
Rimage Professional series of disc publishing systems. The instructions in this
document are intended for people who are familiar with hardware setup, software
installation, and the Windows® operating system. If you do not understand the
procedures in this document, ask your computer technician for help.
Documents referenced in this procedure are found on the Rimage Professional 2450
User Guide disc included with your system and are also available online at
rimage.com/support.
Important!
•
Read all setup instructions thoroughly before you begin.
•
Save all packing boxes and packing materials for your Rimage system.
Notes:
•
The 2450 and integrated Everest
400 printer requires an external PC to be
TM
used as the client control center, which does not ship with the 2450. Refer to
the Rimage Professional 2450 Specifications document for minimum PC
requirements.
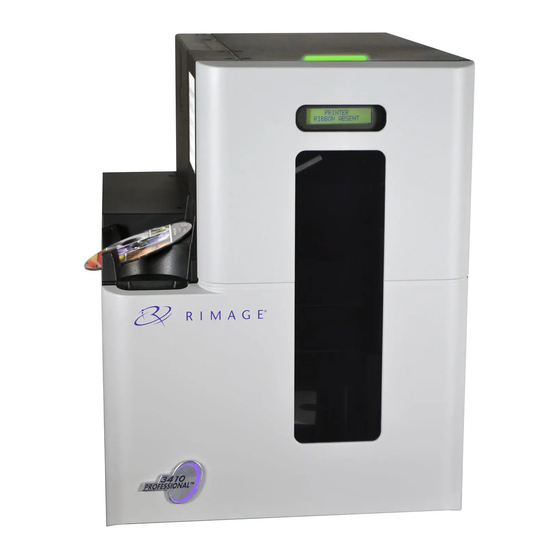
•
Your product may not look exactly like the product pictured.
•
You must have administrative privileges to install the Rimage Software Suite.
•
The terms "system" and "autoloader" may be used throughout this manual to
refer to the 2450. The term "printer" is used to refer to the integrated Everest
400 printer.
•
This product is designed for an IT power distribution system with phase-to-
phase voltage 120/230V.
•
Unless otherwise indicated, all Windows navigation statements are Windows 10
paths. Other operating system's navigation paths may differ.
2004848_A
1
Verify the Contents of the Accessory Kit
The Accessory Kit contains:
•
Rimage Professional 2450 Setup and Installation Guide (this document)
Rimage Professional 2450 User Guide on disc
•
•
Disc holder with Rimage Software Suite
Rimage Product Warranty/Guarantee
•
•
NEMA 5-15P power cable (North America)
CEE 7/16 power cable (Europe)
•
•
USB cable
4 Air Filters
•
2
Prepare the Autoloader
Important!The 2450 is heavy. Use
assistance when listing the system.
a.
Open the shipping boxes and remove
all packing material from the outside
of the autoloader.
Tape and
Plastic Packing
Tape and Packing
Foam
b. Open the front door.
c.
Remove the plastic packing brace
and tape near the lift arm.
d.
Remove the tape and packing foam from
the input/output bins.
i.
Remove the tape and plastic packing from the printer tray.
ii.
Lower the printer door and rotate the plastic packing clockwise to
remove it.
Note: You may need to bend the plastic packing in the printer tray
slightly to remove it.
3
Prepare the Everest 400 Printer
a.
Pull up on the printer cover latch.
b.
Lower the printer cover to expose the ribbon
carriers.
Copyright © 2020 Rimage
4
Remove the Ribbon Carriers
Note:
For more detailed instructions on installing the print and retransfer
ribbons, refer to our YouTube channel at
RimageDiscPublishing
the Print Ribbon procedure on on the inside of the printer cover.
a.
Turn the center latch counter-clockwise to unlock it.
b.
Pull the print ribbon carrier and the retransfer ribbon carrier to remove
them from the printer.
Print Ribbon
Carrier
Center Latch
(Locked Position)
5
Remove the Retransfer Ribbon Packaging
a.
Remove the tape and
plastic brace from the front
of the carrier.
b.
Remove tape and plastic
packaging from around the
outside of the carrier.
Plastic Packing
Brace and Tape
6
Install the Retransfer Ribbon
a.
With the supply roll on the left side, and the takeup roll on the right side,
unroll a few inches of ribbon and lay the ribbon on a clean, flat surface.
b.
Place the retransfer ribbon carrier on top of the exposed ribbon.
c.
Place the supply roll on the carrier with the large end in the hole and
push down to snap the roll into place.
d. Place the takeup roll on the carrier with the
large end in the hole and push down to snap
the roll into place.
e. Return the retransfer ribbon carrier to the
autoloader.
Youtube.com/user/
for instruc�onal videos or refer to the Change
Retransfer Ribbon
Center Latch
Carrier
(Unlocked Position)
Tape and
Plastic
Packaging
Tape and
Plastic Brace
Supply Roll
Takeup Roll
Page 1
Advertisement

Related Manuals for Rimage Professional 2450


Summary of Contents for Rimage Professional 2450
- Page 1 This document describes how to set up your Rimage Professional 2450 system to Tape and run with Rimage Software Suite version 9.4. and higher. The 2450 is part of the Plastic Packing Rimage Professional series of disc publishing systems. The instructions in this...
- Page 2 Refer to the Rimage Professional 2450 User Guide for information on information on how to operate and maintain the Professional 2450, changing bin configuration. Press the power switch at the back of the please refer to the image 2450 User Guide at rimage.com/support.